There’s nothing quite as disheartening as pulling a beautiful tart from the oven, only to find the bottom crust sadly limp and wet. I’ve been there! But with this recipe for a Rustic Fig and Sweet Onion Tart, I’m going to share the simple, expert trick that completely banishes that dreaded soggy bottom, guaranteeing a crisp, golden base every single time.
This elegant tart, marrying the jammy sweetness of figs with the savory depth of caramelized sweet onions, is not just visually stunning but also incredibly satisfying. It’s perfect for brunch, a light lunch, or a sophisticated appetizer, and surprisingly easy to master with my foolproof method.
Beyond the Basics: Why This Tart Won’t Give You a Soggy Bottom
The secret to an immaculately crisp crust lies in two crucial, yet straightforward, techniques: blind baking the puff pastry and properly sautéing the sweet onions. These steps work in tandem to create a robust barrier against moisture, ensuring your tart remains flaky and delightful from the very first bite to the last.
Beyond its structural integrity, this Rustic Fig and Sweet Onion Tart excels in its harmonious flavor profile. The natural sugars in fresh figs, intensified by baking, perfectly complement the savory, mellow sweetness developed in the slow-cooked onions.
The delicate, buttery puff pastry provides a rich contrast to these fillings, making each bite a complex dance of sweet, savory, and subtly earthy notes. This makes it an adaptable centerpiece that truly shines for any occasion.
The Harmonious Ingredients for Your Perfect Tart
Puff Pastry: The Versatile Foundation
Puff pastry is our magic shortcut, providing a light, airy, and buttery foundation without the fuss of making your own crust.
Opt for an all-butter variety if possible; its superior flavor and flakiness truly elevate the tart. Ensure it’s fully thawed but still cold enough to handle easily, preventing it from becoming sticky or tearing.
Sweet Onions & Fresh Figs: A Symphony of Sweet & Savory
For the sweet onions, choose firm, unblemished bulbs like Vidalia or Walla Walla, known for their mildness and high sugar content.
Fresh figs are paramount; look for plump, slightly soft figs with unblemished skin, indicating ripeness. Halving them beautifully exposes their jewel-toned interior, making for a stunning presentation.
The Drizzle & Seasoning: Finishing Touches
A good quality olive oil forms the initial base for sautéing the onions, adding a subtle peppery note.
Honey or maple syrup isn’t just for sweetness; it creates a beautiful caramelization on the figs and onions, enhancing their natural flavors. A sprinkle of salt balances the sweetness, while freshly ground black pepper adds a hint of warmth and complexity.
Gather Your Gear: Essential Tools for Tart Success
- Baking Pan (9×13 inch):
The ideal size for our rustic tart, ensuring even baking and easy handling as you assemble and serve.
- Parchment Paper:
Crucial for blind baking, preventing the crust from sticking and allowing for easy removal of pie weights.
- Pie Weights or Dried Beans:
These prevent the puff pastry from puffing up excessively during blind baking, creating a flat, stable base.
- Medium Skillet:
Used for gently sautéing the sweet onions, developing their flavor and removing excess moisture before they hit the crust.
- Sharp Knife and Cutting Board:
Essential for thinly slicing onions and precisely halving the delicate fresh figs.
- Fork:
For pricking the pastry, which helps prevent steam buildup and uneven puffing during the initial bake.
Crafting Your Rustic Fig and Sweet Onion Tart: A Step-by-Step Guide
- Preheat Oven & Prepare Pastry:
Preheat your oven to a precise 400°F (200°C) to ensure rapid and even baking for the puff pastry.
Gently unroll the thawed puff pastry sheet into your 9×13 inch baking pan, pressing it evenly into the bottom and slightly up the sides to form a neat edge. Prick the bottom all over with a fork; this allows steam to escape, preventing large bubbles and creating a flat crust.
- The Anti-Soggy Bottom Secret: Blind Bake!
To start the blind bake, line the pastry with parchment paper, then fill it with pie weights or dried beans. This crucial step holds the pastry in place as it bakes.
Bake for 15 minutes. Carefully remove the parchment and pie weights, then continue to bake for another 5-7 minutes, or until the crust is lightly golden and appears set. This process effectively seals the pastry, creating a solid barrier against moisture from your toppings.
For a similar crisp finish on a fruit tart, explore this caramelized apple puff pastry tart.
Remove the partially baked crust from the oven and let it cool slightly while you prepare the fillings.
- Sauté the Sweet Onions: Moisture Control is Key
While the crust is blind baking, heat the olive oil in a medium skillet over medium heat. Add your thinly sliced sweet onion and a pinch of salt to draw out their natural moisture.
Sauté gently for 7-10 minutes, stirring occasionally, until the onions are beautifully softened, translucent, and have visibly released much of their liquid. This step is absolutely essential to prevent them from releasing excess moisture into your crisp crust during the final bake, which can lead to sogginess.
For more onion deliciousness, check out these caramelized onion swirls.
Let the cooked onions cool for a few minutes; this prevents them from heating the pastry prematurely and makes them easier to handle.
- Assemble the Tart Base:
Spread the cooled, softened onions evenly over the blind-baked crust in the pan. Distribute them right up to the edges of the slightly raised pastry.
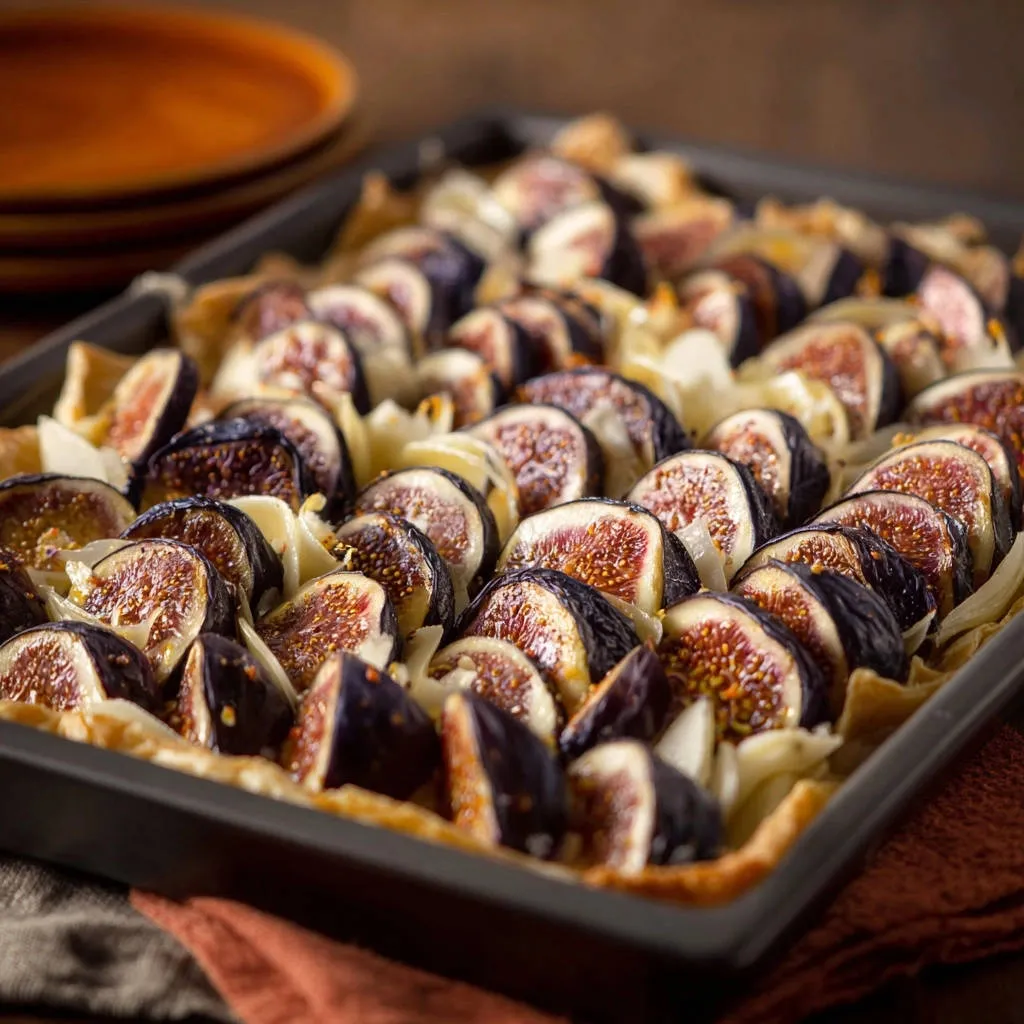
- Artfully Arrange the Figs:
Arrange the halved figs, cut side up, tightly in neat rows over the onions. Take a moment to arrange them aesthetically; the visual appeal adds to the charm of this rustic tart.
- Drizzle & Season for Flavor:
Drizzle the tart generously with honey or maple syrup. This adds a layer of sweet glaze that will caramelize beautifully. Season lightly with the remaining salt and freshly ground black pepper to enhance the savory notes and balance the sweetness.
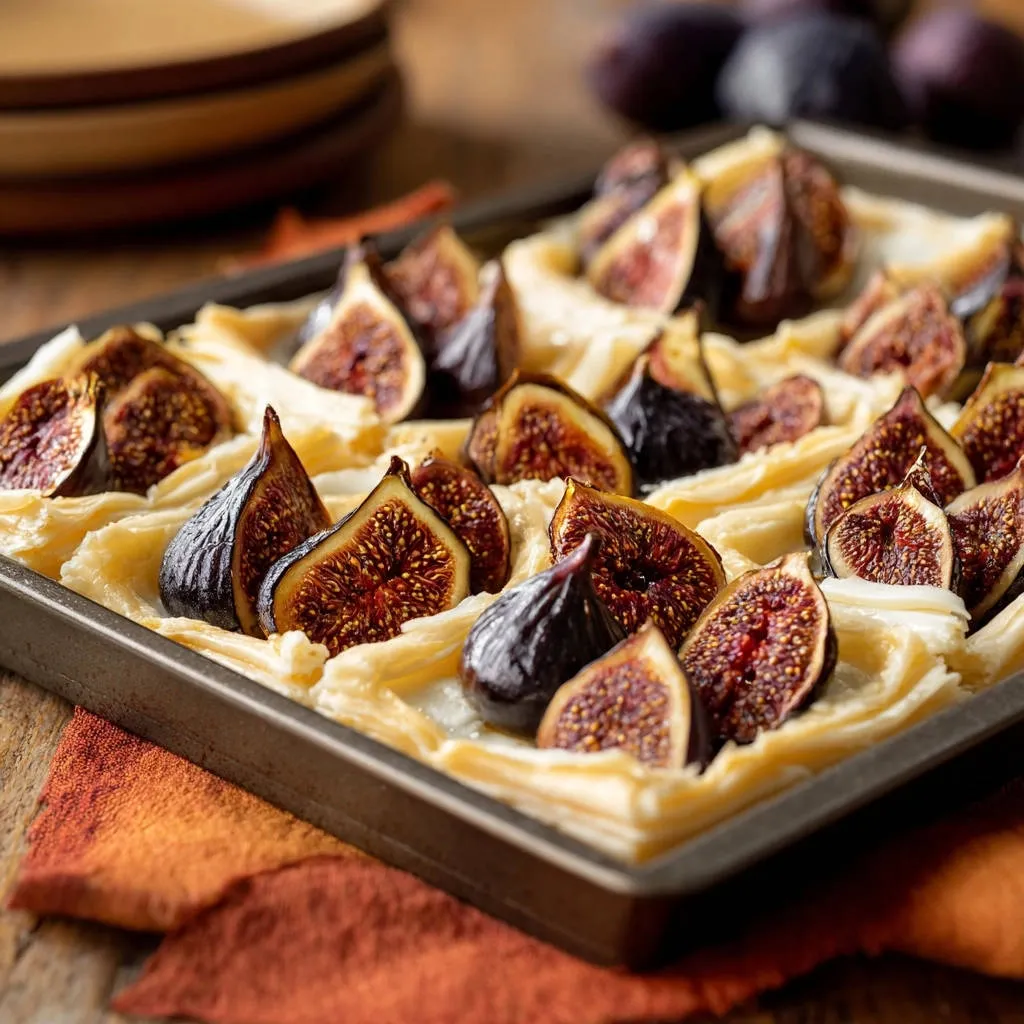
- Final Bake to Golden Perfection:
Return the assembled tart to the oven and bake for 20-25 minutes, or until the crust is deeply golden brown. The figs should appear tender and slightly caramelized, and the filling should be bubbling gently.
- Cool Before Serving: The Patience Pays Off!
Let the Rustic Fig and Sweet Onion Tart cool in the pan for at least 15 minutes before slicing and serving. This cooling time is vital as it allows the filling to set properly, ensuring clean, elegant slices without the filling oozing out.
Unlock the Secrets: Expert Tips for a Flawless Tart
The Magic of Blind Baking: Your Anti-Soggy Bottom Shield
Blind baking is not just a suggestion; it’s the cornerstone of a crisp tart crust. It pre-cooks the pastry, evaporating excess moisture and forming a barrier against liquid fillings. Don’t skimp on the pie weights, as they prevent the base from puffing up unevenly.
Caramelizing Onions: Flavor & Moisture Control
Sautéing the onions until translucent and softened is essential for two reasons. Firstly, it develops their inherent sweetness. Secondly, and critically for our “no soggy bottom” mission, it removes their high water content, preventing them from making your crust wet.
Cooling is Key: Perfect Slices Every Time
Resist the urge to slice your tart immediately! Allowing it to cool for at least 15 minutes lets the fruit juices and onion glaze set. This ensures each slice holds its shape beautifully and the flavors fully meld for an optimal tasting experience.
Customizing Your Drizzle: Honey vs. Maple Syrup
While both honey and maple syrup provide beautiful sweetness and caramelization, they offer distinct flavor profiles. Honey lends a floral, robust sweetness, while maple syrup provides a warm, earthy, and slightly woody note. Choose based on your preference or what you have on hand.
Don’t Overcrowd the Pan (for the Figs):
When arranging your figs, leave a small border (about 1/2 inch) around the edges of the pastry. This allows the puff pastry to fully expand and rise, creating a beautiful, flaky frame for your vibrant filling.
Serving Your Rustic Fig and Sweet Onion Tart: Elegant Pairings
This versatile Rustic Fig and Sweet Onion Tart can be enjoyed warm or at room temperature. For a truly indulgent experience, serve it with a dollop of fresh mascarpone cheese or a scoop of vanilla bean ice cream.
Thinking About What Comes Next?
Round out your meal with these complementary dishes.
- For a bright kick that cuts through the richness of the Rustic Fig and Sweet Onion Tart, try these Spicy Jalapeño Marinated Carrots.
- Add a fresh, peppery counterpoint to your tart with this Arugula and Seared Pear Salad, featuring a lovely glaze.
For a savory twist, a sprinkle of fresh thyme or rosemary before serving adds an aromatic touch. It also pairs wonderfully alongside a light, peppery arugula salad dressed with a simple vinaigrette, balancing its richness.
Planning Ahead & Preserving Freshness
Can You Make This Tart Ahead?
Absolutely! You can blind bake the puff pastry crust a day in advance and store it at room temperature. The sautéed onions can also be prepared a day ahead and refrigerated in an airtight container. Assemble and bake the tart just before serving for the freshest taste and crispiest crust.
Storing Leftover Tart
Store any leftover Rustic Fig and Sweet Onion Tart in an airtight container at room temperature for up to 1 day, or in the refrigerator for up to 3 days. The crust may soften slightly after refrigeration, but the flavors will still be delicious.
Reheating for Best Results
To restore some of that delightful crispness, reheat individual slices of the tart in a preheated oven at 300°F (150°C) for about 10-15 minutes, or until warmed through and the crust feels crisp to the touch. Avoid microwaving, as this will make the pastry soggy.
Troubleshooting Common Tart Hurdles
My Crust is Still Soft on the Bottom!
This usually means your blind baking was insufficient. Ensure your oven temperature is accurate and that you baked the crust for the full recommended time, both with and without pie weights. Make sure the pastry bottom looked light golden and dry before adding the filling.
Figs or Onions Seem Watery
If your onions released too much water, they likely weren’t sautéed long enough, or the heat was too low. For figs, especially very ripe ones, a quick pat with a paper towel before arranging can help absorb excess moisture. Properly sautéed onions are key here.
Tart Top Browning Too Quickly
If you notice the figs or crust edges browning too fast during the final bake, loosely tent the tart with a piece of aluminum foil. This protects the top while allowing the rest of the tart to finish baking evenly.
Your Rustic Fig and Sweet Onion Tart Questions, Answered
Can I Use Frozen Figs?
While fresh figs offer the best texture and visual appeal, you can use frozen figs. Thaw them completely and pat them very dry with paper towels to remove excess moisture, which can make your tart soggy.
What If I Don’t Have Pie Weights?
No pie weights? No problem! You can use dried beans, uncooked rice, or even a smaller oven-safe dish placed on top of the parchment paper to weigh down the puff pastry during blind baking. Anything that provides even weight distribution will work.
Can I Make This Gluten-Free?
Yes, many brands now offer excellent gluten-free puff pastry options. Ensure you use a certified gluten-free brand to make this Rustic Fig and Sweet Onion Tart suitable for those with dietary restrictions. The rest of the ingredients are naturally gluten-free.
Is There a Savory Version of This Tart?
Absolutely! This tart is highly adaptable. You could swap figs for roasted red peppers and add crumbled goat cheese or blue cheese, along with fresh herbs like rosemary or thyme, for a delicious savory tart. For more ideas, explore our recipe for a perfect savory onion tart.
How Can I Make This Tart Sweeter (or Less Sweet)?
To make it sweeter, increase the amount of honey or maple syrup drizzled over the figs, or dust with a little powdered sugar after baking. For a less sweet version, reduce the amount of drizzle or balance it with a tangy balsamic glaze drizzled just before serving.
Ready to Create and Share Your Masterpiece?
Now you have all the knowledge and expert tips to create a truly exceptional Rustic Fig and Sweet Onion Tart with a flawlessly crisp crust. It’s an impressive dish that’s surprisingly simple to execute, perfect for impressing guests or enjoying a quiet moment of culinary bliss.
Don’t let the fear of a soggy bottom hold you back any longer! Dive into this recipe, savor the beautiful blend of flavors, and confidently share your stunning creation. I’d love to hear about your experience in the comments below!
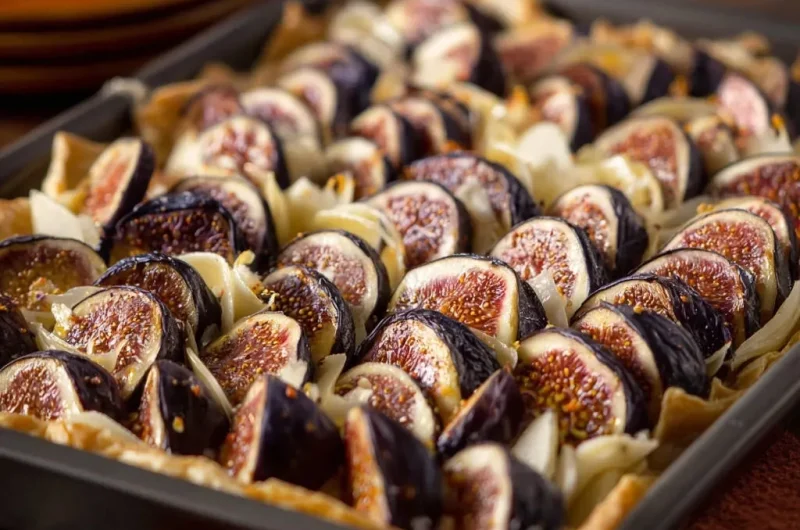
Fig and Onion Tart
Course: PastryCuisine: InternationalDifficulty: medium6
servings20
minutes1
hour240
kcal60
minutesBanish soggy bottoms forever with this elegant Rustic Fig and Sweet Onion Tart. Featuring a crisp puff pastry base, sweet caramelized onions, and tender figs, it’s a guaranteed success for any occasion. A simple blind-baking trick ensures a perfect golden crust.
Ingredients
1 sheet puff pastry (about 14 oz or 400g), thawed if frozen
10-12 fresh figs, halved
1 large sweet onion, thinly sliced
1 tablespoon olive oil
2 tablespoons honey or maple syrup
1/4 teaspoon salt
1/4 teaspoon black pepper
Directions
- Preheat your oven to 400°F (200°C).
- Gently unroll the puff pastry sheet into a 9×13 inch baking pan. Press it evenly into the bottom and up the sides. Prick the bottom all over with a fork to prevent bubbling during baking. Line the pastry with parchment paper and fill with pie weights or dried beans.
- To prevent a soggy bottom, we blind bake! Bake the pastry for 15 minutes. Carefully remove the parchment and pie weights. Continue to bake for another 5-7 minutes, or until the crust is lightly golden and appears set. This crucial step creates a solid barrier against moisture. Remove from oven and let cool slightly.
- While the crust is blind baking, heat the olive oil in a medium skillet over medium heat. Add the thinly sliced sweet onion and a pinch of salt. Saute gently for 7-10 minutes, stirring occasionally, until the onions are softened, translucent, and have released much of their moisture. This step is key to preventing them from releasing liquid into your beautiful crust. Let the cooked onions cool for a few minutes.
- Spread the cooled, softened onions evenly over the blind-baked crust in the pan.
- Arrange the halved figs, cut side up, tightly in neat rows over the onions.
- Drizzle the tart generously with honey or maple syrup. Season lightly with the remaining salt and freshly ground black pepper.
- Return the tart to the oven and bake for 20-25 minutes, or until the crust is deeply golden brown, the figs are tender and slightly caramelized, and the filling is bubbling gently.
- Let the tart cool in the pan for at least 15 minutes before slicing and serving. This allows the filling to set properly and ensures a clean cut.
Notes
- Allow to cool for 15 minutes before slicing for best results.