If you have ever been disappointed by a mushy, soggy crust ruining your perfect dessert, you understand the necessity of a foolproof foundation.
This recipe for Salted Caramel Cheesecake Bars solves that exact problem, incorporating a specific, non-negotiable step that ensures a crisp, chewy base every single time.
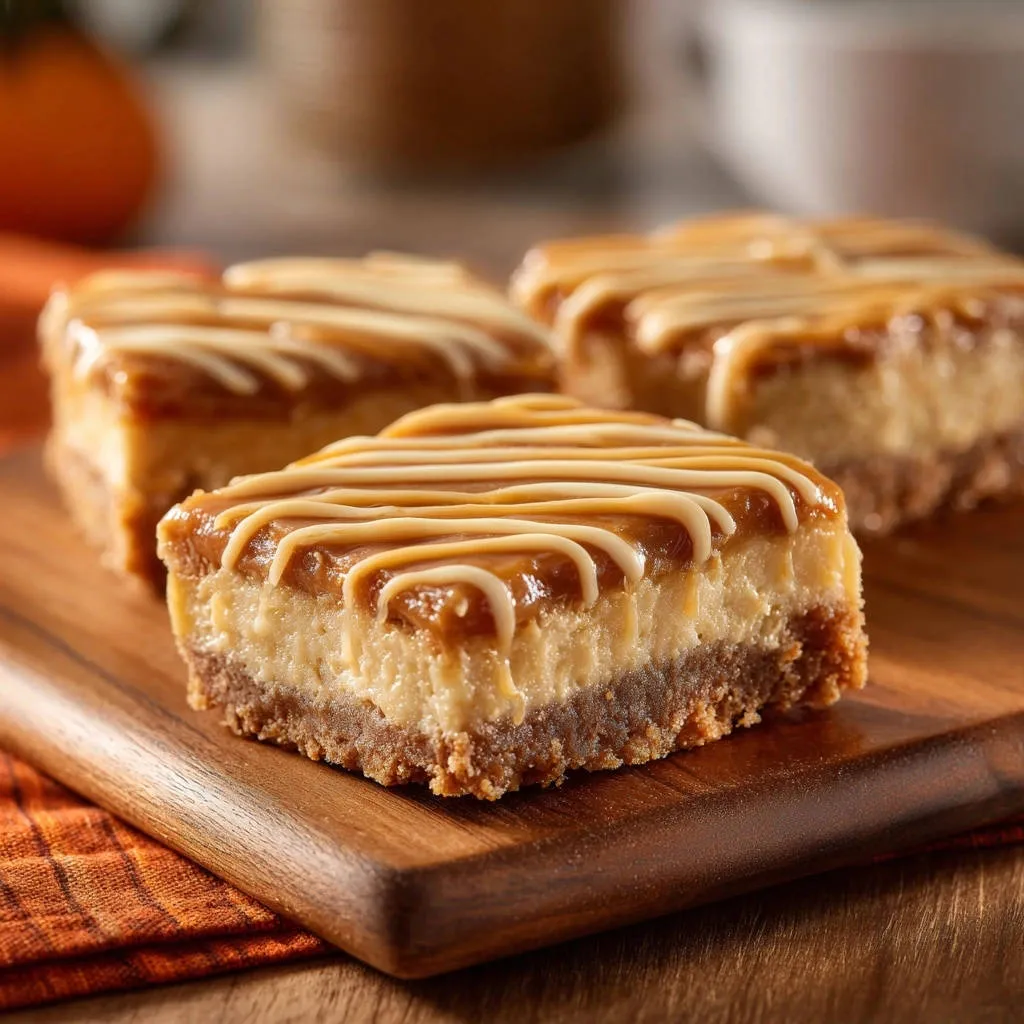
Get ready for a treat featuring a silky, spiced filling topped with luxurious caramel, crafted with professional techniques for flawless results.
If you’re also interested in preventing leaks, check out this red velvet cheesecake stuffed cookies method.
Why This Salted Caramel Cheesecake Bars Recipe Triumphs Over the Soggy Bottom
The Non-Negotiable Step: Achieving a Perfectly Crisp, Anti-Soggy Foundation
The secret is simple: pre-baking the graham cracker crust creates a stable, dried barrier that prevents moisture from the cheesecake filling from soaking into the crumbs.
More Sweet and Savory Ideas
To complement your Salted Caramel Cheesecake Bars, consider these other treats.
- For a breakfast that continues the sweet theme, try the Apple Cinnamon Roll Pancakes for a fluffy start.
- If you’re craving something hearty and savory, the Loaded Sausage Gravy Tater Tot Bowl offers a satisfying contrast.
This crucial step ensures a structural foundation that holds up beautifully, eliminating the mushy bottom texture entirely.
A Balanced Flavor Profile: Spice, Salt, and Sweet Perfection
A touch of pumpkin pie spice or cinnamon elevates the creamy filling beyond standard cheesecake, adding a warm complexity that plays perfectly against the tangy cream cheese.
For a similar warm spice experience, explore creamy pumpkin swirl cheesecake.
When combined with the bittersweet richness of the caramel and the textural burst of coarse sea salt, the flavor profile is sophisticated and deeply satisfying.
The Low-Stress Cheesecake: Preventing Cracks and Sinking
We utilize two specific thermal techniques: reducing the oven temperature after the crust bakes and using a slow cool down (oven door ajar).
This gradual temperature transition is essential for preventing structural shock, which is the primary cause of unsightly cracks and sunken centers in cheesecake.
The Building Blocks: Essential Ingredients for Superior Cheesecake Bars
The Foundation: High-Quality Graham Cracker Crumbs and Butter
Using fully melted, unsalted butter is key to uniformly binding the graham crumbs and sugar, ensuring the crust holds its shape during compaction and baking.
The specific ratio of butter to crumbs is designed to be moist enough to compact tightly but dry enough not to become greasy after baking.
Achieving the Ideal Cheesecake Filling Texture
Both cream cheese and eggs must be at true room temperature. Cold ingredients resist blending, leading to lumps and requiring excessive beating.
Overmixing introduces air, which expands during baking and then collapses, causing dense texture and potential cracks.
The Signature Finish: Caramel Sauce, Salt, and White Chocolate Details
A thick, high-quality caramel sauce (store-bought or homemade) ensures the topping doesn’t immediately soak into the cheesecake layer.
Adding a small amount of vegetable oil to the white chocolate chips ensures the chocolate melts into a thin, smooth, and easily drippable consistency for professional presentation.
Setting the Scene: Essential Equipment and Pre-Prep Secrets
Selecting the Right Pan Size (8×8 vs. 9×9 Considerations)
An 8×8-inch pan yields thicker, taller cheesecake bars that require a slightly longer baking time and a more pronounced chill period.
A 9×9-inch pan results in thinner bars that bake quicker, but regardless of size, the edge-set and center-jiggle visual cues remain critical.
The Critical Role of the Parchment Paper Sling
Lining the pan with parchment paper and leaving a substantial overhang is non-negotiable for clean removal.
This “sling” allows you to lift the entirely cooled and set cheesecake out of the pan without compromising the crisp edges or the filling.
Creating Excellence: Step-by-Step Instructions for Salted Caramel Cheesecake Bars
-
Phase 1: Preparing and Pre-Baking the Crust (The Moisture Barrier)
Preheat the oven to 350°F and line your pan, ensuring the parchment paper overhang is substantial enough to act as handles later.
Combine the graham cracker crumbs, sugar, and fully melted butter until every crumb is uniformly moistened, resembling wet sand.
Press the mixture incredibly firmly and evenly into the prepared pan; use the flat bottom of a measuring cup or glass to achieve the tightest possible compaction.
Bake for exactly 8 minutes, then remove and cool completely on a wire rack. This cooling period is absolutely mandatory for achieving the anti-soggy, moisture-resistant foundation.
-
Phase 2: Mixing the Cheesecake Filling Without Overbeating
Reduce the oven temperature to 325°F immediately after the crust comes out. This prevents the filling from baking too fast.
First, beat the softened cream cheese with a hand mixer for about three dedicated minutes until it is perfectly smooth and airy, with zero lumps remaining.
Add the sugar, vanilla extract, and the warming pumpkin spice (or cinnamon), beating just until incorporated, then scrape down the bowl thoroughly.
Finally, add the room temperature eggs one at a time, mixing on low speed only until the yolk disappears. Overmixing at this stage incorporates too much air, which guarantees cracks later.
-
Phase 3: The Gentle Bake and Crucial Slow Cooling Process
Pour the filling over the cooled, pre-baked crust. Bake at 325°F for 30 to 35 minutes.
The bars are done when the edges are completely set but the very center still has a slight, distinct jiggle-it should look like firm gelatin.
To prevent sinking, turn the oven completely off and immediately prop the door open slightly with a wooden spoon, leaving the bars inside for 15 minutes for a slow thermal transition.
Remove the pan and cool completely on a wire rack to room temperature before attempting to chill further.
-
Phase 4: Chilling, Topping, and Achieving Clean Slices
Cover the pan loosely and refrigerate for a minimum of 4 hours, or ideally overnight, until the cheesecake is rock-solid and fully set.
Once chilled, slightly warm your caramel sauce to make it pourable, spread it evenly, and sprinkle with coarse sea salt for textural contrast and flavor balance.
Melt the white chocolate chips with the vegetable oil in short microwave bursts until perfectly smooth. The oil is key to creating a thin, pipeable drizzle consistency.
Use the parchment overhang to lift the entire chilled block out. Dip a long, sharp knife into hot water, wipe dry, and slice firmly, redipping the knife between every cut for pristine, professional squares of your Salted Caramel Cheesecake Bars.
Chef’s Corner: Advanced Tips and Troubleshooting for Flawless Cheesecake Bars
Three Ways to Achieve the Smoothest Cheesecake Surface
Use True Room Temperature Ingredients: Ingredients that are too cold cause lumps and require overmixing, which ruins the texture.
Scrape Down the Bowl Religiously: Ensure no unmixed streaks of cream cheese or sugar remain on the sides during mixing.
The Steam Bath Alternative: For ultra-gentle, uniform baking, you can place the baking pan inside a larger pan filled with about an inch of hot water before baking.
Troubleshooting Common Cheesecake Bar Failures
My Salted Caramel Cheesecake Bars Cracked or Sank
Rapid temperature changes are the primary cause of cracks. Ensure you always use the slow cooling technique and never move the bars directly from a hot oven to a cool counter.
If the center sank, it likely means the eggs were overmixed, incorporating too much air that subsequently deflated.
The Crust Still Seems Too Hard or Crumbly
If the crust is too crumbly, you may need a tablespoon more melted butter next time.
If it is too hard, ensure you are compacting it firmly but not aggressively over-baking it, which can dry out the butter.
Make-Ahead & Storage: Keeping Your Salted Caramel Cheesecake Bars Fresh
Can I Prepare the Cheesecake Filling in Advance?
Due to the eggs acting as leaveners and stabilizers, the filling performs best when mixed immediately before baking.
If necessary, you can mix the cream cheese and sugar base a few hours ahead, but always add the eggs right before pouring it into the crust.
Proper Storage for Leftover Bars
Store cut bars in an airtight container in the refrigerator for up to 5 days for optimal freshness and texture.
Ensure the layers are separated by parchment paper if stacking to prevent sticking or damage to the caramel topping.
Can I Freeze Salted Caramel Cheesecake Bars?
Yes, these treats freeze exceptionally well! It is best to freeze them before applying the caramel and white chocolate topping.
Wrap the completely chilled, un-topped bars tightly in plastic wrap and foil. Thaw overnight in the refrigerator, then top and slice.
Common Questions About Salted Caramel Cheesecake Bars
What Can I Substitute for Graham Cracker Crumbs in the Crust?
Excellent alternatives include vanilla wafer cookies, shortbread cookies, or gingersnap crumbs, which add a spicy kick.
Ensure the substitution volume (1 and 1/2 cups) and the butter ratio remain the same for structural integrity.
What is the Best Type of Salt to Use for the Caramel Topping?
Coarse sea salt, flaked sea salt, or Fleur de Sel are the best choices because the larger crystals provide a necessary crunch and an immediate burst of salinity.
Avoid fine table salt, as it dissolves immediately and lacks the desired textural impact.
I Don’t Have Pumpkin Pie Spice-What Should I Use Instead?
You can substitute with 1/2 teaspoon of pure cinnamon for a simple, warm flavor profile.
For a closer match, mix 1/4 teaspoon cinnamon with a generous pinch each of ground nutmeg and ginger.
Ready to Impress? Share Your Salted Caramel Cheesecake Bars Masterpiece!
This recipe provides the structure, the flavor balance, and the critical anti-soggy crust technique you need for complete success.
Dive into the delightful world of homemade Salted Caramel Cheesecake Bars and watch the compliments roll in!
Salted Caramel Cheesecake Bars
Course: DessertCuisine: AmericanDifficulty: medium4
9-16 bars20
minutes1
hour550
kcal300
minutesSay goodbye to soggy cheesecake crusts! This recipe employs a simple, non-negotiable step—pre-baking the graham cracker crust—to guarantee a perfect, crisp foundation every time. Topped with rich caramel and a white chocolate drizzle, these bars are the ideal chewy and creamy dessert.
Ingredients
For the Crust:
1 and 1/2 cups graham cracker crumbs
1/4 cup granulated sugar
1/2 cup (1 stick) unsalted butter, melted
For the Cheesecake Filling:
2 packages (8 oz each) cream cheese, softened to room temperature
3/4 cup granulated sugar
2 large eggs, room temperature
1 teaspoon vanilla extract
1/2 teaspoon pumpkin pie spice or cinnamon
For the Topping:
1 cup thick caramel sauce (store bought or homemade)
2 tablespoons white chocolate chips
1 teaspoon vegetable oil
Directions
- Prepare the Crust (The Anti-Soggy Bottom Technique)
- Preheat oven to 350 degrees F. Line an 8×8 or 9×9 inch baking pan with parchment paper, leaving an overhang on two sides for easy removal later. This paper is essential for keeping the structure intact.
- In a medium bowl, combine the graham cracker crumbs, 1/4 cup sugar, and melted butter until all crumbs are uniformly moistened.
- Press the mixture firmly and evenly into the bottom of the prepared pan. Use the bottom of a measuring cup to compact the crust as tightly as possible.
- Bake the crust for exactly 8 minutes. Remove and allow it to cool completely on a wire rack before starting the filling. This pre-baking process creates a moisture barrier, fulfilling the anti-soggy promise.
- Make the Cheesecake Layer
- Reduce oven temperature to 325 degrees F.
- In a large bowl, use a hand mixer to beat the softened cream cheese until perfectly smooth and lump free. This takes about 3 minutes of dedicated beating.
- Add the sugar and beat until just combined. Scrape down the bowl.
- Beat in the vanilla extract and pumpkin pie spice.
- Add the eggs one at a time, mixing only until each egg is incorporated. Do not overbeat once the eggs are in, as this introduces too much air and can cause cracking or sinking.
- Bake the Bars
- Pour the cheesecake filling evenly over the cooled, pre-baked crust.
- Bake at 325 degrees F for 30 to 35 minutes, or until the edges are set and the center still has a slight jiggle (like set gelatin).
- Turn the oven off, prop the door open slightly with a wooden spoon, and leave the bars inside for 15 minutes. This slow cooling helps prevent the center from sinking.
- Remove the pan from the oven and cool completely on a wire rack for at least 1 hour.
- Chill and Finish
- Once cooled to room temperature, cover the pan loosely and refrigerate for at least 4 hours, or ideally overnight, until fully set.
- Once chilled, warm the caramel sauce slightly so it is pourable and spread it evenly over the top of the cheesecake layer. If using coarse sea salt, sprinkle a pinch over the caramel now.
- In a small bowl, combine the white chocolate chips and vegetable oil. Microwave in 15 second bursts, stirring in between, until completely smooth. Transfer the melted white chocolate mixture to a piping bag or a zip top bag with a tiny corner snipped off.
- Drizzle the white chocolate generously across the caramel layer in a decorative pattern.
- Lift the bars from the pan using the parchment overhang and cut into squares using a sharp knife dipped in hot water between cuts for the cleanest possible slices. Store leftovers in the refrigerator.
Notes
- Do not skip the 8-minute pre-bake for the crust; this creates a moisture barrier and prevents a soggy bottom. The bars require at least 4 hours of refrigeration to fully set.