Imagine a bowl of beef stew where the meat collapses at the mere suggestion of a fork, bathed in a gravy so rich it coats the back of your spoon like velvet. Most people struggle with dumplings that turn into gummy, gray blobs or beef that stays stubbornly chewy despite hours on the stove. This recipe changes that by focusing on a specific “perching” technique that ensures your dumplings stay light and airy with a golden, biscuit-like crust.
The secret lies in the contrast between the long, slow braise of the beef and the quick, high-heat finish for the topping. We aren’t just boiling dough in liquid here; we are steaming it on a bed of tender vegetables and then broiling it to perfection. This method solves the age-old problem of soggy dough while intensifying the deep, savory flavors of the beef and mushrooms.
To get that professional-grade texture, you must ensure your stew liquid has reduced enough before adding the dough. If the dumplings are submerged, they will dissolve into the broth. By resting them on top of the meat and vegetables, you allow the bottom to steam into a soft pillow while the top stays dry enough to shatter when it hits the broiler.
The Science of Tender Beef Chuck
Beef chuck is the undisputed king of the stew pot because it is packed with connective tissue and collagen. During a long, slow simmer, this tough collagen undergoes a physical transformation into gelatin. This process doesn’t just make the meat tender; it actually thickens the cooking liquid, giving it a luxurious, lip-smacking mouthfeel that leaner cuts simply cannot provide.
Cutting your beef into 1.5-inch cubes is the sweet spot for heat penetration. If the pieces are too small, they’ll dry out before the collagen breaks down; if they’re too large, the center won’t get that melt-in-your-mouth texture. You want enough surface area to develop a deep brown crust during the searing phase, which triggers the Maillard reaction. This chemical reaction between amino acids and sugars is what creates those complex, savory notes that define a world-class stew.
When you sear the meat, don’t rush it. You are looking for a dark, mahogany color on the outside. This isn’t just about aesthetics; that crust is the foundation of your flavor profile. Without a proper sear, your stew will taste flat and one-dimensional, no matter how many herbs you add later.
Selecting the Right Cut for Braising
Always reach for a well-marbled chuck roast rather than “stew meat” packs, which often contain a mix of lean scraps like round or sirloin. Lean cuts lack the intramuscular fat and collagen needed for a long cook. If you use a lean cut, the meat will become stringy and dry by the time the vegetables are soft. The fat in the chuck acts as an internal basting mechanism, keeping every bite succulent.
Essential Components for a Rich Stew Base
A great stew requires a balance of earthy, sweet, and acidic elements. Cremini mushrooms are essential here because they hold their shape better than white buttons and offer a deeper, woodsy flavor. Pearl onions provide little bursts of sweetness that cut through the richness of the beef, while garlic adds that necessary aromatic punch.
Tomato paste is your secret weapon for depth. By cooking it for a minute before adding the liquid, you caramelize the sugars and remove the raw metallic taste. This provides a subtle acidity that balances the heavy fats. For the liquid, always choose a high-quality beef bone broth. It contains more natural gelatin than standard stock, which results in a sauce that feels substantial and rich on the palate.
Bone Broth vs. Standard Stock
Bone broth is simmered for much longer than standard stock, extracting every bit of protein and mineral from the bones. This results in a higher gelatin content. When you use bone broth, the sauce naturally thickens as it reduces, creating a glossy finish that clings to the meat. Standard stock often feels thin and watery in comparison, requiring more flour to achieve the same body.
Phase One: Searing and Building the Fond
The most common mistake in stew-making is crowding the pan. When you dump all the meat in at once, the temperature of the oil drops, and the meat releases moisture. Instead of searing, the beef ends up steaming in its own juices, turning gray and rubbery. Work in batches, giving each cube enough space to breathe so the moisture evaporates instantly.
As you sear, you’ll notice brown bits sticking to the bottom of the pot. This is called the “fond,” and it is pure culinary gold. These caramelized drippings contain the most concentrated beef flavor in the entire dish. Once the meat is removed, the moisture from the mushrooms and onions will help loosen these bits, incorporating them back into the sauce for a massive flavor boost.
Phase Two: Deglazing and Developing the Sauce
After your vegetables have softened and turned golden, it’s time to build the sauce using the “singer” method. By sprinkling the flour directly over the fat-coated vegetables, you create a roux right in the pot. This ensures the flour is cooked through, removing any “pasty” taste before the liquid is even added.
For even softer vegetables, explore how to achieve slow braised beef and carrots perfectly cooked.
When you pour in the bone broth, do it gradually. Start with a small splash and stir vigorously to create a thick paste, then slowly add the rest. This technique prevents lumps and guarantees a velvety, smooth consistency. As the liquid hits the hot pan, it will deglaze the bottom, lifting every last bit of that savory fond into the gravy.
The Secret to Fluffy Herb Dumplings
The perfect dumpling should be as light as a cloud. To achieve this, you must use cold, cubed butter. When the cold butter hits the hot steam in the pot, it melts and creates tiny pockets of air within the dough. This is exactly what makes the dumplings rise and stay fluffy rather than becoming dense and leaden.
When mixing your dough, use a light hand. Overworking the flour activates the gluten, which leads to a tough, rubbery texture. Stir the milk in until the flour is just moistened. It’s okay if the dough looks a little shaggy or uneven; that’s actually a sign that your dumplings will be tender and delicate once cooked.
Why Dried Herbs Work Better in Dough
While fresh parsley is great for a garnish, dried herbs are superior inside the dumpling dough. Dried parsley and garlic powder have zero moisture content, so they distribute evenly through the flour without clumping. Fresh herbs can release moisture as they cook, which can sometimes create soggy spots inside the dough. The dried versions provide a consistent, savory flavor in every bite.
The Perching Method: Avoiding Soggy Dough
This is the “Skyscraper” core of the recipe. Most people fail because they drop the dough directly into the boiling liquid, where it acts like a sponge and soaks up too much broth. By the time the center is cooked, the outside has dissolved into a slimy mess. The “perching” method fixes this by using the meat and vegetables as a physical platform.
Before adding the dough, make sure your stew has reduced enough so that the beef and mushrooms are peeking through the surface. Drop your scoops of dough directly onto these solid “islands.” This allows the bottom of the dumpling to cook via gentle steam while the top remains relatively dry. It’s the difference between a boiled dough ball and a light, steamed biscuit.
The Two-Stage Finish: Steaming and Broiling
Once the dumplings are perched, you must follow the “No-Peek” rule. Keep the lid tightly sealed for the full 15 minutes. Every time you lift the lid, you lose the steam pressure required to make the baking powder react and lift the dough. Without that trapped heat, your dumplings will stay flat and heavy.
The final step is what sets this recipe apart. After steaming, the dumplings are cooked through but pale. By placing the pot under the broiler for a few minutes, you transform the tops into a golden, crispy crust. This creates a beautiful textural contrast: a crunchy top, a fluffy middle, and a savory, steam-softened bottom that has soaked up just enough of the stew’s gravy.
Troubleshooting Common Stew Issues
If your stew is too thin after two hours, don’t panic. Simply remove the lid and let it simmer for another 15 minutes to reduce the liquid before adding the dumplings. If you accidentally over-salted the base, drop in a few large chunks of raw potato for 10 minutes; they will absorb some of the excess salt, and you can remove them before serving.
If your dumplings dissolve, it usually means your liquid was at a rolling boil rather than a gentle simmer. High heat breaks the dough apart before it has a chance to set. Always turn the heat down to low before dropping the dough. If the beef is still tough after the allotted time, it simply needs more time, not more heat. Keep simmering until it yields easily to a fork.
Make-Ahead Strategies and Storage
You can absolutely make the beef stew base up to 24 hours in advance. In fact, the flavor often improves as it sits in the fridge. However, you must wait to make and cook the dumplings until you are ready to serve. Dumplings do not store well in liquid, as they will eventually lose their structure and become mushy.
If you want to freeze the stew, freeze the beef and vegetable base only. When you’re ready to eat, thaw the base, bring it to a simmer on the stove, and then follow the steps to make and steam fresh dumplings. This ensures the meal tastes exactly like it was made from scratch that day.
Optimal Side Dishes for Beef Stew
Since this stew is incredibly rich and hearty, you want side dishes that offer a bright, acidic contrast. A simple arugula salad tossed with lemon juice and olive oil is the perfect palate cleanser. The peppery bite of the greens cuts through the heavy fat of the beef chuck and the buttery dumplings.
Serving Suggestions
To round out your meal, consider these dishes that complement the hearty flavors of slow-simmered beef stew.
- For a classic pairing, serve your beef stew with creamy mashed potatoes. The smooth texture and rich gravy make a wonderful base for the stew.
- Another comforting option is a cheesy potato casserole. The added richness and crispy onions provide a pleasing contrast.
Roasted root vegetables, like carrots or parsnips with a touch of honey, also pair beautifully. They echo the sweetness of the pearl onions while providing a different texture. Avoid serving this with mashed potatoes or bread, as the dumplings already provide plenty of comforting starch to the meal.
Expert Tips for Reheating Leftovers
Never use the microwave to reheat dumplings; it will turn them into rubber. Instead, separate the dumplings from the stew. Heat the stew base in a small pot on the stove until bubbling. Meanwhile, place the dumplings in a toaster oven or under the broiler for 2-3 minutes. This restores the crispy top and warms the center without ruining the delicate texture.
Frequently Asked Questions
How do I store leftovers?
Store the stew and dumplings in an airtight container in the refrigerator for up to 3 days. For the best results, try to store the dumplings in a separate container or perched on top of the meat so they don’t fully submerge in the gravy. Do not freeze the dumplings, as the texture will become grainy and unpleasant upon thawing.
Why are my dumplings tough or rubbery?
This usually happens for two reasons: overmixing the dough or overcooking it. When you mix the flour and milk, stop as soon as the streaks of flour disappear. Additionally, make sure you only steam them for the recommended 15 minutes. If they cook too long, the air pockets collapse, and the dough becomes dense.
Can I use a different cut of meat?
While beef chuck is the best choice, you can use bone-in short ribs for an even richer flavor. Avoid using “lean” cuts like sirloin or eye of round. These cuts lack the fat and connective tissue needed for a long simmer and will become very dry and tough if cooked for two hours.
For an even richer flavor, consider how to achieve maximum tenderness in braised beef short ribs.
What if I don’t have a food processor for the dough?
You can easily make the dough by hand. Use a pastry cutter or two forks to work the cold butter into the flour mixture until it looks like coarse crumbs. The goal is to keep the butter in small, solid pieces rather than melting it with the warmth of your hands.
Can I substitute the pearl onions?
Yes, if you can’t find pearl onions, you can use a large yellow onion cut into 1-inch chunks. While you lose the visual appeal of the whole onions, the flavor profile will remain very similar. Just be sure to sauté them well to bring out their natural sweetness.
Why didn’t my dumplings brown on top?
The browning happens during the broiler stage, not the steaming stage. If they are still pale, it means they need another minute or two under the broiler. Make sure your oven rack is in the top position so the heat is close to the dumplings, but watch them closely as they can go from golden to burnt very quickly.
Beef Stew
Course: Main CourseCuisine: AmericanDifficulty: medium6
servings20
minutes2
hours510
kcal180
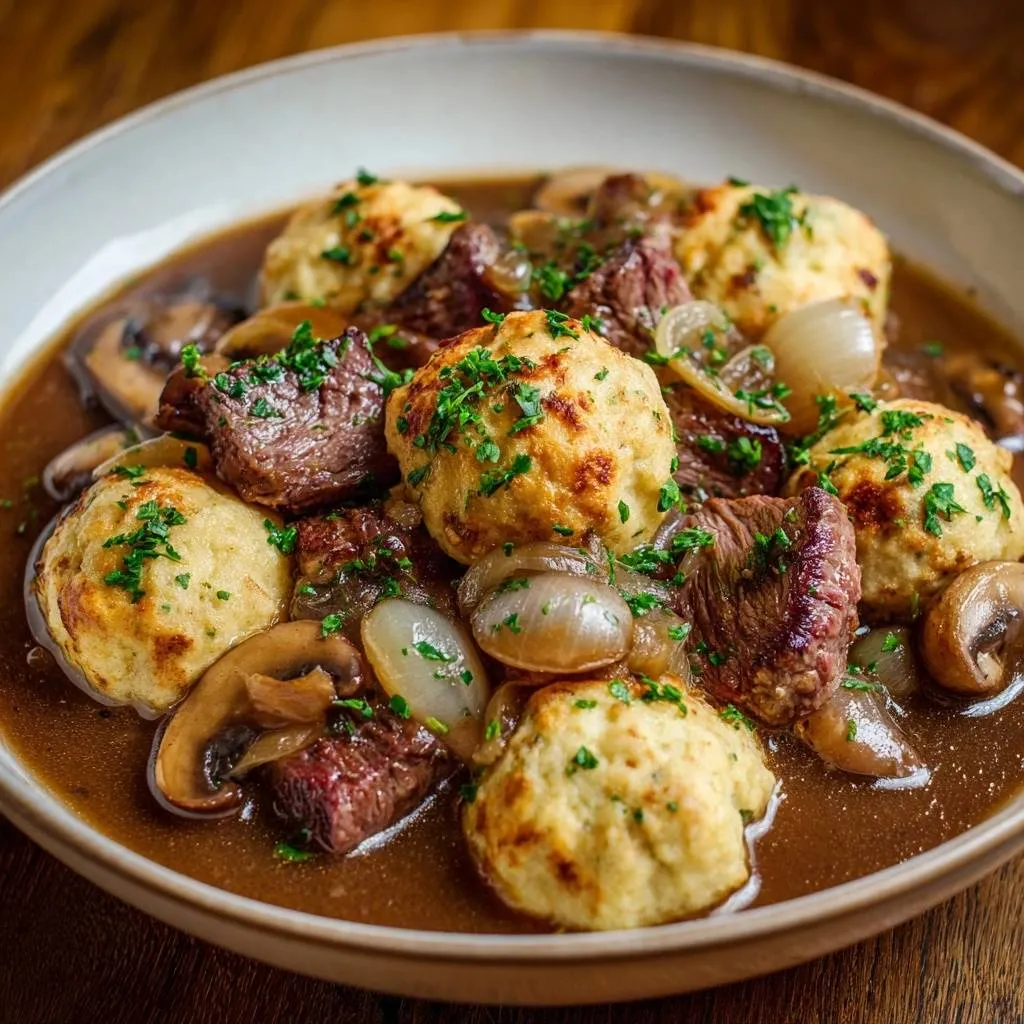
MinutesThis recipe delivers melt-in-your-mouth beef chuck and savory mushrooms topped with herb-infused dumplings. The secret lies in steaming the dumplings on top of the stew solids and finishing them under the broiler for a biscuit-like crunch.
Ingredients
2 lbs beef chuck, cut into 1.5 inch cubes
1 lb cremini mushrooms, sliced
2 cups pearl onions, peeled
4 cups beef bone broth
2 tablespoons tomato paste
3 cloves garlic, minced
2 tablespoons vegetable oil
2 tablespoons all-purpose flour (for thickening)
1/4 cup fresh parsley, finely chopped
Salt and black pepper to taste
For the Dumplings:
2 cups all-purpose flour
1 tablespoon baking powder
1/2 teaspoon salt
1/2 cup (1 stick) cold unsalted butter, cubed
3/4 cup whole milk
1 tablespoon dried parsley
1/2 teaspoon garlic powder
Directions
- Season the beef cubes generously with salt and pepper. Heat oil in a large, heavy oven-safe pot or Dutch oven over medium-high heat. Sear the beef in batches until a deep brown crust forms on all sides. Remove beef and set aside.
- In the same pot, add the mushrooms and pearl onions. Cook until the mushrooms release their moisture and turn golden brown. Stir in the garlic and tomato paste, cooking for 1 minute.
- Sprinkle 2 tablespoons of flour over the vegetables and stir for 1 minute to cook out the raw flour taste. Gradually pour in the beef broth while stirring to create a smooth, thickened base.
- Return the beef to the pot. Bring to a simmer, then reduce heat to low. Cover and simmer for 2 hours or until the beef is fork-tender.
- Prepare the dumpling dough: Pulse the flour, baking powder, salt, and garlic powder in a food processor with the cold butter until it resembles coarse crumbs (or use a pastry cutter). Gently stir in the milk and dried parsley until just combined. Do not overmix.
- The Anti-Soggy Technique: Ensure the stew liquid has reduced slightly so the meat and vegetables are peeking through the surface. Drop rounded tablespoons of dough directly onto the solid pieces of meat and mushrooms rather than into the liquid. This “perching” method prevents the dumplings from becoming waterlogged.
- Cover the pot tightly and simmer on low for 15 minutes. Do not lift the lid; the steam is what makes them fluffy.
- The Golden Finish: Remove the lid. Place the pot under a preheated broiler for 3-5 minutes. Watch closely until the tops of the dumplings are toasted golden brown with the crispy texture seen in the image.
- Garnish with a generous amount of fresh chopped parsley and serve immediately.
Notes
- The ‘perching’ method is essential; by placing the dough on the meat rather than submerged in liquid, you achieve a fluffy interior and a crispy exterior.