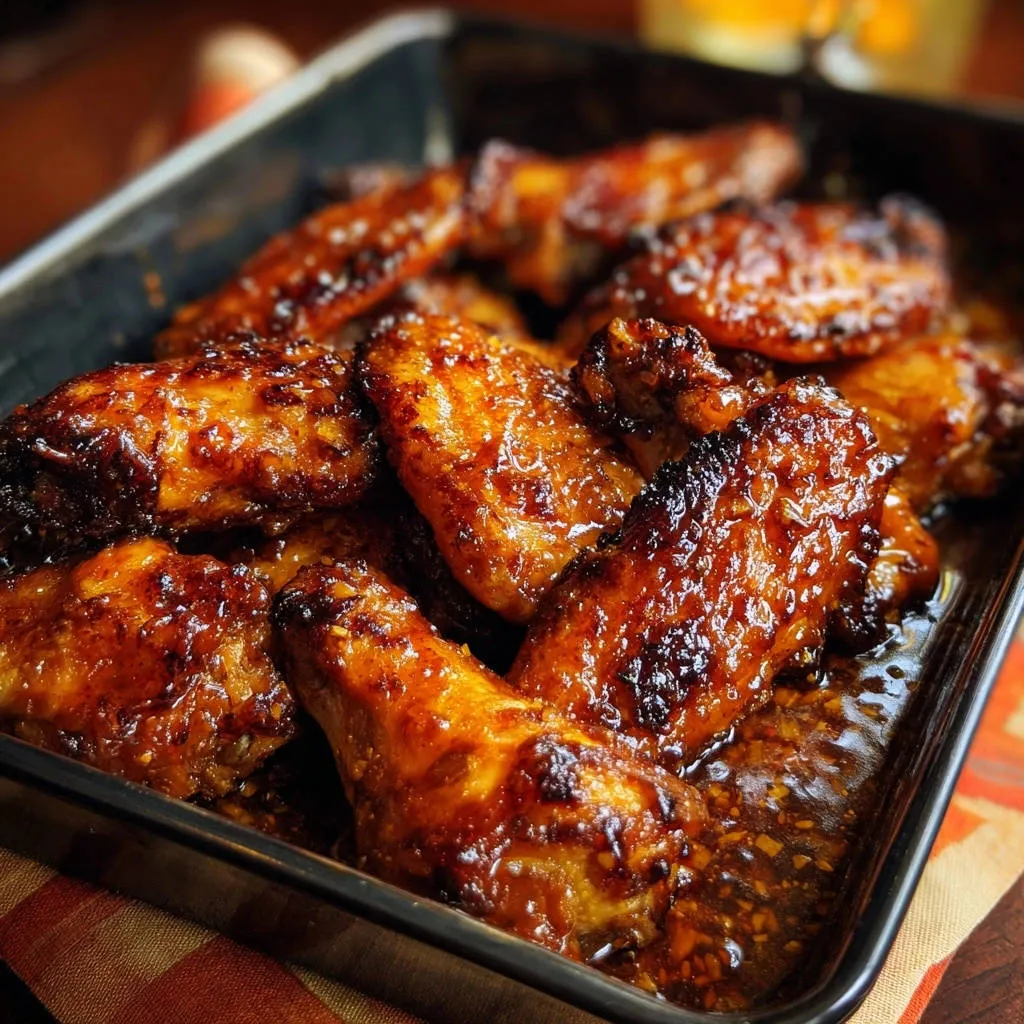
There’s nothing more disheartening than spending time on homemade chicken wings, only for the glaze to be thin and slide right off, leaving them looking lackluster. I’ve faced that disappointment too! This recipe for Sticky Sweet Glazed Chicken Wings is your solution, featuring a secret technique that locks in a beautiful, thick, and perfectly sticky glaze, resulting in truly crispy, restaurant-quality wings right from your own kitchen.
Why This Recipe is Your New Go-To for Irresistibly Glazed Chicken Wings
Many recipes promise sticky wings, but often deliver a glaze that’s either too runny or becomes brittle. Our method specifically tackles this common frustration, ensuring your wings are not just coated, but truly enveloped in a luscious, deeply flavored glaze that holds tight.
We’ll guide you through precise steps for achieving wings that are both incredibly crispy on the outside and wonderfully juicy inside. The secret lies in a strategic double-bake process paired with a perfectly executed cornstarch slurry for glaze thickening.
The result? An explosion of sweet and savory notes, with that irresistible finger-licking stickiness that makes these Sticky Sweet Glazed Chicken Wings utterly addictive and a guaranteed crowd-pleaser.
Gathering Your Ingredients: The Heart of Delicious Wings
- 2 pounds chicken wings, separated into flats and drumettes
- 1 tablespoon neutral oil, plus more for baking sheet
- 1/2 cup soy sauce
- 1/2 cup honey or brown sugar
- 2 tablespoons rice vinegar
- 2 cloves garlic, minced
- 1 teaspoon grated fresh ginger (optional)
- 1/4 cup water or chicken broth
- 1 tablespoon cornstarch
- 1 tablespoon cold water (for slurry)
- Salt to taste
- Black pepper to taste
- Sesame seeds, for garnish (optional)
The Star: Perfectly Prepped Chicken Wings
Using separated flats and drumettes ensures even cooking and easier handling for dipping. Thoroughly patting the chicken wings dry is paramount; it removes surface moisture which is the enemy of crispy skin.
Dry wings allow the skin to render properly and become golden and crisp, rather than steaming in their own juices.
Crafting the Signature Sticky-Sweet Glaze Base
Soy sauce provides a crucial savory depth and umami foundation to our glaze. Honey or brown sugar delivers the signature sweetness and helps achieve that desirable sticky texture and beautiful caramelization.
Rice vinegar adds a subtle, essential tang that perfectly balances the sweetness, preventing the glaze from being cloyingly sweet. Fresh minced garlic and grated ginger infuse the glaze with aromatic warmth and a pungent kick, elevating the overall flavor profile.
The Secret Weapon: Cornstarch for Unbeatable Thickness
Cornstarch is the true game-changer in this recipe, transforming a simple liquid into a glossy, thick, and clingy glaze. When properly used, it creates a velvety texture that adheres beautifully to every curve of the chicken wing.
It’s crucial for achieving the “sticky” in Sticky Sweet Glazed Chicken Wings, ensuring the sauce stays put and caramelizes effectively in the final bake.
Essential Tools for Glazed Chicken Wing Success
Large Baking Sheet: Crucial for ensuring wings bake in a single layer for maximum crispness.
Parchment Paper or Foil: Essential for hassle-free cleanup, especially with sticky glazes.
Medium Saucepan: The ideal vessel for simmering and perfectly thickening your delicious glaze.
Whisk: Indispensable for creating a smooth cornstarch slurry and evenly combining glaze ingredients.
Large Mixing Bowl: Perfect for tossing the hot, crispy wings with the luscious, thickened glaze.
Your Path to Sticky Sweet Glazed Chicken Wings Perfection: A Detailed Guide
- Preheat Oven & Prepare Baking Sheet:
Preheat your oven to 400°F (200°C). Line a large baking sheet with parchment paper or foil for easier cleanup, and lightly grease it with neutral oil to prevent sticking.
- Pat Dry & Season Wings:
Pat the chicken wings very dry with paper towels. This step is absolutely crucial for achieving crispy skin. Season the wings lightly but evenly with salt and black pepper.
- First Bake for Crispness:
Arrange the seasoned wings in a single layer on the prepared baking sheet, ensuring they don’t overlap. Bake for 25 minutes, then flip each wing and continue baking for another 20-25 minutes, or until the wings are cooked through and lightly golden brown.
- Simmer the Glaze Base:
While the wings are baking, begin preparing your glaze. In a medium saucepan, combine the soy sauce, honey (or brown sugar), rice vinegar, minced garlic, grated ginger (if using), and 1/4 cup water or chicken broth. Bring this mixture to a gentle simmer over medium heat, stirring occasionally until the sweetener fully dissolves.
- The Glaze Game-Changer: Cornstarch Slurry:
This is the secret to a perfectly thick and sticky glaze: In a small separate bowl, whisk together the cornstarch and 1 tablespoon of cold water until you have a completely smooth slurry. Pour this cornstarch slurry into the simmering sauce in the saucepan, whisking constantly to prevent lumps. Continue to simmer and whisk for 1-2 minutes until the sauce has visibly thickened to a beautiful syrupy consistency that coats the back of a spoon. Remove the glaze from the heat immediately.
- Toss Wings with Glaze:
Once the wings are cooked through from their first bake, remove them from the oven. Carefully transfer the hot wings to a large mixing bowl. Pour the freshly thickened glaze evenly over the wings and toss gently but thoroughly until every single wing is beautifully coated in the sticky sauce.
- Final High-Heat Glaze Set:
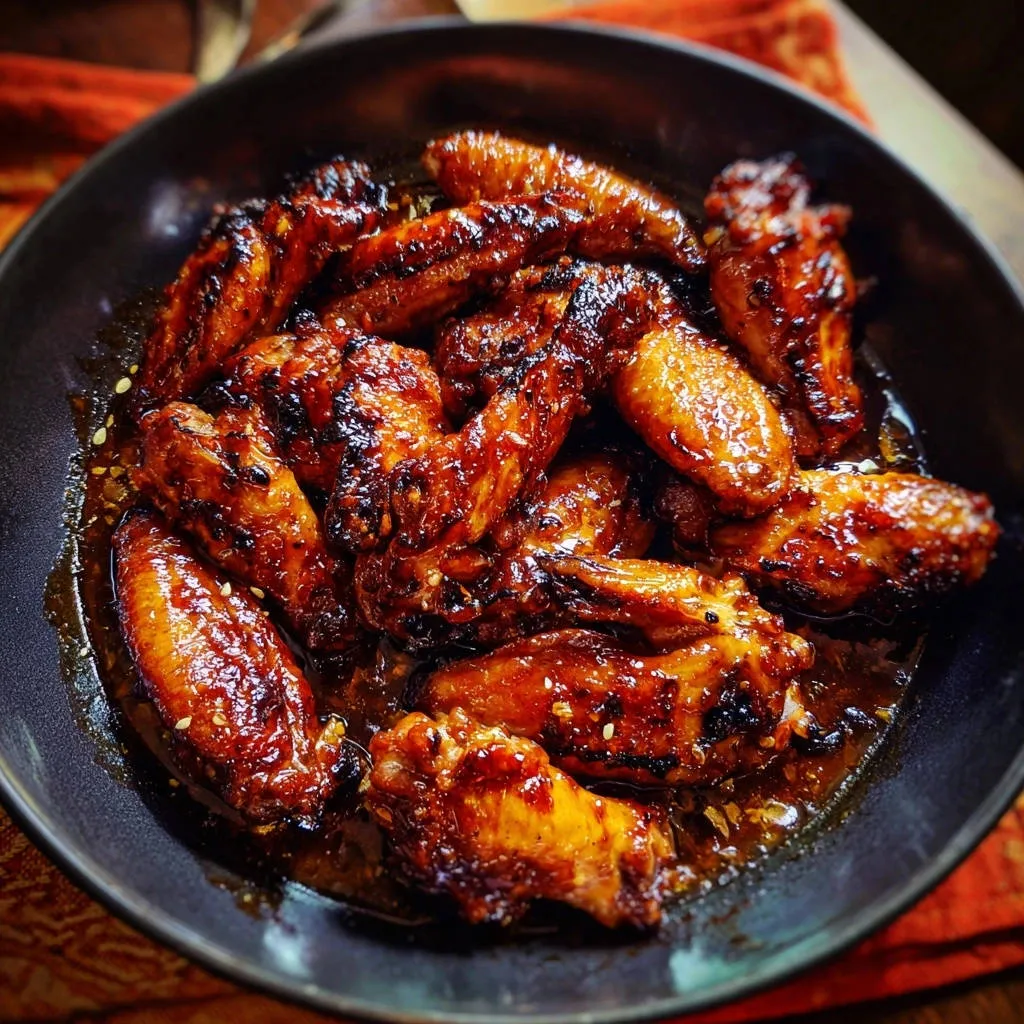
Return the glazed wings to the baking sheet in a single layer. Increase the oven temperature to 425°F (220°C) or switch your oven to broiler mode (if using the broiler, watch very carefully!). Bake or broil for an additional 5-10 minutes, flipping once about halfway through, until the glaze is wonderfully caramelized, intensely sticky, and slightly charred in spots. This crucial final high-heat step sets the thick glaze and develops incredible depth of flavor.
- Serve & Garnish:
Serve your Sticky Sweet Glazed Chicken Wings immediately, garnished with a sprinkle of sesame seeds if desired for an extra touch of flavor and visual appeal.
Elevate Your Glazed Wings: Expert Tips for Next-Level Flavor and Texture
The Power of Dryness: Why Patting is Paramount for Crispy Skin
Ensuring your chicken wings are as dry as possible before baking is the single most important step for achieving truly crispy skin. Any surface moisture will steam the wings instead of allowing them to crisp up, leading to a less satisfying texture.
Mastering the Cornstarch Slurry: Your Secret to a Flawless, Thick Glaze
For a lump-free and perfectly thickened glaze, always mix cornstarch with cold water to form a smooth slurry before adding it to a hot liquid. Whisk it in slowly and continuously to ensure even distribution and thickening. This prevents grainy textures and guarantees a beautifully cohesive glaze.
Don’t Skip the Double Bake: Achieving that Perfect Caramelized Stickiness
The final, higher-temperature bake or broil isn’t just an afterthought; it’s what transforms a good glaze into an extraordinary one. This intense heat caramelizes the sugars in the glaze, making it incredibly sticky, flavorful, and giving it that desirable slightly charred, restaurant-quality finish that adheres firmly to the wings.
Flavor Customization: Personalizing Your Sticky Sweet Glazed Chicken Wings
Feel free to adjust the glaze to your taste! For a hint of heat, add a pinch of red pepper flakes or a dash of sriracha to the simmering sauce. A squeeze of fresh lime juice at the end can brighten the flavors, or a sprinkle of chopped fresh cilantro for a herbaceous twist.
Serving Suggestions: What to Pair with Your Perfect Sticky Sweet Glazed Chicken Wings
Light and Refreshing Sides
Balance the rich sweetness of these wings with fresh, crisp sides. A vibrant Asian-inspired coleslaw, a simple cucumber salad with rice vinegar, or a bowl of fluffy steamed white or brown rice are perfect choices to cut through the richness and cleanse the palate.
Complementary Vegetable Companions
Roasted broccoli florets tossed with a little sesame oil, garlicky sautéed green beans, or a fresh mixed green salad with a light vinaigrette all make excellent, healthful companions that don’t overpower the main event. For another crispy side, consider making crispy roasted cauliflower.
The Ultimate Game Day Spread
Planning a gathering? These wings are a stellar addition to any appetizer lineup. Pair them with other crowd-pleasers like crispy vegetable spring rolls, a bowl of lightly salted edamame, or even some homemade crispy onion rings for an ultimate finger-food feast.
Make Ahead & Storage: Enjoying Your Glazed Wings Later
Can You Make Sticky Sweet Glazed Chicken Wings Ahead of Time?
You can certainly do some prep work ahead! Bake the chicken wings through their initial bake (step 3), let them cool, and store them in an airtight container in the refrigerator for up to 2 days. The glaze can also be made ahead and stored separately in the fridge. Reheat the glaze gently, then proceed with steps 6-8 when ready to serve.
Storing Leftover Glazed Chicken Wings
Store any leftover Sticky Sweet Glazed Chicken Wings in an airtight container in the refrigerator for up to 3-4 days. To reheat, spread them in a single layer on a baking sheet and warm in a 350°F (175°C) oven for 10-15 minutes, or until heated through and the glaze is re-caramelized, helping to re-crisp the skin.
Troubleshooting Common Glazed Chicken Wing Challenges
Problem: My Glaze is Too Thin and Watery
If your glaze didn’t thicken properly, simply return it to the saucepan over medium heat. If it’s only slightly thin, continue to simmer and whisk for a few more minutes to reduce it. If it’s very thin, prepare a small additional slurry of 1/2 teaspoon cornstarch mixed with 1 tablespoon cold water, then slowly whisk it into the simmering glaze until desired thickness is reached.
Problem: My Wings Aren’t Crispy Enough
The key to crispiness lies in two main factors: thoroughly drying the wings with paper towels before seasoning, and ensuring they are in a single layer on the baking sheet for both baking stages. The final high-heat bake or quick broil also dramatically improves crispness by caramelizing and setting the glaze.
Problem: The Glaze Burned or Became Too Dark
Glazes with sugar can burn quickly, especially under a broiler. During the final high-heat step (step 7), keep a very close eye on the wings. Broilers can vary greatly, so check frequently and flip often. If using the oven, reduce the temperature slightly if you notice rapid darkening.
Frequently Asked Questions (FAQs) About Sticky Sweet Glazed Chicken Wings
Can I use frozen chicken wings for this recipe?
Yes, you can use frozen chicken wings, but it is absolutely essential that they are fully thawed and then patted very dry before proceeding with the recipe. Any residual ice or moisture will hinder crisping and dilute the glaze.
What’s the best way to get wings extra crispy?
Beyond patting them dry, baking them in a single layer, and utilizing the crucial double-bake method outlined in this recipe, some cooks find success by adding a small amount (1/2 teaspoon per pound) of baking powder (not baking soda) to the dry seasoning mix. This helps to further dry out the skin and create tiny air bubbles for an even crispier result.
Is there a substitute for honey or brown sugar in the glaze?
While honey and brown sugar provide unique depth and stickiness, you can experiment with alternatives. Maple syrup or agave nectar can work, though they might slightly alter the final flavor and caramelization. Granulated sugar can also be used, but brown sugar often adds a richer, molasses-like note that is preferred for this type of glaze.
Can I make these wings gluten-free?
Absolutely! To make these Sticky Sweet Glazed Chicken Wings gluten-free, simply ensure you use a gluten-free soy sauce (often labeled tamari) and confirm that your cornstarch is certified gluten-free. All other ingredients are naturally gluten-free.
Ready to Impress? Share Your Sticky Sweet Glazed Chicken Wings!
With this recipe, you now hold the secret to creating Sticky Sweet Glazed Chicken Wings that will disappear from the plate in record time. No more watery glazes or soggy skin – just pure, caramelized, crispy perfection. We’re confident this will become your go-to recipe for game nights, parties, or simply a delicious family meal. If you’re looking for another fantastic glazed chicken dish, be sure to check out our Sweet Sticky Glazed Chicken.
We’d love to see your culinary creations! Share your photos and experiences in the comments below, or tag us on social media. Your feedback inspires us to keep delivering delicious, foolproof recipes.
Chicken Wings
Course: Main CourseCuisine: AsianDifficulty: medium2
servings20
minutes1
hour750
kcal60
minutesSay goodbye to watery glazes! This recipe reveals a secret technique to achieve restaurant-quality Sticky Sweet Glazed Chicken Wings with a perfectly thick, sticky, and caramelized coating every time. Enjoy spectacular, flavorful wings right from your own kitchen.
Ingredients
2 pounds chicken wings, separated into flats and drumettes
1 tablespoon neutral oil, plus more for baking sheet
1/2 cup soy sauce
1/2 cup honey or brown sugar
2 tablespoons rice vinegar
2 cloves garlic, minced
1 teaspoon grated fresh ginger (optional)
1/4 cup water or chicken broth
1 tablespoon cornstarch
1 tablespoon cold water (for slurry)
Salt to taste
Black pepper to taste
Sesame seeds, for garnish (optional)
Directions
- Preheat your oven to 400°F (200°C). Line a large baking sheet with parchment paper or foil for easier cleanup, and lightly grease it with oil.
- Pat the chicken wings very dry with paper towels. This is crucial for texture. Season the wings lightly with salt and pepper.
- Arrange the wings in a single layer on the prepared baking sheet. Bake for 25 minutes, then flip the wings and bake for another 20-25 minutes, or until cooked through and lightly golden.
- While the wings are baking, prepare the glaze. In a medium saucepan, combine the soy sauce, honey or brown sugar, rice vinegar, minced garlic, grated ginger (if using), and 1/4 cup water or chicken broth. Bring the mixture to a simmer over medium heat, stirring until the sweetener dissolves.
- This is the game-changer for a perfectly thick glaze: In a small bowl, whisk together the cornstarch and 1 tablespoon of cold water until smooth to create a slurry. Pour the cornstarch slurry into the simmering sauce, whisking constantly. Continue to simmer and whisk for 1-2 minutes until the sauce has visibly thickened to a syrupy consistency that coats the back of a spoon. Remove from heat.
- Once the wings are cooked through, remove them from the oven. Carefully transfer the hot wings to a large bowl. Pour the thickened glaze over the wings and toss gently until every wing is evenly coated.
- Return the glazed wings to the baking sheet in a single layer. Increase the oven temperature to 425°F (220°C) or switch to the broiler (watching carefully). Bake or broil for an additional 5-10 minutes, flipping once, until the glaze is beautifully caramelized, sticky, and slightly charred in spots. This final high-heat step sets the thick glaze.
- Serve immediately, garnished with sesame seeds if desired.
Notes
- Ensure wings are very dry for best texture. The cornstarch slurry is essential for a thick, syrupy glaze.