There’s nothing quite as disappointing as a coconut cookie that turns out dry and crumbly, losing its charm right out of the oven. I’ve been there, striving for that ideal tender bite, and after countless experiments, I finally perfected the art of creating truly moist and chewy Swirled Coconut Delights. This recipe is your reliable guide to achieving that irresistible texture and beautiful swirl every single time, making dry cookies a distant memory.
Why These Swirled Coconut Delights Will Become Your Go-To Recipe
The Secret to Unrivaled Moisture and Chewiness
This recipe guarantees a tender, moist interior and a satisfying chew, addressing the common problem of overly dry coconut cookies. Our specific baking time and cooling method ensure the cookies set perfectly without losing their delightful texture.
Crafting Visually Stunning Swirls Every Time
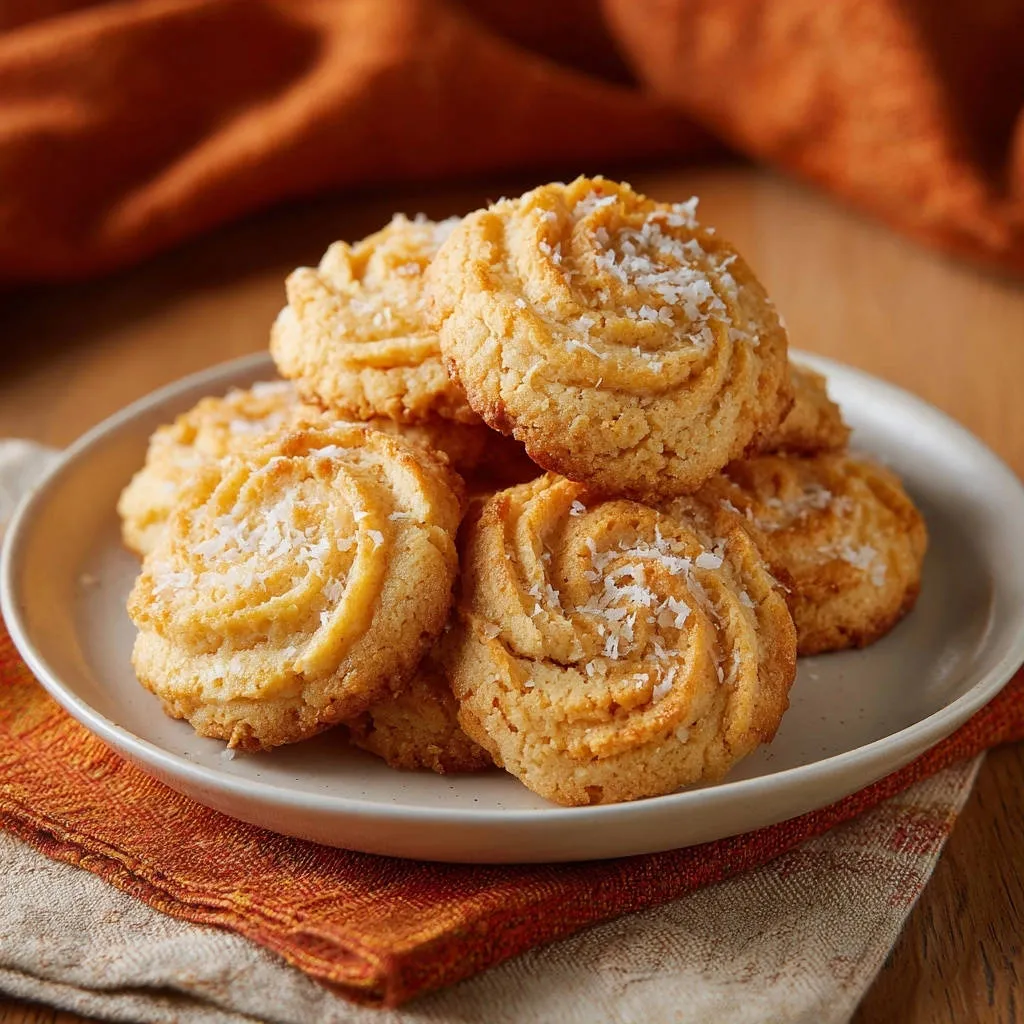
The aesthetic appeal of these piped, swirled shapes is undeniable, making them look professionally baked. You’ll find that creating these elegant swirls is surprisingly easy, perfect for gifting or impressing any guest.
Effortless Baking, Exceptional Results
Despite their sophisticated appearance, the steps for these Swirled Coconut Delights are straightforward and approachable. This recipe makes it simple for bakers of all levels to achieve exceptional, bakery-quality results right in their own kitchen.
Gathering Your Essentials: Ingredients for Swirled Coconut Delights
Dairy & Flavor Foundations
Unsalted Butter (Softened): Softened butter is key for proper creaming, providing richness and contributing significantly to the tender texture of the final cookie.
Granulated Sugar: Beyond just sweetening, sugar aids in the beautiful golden-brown edges and helps create a perfectly chewy cookie.
Large Egg: The egg acts as a crucial binder, adding essential moisture and helping to build the cookie’s structure and elasticity.
Vanilla Extract: A touch of quality vanilla extract enhances the overall flavor profile, adding warmth and a delightful aromatic depth that complements the coconut.
The Dry Blend for Perfect Structure
All-Purpose Flour: This forms the essential structure of your Swirled Coconut Delights. Accurate measurement, ideally by weight, is crucial to avoid a dense or dry cookie.
Baking Powder: As a leavening agent, baking powder is responsible for giving these cookies a slight lift, contributing to their light and tender crumb.
Salt: A small but mighty ingredient, salt balances the sweetness and meticulously enhances all the other flavors present in the cookie.
Sweetened Shredded Coconut: The Star Ingredient
Sweetened Shredded Coconut: This ingredient is paramount, providing both the signature tropical coconut flavor and the wonderful chewy texture. It’s used generously within the dough and as a beautiful, crunchy topping.
Essential Kitchen Tools for Perfect Coconut Swirls
Mixing and Measuring Must-Haves
Electric Mixer: An electric mixer is invaluable for creaming the butter and sugar until it’s light and fluffy, incorporating the necessary air for a tender cookie.
Large and Medium Mixing Bowls: Using separate bowls for wet and dry ingredients ensures proper mixing and easier, more controlled combining.
Measuring Cups and Spoons: Accuracy in ingredient quantities is crucial for baking success. Always level your dry ingredients and measure liquids at eye level.
Rubber Spatula: This versatile tool is essential for scraping down the sides of bowls, ensuring all ingredients are fully incorporated, and for gently folding in the coconut.
Piping for Picture-Perfect Shapes
Piping Bag with Star Tip (or Large Round Tip): This is your secret weapon for creating those stunning, professional-looking swirled shapes. A star tip yields ridged swirls, while a round tip offers a smoother, rustic look.
Baking and Cooling Essentials
Baking Sheets: Sturdy baking sheets provide the foundation for baking your cookies evenly. Use light-colored sheets to prevent over-browning on the bottom.
Parchment Paper: Lining your baking sheets with parchment paper prevents sticking, ensures even heat distribution, and makes cleanup incredibly easy.
Wire Cooling Rack: A wire rack is vital for allowing air to circulate around the cookies as they cool. This prevents condensation and keeps the bottoms from becoming soggy.
Your Journey to Irresistible Swirled Coconut Delights: A Step-by-Step Guide
- Cream Butter & Sugar:
In a large mixing bowl, combine the softened unsalted butter and granulated sugar.
Using an electric mixer, beat them together on medium-high speed until the mixture becomes visibly light, fluffy, and a pale yellow. This critical creaming process incorporates air, which is fundamental for achieving a tender and airy cookie texture.
- Incorporate Wet Ingredients:
To the creamed butter and sugar, add the large egg and vanilla extract.
Continue beating until these ingredients are thoroughly combined, pausing to scrape down the sides of the bowl with a rubber spatula as needed to ensure everything is evenly incorporated.
- Prepare Dry Ingredients:
In a separate medium bowl, whisk together the all-purpose flour, baking powder, and salt.
Whisking these dry ingredients ensures they are thoroughly combined and evenly distributed throughout the flour, which prevents lumps and guarantees a consistent rise in your cookies.
- Combine Wet & Dry Gently:
Gradually add the whisked dry ingredients to the wet mixture, mixing on low speed with your electric mixer until they are just combined.
It’s absolutely crucial not to overmix at this stage; over-developing the gluten can lead to tough, dry cookies, robbing them of their desired moist and chewy texture.
- Fold in Coconut:
Gently fold in the 1 cup of sweetened shredded coconut by hand using a rubber spatula.
Continue folding until the coconut is evenly distributed throughout the dough, taking care not to overwork the mixture, which could also contribute to a tougher cookie.
- Chill the Dough:
Cover the cookie dough tightly with plastic wrap and chill it in the refrigerator for at least 30 minutes.
This chilling step is essential; it firms up the butter in the dough, making it significantly easier to handle and pipe, and critically reduces spreading during baking, ensuring your beautiful swirls hold their shape and the cookies maintain their thickness.
- Preheat Oven & Prep Sheet:
While the dough chills, preheat your oven to 350°F (175°C).
Line a baking sheet with parchment paper to prevent the cookies from sticking and to ensure easy transfer and cleanup.
- Pipe Swirls (or Form Balls):
Transfer the chilled dough to a piping bag fitted with your chosen star tip (for defined ridges) or a large round tip (for a smoother, rustic swirl).
Pipe circular, swirled shapes onto the prepared baking sheet, leaving approximately 2 inches between each cookie to allow for slight spreading.
Alternatively, if you don’t have a piping bag, simply roll the dough into 1-inch balls and gently press them with a fork to create a charming, decorative pattern on top.
- Top with Extra Coconut:
Lightly sprinkle the tops of your piped or formed cookies with extra sweetened shredded coconut.
This adds an additional layer of coconut flavor, a pleasant texture, and enhances their visual appeal, making them even more enticing.
- Bake to Perfection:
Bake for 10-12 minutes, or until the edges are just lightly golden and the centers still look slightly soft.
This is the critical step to avoid dry cookies; do not wait for the entire cookie to be golden brown or hard, as they will continue to set and firm up as they cool outside the oven.
- Cool Smartly:
Remove the baking sheet from the oven and let the cookies cool on the sheet for 5 minutes.
This brief cooling period on the warm sheet allows them to finish baking gently with residual heat without drying out, perfectly preserving their moist and chewy interior. After 5 minutes, transfer them to a wire rack to cool completely.
Beyond the Recipe: Expert Tips for Flawless Swirled Coconut Delights
Mastering the Mix: Avoiding Tough Cookies
Don’t Overmix! Once you’ve added the flour, mix only until the ingredients are just combined. Excessive mixing develops gluten, which directly leads to a tough, dry, and less tender cookie texture, diminishing that delightful chewiness.
The Chilling Secret: Dough Perfection
Chill for Success. Absolutely do not skip the refrigeration step! Chilling the dough firms up the butter, making it significantly easier to handle for piping and drastically reduces spreading in the oven, ensuring your intricate swirls hold their beautiful shape and the cookies maintain their ideal thickness.
Baking to Perfection: Spotting the ‘Just Right’ Moment
Watch the Edges, Not the Center. For perfectly moist Swirled Coconut Delights, remove them from the oven when only the edges are lightly golden and the centers still appear slightly soft. Remember, cookies continue to cook and firm up as they cool on the hot baking sheet.
Cooling Gracefully: Maintaining Tenderness
The 5-Minute Sheet Cool. Allowing the cookies to cool on the warm baking sheet for 5 minutes before transferring them to a wire rack is a crucial step. This gentle, residual baking helps them set completely without any risk of over-drying, preserving their wonderfully moist interior.
Creative Swirls and Alternative Shapes
Experiment with Tips. A star tip creates beautifully defined ridges for a classic swirled look, while a large round tip yields a smoother, more rustic swirl. Don’t hesitate to try different piping tips to vary the appearance of your treats.
No Piping Bag? No Problem! As mentioned in the directions, if you don’t have a piping bag, you can simply roll the dough into uniform 1-inch balls. Gently press each ball with a fork to create a classic, textured cookie; the delicious flavor remains unchanged. For another simple coconut treat, try our easy coconut bars.
Common Challenges & Simple Solutions for Your Swirled Coconut Delights
Why Are My Cookies Spreading Too Much?
Excessive spreading is often due to butter that is too soft or even melted, insufficient chilling of the dough, or an oven that isn’t at the correct temperature. Always ensure your butter is softened but still cool to the touch, and never skip the minimum 30-minute chilling period. It’s also wise to verify your oven temperature with an oven thermometer for accuracy.
My Cookies Are Dry or Tough – What Went Wrong?
The primary culprits for dry or tough cookies are overmixing the dough, which develops too much gluten, and overbaking. To prevent this, mix the dough only until the flour is just incorporated, and remember to remove the cookies from the oven when the edges are merely golden and the centers are still soft.
The Swirls Aren’t Holding Their Shape!
If your swirled shapes aren’t holding up, it strongly indicates that the dough is likely too warm or hasn’t been chilled sufficiently. Chilling the dough firms up the butter within it, which is absolutely essential for maintaining the intricate piped shapes during the baking process. Ensure your piping technique is also steady and consistent for best results.
Delightful Pairings: How to Serve Your Swirled Coconut Treats
Perfect Companions for Coconut Bliss
These moist and chewy Swirled Coconut Delights pair beautifully with a hot cup of freshly brewed coffee or a soothing herbal tea, especially perfect for a cozy afternoon break. For a refreshing and vibrant treat, consider serving them alongside a scoop of creamy vanilla bean ice cream or a vibrant tropical fruit salad.
Elevating the Presentation
To truly elevate the experience, arrange your Swirled Coconut Delights artfully on a serving platter. For an extra touch of elegance and flavor, you can lightly sprinkle them with a few toasted coconut flakes or drizzle a delicate pattern of melted dark chocolate over the tops. They make a lovely and impressive addition to any dessert spread, party, or cookie exchange.
Storing Your Swirled Coconut Delights: Freshness That Lasts
Keeping Them Fresh: Short-Term Storage
Once your Swirled Coconut Delights have completely cooled, store them in an airtight container at room temperature for up to 3-5 days. For an extra tip to maintain their tender texture, you can even place a half-slice of plain bread in the container; the cookies will subtly absorb moisture from the bread, helping them stay softer for longer.
Planning Ahead: Freezer-Friendly Options
These delicious cookies freeze wonderfully, making them perfect for future enjoyment or meal prep. To freeze, first place them in a single layer on a baking sheet and freeze until solid. Once frozen, transfer them to an airtight freezer-safe bag or container, where they will keep for up to 2-3 months. Thaw them at room temperature for an hour or two before serving.
Your Top Questions Answered: Swirled Coconut Delights Edition
Can I make these gluten-free?
Yes, you can absolutely substitute the all-purpose flour with a high-quality 1:1 gluten-free baking flour blend that contains xanthan gum. The texture might have a slight difference, but the resulting Swirled Coconut Delights should still be wonderfully moist and delicious.
Can I use unsweetened coconut?
You can use unsweetened shredded coconut, but be aware that it will result in a significantly less sweet cookie overall. If opting for unsweetened coconut, you might consider increasing the granulated sugar by 1-2 tablespoons to compensate for the lost sweetness, or perhaps add a touch of coconut extract for a more intense coconut flavor. For another rich coconut experience, check out our irresistibly moist chocolate coconut orange cake.
How long do these cookies last?
When stored correctly in an airtight container at room temperature, your Swirled Coconut Delights will remain fresh and delightful for approximately 3-5 days. If you choose to freeze them, they can maintain their quality for up to 2-3 months, ready to be enjoyed whenever a craving strikes.
Can I skip the chilling step?
While technically possible, skipping the chilling step is strongly not recommended for this particular recipe. Chilling is absolutely crucial for preventing the cookies from spreading too much during baking and is essential for helping them hold their beautiful swirled shape, also contributing to a better, chewier texture.
What if I don’t have a piping bag?
No piping bag? No problem at all! As mentioned in the detailed directions, you can simply roll the dough into uniform 1-inch balls. Then, gently press a fork onto each ball to create a lovely, classic pattern. The flavor will be just as amazing and the cookies equally delicious, just with a slightly different visual appeal. You might also enjoy our foolproof coconut cookie nests recipe for another fun coconut treat.
Ready to Impress? Share Your Swirled Coconut Delights Masterpiece!
There you have it – the definitive guide to creating Swirled Coconut Delights that are not only perfectly moist and delightfully chewy but also absolutely stunning in appearance. We truly hope this detailed recipe brings a little extra joy and a lot of deliciousness to your kitchen, making every baking session a success.
Don’t be shy; take immense pride in your baking achievements and share your beautiful creations! We’d absolutely love to see your perfect swirls and hear about your baking success stories. If you’ve enjoyed mastering this recipe, be sure to explore our other fantastic cookie recipes for even more sweet inspiration and delightful baking adventures.
Coconut Delights
Course: DessertCuisine: AmericanDifficulty: medium4
about 2 dozen cookies45
minutes10
minutes240
kcal60
minutesEver baked a batch of beautiful cookies only to find them turn out dry and crumbling after cooling? This recipe cracks the code, ensuring perfectly moist and chewy coconut cookies every time. Achieve delightful tenderness with these easy-to-follow steps.
Ingredients
1/2 cup (1 stick) unsalted butter, softened
1/2 cup granulated sugar
1 large egg
1 teaspoon vanilla extract
1 1/2 cups all-purpose flour
1/2 teaspoon baking powder
1/4 teaspoon salt
1 cup sweetened shredded coconut, plus extra for topping
Directions
- In a large bowl, cream together the softened butter and granulated sugar with an electric mixer until light and fluffy.
- Beat in the egg and vanilla extract until well combined, scraping down the sides of the bowl as needed.
- In a separate medium bowl, whisk together the all-purpose flour, baking powder, and salt.
- Gradually add the dry ingredients to the wet ingredients, mixing on low speed until just combined. Be careful not to overmix. Overmixing can develop the gluten too much, leading to tougher, drier cookies.
- Gently fold in the 1 cup of sweetened shredded coconut by hand until evenly distributed.
- Cover the dough and chill it in the refrigerator for at least 30 minutes. This helps the dough firm up, making it easier to handle and preventing excessive spreading during baking, which also contributes to a better texture.
- Preheat your oven to 350°F (175°C). Line a baking sheet with parchment paper.
- Transfer the chilled dough to a piping bag fitted with a star tip (or a large round tip for a more rustic swirl). Pipe circular, swirled shapes onto the prepared baking sheet, leaving about 2 inches between each cookie. Alternatively, you can roll the dough into 1-inch balls and gently press a fork onto them to create a pattern.
- Lightly sprinkle the tops of the cookies with extra sweetened shredded coconut.
- Bake for 10-12 minutes, or until the edges are just lightly golden and the centers still look slightly soft. This is the key step to avoiding dry cookies! Do not wait for the entire cookie to be golden brown or hard. They will continue to set as they cool.
- Remove the baking sheet from the oven and let the cookies cool on the sheet for 5 minutes before transferring them to a wire rack to cool completely. This cooling period on the warm sheet allows them to finish baking gently without drying out.
Notes
- Ensure dough is chilled and do not overbake for the perfect moist and chewy texture.