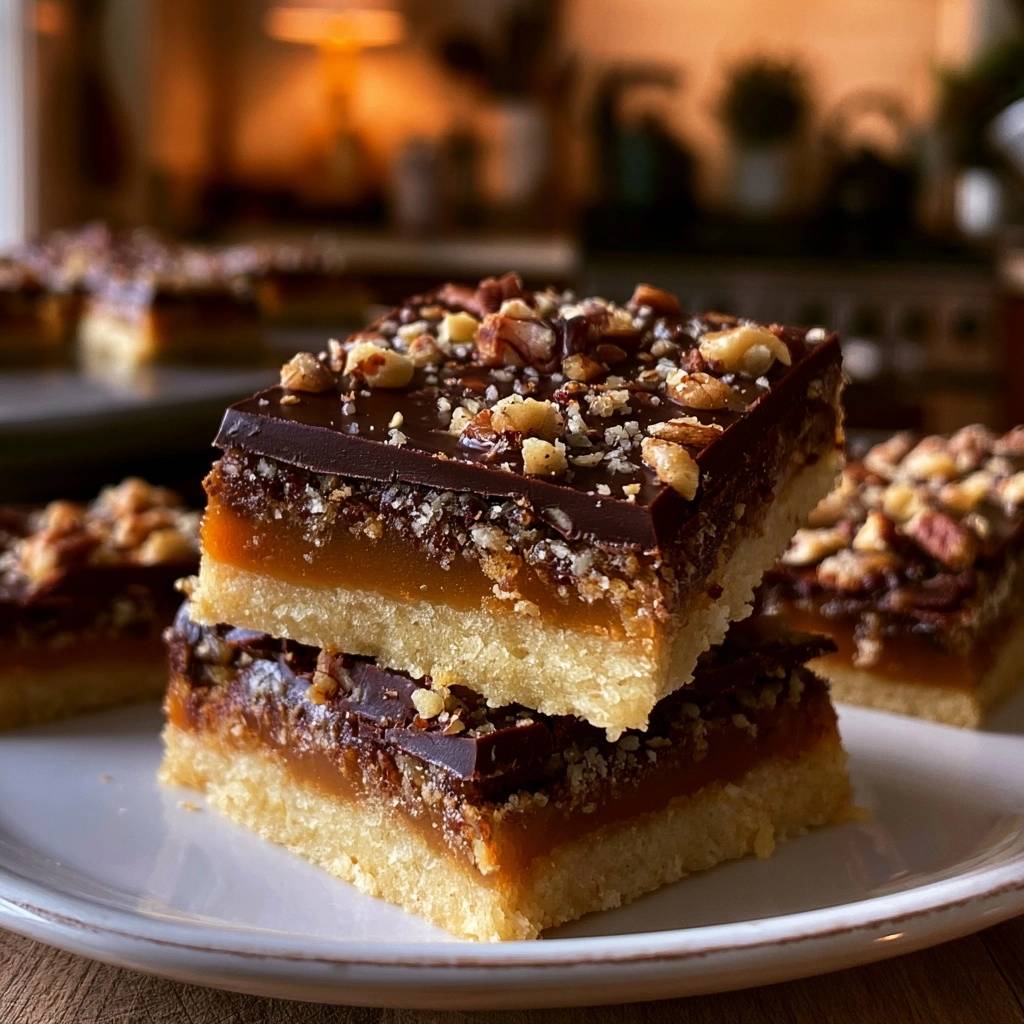
Imagine biting through a thick, snappy layer of semi-sweet chocolate into a pool of buttery, chewy caramel that doesn’t run down your chin. Beneath that richness lies a shortbread crust so crisp and sturdy it actually supports the weight of the toppings without bending. These Decadent Chocolate Caramel Pecan Bars are a masterclass in contrasting textures, balancing the earthy crunch of toasted nuts with a silky, golden center.
However, many home bakers struggle with the dreaded “soggy bottom,” where the caramel seeps into the crust and turns it into a mushy mess. This recipe eliminates that frustration by focusing on the structural integrity of each layer. By understanding the relationship between the fats and sugars, you can create a professional-grade bar that looks like it came from a high-end patisserie.
The secret to this success lies in the moisture-barrier method. We don’t just layer ingredients; we engineer them to stay distinct. By par-baking the base and then “sealing” it with a second bake once the caramel is added, you ensure the shortbread stays snappy for days. It’s all about controlling the evaporation of moisture to keep those layers perfectly defined.
Engineering the Perfect Anti-Soggy Shortbread Base
The foundation of any great layered bar is the chemistry of the crust. To achieve a structural lattice that resists moisture, you must use cold, cubed butter. When you work cold butter into the flour, you create tiny pockets of fat that coat the flour proteins. This prevents the gluten from over-developing, resulting in a short, tender crumb that remains firm rather than becoming bread-like or soft.
Granulated sugar plays a vital role here as well. Unlike powdered sugar, which contains cornstarch and creates a melt-in-your-mouth softness, granulated sugar provides a crisp, crystalline structure. This creates a sturdier base that can handle the heavy caramel and chocolate layers without crumbling under the pressure of a fork. It acts as the “skeleton” of your dessert.
The “Moisture Barrier” concept is the most important part of this process. Par-baking the crust for nearly 20 minutes allows the flour to fully hydrate and the sugars to caramelize slightly. This creates a hardened surface. When you eventually pour the hot caramel on top, the crust is already set, meaning the liquid caramel sits on top of the base rather than migrating into the flour particles.
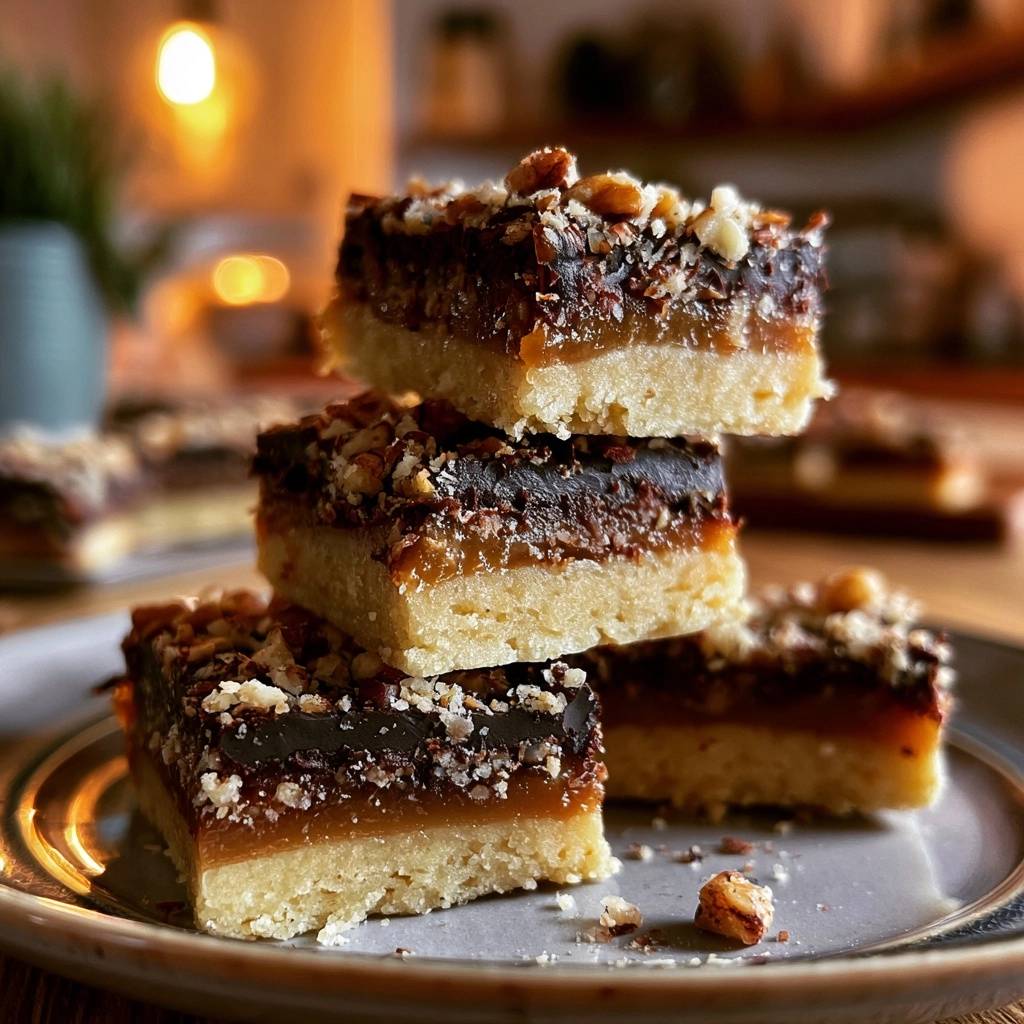
Essential Components for the Shortbread Layer
All-purpose flour is the non-negotiable choice for this recipe because it provides the necessary gluten structure. You need that protein content to support the dense, heavy toppings. If you used cake flour, the bars would likely fall apart the moment you tried to lift them out of the pan. All-purpose flour strikes the perfect balance between tenderness and strength.
I always recommend using unsalted butter for the shortbread. This allows you to control the sodium profile of the final bar precisely. Since we add a specific amount of salt to the dough, using salted butter could make the base unpredictably salty. High-quality butter with a high fat content will also yield a more fragrant, golden crust that smells like a traditional French bakery.
Mastering the Homemade Caramel Emulsion
Creating the caramel layer involves a fascinating transformation of sweetened condensed milk into a stable, chewy confection. As you heat the milk with brown sugar and butter, a Maillard reaction occurs. This isn’t just melting sugar; it’s a chemical reaction between the amino acids in the milk proteins and the reducing sugars, which creates that complex, toasted flavor and deep amber gold color.
You must stir the mixture vigorously and constantly over medium heat. Because sweetened condensed milk is high in sugar and dairy solids, it can scorch on the bottom of the pan in seconds. You are looking for the mixture to thicken until it pulls away from the sides of the pan slightly. This ensures the caramel will be firm enough to slice once it cools, rather than oozing out of the sides.
The Role of Sweetened Condensed Milk
Sweetened condensed milk is essentially a “cheat code” for caramel stability. Traditional caramels made from just sugar and water are temperamental and can easily crystallize or break. The proteins in the condensed milk act as emulsifiers, holding the fats and sugars together in a smooth, homogenous state that is much more forgiving for the home cook.
These milk proteins also contribute to the specific “chew” of the bar. While a sugar-only caramel might be hard or sticky, the dairy solids ensure a fudge-like consistency. This is what allows for those clean, sharp edges when you slice the bars later. It provides a rich mouthfeel that perfectly bridges the gap between the crunchy crust and the snappy chocolate.
Step-by-Step: Constructing the Triple-Layer Architecture
Building these bars requires a specific sequence to ensure the layers bond without mixing. This is known as the “Double Bake” method. After the initial par-bake of the crust, you pour the hot caramel over the base while the crust is still warm. This creates a thermal bond between the two layers, ensuring they don’t slide apart when you take a bite.
The second trip to the oven is where the magic happens. Baking the caramel for an additional 12 to 15 minutes “sets” the emulsion. You’ll notice the edges of the caramel bubbling slightly; this indicates that the sugars are concentrated and the layer is forming a seal against the crust. This step is the final insurance policy against a soggy bottom.
Achieving the Professional Chocolate Snap
The top layer needs to be more than just melted chocolate; it needs to have a professional snap. By adding a small amount of coconut oil or vegetable shortening to the chocolate chips, you lower the melting point slightly and create a smoother texture. This prevents the chocolate from becoming too brittle or cracking into shards when you bite into the bar.
When you pour the chocolate over the cooled caramel, use an offset spatula to spread it in long, even strokes. This technique helps you achieve a mirror-like, perfectly flat finish. Avoid over-working the chocolate, as this can cause it to lose its luster. You want a thick, uniform sheet that looks as good as it tastes.
Toasting Pecans for Maximum Flavor Extraction
Raw pecans are fine, but toasted pecans are transformative. Heating the nuts releases their volatile oils, which intensifies their earthy, buttery aroma. I recommend dry-toasting them in a skillet or in the oven for a few minutes until they smell fragrant and look slightly darkened. This provides a necessary savory contrast to the sweet caramel.
Timing is everything when adding the nuts. You must sprinkle the toasted pecans over the chocolate while it is still wet and melted. This “locks” the nuts into the chocolate layer so they don’t fall off when the bars are sliced or eaten. Gently press them down with your palm to ensure they are fully embedded in the chocolate surface.
Troubleshooting Common Layered Bar Failures
If your caramel ends up too hard to bite through, you likely simmered it for too long on the stove. The longer you boil the mixture, the more water evaporates, leading to a harder set. To fix this next time, pull the caramel off the heat the moment it reaches a thick, lava-like consistency. It will continue to firm up as it bakes and cools.
Chocolate streaking or “seizing” usually happens if a drop of water gets into the bowl or if it’s overheated. Always use a completely dry bowl and melt the chocolate in short 30-second bursts. If the crust crumbles when you slice it, you may not have pressed the flour mixture firmly enough into the pan. Use the bottom of a flat measuring cup to pack the crust down tightly before baking.
Make-Ahead Strategies and Storage Physics
These bars actually improve with age. As they sit for 24 hours, the moisture levels stabilize and the flavors of the vanilla and brown sugar deepen. This makes them an ideal make-ahead dessert for parties or gifting. You can store them at room temperature in an airtight container for up to 5 days, though the chocolate stays snappiest in a cool environment.
For long-term storage, these bars freeze beautifully. Wrap individual squares tightly in plastic wrap and then place them in a heavy-duty freezer bag. They will stay fresh for up to 3 months. When you’re ready to eat, thaw them in the refrigerator overnight. Avoid thawing at room temperature if it’s a warm day, as condensation can form on the chocolate and dull its finish.
Expert Tips for Clean Slicing and Presentation
To get those perfectly square, professional-looking edges, you must be patient. Chilling the bars for at least 2 hours is a requirement. This allows the caramel to fully transition from a liquid state to a solid, sliceable fudge. If you try to cut them while they are even slightly warm, the layers will smear into each other.
Use the parchment paper overhang to lift the entire block out of the pan and onto a cutting board. Use a long, sharp chef’s knife and run it under hot water, then wipe it dry before every single cut. The heat from the blade will glide through the chocolate and caramel like butter, preventing the layers from dragging. Clean the knife after every slice for the best results.
Customizing the Flavor Profile
Once you master the base recipe, you can experiment with sophisticated variations. A heavy sprinkle of flaky sea salt over the caramel before adding the chocolate creates a salted caramel version that cuts through the sweetness. You can also swap the pecans for toasted walnuts or macadamia nuts for a different crunch profile.
If you prefer a less sweet dessert, use dark chocolate with at least 70% cacao for the top layer. The bitterness of the dark chocolate provides a stunning contrast to the sugary caramel. Regardless of the toppings you choose, keep the ratios of the shortbread and caramel the same to maintain the structural integrity that makes these bars so successful.
Frequently Asked Questions
Can I use margarine instead of butter in the crust?
It is not recommended to use margarine for the shortbread base. Margarine has a much higher water content than butter, which will cause the flour to develop too much gluten and result in a tough, bread-like texture. Furthermore, the water will evaporate during baking, potentially causing the crust to shrink or become soggy when the caramel is added.
Why did my caramel separate or look oily?
Caramel separation usually happens when the emulsion breaks due to uneven heat or lack of stirring. If the butter starts to pool on top, it means the fat has detached from the milk solids. You can often fix this by removing the pan from the heat and whisking vigorously with a tablespoon of very hot water until the mixture comes back together and looks smooth again.
How do I prevent the chocolate from blooming or turning white?
Chocolate bloom occurs when the fats or sugars migrate to the surface, usually caused by drastic temperature changes. To prevent this, let the bars cool gradually at room temperature for an hour before putting them in the fridge. Avoid freezing the bars and then immediately moving them to a hot car or room, as the condensation will cause the sugar to bloom.
Can I make this in a 9×13 pan instead of an 8×8?
Yes, you can scale this recipe for a larger 9×13 pan, but you will need to double the ingredients. A 9×13 pan has about twice the surface area of an 8×8 pan. If you double the recipe, the baking times for the crust and the caramel layer will remain roughly the same, though you should start checking for doneness a few minutes early just to be safe.
What if I don’t have parchment paper?
If you don’t have parchment paper, you can grease the pan heavily with butter and a dusting of flour, but it will be much harder to remove the bars cleanly. Without the parchment “sling,” you will have to cut the bars inside the pan, which often results in the first few pieces crumbling. Parchment is highly recommended for the best presentation.
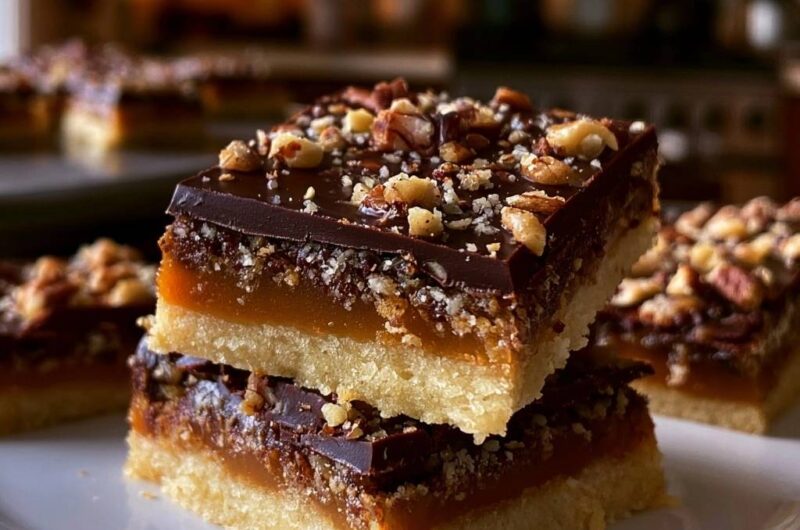
Decadent Chocolate Caramel Pecan Bars
Course: DessertCuisine: AmericanDifficulty: easy16
bars20
minutes35
minutes55
Minutes310
kcalAmerican
Ingredients
2 cups all-purpose flour
1/2 cup granulated sugar
1 cup cold unsalted butter, cubed
1/2 teaspoon salt
1 can (14 oz) sweetened condensed milk
1/2 cup packed light brown sugar
1/2 cup unsalted butter (for the caramel)
1 teaspoon vanilla extract
1.5 cups semi-sweet chocolate chips
1 tablespoon coconut oil or vegetable shortening (for a smooth chocolate snap)
1 cup chopped pecans, toasted
Directions
- Preheat your oven to 350°F (175°C). Line an 8×8 inch baking pan with parchment paper, leaving an overhang on the sides for easy removal.
- To prevent a soggy bottom, combine flour, granulated sugar, salt, and cold cubed butter in a bowl. Use a pastry cutter or your fingers to work the butter in until the mixture looks like coarse crumbs. Press this firmly and evenly into the bottom of the prepared pan.
- Bake the crust for 18 to 20 minutes until the edges are lightly golden. This par-baking step is crucial to set the structure before adding wet toppings.
- While the crust bakes, prepare the caramel. In a heavy saucepan over medium heat, combine the sweetened condensed milk, brown sugar, and 1/2 cup butter. Bring to a gentle boil, stirring constantly. Reduce heat and simmer for 5 to 7 minutes, stirring vigorously, until the mixture thickens and turns a deep amber gold. Stir in vanilla.
- Pour the hot caramel over the warm crust. Return to the oven for 12 to 15 minutes. This second bake “sets” the caramel and creates a seal against the crust to ensure it stays crisp.
- Remove from the oven and let the bars cool for 10 minutes.
- While the bars cool slightly, melt the chocolate chips and coconut oil together in a microwave-safe bowl in 30-second intervals, stirring until completely smooth.
- Pour the melted chocolate over the caramel layer and spread into a perfectly smooth, thick sheet using an offset spatula.
- Immediately sprinkle the toasted chopped pecans over the wet chocolate.
- Allow the bars to cool at room temperature for 1 hour, then refrigerate for at least 2 hours. This ensures the chocolate and caramel set into the distinct, clean layers shown in the image. Slice with a hot knife for professional results.
Notes
- Using a hot knife to slice the bars will result in professional, clean edges. The second bake is the secret to preventing a soggy bottom by creating a moisture barrier between the caramel and the shortbread.