Few things in the kitchen are as heartbreaking as watching a golden, fragrant cake deflate the moment you pull it from the oven. You’ve spent time measuring and mixing, only to end up with a gummy center and a sad dip in the middle. This Glazed Toasted Almond Cake is designed specifically to end that frustration forever.
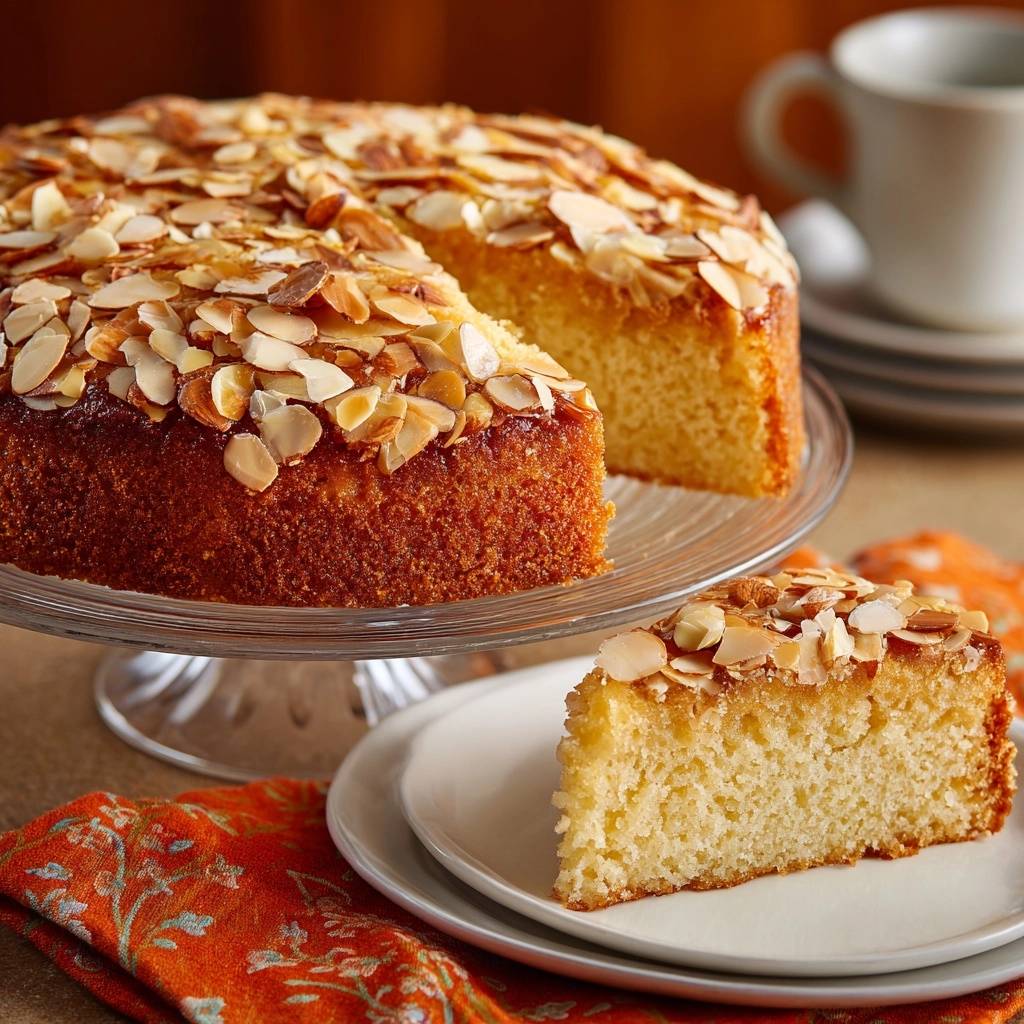
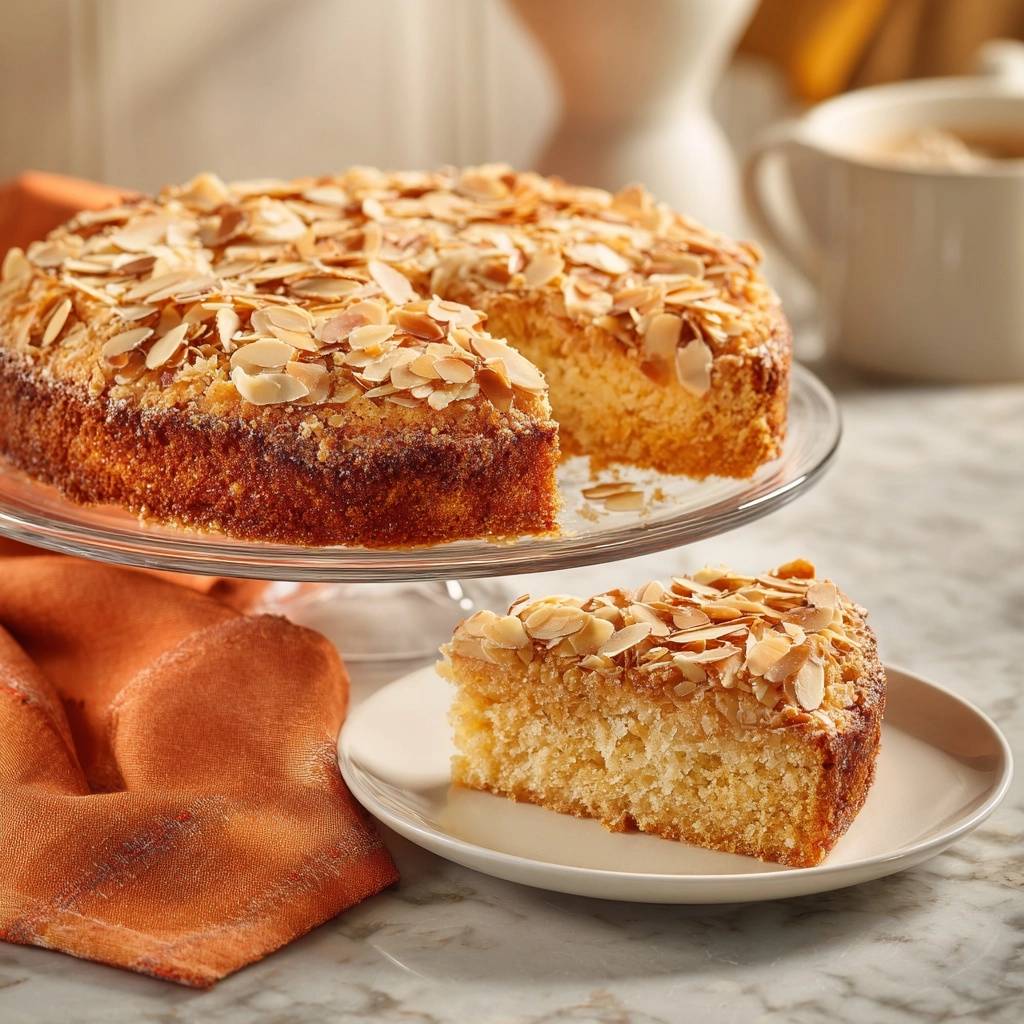
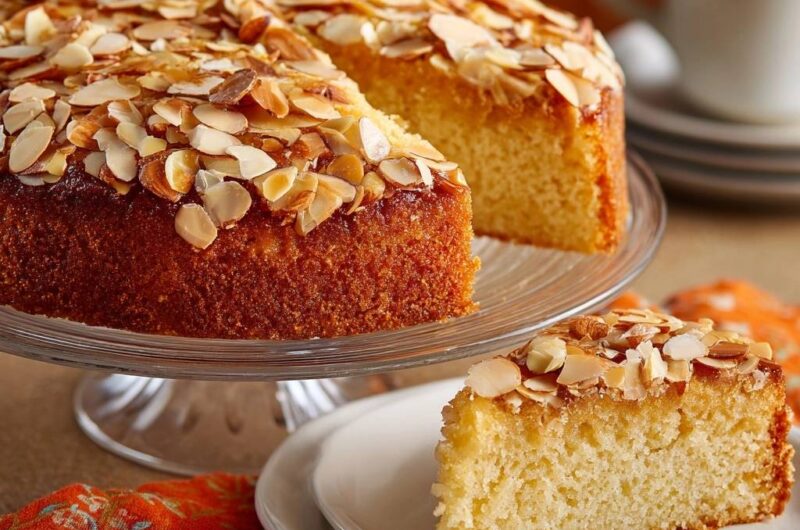
The secret lies in the structural integrity of the batter, which provides a sturdy foundation for that gorgeous, crunchy almond topping. When you take your first bite, you’ll experience a beautiful contrast between the shatteringly crisp toasted nuts and the soft, velvet-like crumb underneath. It’s a sophisticated dessert that looks like it came from a high-end bakery but relies on simple, scientific principles.
To ensure your cake stays tall and proud, you must focus on the temperature of your ingredients. Using room temperature eggs and milk isn’t just a suggestion; it’s the key to creating a stable emulsion. Cold ingredients will break the butter’s air pockets, leading to the very collapse we’re trying to avoid. Trust the process, and you’ll be rewarded with a perfect slice every time.
Why Most Almond Cakes Sink in the Middle
Most almond cakes fail because the topping is simply too heavy for the delicate bubbles inside the batter to support. As the cake rises, the weight of the sliced almonds pushes down on the expanding air cells. If those cells aren’t strong enough, they pop, causing the center to cave in before the structure sets.
Furthermore, almond flour adds a significant amount of fat and moisture to a recipe. While this creates a delicious flavor, too much fat can weaken the gluten network that holds the cake together. Without a precise balance of proteins and fats, the cake lacks the “bones” it needs to stay upright during the cooling process.
The Role of Structural Density in Baking
This recipe utilizes a specific 3:1 ratio of all-purpose flour to almond flour. The all-purpose flour provides the necessary gluten proteins to build a strong internal scaffolding. Meanwhile, the almond flour adds that signature nutty density and a tender “melt-in-mouth” quality that keeps the cake from feeling like a standard sponge.
By combining these two flours, we create a batter that is thick enough to hold the almonds on the surface rather than letting them sink into the depths of the cake. This structural density ensures that every air pocket created during the mixing phase is reinforced by a stable flour matrix.
For a similar approach to keeping fruit from sinking, check out this rustic pear almond cake.
Essential Components for Your Glazed Toasted Almond Cake
Quality ingredients are the backbone of this dish, and their temperature is your most important tool. Softened unsalted butter is vital because it allows you to control the salt content while ensuring the sugar can properly aerate the fat. If the butter is too melted or too cold, those microscopic air bubbles won’t form.
I always recommend using a high-quality almond extract to achieve that deep, marzipan-like aroma. While the toasted nuts provide texture, the extract carries the flavor through every crumb of the cake. Additionally, ensure your baking powder is fresh; if it’s been sitting in your pantry for over six months, it might not have the lifting power required for this dense batter.
Selecting the Right Sliced Almonds
When shopping, look for blanched sliced almonds rather than slivered ones. Sliced almonds are paper-thin, which means they offer a massive amount of surface area for toasting without adding excessive weight. This helps them stay perched on top of the batter as it rises in the oven.
Unblanched almonds (with the skins on) can sometimes become slightly bitter when toasted deeply. Blanched almonds provide a cleaner, sweeter nuttiness that complements the apricot or honey glaze perfectly. Their light color also makes it easier to see exactly when they’ve reached that perfect golden-brown stage.
The Critical Five-Minute Creaming Technique
The most common mistake in cake baking is rushing the creaming of butter and sugar. You aren’t just mixing them; you’re performing a mechanical process where sugar crystals cut into the butter to create thousands of tiny air pockets. This is the only time you should mix on high speed.
Set a timer for a full five minutes. You’ll notice the mixture transform from a yellow, gritty paste into a pale, almost white, fluffy cloud. This volume is what gives the cake its lift. If you stop after only a minute, your cake will be dense, oily, and much more likely to sink in the center.
Step-by-Step: Building a Stable Cake Batter
Once your butter and sugar are aerated, it’s time for the Emulsification Phase. Add your room temperature eggs one at a time. This allows the fats in the butter to bond with the liquid in the eggs. If the batter looks curdled or “broken,” your eggs were likely too cold, but you can usually fix this by beating in a tablespoon of your flour mixture.
Next, we use the “Alternating Method” for the dry and wet ingredients. Start by adding one-third of your flour mixture, then half of the milk, and repeat. This technique prevents the batter from becoming over-saturated with liquid, which can cause the flour to clump or the air bubbles to deflate.
Always end with the dry ingredients. This final addition of flour helps “lock in” the moisture and ensures the batter has the right viscosity to support the almond topping. Use the lowest speed on your mixer during this stage to keep the texture light and airy.
Avoiding Gluten Over-Development
The moment flour touches liquid, gluten begins to form. While we need some gluten for structure, over-mixing will turn your cake into something resembling bread. A rubbery cake will expand rapidly in the oven and then shrink violently as it cools, leading to a massive sinkhole.
Stop the mixer when you still see a few streaks of flour, then finish the job by hand with a spatula. This gentle “folding” motion ensures everything is combined without toughening the crumb. Your batter should be thick, pale, and hold its shape when dropped from a spoon.
Achieving the Signature Toasted Almond Crust
When adding the almonds, don’t just sprinkle them in the center. Start from the outside edges and work your way in, creating a thick, even layer that covers every inch of the batter. This layer of nuts actually acts as a heat shield, allowing the cake to bake evenly without the top drying out too quickly.
Keep a close eye on the oven during the last 15 minutes of baking. If the almonds are looking dark brown but the cake still wobbles in the middle, loosely drape a piece of aluminum foil over the top. This “tenting” stops the browning process while allowing the internal heat to finish cooking the center of the cake.
The Glazing Process: Adding Shine and Stability
The glaze is the finishing touch that moves this cake from “home-cooked” to “professional.” Whether you use apricot preserves or honey, the goal is to create a tacky sealant. This glaze doesn’t just add a beautiful high-shine finish; it actually “glues” the loose almonds to the cake so they don’t fall off when you slice it.
Warm the glaze until it’s thin and runny, then use a pastry brush to gently dab it onto the warm almonds. Avoid a heavy brushing motion, which can dislodge the nuts or tear the delicate top of the cake. The glaze will soak in slightly, adding a hint of tartness that cuts through the rich almond flavor.
For a similar sweet finish that’s easy to get right, check out these foolproof honeycomb bites.
Troubleshooting Your Almond Cake Results
If your cake feels dry, you likely left it in the oven a few minutes too long. Every oven is different, so start checking for doneness at the 35-minute mark. On the other hand, if the almonds fell off the moment you sliced the cake, you might have waited too long to apply the glaze. It needs to be applied while the cake is still warm to bond correctly.
For those who still experience a slight dip, check your oven temperature with an external thermometer. Many ovens run 25 degrees hot or cold, which can drastically affect how a cake rises and sets. Also, ensure you aren’t slamming the oven door, as the physical vibration can collapse a cake before the structure has solidified.
Testing for Doneness Without Deflating
Opening the oven door too early is a recipe for disaster. A sudden rush of cool air can cause the internal temperature of the cake to drop, leading to an immediate collapse. Wait until the cake has been baking for at least 35 minutes before you even think about peeking.
Use a long wooden skewer or toothpick and insert it directly into the center. It must come out clean or with just a few dry crumbs. You can also use the “spring-back” test: gently press the center of the cake with your finger. If it feels firm and bounces back, it’s done. If it leaves an indentation, it needs more time.
Optimal Storage and Serving Suggestions
This cake is remarkably resilient thanks to the almond flour and the protective glaze. You can store it at room temperature in an airtight container for up to three days. The glaze acts as a barrier that keeps the moisture locked inside the crumb, while the almonds stay surprisingly crunchy.
When serving, this cake doesn’t need much help. However, a dollop of cold, unsweetened whipped cream provides a lovely temperature contrast. If you want to brighten the flavors, serve each slice with a handful of fresh raspberries or blackberries. The tart fruit balances the sweet, nutty profile of the toasted almonds beautifully.
More Sweet Ideas
Enjoy this toasted almond cake with these delightful breakfast and brunch treats.
- For a sweet start, try these heavenly French toast bites, perfect for soaking up extra flavor.
- You might also enjoy these fluffy diner-style pancakes, offering a light and airy texture.
Make-Ahead Instructions for Entertaining
Believe it or not, this cake actually tastes better the next day. As it sits, the oils from the almond flour and the extract permeate the crumb, deepening the flavor. If you’re hosting a dinner party, feel free to bake this a full 24 hours in advance and keep it covered on the counter.
If you need to freeze the cake, do so before glazing. Wrap the cooled cake tightly in plastic wrap and then a layer of foil. When you’re ready to serve, thaw it at room temperature, then warm the glaze and apply it fresh. This ensures the almonds don’t get soggy during the thawing process.
Expert Baking FAQ
Can I use almond meal instead of almond flour?
It is best to stick with fine-blanched almond flour for this recipe. Almond meal is usually made from unpeeled almonds and has a much coarser, grittier texture. Using almond meal can make the cake feel heavy and may interfere with the delicate air pockets we worked so hard to create during the creaming stage, potentially leading to a denser result.
Why did my almonds turn bitter?
Almonds contain natural oils that can scorch if they are exposed to high heat for too long. If your oven has hot spots or if the cake is placed too high in the oven, the nuts will over-toast. Always use the middle rack and remember to use the foil tenting method if the almonds reach a golden-brown color before the cake is finished baking.
Is there a substitute for apricot preserves?
Yes, honey is an excellent substitute and provides a lovely floral sweetness. You could also use a simple syrup made of equal parts sugar and water boiled together until thickened. The goal is to use something sticky and translucent that will provide shine and hold the nuts in place without masking the almond flavor.
How do I ensure the cake releases cleanly from the pan?
Using a springform pan is the safest bet for this cake because you can remove the sides without flipping the cake over, which protects the almond topping. Regardless of the pan, you must grease it thoroughly with butter and then dust it with flour, tapping out the excess. For extra insurance, place a round of parchment paper at the bottom of the pan before greasing.
Almond Cake
Course: DessertCuisine: AmericanDifficulty: medium8
servings15
minutes45
minutes380
kcal60
MinutesThis sturdy and airy almond cake uses a structural flour-to-fat ratio and a 5-minute creaming process to ensure the center never collapses. It is finished with a thick layer of sliced almonds and a sweet apricot or honey glaze for a professional shine.
Ingredients
1.5 cups all-purpose flour
1/2 cup almond flour (for structural density and flavor)
1 cup granulated sugar
1/2 cup unsalted butter, softened
2 large eggs, room temperature
1/2 cup whole milk, room temperature
1.5 teaspoons baking powder
1/2 teaspoon salt
1 teaspoon almond extract
1.5 cups sliced almonds (to achieve the thick visual coverage shown)
1/4 cup apricot preserves or honey for glaze
Directions
- Preheat your oven to 350°F (175°C). Grease and flour a 9-inch round springform or deep cake pan.
- The secret to preventing a sinkhole is the Creaming Stage. Beat the softened butter and sugar for a full 5 minutes until the mixture is pale and significantly increased in volume. This creates the microscopic air pocket structure needed for a stable rise.
- Add eggs one at a time, beating for 30 seconds after each addition to emulsify the fats. Stir in the almond extract.
- In a separate bowl, whisk the all-purpose flour, almond flour, baking powder, and salt.
- Alternating Method: Add one-third of the dry ingredients to the butter mixture, then half the milk. Repeat, ending with the dry ingredients. Mix on low speed only until just combined. Overworking the gluten causes the cake to toughen and then collapse as it cools.
- Pour the batter into the prepared pan. Scatter the sliced almonds heavily across the top, ensuring they cover the surface from edge to edge.
- Bake for 40 to 45 minutes. To ensure the center is set and won’t sink, use a toothpick; it must come out completely clean. If the almonds brown too quickly, tent the top loosely with foil for the last 10 minutes.
- While the cake is warm, heat the preserves or honey in the microwave for 20 seconds. Using a pastry brush, gently dab the glaze over the toasted almonds. This “glues” the almonds to the surface and provides the professional high-shine finish seen in the image.
- Let the cake cool in the pan for at least 20 minutes before removing. This allows the internal crumb to set, guaranteeing a perfect, level slice every time.
Notes
- To prevent the center from sinking, ensure butter and sugar are creamed for a full 5 minutes and use room temperature eggs and milk. If almonds brown too quickly during baking, tent the pan with foil for the final 10 minutes.