There is nothing quite as disappointing as a cream pie that looks stunning on the outside but reveals a mushy, weeping crust once you cut the first slice. Most cream pies suffer from the “soggy bottom” syndrome, where the moisture from the filling slowly migrates into the pastry, turning a crisp base into a damp mess. This recipe solves that heartbreak by using a dual-layer moisture barrier that keeps every bite as crunchy as the first.
The secret lies in a specific heat-sealing technique for the graham cracker base combined with a thick ganache shield. By treating the crust as a structural foundation rather than just a container, we create a dessert that holds its integrity for days. You’ll get that satisfying snap of chocolate and toasted cracker against a cloud-like toffee cream.
For a similar no-fuss approach to a crisp base, check out this chocolate peanut butter pie.
To ensure success, the real trick is the temperature of your crust when you apply the chocolate. Spreading the ganache while the crust is still hot from the oven allows the chocolate to fuse into the pores of the cracker crumbs. This creates an impenetrable hydrophobic seal that prevents the cream filling from ever touching the base.
The Science of the Anti-Soggy Crust
Understanding why crusts fail is the first step toward mastering the perfect pie. When you pour a high-moisture filling—like one made with heavy cream and cream cheese—directly onto a standard graham cracker base, the sugar in the crumbs acts like a sponge. Over time, the water molecules in the dairy move toward the dry sugar, leading to a structural collapse that ruins the texture.
In this recipe, we use physics to our advantage. By par-baking the crust, we aren’t just cooking the flour and butter; we are actually melting the granulated sugar so it coats the cracker crumbs. As it cools, this sugar hardens into a glass-like state, providing the first line of defense against moisture. However, sugar alone isn’t enough because it is still water-soluble.
That is where the fat-heavy ganache comes in. Since oil and water don’t mix, the high fat content in the semi-sweet chocolate chips creates a natural barrier. By layering this over the par-baked crumbs, you create a surface that moisture simply cannot penetrate. This engineering ensures that even after 24 hours in the fridge, your pie maintains a distinct, professional-grade crunch.
Thermal Sealing via Par-Baking
Baking the crust at 350°F is the critical “sweet spot” for setting the crumb structure. At this temperature, the butter solids begin to brown slightly, adding a nutty depth to the flavor profile. More importantly, the granulated sugar reaches a stage where it liquefies and binds the graham cracker crumbs together into a solid unit.
If you skip this step or use a lower temperature, the crust will remain crumbly and porous. You want to see the edges turn a light golden brown and smell a toasted, honey-like aroma. This indicates that the sugars have caramelized enough to provide the structural integrity needed to support the heavy toffee filling.
For more tips on preventing a crumbly crust, check out this chocolate coconut dream pie.
The Ganache Moisture Shield Explained
The ganache layer is the technical heart of this Chocolate Toffee Cream Pie. By mixing semi-sweet chocolate with a small amount of heavy cream, we create a coating that is firm enough to block moisture but soft enough to bite through without shattering the crust. It acts as a hydrophobic shield, repelling the water content found in the whipped cream.
Applying this ganache to a hot crust is vital. The residual heat from the oven keeps the chocolate fluid for a few extra seconds, allowing it to seep into any tiny gaps in the graham cracker layer. Once refrigerated, this layer solidifies into a seamless bond that protects the base from the “weeping” that often occurs with stabilized whipped cream fillings.
Essential Components for Chocolate Toffee Cream Pie
Quality ingredients are the difference between a good pie and a legendary one. For the filling, you must use heavy whipping cream with a fat content of at least 36%. This higher fat percentage allows the cream to hold stiff peaks and provides the richness necessary to balance the salty-sweet toffee bits. If the cream is too thin, the pie will lose its height within an hour of slicing.
Temperature management is equally important for the cream cheese. It must be completely softened to room temperature before you start mixing. If the cream cheese is even slightly cold, it will form tiny, stubborn lumps that no amount of whisking can remove. Softened cream cheese aerates beautifully, creating a silky base that carries the vanilla and toffee flavors evenly.
When choosing your vanilla, reach for a pure extract rather than an imitation version. Since this is a no-cook filling, the floral and woody notes of the vanilla are front and center. A high-quality extract rounds out the sweetness of the powdered sugar and bridges the gap between the dark chocolate and the buttery toffee.
Selecting the Right Toffee and Chocolate
Not all toffee is created equal. For this pie, look for plain butter crunch toffee bits rather than the variety coated in extra chocolate or almonds. You want the pure, burnt-sugar flavor of the toffee to stand out against the cream. If you can only find almond toffee, ensure it is finely crushed so the nuts don’t interfere with the silky texture of the filling.
For the topping, use dark chocolate chunks with at least 60% cacao. The bitterness of dark chocolate is essential here; it cuts through the intense sweetness of the toffee and the powdered sugar. Roughly chopping the chunks yourself creates a rustic, professional look and provides varied textures in every bite.
The Role of Stabilized Whipped Cream
A standard whipped cream pie often collapses after a few hours, but this version stays tall and proud. The cream cheese acts as a stabilizer, providing a dense protein structure that “traps” the air bubbles from the whipped cream. This prevents the filling from weeping or becoming runny, even if the pie sits on a dessert table for a while.
Step-by-Step: Constructing the Foundation
Start by mixing your graham cracker crumbs, sugar, and melted butter until the mixture looks like wet sand. If it’s too dry, it will fall apart; if it’s too greasy, it will slump down the sides of the dish. You should be able to squeeze a handful of the mixture and have it hold its shape perfectly.
When pressing the crumbs into your 9-inch glass pie plate, don’t just use your fingers. Use the flat bottom of a dry measuring cup to firmly pack the bottom and the sides. This ensures an even thickness throughout, which is key for a consistent bake. Pay extra attention to the “corner” where the bottom meets the sides, as this is where crusts are often too thick.
Executing the Chocolate Barrier Technique
To make the ganache, heat your chocolate chips and cream in the microwave in short, 30-second bursts. Chocolate is temperamental and can seize or burn if it gets too hot. Stir gently between each interval until the mixture is glossy and smooth. It should flow like thick ribbons from your spoon.
Pour the ganache into the center of your hot crust and use the back of a spoon to spread it upward. You want to coat the entire interior surface, right up to the top edge. Let the pie plate sit at room temperature for a few minutes before moving it to the fridge. This gradual cooling prevents the chocolate from cracking due to a sudden temperature shock.
Aerating the Toffee Cream Filling
Once your cream cheese and sugar are whipped into a fluffy cloud, it is time to incorporate the whipped cream. This is where many bakers go wrong. You must use a gentle “folding” motion with a rubber spatula. Cut through the center, scrape the bottom, and lift the mixture over the top. Repeat this until no white streaks remain.
Never use a whisk or an electric mixer for this step, as you will deflate all the air you worked so hard to get into the cream. The goal is a texture that feels light and airy but holds its shape on a spoon. Once the base is folded, gently stir in the first half-cup of toffee bits, ensuring they are distributed evenly throughout the filling.
Finishing Touches and Structural Setting
After smoothing the filling into the chilled crust, it is time for the garnish. Generously sprinkle the remaining toffee bits and dark chocolate chunks over the top. Use your palms to very lightly press the toppings into the cream. This small step ensures the toppings don’t go flying when you try to slice the pie later.
Patience is the final ingredient. You must chill this pie for at least 4 hours, though overnight is much better. This time allows the fats in the cream cheese and the chocolate barrier to fully re-solidify. A well-chilled pie results in clean, sharp slices that show off the distinct layers of crust, chocolate, and cream.
More Sweet Treats to Enjoy
To complement your rich chocolate toffee cream pie, consider these other chocolate delights.
- For a refreshing beverage to balance the sweetness, try this creamy copycat iced coffee, perfect for cutting through richness.
- If you’re craving more deep chocolate flavor, bake a moist chocolate bundt cake for another satisfying dessert experience.
Troubleshooting Common Cream Pie Issues
If you find your crust is crumbling when you slice it, you likely didn’t press the crumbs firmly enough into the pan. Next time, use more pressure with the measuring cup. If the ganache layer seems to crack, it might have been spread too thin. Ensure you use the full amount of chocolate to create a sturdy, protective floor for the filling.
For a filling that turns out too soft or runny, the culprit is usually under-whipped cream or over-folding. Make sure your heavy cream reaches stiff peaks—where the cream stands straight up when the whisk is lifted—before you fold it into the cream cheese. If you over-mix during the folding process, you’ll lose the air bubbles that provide the pie’s structure.
Managing Temperature Fluctuations
Toffee is essentially cooked sugar, which means it is highly sensitive to humidity. In a humid kitchen, toffee bits can become sticky or even melt into the cream. To prevent this, keep the pie tightly covered in the refrigerator. The cold, dry air of the fridge helps maintain the “snap” of the chocolate and the crunch of the toffee.
Achieving Clean Slices Every Time
To get those picture-perfect slices, use a long, sharp knife dipped in hot water. Wipe the blade dry before each cut. The heat from the blade will glide through the cold cream and melt just enough of the chocolate barrier to let you slice through without crushing the crust. Use a firm, downward stroke rather than a sawing motion.
Make-Ahead Strategies and Storage Logistics
This is an excellent make-ahead dessert because it actually improves after 24 hours. The flavors of the toffee and vanilla have more time to meld into the cream. You can prepare the crust and the chocolate ganache layer up to 48 hours in advance; just keep it covered at room temperature or in the fridge until you are ready to add the filling.
However, do not attempt to freeze this pie. The high moisture content in the cream cheese and whipped cream can cause the filling to become grainy or “separate” once thawed. It will stay fresh and delicious in the refrigerator for up to 3 days. After that, the toffee bits on top may start to soften, though the crust will remain crisp thanks to our ganache shield.
Expert Tips for Customizing Your Pie
If you want to experiment with the flavor profile, try adding a half-teaspoon of espresso powder to the chocolate ganache. Coffee naturally enhances the richness of chocolate without making the pie taste like mocha. It adds a sophisticated bitterness that pairs beautifully with the buttery toffee.
You can also swap the graham crackers for Biscoff cookies or chocolate wafers. If using chocolate wafers, you may need to slightly increase the amount of melted butter, as they tend to be drier than graham crackers. Regardless of the base, the heat-sealing and ganache techniques remain the same to ensure that perfect, crunch-filled experience.
How do I store leftovers?
Store any remaining pie in the refrigerator, tightly covered with plastic wrap or a pie dome. It will stay fresh for up to 3 days. Do not freeze this pie, as the cream cheese and whipped cream filling will lose its silky texture and may become grainy or watery upon thawing.
Why is my pie filling runny?
A runny filling usually happens for two reasons: the heavy cream wasn’t whipped to stiff peaks, or the mixture was over-folded. Ensure your cream is very cold before whipping, and stop as soon as the peaks stand straight up. When combining with the cream cheese, use a gentle hand to keep the air bubbles intact.
Can I use a store-bought crust?
You can use a store-bought graham cracker crust, but you should still follow the ganache barrier step. Brush the inside of the pre-made crust with the chocolate ganache to prevent it from getting soggy. However, homemade crusts usually have a better flavor and a sturdier texture for this specific recipe.
What can I use instead of toffee bits?
If you can’t find toffee bits, you can chop up butter crunch candy bars. Alternatively, you can use toasted pecans or walnuts for a similar crunch, though the flavor will be less sweet. If you want to stick to the chocolate theme, use a mix of white and dark chocolate mini chips.
How do I prevent the crust from sticking to the pan?
The butter in the crust usually prevents sticking, but using a glass pie plate helps you see if the crust is browning evenly. If you are worried, you can lightly spray the plate with non-stick cooking spray before pressing in the crumbs. The “hot knife” slicing method also helps the crust release cleanly from the bottom.
Can I make this without a microwave?
Yes, you can make the ganache using a double boiler. Place the chocolate chips and cream in a heat-proof bowl over a pot of simmering water. Stir constantly until melted and smooth, making sure no water splashes into the chocolate, which would cause it to seize.
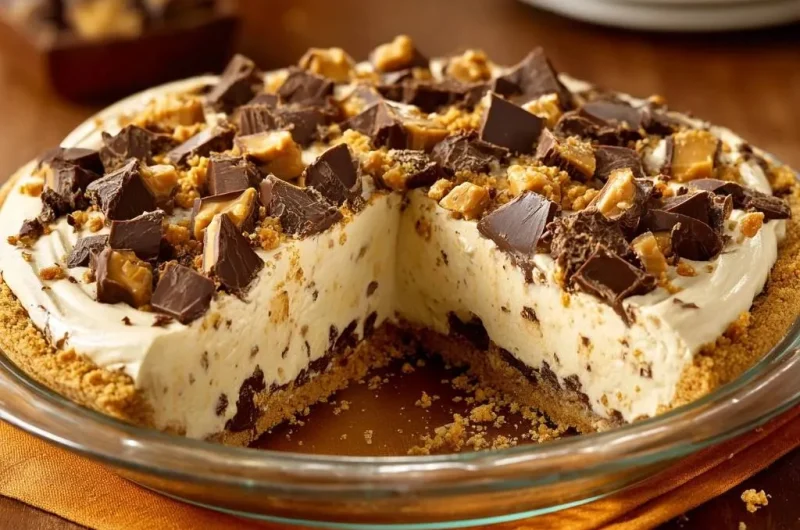
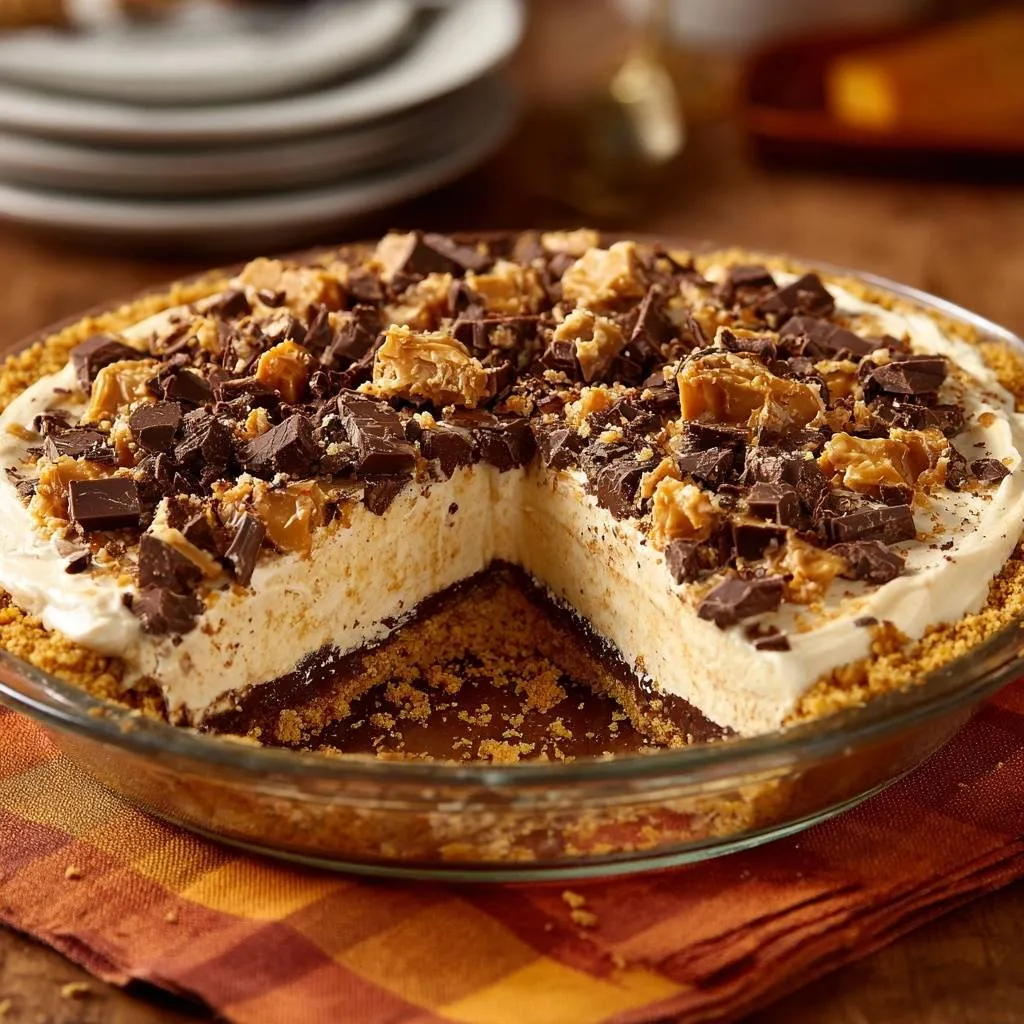
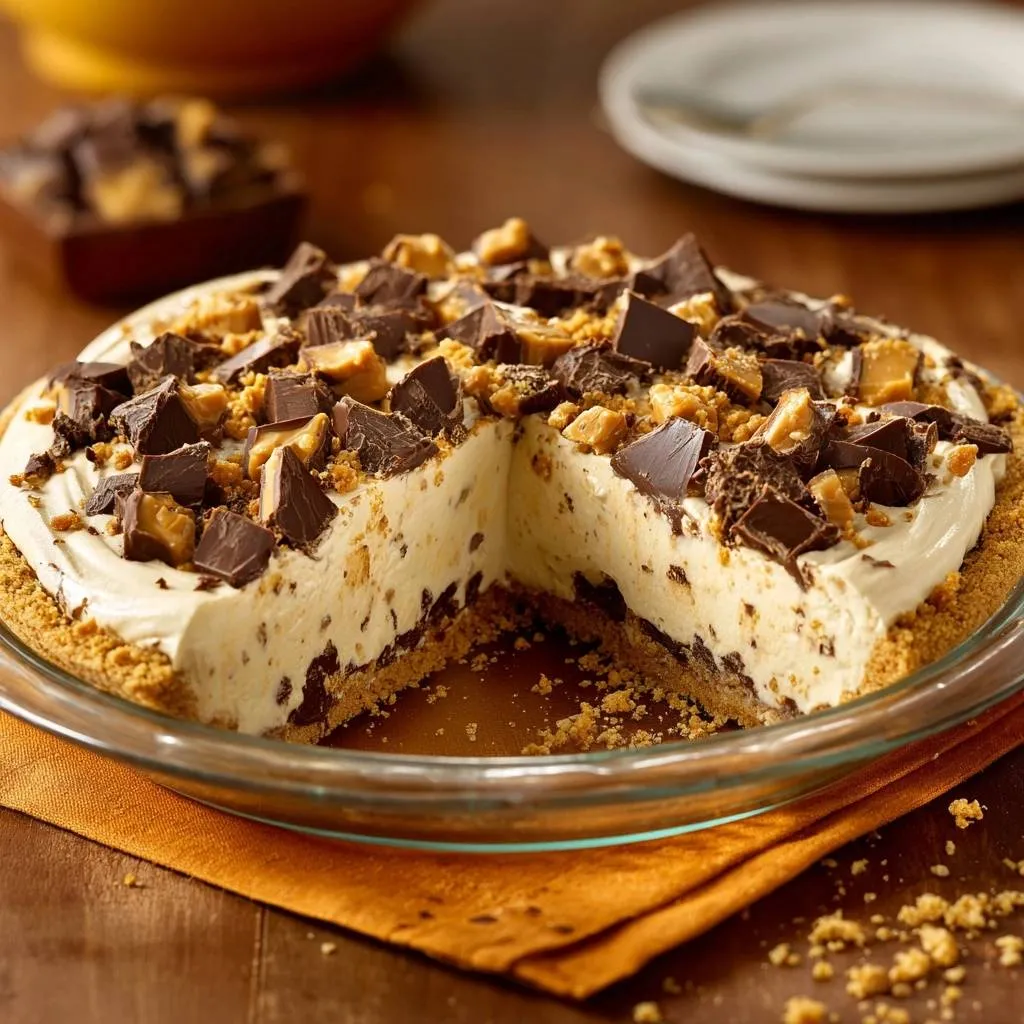
Chocolate Toffee Cream Pie
Course: DessertCuisine: AmericanDifficulty: medium8
servings30
minutes10
minutes510
kcal40
MinutesThis recipe solves the common problem of soggy pie crusts by using a par-baked graham cracker base and a thick chocolate ganache seal. The filling is a light, aerated cream cheese and whipped cream mixture loaded with crunchy toffee bits and dark chocolate chunks.
Ingredients
1.5 cups graham cracker crumbs
6 tablespoons unsalted butter, melted
1/4 cup granulated sugar
1 cup semi-sweet chocolate chips
1/4 cup heavy cream (for ganache layer)
8 ounces cream cheese, softened
1 cup powdered sugar
1 teaspoon vanilla extract
1.5 cups heavy whipping cream (for filling)
1.5 cups crushed toffee bits (divided)
1 cup dark chocolate chunks, roughly chopped
Directions
- Preheat your oven to 350°F (175°C). In a medium bowl, combine graham cracker crumbs, sugar, and melted butter until the mixture resembles wet sand. Press the mixture firmly into the bottom and up the sides of a 9-inch glass pie plate.
- Bake the crust for 8 to 10 minutes until golden and fragrant. This par-baking step caramelizes the sugars to provide structural integrity.
- While the crust is baking, prepare the moisture barrier. Place chocolate chips and 1/4 cup heavy cream in a microwave-safe bowl. Heat in 30-second intervals, stirring until glossy and smooth.
- Immediately spread the ganache in a thick, even layer over the bottom and sides of the hot crust. This chocolate “seal” prevents moisture from the cream filling from migrating into the crackers. Let the crust cool completely at room temperature, then refrigerate for 15 minutes until the chocolate is set firm.
- In a large bowl, beat the softened cream cheese, powdered sugar, and vanilla extract until smooth and aerated.
- In a separate chilled bowl, whip the 1.5 cups of heavy cream to stiff peaks. Gently fold the whipped cream into the cream cheese mixture in two batches to maintain volume. Fold in 1/2 cup of the crushed toffee bits.
- Pour the cream filling over the set chocolate barrier, smoothing the top with a spatula.
- Generously top the pie with the remaining 1 cup of toffee bits and the dark chocolate chunks, pressing them slightly into the cream so they adhere.
- Chill the pie for at least 4 hours (preferably overnight) before slicing. The chocolate seal ensures every bite maintains a distinct, crunchy snap against the silky filling.
Notes
- The chocolate ganache layer acts as an impenetrable moisture shield. For the best results, ensure the pie chills for at least 4 hours or overnight to allow the filling to set and the flavors to meld.