Imagine a dessert where the deep, caramelized warmth of speculoos cookies meets a filling so velvety it practically dissolves on your tongue. This Biscoff Cookie Butter Tart isn’t just another trendy sweet; it’s a masterclass in contrasting textures. You get that iconic, spiced snap from a perfectly compressed crust followed immediately by a cloud-like mousse that carries the rich, toasted notes of cookie butter.
Most people struggle with tarts because the crust either shatters into a dry mess or turns into a soggy sponge under the weight of the filling. However, this recipe solves those structural woes with a specific technical approach. By focusing on the integrity of the base, we ensure every bite maintains its architectural crunch against the silky interior.
The secret to this professional-grade finish lies in the temperature of your fats. While you want your butter melted for the crust, your cream cheese must be completely soft, and your heavy cream must be ice-cold. This temperature play is exactly how you achieve a stable, pipeable mousse that holds its shape without the need for gelatin or artificial thickeners.
For a similarly smooth result, consider this foolproof Cookies and Cream Dream Cheesecake recipe.
The Physics of a No-Slump Speculoos Crust
Creating a crust that doesn’t slump or crumble requires more than just mixing crumbs and butter. Therefore, we use a double-compression technique to build a structural matrix. When you press the buttery crumbs into the pan, you’re essentially forcing the lipid (the butter) into the porous gaps of the cookie particles.
I recommend using the flat bottom of a heavy measuring cup to apply even, vertical pressure across the base. This creates a dense, uniform floor for your tart. Once the bottom is set, use your thumb to firmly drive the mixture into the fluted ridges of the tart pan. This high-pressure packing ensures the sides stay upright and don’t slide down during the baking process.
As the butter cools and eventually bakes, it acts as a biological glue. Because Biscoff cookies have a high sugar content, the compression helps those sugars fuse together. Consequently, you end up with a tart shell that is sturdy enough to be lifted off the removable bottom but delicate enough to melt in your mouth.
Flash-Baking for a Moisture-Proof Barrier
Flash-baking is the definitive solution for the dreaded “soggy bottom.” When you pop that crust into a 350°F oven for ten minutes, you’re triggering the Maillard reaction. This process toasts the cookie crumbs further and caramelizes the sugars, creating a literal shield against moisture.
This caramelized layer acts as a waterproof seal. Without this step, the water content in the cream cheese and heavy cream would slowly migrate into the crust, turning it into mush within hours. Instead, the flash-bake ensures your tart stays crisp for days in the fridge. You’ll notice the aroma changes from simple sugar to a complex, toasted scent as the crust sets.
Essential Components for the Biscoff Filling
The filling relies on the harmony between the dense cookie butter and the airy whipped cream. To get this right, you must use full-fat, brick-style cream cheese. In addition, ensure it is strictly at room temperature. If the cheese is even slightly chilly, it will form tiny “beads” or lumps that are impossible to smooth out once the cold cream is added.
Your heavy whipping cream should have a minimum of 36% milk fat. This high fat content is vital because it provides the structural stability needed for piping. When you whip the cream, the fat globules trap air, creating a foam that supports the weight of the heavy cookie butter. If you use a lower-fat cream, the tart might look good initially but will likely weep or deflate after a few hours.
Powdered sugar is the preferred sweetener here because it contains a small amount of cornstarch. This starch acts as a secondary stabilizer for the mousse. Furthermore, the fine texture of the sugar ensures the filling remains perfectly smooth without any gritty residue.
Selecting the Right Cookie Butter Texture
While “crunchy” cookie butter is delicious on toast, you must use the “creamy” variety for this tart. The creamy version has a consistent oil-to-solid ratio that emulsifies beautifully with the cream cheese. If you use the crunchy version, the cookie bits will clog your piping tip and tear through the delicate aeration of the mousse.
Step-by-Step: Constructing the Tart Base
Start by pulsing your Biscoff cookies until they look like fine, uniform sand. If you have large chunks left over, the crust will have weak points and likely crack. Once you stir in the melted butter, the mixture should feel like wet beach sand. If you squeeze a handful in your palm, it should hold its shape perfectly without falling apart.
Transfer the crumbs to your 9-inch fluted tart pan. I like to start by building the walls first, pushing the crumbs up the sides with my fingers to ensure the fluted edges are well-defined. Afterward, dump the remaining crumbs into the center and use your measuring cup to level the floor. This ensures the corner where the wall meets the base is reinforced and strong.
After the 10-minute bake, the crust will look slightly darker and smell incredibly fragrant. However, do not touch it yet! It will be very soft while hot. Place the pan on a wire rack and let it cool completely. This allows the butter and sugars to fully solidify, creating that “snap” we’re looking for.
Achieving the Perfect Mousse Aeration
The technical heart of this recipe is the two-bowl method. In the first bowl, you’ll beat the cream cheese and cookie butter until the mixture looks pale and fluffy. This aeration is crucial because it lightens the dense fats before you introduce the whipped cream. You’re looking for a texture that resembles a thick frosting.
In your second bowl, which should be chilled for the best results, whip the heavy cream. Start on low speed to build small, stable bubbles, then increase to medium-high. You must stop the moment you hit “stiff peaks.” If the cream starts to look grainy or dull, you’ve gone too far and are on your way to making butter. The cream should be glossy and hold its shape firmly on the whisk.
The Folding Method: Preserving Air Bubbles
To combine these two mixtures without losing all that hard-earned air, use the “sacrificial third” technique. Take about a third of your whipped cream and stir it vigorously into the heavy cookie butter base. This “loosens” the base, making it more compatible with the rest of the delicate cream.
For the remaining cream, use a large rubber spatula and a “J-motion.” Cut through the center of the bowl, scrape along the bottom, and fold the mixture over the top while rotating the bowl. This gentle movement preserves the air bubbles. Stop the moment you see no more white streaks. Over-mixing at this stage will turn your mousse into a runny liquid.
Professional Piping and Presentation Techniques
To get that high-end bakery look, use a piping bag fitted with a large star or round tip. Start in the very center of the cooled tart shell. Hold the bag vertically and apply steady pressure, moving in a slow, continuous spiral toward the outer edges. This creates deep ridges that catch the light and make the tart look voluminous.
These ridges aren’t just for looks; they actually increase the surface area of the filling, which enhances the flavor perception as you eat. For the topping, I prefer coarsely crushed cookies rather than a fine dust. The larger chunks provide a rustic contrast to the precision of the piped mousse and add an extra layer of crunch that echoes the crust.
Troubleshooting Common Cookie Butter Obstacles
If you find your filling is too runny to pipe, it usually means the cream cheese was too warm or the cream wasn’t whipped enough. Don’t panic; simply pop the bowl into the fridge for 30 minutes to firm up the fats, then give it a very brief whisk. However, be careful not to over-work it, or it may break.
If your crust feels too hard to cut, it’s likely because it was pressed too thin or baked a minute too long. To fix this during serving, let the tart sit at room temperature for about 10 minutes before slicing. This softens the butter in the crust just enough to let a knife glide through without shattering the base.
Lumpy cream cheese is the most common headache. If you see lumps after mixing the cookie butter in, you can pass the base mixture through a fine-mesh sieve before folding in the whipped cream. It’s a bit of extra work, but it’s the only way to ensure that signature velvet texture if the initial mixing failed.
Make-Ahead Strategy and Storage Logistics
This tart is the ultimate make-ahead dessert. While a 4-hour chill is the bare minimum for the mousse to set, a full 12 hours (overnight) is significantly better. This time allows the spices in the cookie butter to bloom and permeate the cream, resulting in a much deeper flavor profile.
When storing the tart in the fridge, keep it in a deep airtight container or loosely tented with foil. Avoid wrapping plastic wrap directly onto the surface, as it will ruin your beautiful piping. Be mindful that dairy-based desserts can absorb “fridge smells” like onions or garlic, so keep it away from pungent leftovers to preserve that pure Biscoff aroma.
Expert Tips for Clean Slicing
To achieve those sharp, geometric edges you see in professional food photography, you need a hot knife. Run a long, thin chef’s knife under hot water, then wipe it completely dry with a clean towel. The residual heat will melt through the fats in the mousse and crust like a hot wire through wax.
For perfectly sliced treats, check out these Layered Chocolate Cookie Dream Bars.
Crucially, you must wipe the blade clean and re-heat it between every single slice. If you don’t, the leftover mousse on the blade will smudge the next cut, ruining the clean lines. Press down firmly through the crust in one decisive motion rather than sawing back and forth.
Frequently Asked Questions
Can I make this tart vegan?
Yes, you can adapt this recipe by using a high-quality plant-based butter for the crust. For the filling, substitute the cream cheese with a firm vegan cream cheese alternative and use the chilled fatty solids from two cans of full-fat coconut milk instead of heavy cream. Note that the set will be slightly softer, so keep it chilled until the very moment of serving.
Why did my crust shrink during the flash-bake?
Crust shrinkage usually happens if the dough was overworked, which activates the gluten in the cookie crumbs. Since Biscoff cookies are already baked, this is less common than with traditional pastry, but it can still happen if you mix the butter and crumbs too aggressively. Simply mix until just combined and press firmly but gently.
Can I use a springform pan instead of a tart pan?
You can use a 9-inch springform pan if you don’t have a fluted tart pan. However, the tart pan is preferred because the fluted edges provide more surface area for the crust to “grip,” helping it stay upright. If using a springform pan, only bring the crust about 1 inch up the sides to ensure it doesn’t collapse.
What to Pair with Your Biscoff Tart
Complement your Biscoff cookie butter tart with these delightful drinks and dishes.
- For a cool, sweet start to your meal, try this Creamy Copycat Iced Coffee, perfect for cutting through the richness of the tart.
- If you’re looking for another satisfying bake with cheesy goodness, consider this Cheesy Artichoke and Ham Casserole for a comforting meal.
How long does the crust stay crisp?
Thanks to the flash-baking technique, the crust will stay remarkably crisp for up to 3 days in the refrigerator. The caramelized sugar barrier prevents the moisture from the mousse from softening the cookies. After the third day, you may notice a slight softening, but it will still hold its shape much better than a standard no-bake crust.
Can I freeze this Biscoff tart?
This tart freezes surprisingly well. Wrap it tightly in several layers of plastic wrap and then foil to prevent freezer burn. It can be frozen for up to one month. For the best texture, thaw it in the refrigerator overnight rather than on the counter, which helps the mousse maintain its structural integrity as it softens.
Biscoff Cookie Butter Tart
Course: DessertCuisine: EuropeanDifficulty: medium8
servings25
minutes10
minutes410
kcal35
MinutesThis decadent tart combines a crunchy Biscoff cookie base with a light, aerated cookie butter mousse. By using a specific baking technique to seal the crust, this recipe eliminates the common issue of a soggy bottom, resulting in a professional-quality dessert with a perfect snap.
Ingredients
2 1/2 cups Biscoff cookie crumbs (finely pulsed)
6 tablespoons unsalted butter, melted
1 1/4 cups heavy whipping cream, cold
8 ounces cream cheese, softened to room temperature
3/4 cup Biscoff cookie butter (creamy)
1/2 cup powdered sugar
1 teaspoon vanilla extract
1/2 cup coarsely crushed Biscoff cookies (for topping)
Directions
- To solve the soggy bottom issue, start by mixing the 2 1/2 cups of fine cookie crumbs and melted butter until the mixture resembles wet sand and holds together when squeezed.
- Press the mixture into a 9-inch fluted tart pan with a removable bottom. Use the flat bottom of a measuring cup to firmly pack the crumbs into the base, then use your thumb to compress the mixture tightly into the fluted ridges of the sides. This high-pressure compression is the first secret to a crust that holds its shape.
- Bake the empty crust at 350°F (175°C) for exactly 8 to 10 minutes. This flash-bake step caramelizes the sugars in the cookies, creating a moisture-proof barrier that prevents the filling from softening the crust. Let it cool completely on a wire rack.
- In a large bowl, beat the softened cream cheese, cookie butter, powdered sugar, and vanilla extract until completely smooth and aerated.
- In a separate chilled bowl, whip the heavy cream until stiff peaks form.
- Gently fold one-third of the whipped cream into the cookie butter mixture to loosen it, then fold in the remaining whipped cream. This ensures the filling is light and stable enough to hold a decorative shape.
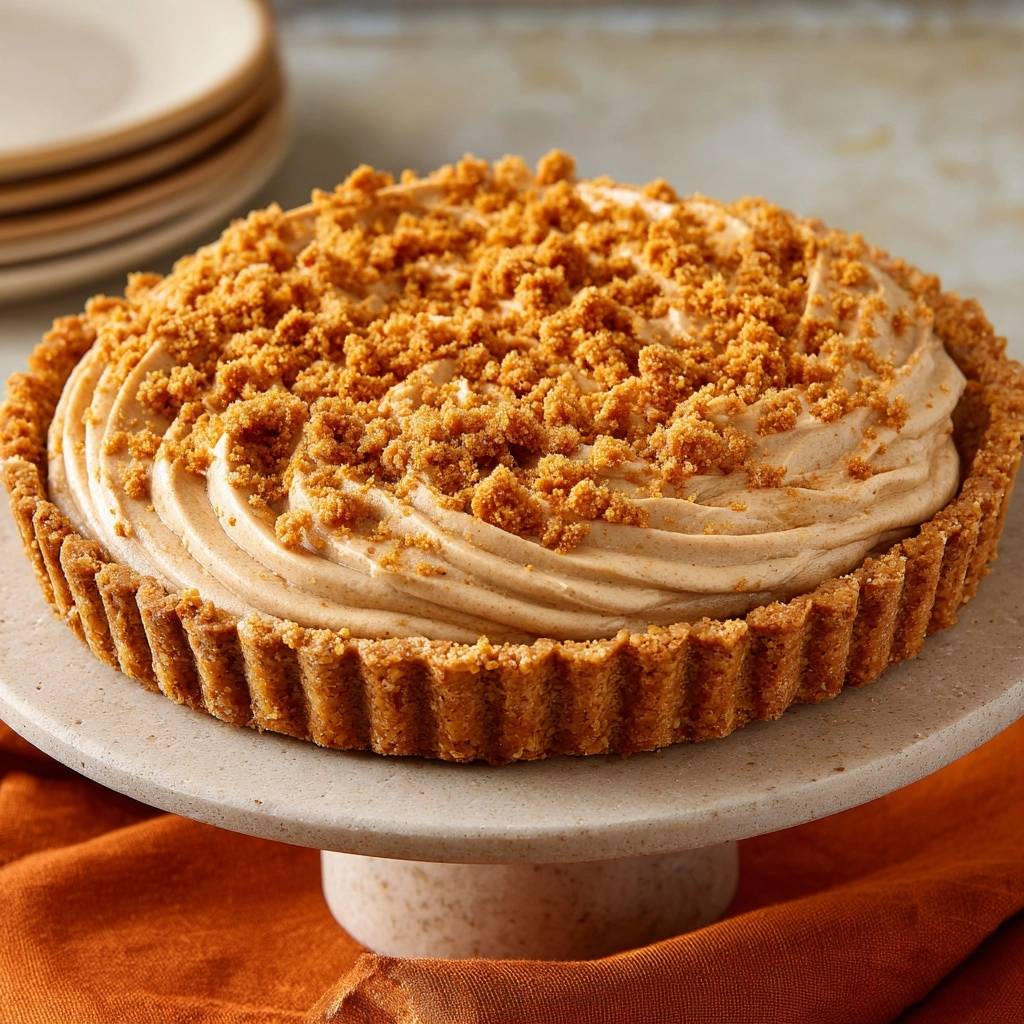
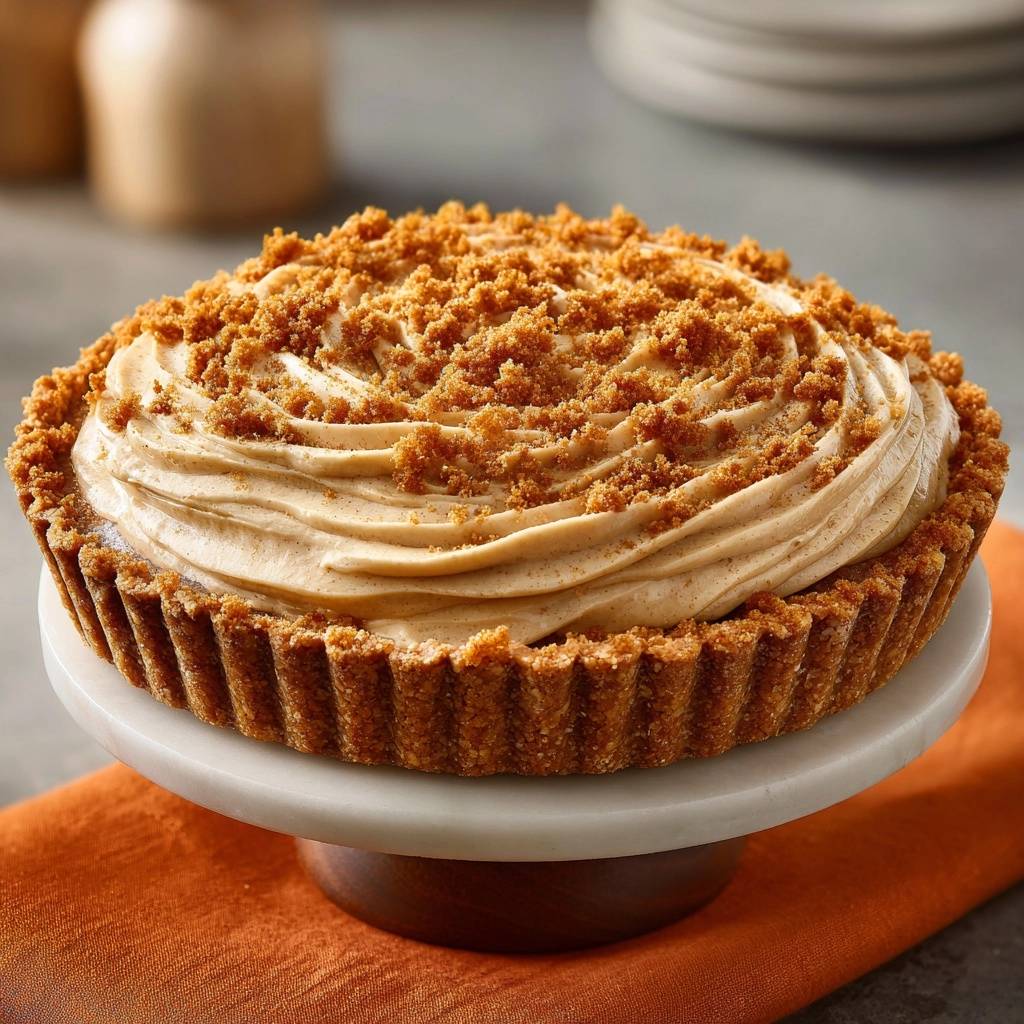
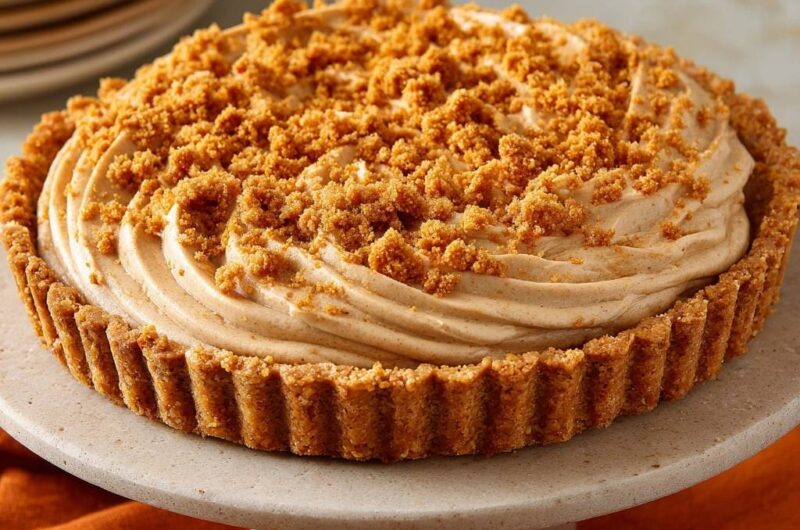
- Transfer the filling to a piping bag fitted with a large star or round tip. Starting from the center, pipe the filling in a continuous, tight spiral moving outward to create the deep ridges shown in the image.
- Generously pile the coarsely crushed cookies in the center of the tart, leaving the piped edges visible.
- Chill for at least 4 hours (or overnight) to allow the mousse to set. The flash-baked crust will remain perfectly crisp even after chilling.
Notes
- The secret to the crisp crust is the high-pressure compression using a measuring cup and the 10-minute flash-bake which caramelizes the sugars to create a moisture barrier.