Most of us have a love-hate relationship with chicken and rice casseroles. We love the idea of a warm, comforting hug in a bowl, but we hate the reality of mushy, gluey rice and dry, stringy meat. It’s a classic kitchen heartbreak when you pull a dish out of the oven only to find the texture is more like porridge than a proper meal.
This recipe changes the game by tackling the “mushy rice” stigma head-on. By using a specific layering technique, we ensure every grain of rice stays distinct and tender. At 510 kcal per serving, it’s a hearty, satisfying dinner that feels indulgent without being overly heavy. You only need about 65 minutes from start to finish to get this on the table.
The secret lies in the physics of the baking dish. Instead of stirring everything into a chaotic mess, we create a controlled environment where the rice steams perfectly under a blanket of chicken and sauce. This method protects the delicate grains from being crushed by the weight of the dairy, resulting in a fluffy, cheesy masterpiece every single time.
The Science of Non-Mushy Rice Casseroles
To understand why casseroles fail, you have to look at the starch. Long-grain white rice is coated in surface starch that, when agitated with liquid, turns into a sticky paste. This is why rinsing your rice until the water runs clear is a non-negotiable step for this bake.
When you skip the rinse, that extra starch thickens the cooking liquid too quickly. This prevents the moisture from actually penetrating the center of the rice grain. You end up with a dish that is simultaneously gummy on the outside and crunchy on the inside. Rinsing ensures the grains remain separate and elegant.
The “Layering Logic” is the second half of the success equation. We place the rice at the very bottom and pour the warmed broth over it first. By keeping the heavy fats like sour cream and condensed soup on the upper layer, the rice hydrates in the thin, hot broth. If you mix the heavy cream directly into the raw rice, the fat molecules coat the grains and block water absorption.
Essential Components for the Perfect Bake
Quality ingredients make a massive difference when the list is this simple. I always recommend using low-sodium chicken broth. This gives you total control over the salt levels, especially since the condensed soup and cheddar cheese already bring plenty of sodium to the party.
For the cheese, reach for a block of sharp cheddar rather than the pre-shredded bags. Pre-shredded cheese is coated in potato starch or cellulose to prevent clumping, which can make your casserole oily or gritty. Grating it yourself ensures a silky, gooey melt that stretches perfectly when you lift a spoonful.
Rotisserie chicken is the ultimate “pro move” for this recipe. Because it’s already been slow-roasted, the meat is seasoned deeply and has a tender texture that holds up well during the second bake. It saves you twenty minutes of prep and guarantees the chicken won’t be bland.
Choosing the Right Rice Grain
Stick with standard long-grain white rice for this specific ratio of liquid. Long-grain rice has a higher amylose content, which helps the grains stay fluffy and separate. While jasmine or basmati are delicious, they are more delicate and may cook faster, potentially becoming too soft in a 50-minute bake.
Whatever you do, stay away from “Instant” or “Minute” rice. Those products are pre-cooked and dried, meaning they only need a fraction of the liquid and time. If you use them here, you’ll end up with a literal soup. This recipe is calibrated for raw, sturdy grains that can stand up to the steam.
The Role of Dairy and Aromatics
The combination of sour cream, whole milk, and cream of chicken soup creates a complex, tangy base. The sour cream adds a necessary acidity that cuts through the richness of the cheddar. Without it, the dish can feel one-dimensional and overly salty.
Using garlic and onion powder might seem like a shortcut, but it’s actually a technical choice. Fresh onions and garlic release a significant amount of water as they cook. In a precision-based rice dish, that extra moisture can throw off the liquid-to-rice ratio and lead to—you guessed it—soggy rice.
Step-by-Step: Preparing the Chicken and Rice
Start by spreading your rinsed rice in an even layer across the bottom of your greased 9×13 dish. You want a flat “bed” of rice so that every grain has equal access to the liquid. Next, scatter your shredded chicken over the top. Don’t press it down; keep it light and airy.
When you pour the liquid mixture over the top, do it slowly. I like to use a large ladle or pour over the back of a spoon. The goal is to saturate the chicken and rice without disturbing the layers you just built. Remember the golden rule: Do not stir! If you stir, you’ll push the heavy cream down to the bottom and the rice won’t cook evenly.
As the liquid settles, you’ll see the broth sink to the bottom while the creamy soup mixture stays nestled around the chicken. This is exactly what you want. The rice will essentially “boil” in the broth at the bottom of the pan while the chicken stays moist in the cream above it.
Sealing the Dish for Maximum Steam
The most common reason for crunchy rice is a poor seal on the baking dish. You need heavy-duty aluminum foil for this. Standard foil is often too thin and can tear or allow steam to leak out of the corners. If the steam escapes, the rice won’t have enough moisture to soften.
Press the foil tightly against the edges of the ceramic dish, crimping it down firmly. You are essentially creating a low-pressure steamer. If you hear a lot of whistling or see steam billowing out of the oven, your seal isn’t tight enough. Pull it out and add a second layer of foil if you have to.
The Two-Stage Baking Process
The first stage is the “Steam Phase,” which takes about 40 to 45 minutes. This is where the heavy lifting happens. When you pull the foil back, the rice should look plump and most of the liquid should be gone. Don’t worry if there’s a little bubbling moisture around the edges; that will be absorbed during the rest.
The second stage is the “Browning Phase.” Once you add that thick layer of cheddar, you’re baking uncovered. This allows the excess moisture to evaporate and the cheese to become bubbly and slightly golden. This transition is what gives the casserole its signature texture—creamy underneath with a resilient, cheesy crust on top.
Troubleshooting Common Casserole Errors
If you find that your rice is still hard after the initial bake, it’s usually due to one of two things: an interrupted steam cycle or old rice. Rice that has been sitting in the pantry for years can become dehydrated to the point where it needs more liquid and time. If this happens, add two tablespoons of hot broth, reseal tightly, and bake for another 10 minutes.
For those who find the dish too salty, the culprit is almost always the broth or the chicken. If you use a standard rotisserie chicken and regular broth, the salt levels compound. Always stick to low-sodium broth. If you’ve already made the mistake, serve the dish with a dollop of plain Greek yogurt or sour cream to help neutralize the saltiness.
If the dish looks “broken” or oily, you likely used pre-shredded cheese or high-heat settings. Ceramic dishes hold heat longer than metal ones, which helps prevent the dairy from curdling. If you use a thin metal pan, the bottom might cook too fast, causing the fats to separate before the rice is done.
Optimal Tools for Even Heat Distribution
A 9×13 inch ceramic or glass baking dish is the gold standard for this recipe. Ceramic is particularly good because it heats up slowly and distributes that heat evenly across the entire surface. This prevents “hot spots” where the rice in the corners might burn while the center stays raw.
The surface area of a 9×13 dish is also vital. If you try to crowd this into a smaller, deeper dish, the rice layer will be too thick. The grains at the bottom will turn to mush under the weight of the top layers before the middle grains ever get soft. Stick to the wide, shallow format for the best results.
Flavor Variations and Protein Swaps
You can easily customize this bake without ruining the chemistry. If you want to add vegetables, broccoli florets are a fantastic choice. Place them on top of the chicken before pouring the liquid. They will steam perfectly in the same amount of time. Just avoid “wet” vegetables like zucchini or mushrooms unless you sauté them first to remove their water.
For a different flavor profile, swap the cheddar for Gruyère or Monterey Jack. Gruyère adds a sophisticated, nutty note that pairs beautifully with the chicken. Just keep the liquid-to-rice ratio exactly the same. The 3 1/2 cups of broth to 2 cups of rice is a hard rule that ensures the texture remains perfect.
For that same cheesy goodness with a crispy top, check out cheesy hash brown casserole.
Make-Ahead Instructions and Storage
You can assemble this dish up to 24 hours in advance, but there is a catch. The rice will begin to absorb the liquid the moment it touches it. If you prep it ahead of time, the rice might end up slightly softer. To prevent this, store the dry rice and chicken in the dish, and keep the liquid mixture in a separate jar in the fridge. Pour and bake when you’re ready.
Leftovers store beautifully in an airtight container for up to three days. When reheating, avoid the microwave if possible, as it can make the rice rubbery. Instead, put a portion in a small oven-safe dish, add a splash of milk, cover with foil, and warm at 350°F until bubbly. This restores the creaminess without drying out the chicken.
What to Serve with Chicken and Rice Bake
Since this dish is very rich and creamy, you want side dishes that offer a “crunch” or a “zing.” A simple arugula salad with a sharp lemon vinaigrette is my favorite pairing. The bitterness of the greens and the acidity of the lemon cut right through the heavy cheese and cream.
Roasted green beans or steamed asparagus with a sprinkle of sea salt also work well. You want something vibrant and fresh to balance the “Sunday vibes” of the casserole. Avoid serving this with other heavy starches like bread or potatoes, as the rice is already quite filling.
Expert Tips for the Perfect Cheese Crust
The most important part of the entire process happens after the oven dings. You must let the casserole rest for at least 10 minutes. During this time, the rice finishes absorbing the last bits of steam and the sauce thickens as it cools slightly. If you cut into it immediately, the sauce will be runny and the rice will feel loose.
For that professional look, save a half-cup of cheese and your fresh parsley for the very end. Sprinkle them over the dish while it’s resting. The residual heat will melt the cheese just enough to create a beautiful “cheese pull” without over-browning it. The fresh parsley adds a pop of color and a hit of freshness that wakes up the whole meal.
Frequently Asked Questions
Can I use brown rice instead of white rice?
You can, but it requires significant adjustments. Brown rice has a tough outer bran layer that takes much longer to cook and requires more liquid. You would need to increase the broth to 4 1/2 cups and increase the covered baking time to about 65-70 minutes. Note that the chicken may dry out slightly with the longer cook time.
Can I use raw chicken breast instead of cooked?
It is not recommended for this specific “anti-soggy” method. Raw chicken releases a lot of moisture (water and protein) as it cooks. This extra liquid will throw off the rice-to-broth ratio, likely resulting in mushy rice. Using pre-cooked chicken ensures the liquid levels stay exactly where we need them for the rice to cook perfectly.
Why is my cheese oily on top?
This usually happens if you use pre-shredded cheese or if the oven is too hot. Pre-shredded cheese contains additives that can separate under heat. Additionally, if the cheese is baked for too long, the milk solids separate from the fats, creating an oily film. Stick to freshly grated cheese and only bake it uncovered for the final 5-8 minutes.
Can I freeze this chicken and rice bake?
Yes, you can freeze it, but it is best to freeze it after baking. Let the dish cool completely, then wrap it tightly in plastic wrap and then foil. It will stay fresh for up to 2 months. To reheat, thaw it in the fridge overnight and bake at 350°F covered with foil until heated through. Do not freeze the unbaked rice in the liquid, as the rice will break down and become mushy upon thawing.
What if I don’t have cream of chicken soup?
You can substitute it with cream of mushroom or cream of celery soup. If you prefer to avoid condensed soups entirely, you can make a thick béchamel sauce using 3 tablespoons of butter, 3 tablespoons of flour, and 1 1/2 cups of whole milk. Ensure the homemade sauce is thick enough to coat a spoon before adding it to the recipe.

Chicken and Rice Bake
Course: Main CourseCuisine: AmericanDifficulty: easy6
servings15
minutes50
minutes510
kcal65
MinutesThis recipe solves the common problem of mushy rice by using a precise liquid-to-rice ratio and a no-stir layering method. By keeping the rice at the bottom and sealing the dish tightly, the grains steam perfectly in chicken broth while the creamy sauce stays on top.
Ingredients
3 cups cooked shredded chicken breast (rotisserie works best)
2 cups long-grain white rice, uncooked (rinsed well)
3 1/2 cups low-sodium chicken broth, warmed
1 can (10.5 oz) condensed cream of chicken soup
1/2 cup sour cream
1/2 cup whole milk
1 teaspoon garlic powder
1 teaspoon onion powder
1/2 teaspoon salt
1/2 teaspoon black pepper
3 cups shredded sharp cheddar cheese, divided
2 tablespoons fresh parsley, finely chopped
Directions
- Preheat your oven to 375°F (190°C) and lightly grease a 9×13 inch ceramic or glass baking dish.
- Spread the uncooked, rinsed rice evenly across the bottom of the dish. Rinsing the rice removes excess surface starch, which is the primary secret to preventing gumminess.
- In a large bowl, whisk together the warmed chicken broth, cream of chicken soup, sour cream, milk, garlic powder, onion powder, salt, and pepper until smooth.
- Layer the shredded chicken evenly over the dry rice.
- Pour the liquid mixture slowly and evenly over the chicken and rice. Do not stir. This layering allows the rice to sit in the broth at the bottom while the heavier fats from the soup stay near the top, preventing the rice from becoming “weighted down” and mushy.
- Cover the dish very tightly with heavy-duty aluminum foil. A perfect seal is mandatory to create the steam environment needed to cook the rice through in the allotted time.
- Bake for 40-45 minutes. Remove from the oven and check the rice; it should be tender and most of the liquid absorbed.
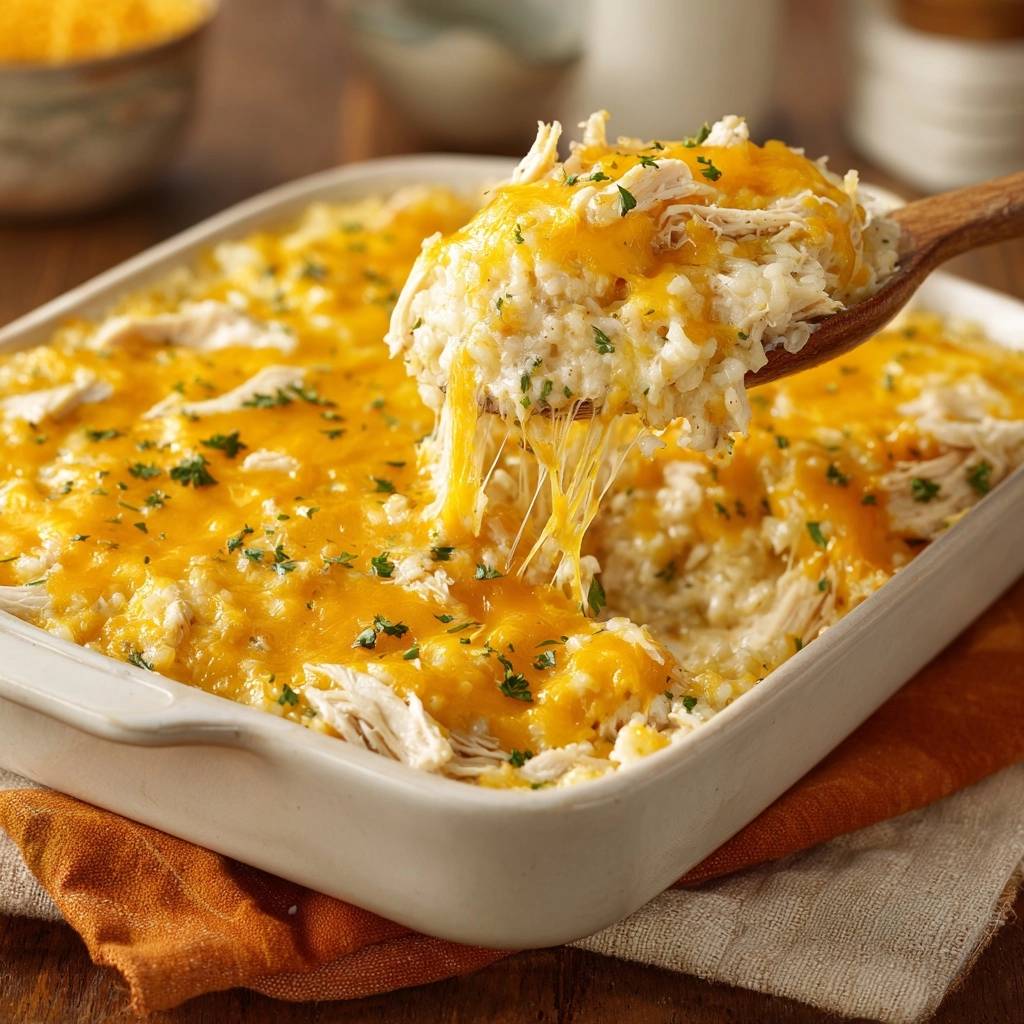
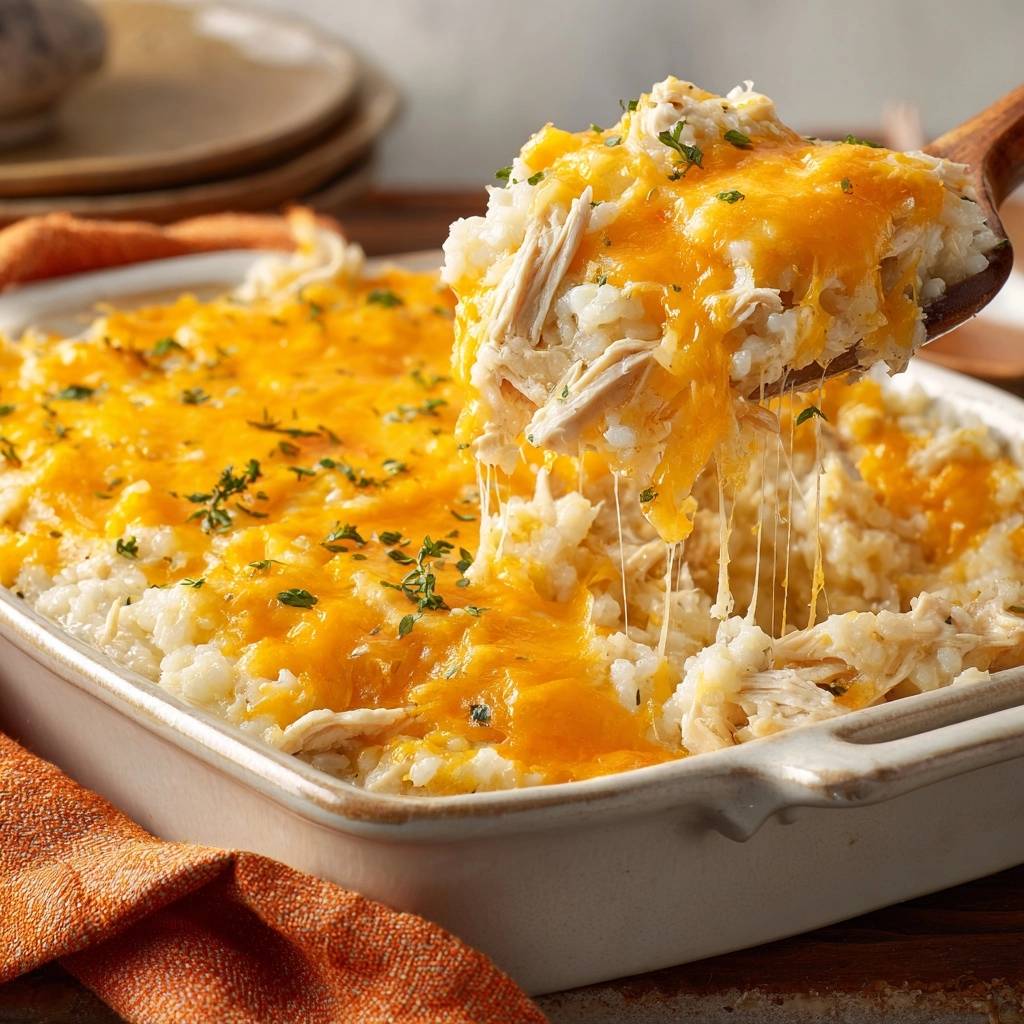
- Remove the foil. Sprinkle 2 1/2 cups of the cheddar cheese evenly over the top. Return to the oven, uncovered, for 5 to 8 minutes until the cheese is fully melted and bubbly, matching the visual pull seen in the image.
- Let the casserole rest for 10 minutes before serving. This resting period is crucial for the sauce to thicken and the rice to finish setting.
- Garnish with the remaining 1/2 cup of cheese and fresh parsley before serving.
Notes
- Rinsing the rice is essential to remove surface starch and prevent gumminess. Ensure the aluminum foil seal is very tight to create the necessary steam environment. Let the dish rest for 10 minutes after baking to allow the sauce to thicken.