We have all been there. You pull a bubbling, golden dish out of the oven, anticipating a comforting meal, only to find the noodles have turned into a gummy, mushy mess. It is the ultimate casserole heartbreak. This recipe changes that narrative by focusing on a technical approach to moisture management and texture contrast.
The secret lies in what I call the Anti-Soggy Secret. By using a specific par-boiling technique and a high-moisture sauce ratio, we ensure your egg noodles stay perfectly al dente while the topping stays shatteringly crisp. This is not just a quick dinner; it is a masterclass in balancing creamy comfort with structural integrity.
The real trick to success here is the “undercooked” noodle. Most people boil their pasta until it is ready to eat, but for a baked dish, that is a recipe for disaster. You must pull those noodles out when they still have a firm, almost chalky center, because they will finish their journey by soaking up the savory sauce in the oven.
The Science of Texture in Baked Pasta
Understanding the chemistry of starch is the first step to a better casserole. Egg noodles are fundamentally different from standard semolina pasta because they contain a higher egg-to-wheat ratio, making them more delicate and prone to over-hydration. When you submerge them in a cream-based sauce and apply heat, they act like sponges.
If the noodles are fully cooked before they hit the baking dish, they have no room left to absorb liquid. Consequently, the sauce sits on the outside, and the starch molecules in the noodle begin to break down further, leading to that dreaded “mush.” This process is exacerbated by retrogradation, where the starch crystals reform as they cool, often resulting in a rubbery texture if the initial cook was too long.
By undercooking the noodles, we trigger an osmotic process. The thirsty, par-boiled noodles pull moisture from the sour cream and milk mixture into their core. This does more than just fix the texture; it seasons the pasta from the inside out, ensuring every bite is infused with the flavors of garlic, onion, and chicken stock rather than just being coated in them.
Essential Components for a Rich Casserole Base
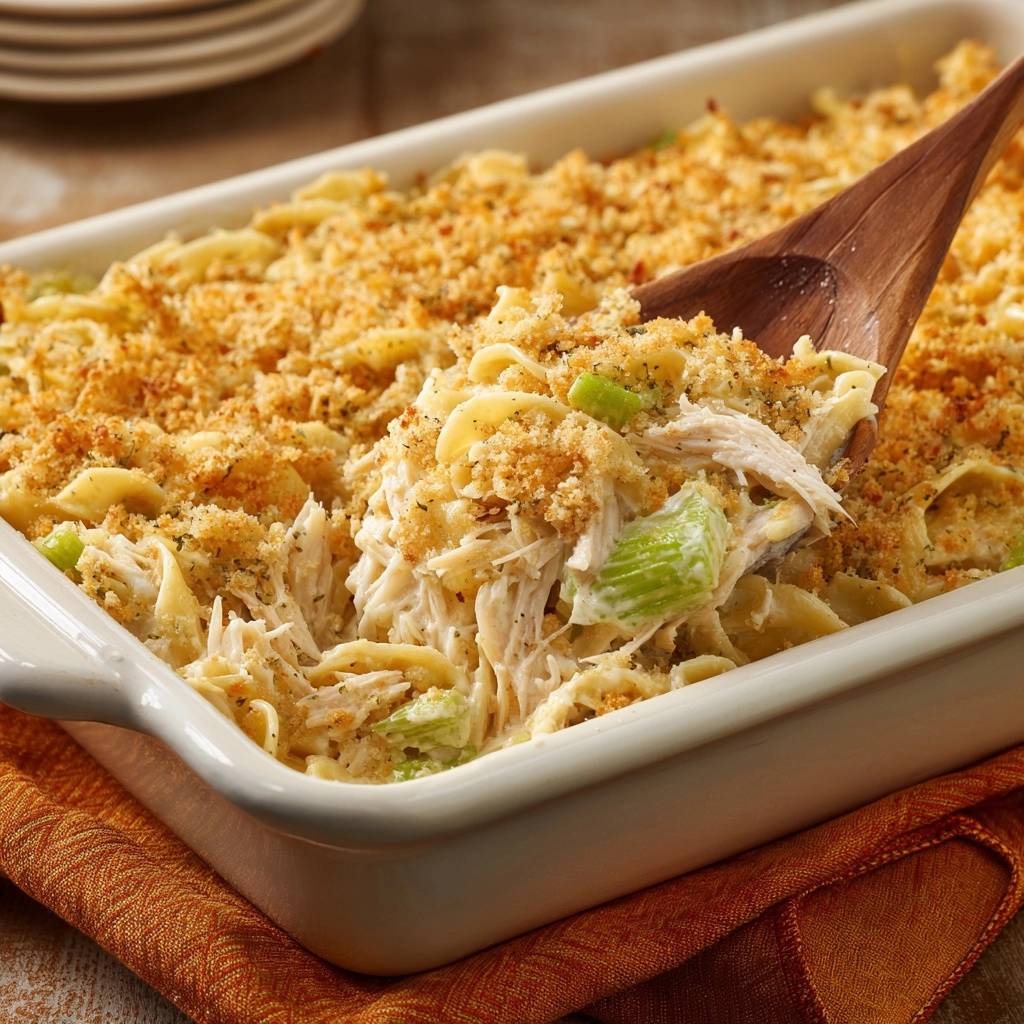
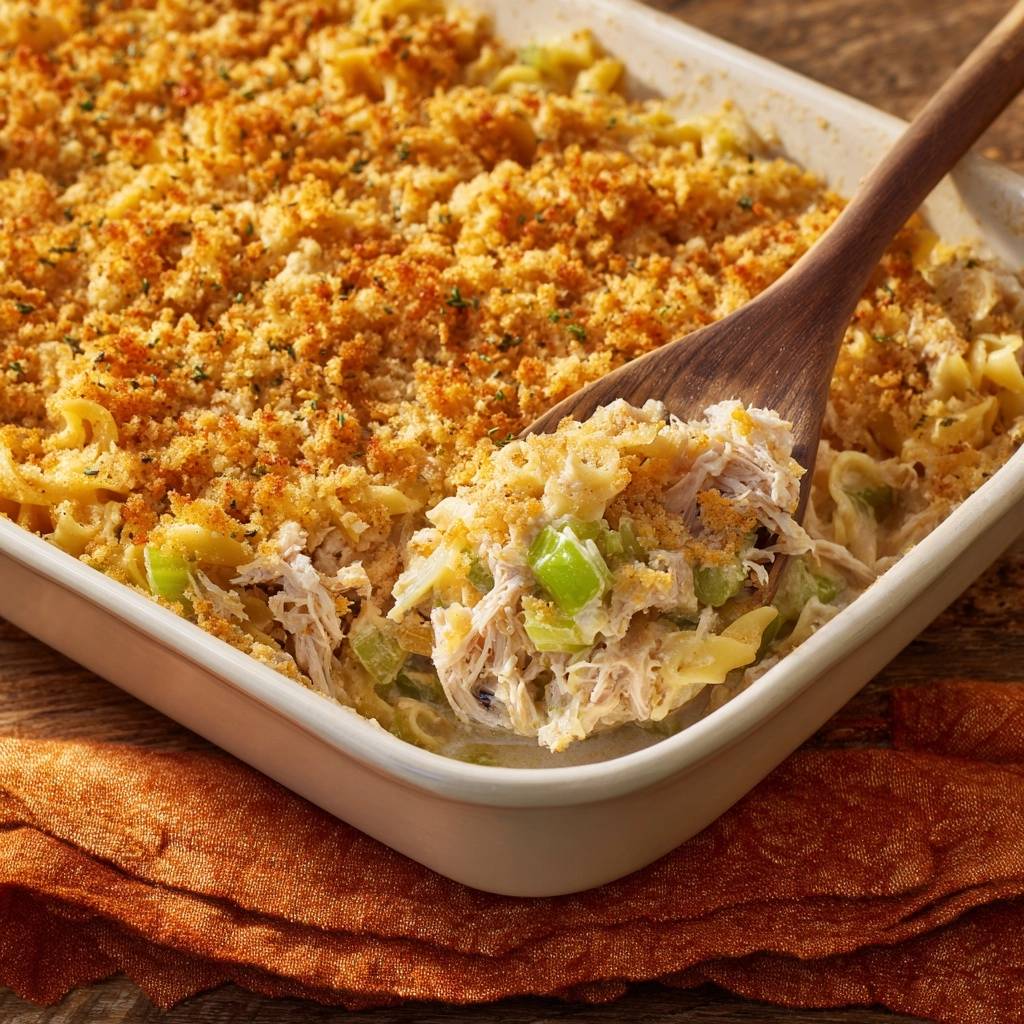
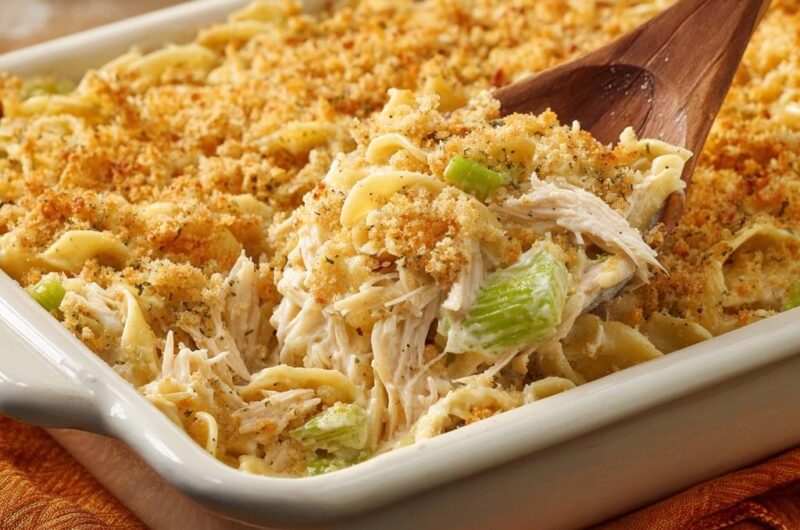
Quality ingredients are the backbone of this dish. Wide egg noodles are the non-negotiable choice here because their broad surface area provides the structural integrity needed to stand up to a heavy sauce. They offer a ribbon-like chew that thinner pastas simply cannot replicate in a baked format.
For the sauce, the combination of sour cream and whole milk provides a necessary tang and stability that heavy cream alone lacks. The acidity in the sour cream cuts through the richness of the chicken. Additionally, using high-quality, freshly grated Parmesan is vital. It acts as a natural thickening agent, melting into the sauce to provide body without the need for extra flour or thickeners.
Texture isn’t just about the noodles; it is about the “crunch insurance” provided by the vegetables. I recommend slicing your celery into 1/2-inch pieces. This specific size ensures that even after twenty-five minutes in the oven, the celery retains a slight snap, offering a refreshing break from the soft, creamy elements of the dish.
Selecting and Preparing the Chicken Protein
You have flexibility when it comes to the three cups of shredded chicken. A rotisserie chicken is a fantastic time-saver and brings a pre-seasoned, roasted depth to the casserole. However, be mindful of the salt content in the skin, as it can make the final dish quite salty if you aren’t careful with your additional seasoning.
If you prefer a cleaner flavor profile, poached chicken breasts are the way to go. Poaching keeps the meat incredibly moist and allows you to control the sodium levels perfectly. Regardless of the method, ensure you shred the chicken into bite-sized pieces rather than large chunks so it integrates evenly into every forkful without becoming stringy or overwhelming the noodles.
The Panko Advantage: Achieving a Shatteringly Crisp Crust
While many traditional recipes call for crushed crackers or standard breadcrumbs, Panko is the superior choice for a modern casserole. Panko flakes are larger and airier, which creates a significantly greater surface area. This increased surface area is the key to a better Maillard reaction, resulting in a deeper golden color and a louder crunch.
The ratio of melted butter to Panko is also critical. You want every single crumb to be lightly hydrated by the fat. This ensures that the heat of the oven fries the breadcrumbs as they bake, rather than just drying them out. The addition of dried parsley adds a pop of color and a subtle earthy note that balances the buttery richness of the topping.
Step-by-Step: Mastering the Anti-Soggy Technique
To achieve the perfect result, you must follow the steps with an eye for detail. This isn’t a “dump and bake” meal; it is a sequenced process designed to maximize flavor and preserve texture. Each phase serves a specific purpose in the final architecture of the dish.
Phase 1: Sautéing Aromatics for Maximum Flavor
Start by melting a tablespoon of butter in a small skillet. Sauté the celery for exactly three to four minutes. You are looking for the celery to become slightly translucent while remaining bright green and crisp. Raw celery releases too much water during the bake, which can thin out your sauce and make it watery.
Conversely, you don’t want to overcook it at this stage. If the celery is already soft before it goes into the oven, it will completely disappear into the sauce, and you will lose that essential textural contrast. Once it hits that vibrant green stage, remove it from the heat immediately and set it aside.
Phase 2: The Critical Three-Minute Par-Boil
This is the most important part of the entire recipe. Bring a large pot of salted water to a rolling boil. Add your egg noodles and set a timer for exactly three minutes less than the package directions for “al dente.” If the box says seven minutes, you are only boiling them for four.
The noodles should feel quite firm, almost stiff, in the center when you test them. As soon as the timer goes off, drain them and rinse briefly with cold water. This shock stops the residual heat from continuing to cook the starch, ensuring the noodles stay in their “thirsty” state until they meet the sauce.
Phase 3: Emulsifying the High-Moisture Sauce
In a large bowl, whisk together the condensed soup, sour cream, milk, Parmesan, and spices. You want a completely smooth emulsion before adding the solids. Do not be alarmed if the sauce looks a bit thin or “too wet” at this stage. This is intentional and necessary for the physics of the dish.
Because your noodles are significantly undercooked, they are going to act like a vacuum for moisture. If the sauce is already thick before it goes into the oven, the noodles will have nothing to drink, and they will stay hard and crunchy. The extra liquid in this sauce is what allows the noodles to reach perfect doneness during the bake.
Phase 4: Assembly and the Golden Bake
Gently fold the chicken, sautéed celery, and par-boiled noodles into the sauce. Use a large spatula and a folding motion rather than aggressive stirring to avoid breaking the fragile, half-cooked noodles. Transfer the mixture to your greased 9×13 dish and spread it into an even layer.
For another creamy chicken favorite, check out this ultimate chicken and broccoli casserole.
Top the mixture with your buttered Panko and bake at 375 degrees F. This temperature is high enough to crisp the topping quickly while the sauce bubbles and thickens. After twenty-two to twenty-five minutes, the edges should be vigorously bubbling and the top should be a uniform, deep golden brown.
Why the 10-Minute Rest Period is Mandatory
I know it is tempting to dive in the second the timer beeps, but you must wait. The ten-minute rest period is a functional part of the cooking process known as carry-over cooking. During this time, the internal temperature stabilizes and the starches in the sauce begin to set.
If you cut into the casserole immediately, the sauce will be runny and will likely pool at the bottom of the dish, leaving the top layers dry. As it rests, the sauce moves from a liquid state to a cohesive, velvety coating that clings to every noodle. This patience results in a much cleaner slice and a better mouthfeel.
Make-Ahead Strategies and Freezing Protocols
This casserole is a fantastic candidate for meal prep, provided you handle the topping correctly. You can assemble the noodle and chicken mixture up to twenty-four hours in advance. However, do not add the Panko topping until the very moment you are ready to put the dish in the oven, or the breadcrumbs will absorb moisture from the sauce and lose their crunch.
For freezing, it is best to freeze the casserole before baking. Wrap the dish tightly in a double layer of plastic wrap and then aluminum foil to prevent freezer burn. When you are ready to eat, thaw it in the refrigerator for a full twenty-four hours. Add the fresh Panko topping and bake as directed, though you may need to add ten extra minutes to the bake time to ensure the center is piping hot.
Troubleshooting Common Casserole Pitfalls
If your sauce breaks or looks oily, it is usually because the oven was too hot or you used low-fat dairy products. Full-fat sour cream and whole milk provide the stability needed to withstand the heat. If the top is browning too fast but the center is still cold, simply tent the dish with a piece of foil to protect the crust while the middle catches up.
If the noodles come out too hard, it means they weren’t boiled long enough or there wasn’t enough liquid in the sauce. Always measure your milk and sour cream carefully. Finally, if the flavor feels flat, check your pepper. Using freshly cracked black pepper instead of fine powder provides little bursts of heat that wake up the creamy sauce and make the chicken pop.
Smart Substitutions and Flavor Variations
While the classic version is a crowd-pleaser, you can easily modernize this dish. Try replacing the celery with thinly sliced fennel for a sophisticated, slightly sweet twist. You can also add a cup of frozen peas during the assembly phase; they don’t need pre-cooking and will stay bright and sweet in the oven’s heat.
For those who prefer to avoid canned goods, you can create a “from-scratch” base. Simply make a quick roux with butter and flour, whisk in two cups of chicken stock and a splash of cream, and simmer until thick. This replaces the condensed soup while maintaining that nostalgic, creamy texture we all crave in a chicken noodle bake.
Optimal Side Dish Pairings
Because this casserole is incredibly rich and savory, it pairs best with sides that offer high acidity or a bit of bitterness. A simple arugula salad dressed with a sharp lemon vinaigrette is the perfect palate cleanser. The peppery greens cut right through the heavy cream and cheese.
Roasted balsamic Brussels sprouts or steamed haricots verts with plenty of minced garlic also work beautifully. These vegetables provide a vibrant color contrast on the plate and a different kind of crunch that complements the Panko topping. Avoid serving this with other heavy starches like mashed potatoes, as the noodles are the star of the show.
Expert Tips for Success
Always grate your own Parmesan cheese from a block. Pre-shredded cheeses are coated in cellulose, an anti-clumping agent that prevents the cheese from melting smoothly into the sauce. Grating it yourself ensures a silky, lump-free consistency that acts as a natural binder for the noodles.
Using a 9×13 inch baking dish is also strategic. This specific size provides a large surface area, which means you get more of that golden Panko crust in every single serving. If you use a deeper, smaller dish, you will have a higher ratio of soft noodles to crunchy topping, which throws off the textural balance we worked so hard to achieve.
How do I store and reheat leftovers?
Store any leftovers in an airtight container in the refrigerator for up to three days. To reheat, place a portion in a microwave-safe dish and add a tiny splash of milk or water before heating. This creates a bit of steam that helps loosen the sauce and prevents the chicken from drying out. For the best results, you can also reheat it in a 350-degree oven for ten minutes to help recrisp the Panko topping.
Why did my noodles turn out mushy despite the 3-minute rule?
The most common culprit for mushy noodles is failing to rinse them with cold water after draining. If the noodles sit in a hot colander, they continue to cook in their own steam. This “carry-over” heat can easily turn a perfect par-boil into an overcooked mess before the noodles even touch the sauce. Always shock them with cold water to lock in that firm texture.
Can I use a different type of pasta like Penne or Rotini?
Yes, you can substitute other pasta shapes, but you must adjust the par-boiling time accordingly. Thicker pastas like Penne take longer to cook than egg noodles, so you should still aim for the “3 minutes less than the package” rule. However, egg noodles are traditional because their soft, buttery flavor perfectly complements the cream of chicken base in a way that wheat-heavy semolina pastas don’t quite match.
What can I use if I don’t have sour cream?
If you are out of sour cream, plain Greek yogurt is an excellent substitute. it provides the same creamy texture and necessary acidity to balance the dish. Just ensure you use a full-fat version if possible, as non-fat yogurt can sometimes curdle or become grainy when exposed to the high heat of the oven for twenty-five minutes.
Is there a way to make the topping even crunchier?
For an extra-shatteringly crisp crust, you can double the Panko and butter ratio, or even mix in a half-cup of crushed buttery round crackers with the Panko. Another pro tip is to turn on the broiler for the final sixty seconds of baking. Watch it very closely, as Panko can go from golden to burnt in a heartbeat, but that blast of direct heat will create an incredible crust.
Can I add vegetables like broccoli or carrots?
Absolutely! If you want to add broccoli, chop it into very small florets and toss them in raw; they will steam perfectly in the sauce. For carrots, you should sauté them along with the celery at the beginning. Since carrots are much denser, they need that extra time in the skillet to ensure they aren’t unpleasantly hard when the rest of the casserole is soft and creamy.
Chicken Noodle Casserole
Course: Main CourseCuisine: AmericanDifficulty: easy6
servings15
minutes25
minutes440
kcal40
MinutesThis comforting casserole uses a specific par-boiling method and a high-moisture sauce ratio to keep egg noodles perfectly al dente. Combined with shredded chicken, sautéed celery, and a buttery Panko crust, it is a texture-perfect family meal.
Ingredients
12 ounces wide egg noodles
3 cups shredded cooked chicken breast
1.5 cups celery, sliced into 1/2-inch pieces
1 tablespoon butter (for sautéing celery)
1 can (10.5 ounces) condensed cream of chicken soup
1 cup sour cream
1/2 cup whole milk
1/2 cup grated Parmesan cheese (for the sauce body)
1 teaspoon garlic powder
1/2 teaspoon onion powder
1/2 teaspoon salt
1/2 teaspoon cracked black pepper
1.5 cups Panko breadcrumbs
4 tablespoons unsalted butter, melted
1 tablespoon dried parsley
Directions
- Preheat your oven to 375 degrees F and grease a 9×13 inch baking dish.
- Sauté the Celery: In a small skillet over medium heat, melt 1 tablespoon of butter. Sauté the sliced celery for 3-4 minutes until slightly softened but still bright green and crisp. This ensures the celery is tender in the final bake without releasing excess water into the sauce. Set aside.
- The Anti-Soggy Secret: Boil a large pot of salted water. Cook the egg noodles for exactly 3 minutes less than the package directions for al dente. They should be quite firm in the center. Drain and rinse briefly with cold water to stop the cooking process.
- Prepare the Sauce: In a large mixing bowl, whisk together the cream of chicken soup, sour cream, milk, Parmesan cheese, garlic powder, onion powder, salt, and pepper until smooth.
- Assembly: Fold the undercooked noodles, shredded chicken, and sautéed celery into the sauce. The mixture will look very wet; this is essential as the par-boiled noodles will absorb the excess liquid to reach perfect doneness in the oven.
- Topping: Transfer the mixture to the prepared baking dish. In a small bowl, toss the Panko breadcrumbs with 4 tablespoons of melted butter and dried parsley. Sprinkle an even, thick layer over the top.
- Bake: Bake for 22 to 25 minutes until the sauce is bubbling and the Panko topping is a deep, uniform golden brown. Let the casserole rest for 5 to 10 minutes before serving to allow the creamy sauce to thicken and set around the noodles.
Notes
- The mixture will look very wet before baking; this is intentional as the par-boiled noodles absorb the excess liquid to reach perfect doneness in the oven.