Finding a chocolate cake that actually stays moist after the first slice is like searching for a needle in a haystack. Most recipes look beautiful on the outside but crumble into dry, disappointing dust the moment you take a bite. This guide changes that by focusing on a specific moisture-locking method that ensures a fudgy, dense interior every single time.
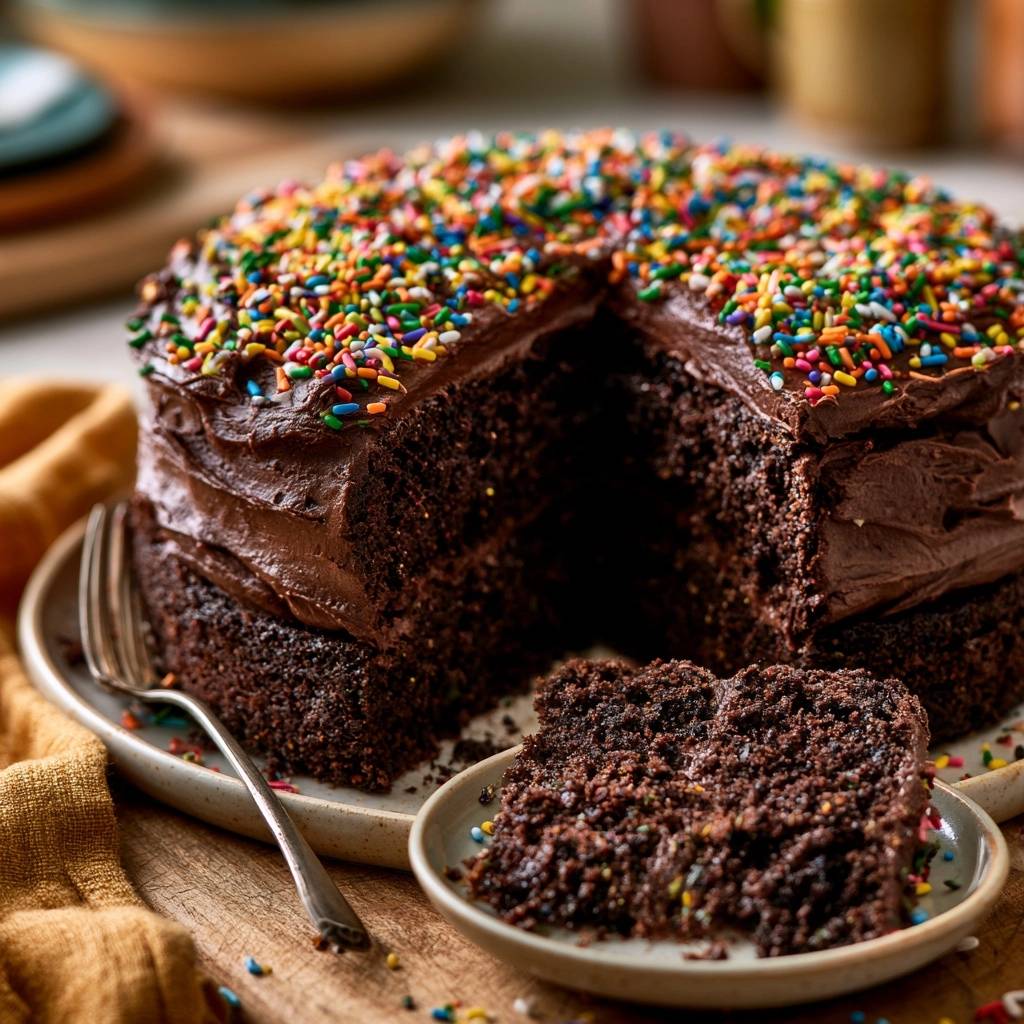
The secret lies in the contrast between the dark, near-black crumb and a thick, velvety fudge frosting. We aren’t just making a dessert; we’re mastering the chemistry of cocoa blooming and high-hydration baking. This masterclass will walk you through the exact steps to achieve a professional bakery texture in your own kitchen.
The real magic happens when you introduce hot liquid to the batter. While most people use room temperature water or milk, we use hot brewed coffee to “bloom” the cocoa. This single step transforms the flavor profile from a simple sweet treat to a deep, sophisticated chocolate experience that stays tender for days.
The Chemistry of Moisture: Why This Recipe Stays Fudgy
Most cakes rely on air bubbles for structure, which can lead to a bread-like texture that dries out quickly. This recipe uses a high-hydration approach, meaning the ratio of liquid to flour is much higher than a standard sponge. When the hot coffee and buttermilk hit the flour, they create a stable emulsion that traps moisture within the crumb.
The buttermilk plays a dual role here. Its acidity breaks down the tough gluten strands in the all-purpose flour, resulting in a “tight” crumb that feels more like fudge than bread. Because the gluten is relaxed, the cake remains soft even after it has cooled completely on the counter.
The Role of Hot Coffee in Cocoa Blooming
Blooming is a technique where you combine cocoa powder with a hot liquid to dissolve the solids and release trapped fats. When you pour hot coffee over the cocoa, it intensifies the chocolate flavor without making the cake taste like a latte. The heat actually “wakes up” the aromatic compounds in the Dutch-processed cocoa.
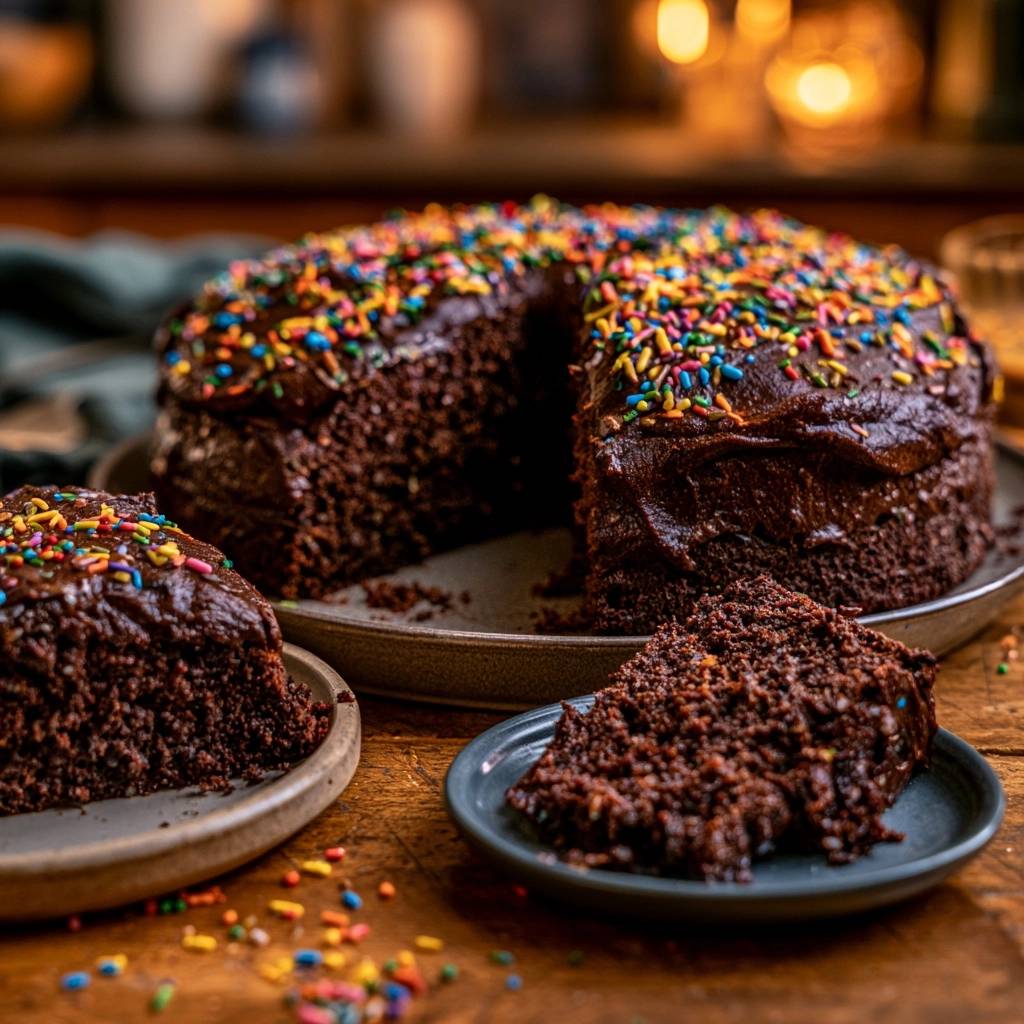
If you were to use cold liquids, the cocoa would simply sit in the batter as a dry ingredient. By blooming it, you ensure the chocolate flavor is integrated into every single molecule of the cake. This results in that signature dark, rich color that makes a birthday cake look truly indulgent.
Buttermilk vs. Regular Milk: Acidity and Leavening
You might be tempted to swap buttermilk for regular whole milk, but the chemistry won’t be the same. Buttermilk is acidic, and that acid is what reacts with the baking soda to create a powerful lift. This reaction happens quickly, creating tiny, uniform bubbles rather than large, uneven gaps.
This specific reaction is what gives the cake its “fudgy” mouthfeel. Instead of a light and airy chiffon, you get a substantial, moist cake that can hold up under the weight of heavy fudge frosting. If you don’t have buttermilk, you can mimic the acidity by adding a tablespoon of lemon juice to a cup of milk, though the real stuff is always better for texture.
Essential Components for the Ultimate Double Chocolate Birthday Cake
Success starts with the quality of your ingredients. Since chocolate is the star, using a high-quality Dutch-processed cocoa powder is non-negotiable. This type of cocoa has been treated with an alkalizing agent, which lowers its acidity and gives it a smoother, darker profile than natural cocoa powder.
Temperature management is another key factor. You must use room temperature eggs and buttermilk. When ingredients are at the same temperature, they emulsify properly, creating a smooth batter that doesn’t break. If you use cold eggs, the fat in the oil can seize up, leading to an uneven bake and a greasy finish.
Dutch-Process Cocoa vs. Natural Cocoa Powder
Dutch-process cocoa is the secret to that nearly black, professional look. It has a mellow, earthy flavor that pairs perfectly with the sweetness of the granulated sugar. Natural cocoa powder is much more acidic and lighter in color, which can make the cake taste sharp and look reddish-brown.
Because we are using a significant amount of baking soda, the Dutch-process cocoa provides the perfect neutral base. This balance ensures the cake rises perfectly without any metallic aftertaste. It’s the difference between a standard grocery store cake and a high-end artisanal dessert.
Selecting the Right Fat: Why Oil Beats Butter Here
While butter offers great flavor, oil is the superior choice for moisture. Butter is a solid at room temperature, which means a butter-based cake will naturally firm up and feel “dryer” as it sits. Oil, however, remains a liquid, keeping the cake incredibly soft and supple even if it’s been sitting out for a few hours.
Since we are getting plenty of flavor from the cocoa and the coffee, the oil acts as a silent partner that focuses entirely on texture. It coats the flour proteins more effectively than butter, preventing too much gluten from forming. This is why the cake has that melt-in-your-mouth quality that everyone craves.
Required Tools for Professional Cake Construction
To get the best results, I recommend using 8-inch round cake pans rather than 9-inch ones. The smaller diameter forces the batter to climb higher, giving you those thick, impressive layers. You will also need parchment paper to line the bottoms; this cake is so moist that it will stick to the pan without it.
A fine-mesh sifter is another essential tool. Cocoa powder is notorious for forming small, stubborn clumps that don’t break down during mixing. Sifting the dry ingredients together ensures a perfectly smooth batter and prevents you from biting into a pocket of dry flour or bitter cocoa.
Step-by-Step: Mixing the High-Hydration Batter
When you start mixing, don’t be alarmed by the consistency. This batter is much thinner than a traditional yellow cake or a pound cake. It will look almost like a thick chocolate milk once the coffee is added. This high liquid content is exactly what creates the “Anti-Dry Crumb” effect.
Start by combining your sifted dry ingredients in a large bowl. Use a whisk to ensure the baking soda and powder are evenly distributed. If the leavening agents are clumped in one spot, your cake will rise unevenly or, worse, collapse in the center during the cooling process.
Sifting and Aerating the Dry Base
Sifting isn’t just about removing clumps; it’s about aerating the flour. By passing the flour and cocoa through a sieve, you incorporate air that helps the cake feel lighter despite its fudgy density. You should see a uniform, pale brown powder before you add any liquids.
If you see any dark bits of cocoa left in the sifter, use the back of a spoon to press them through. Those bits are concentrated flavor! Once sifted, the mixture should look soft and powdery, ready to absorb the buttermilk and oil without forming lumps.
The Two-Minute Emulsion Phase
After adding the buttermilk, oil, eggs, and vanilla, mix on medium speed for exactly two minutes. You are looking for the batter to become smooth and slightly aerated. It will thicken slightly as the flour begins to hydrate, but it should still be very fluid.
This is the stage where you build the foundation of the cake’s structure. Over-mixing at this point is difficult because the high sugar and fat content protect the flour. However, you want to make sure no streaks of egg or oil remain before you move on to the blooming step.
The Pour and The Bloom: Finalizing the Batter
Now comes the most important part: adding the hot coffee. Turn your mixer to the lowest setting or use a hand whisk. Slowly stream the hot coffee into the batter. You will immediately smell the chocolate intensify as the heat hits the cocoa solids.
Be careful not to splash the hot liquid. As you whisk, the batter will become very thin and glossy. This is the “Secret Moisture Lock” in action. The heat helps dissolve the sugar completely, which results in a shiny, crackly top and a perfectly uniform interior crumb.
Precision Baking for a Moist Interior
Oven calibration is everything when it comes to chocolate cake. Because the batter is so dark, it’s hard to tell if it’s burning by sight alone. Set your timer for 30 minutes and start checking. You want to see the edges pulling away slightly from the sides of the pan.
The “toothpick test” is a bit different for this recipe. If the toothpick comes out bone dry, you have overbaked the cake. You want to see a few moist crumbs clinging to the toothpick. This indicates that the center is set but still retains the moisture needed for a fudgy texture.
The Importance of the 15-Minute Pan Rest
Do not try to flip these cakes out of the pans the moment they come out of the oven. Because they are so tender, they need time to “set” their structure. Letting them rest in the pan for 15 minutes allows the steam to settle and the crumb to firm up just enough to handle.
If you rush this step, the cake might break in half or leave its bottom layer stuck to the pan. After 15 minutes, run a thin knife around the edges and gently invert them onto a wire rack. Remove the parchment paper immediately so the bottom doesn’t become soggy from trapped steam.
Building the Ultimate Double Chocolate Birthday Cake
Once the cakes are completely cool, it’s time to assemble. If your cakes have domed slightly in the middle, use a serrated knife to gently level the tops. This creates a flat surface so your layers don’t slide around. A level cake is a stable cake, especially when you’re using heavy frosting.
Place the first layer on your serving plate. If you want a professional look, put a small dollop of frosting on the plate first to “glue” the cake in place. This prevents the cake from sliding as you work the spatula around the sides.
Achieving the 3/4-Inch Frosting Ratio
Most people don’t use enough frosting between the layers. For that iconic bakery look, you want a thick, 3/4-inch layer of chocolate buttercream in the middle. This provides a creamy contrast to the dense cake and ensures every bite has the perfect balance of flavors.
Spread the frosting to the very edge of the first layer. When you place the second layer on top, press down very gently. You want the frosting to reach the edges without squishing out. This thick middle layer acts as a moisture barrier, keeping the interior of the cake fresh.
Creating Professional Texture with a Spatula
Don’t worry about making the frosting perfectly smooth. The “Ultimate” look is all about thick, rustic swirls. Use an offset spatula to scoop a large amount of frosting onto the top. Use a “C” motion with your wrist to create deep swoops and textures.
Work your way down the sides, leaving the frosting thick and textured. This style is much more forgiving than a smooth finish and actually holds more frosting, which is never a bad thing. While the frosting is still tacky, add your sprinkles so they stick firmly to the swirls.
Troubleshooting Common Chocolate Cake Failures
If your cake sinks in the middle, it usually means the oven door was opened too early or the cake was underbaked. The structure needs heat to set; a sudden drop in temperature can cause the air bubbles to collapse. Always wait until at least 25 minutes have passed before checking the oven.
If your frosting feels grainy, your powdered sugar likely needed sifting, or your butter was too cold. To fix grainy frosting, you can add a teaspoon of heavy cream and beat it on high speed for several minutes. This helps dissolve the sugar crystals and creates a silkier mouthfeel.
If the sprinkles are bleeding color into the frosting, the cake or the frosting was likely too warm. Always ensure the cake is stone-cold before you even think about frosting it. If the room is hot, pop the frosted cake in the fridge for 20 minutes to set the exterior before serving.
Make-Ahead Strategies and Storage Solutions
This cake actually tastes better the second day because the flavors have time to meld. You can bake the layers 24 hours in advance. Once they are cool, wrap them tightly in plastic wrap. This traps the residual moisture and makes the layers easier to handle and frost the next day.
For leftovers, store the cake in an airtight container at room temperature for up to 3 days. If you need to keep it longer, you can refrigerate it for up to a week, but let it sit at room temperature for 30 minutes before eating. You can also freeze individual slices wrapped in foil for up to 3 months.
Expert Tips for the Cleanest Cake Slices
To get those perfect, sharp slices you see in magazines, use the “warm knife” technique. Fill a tall glass with hot water and dip a long chef’s knife into it. Wipe the knife completely dry with a clean towel before making your first cut.
The heat from the blade will glide through the thick fudge frosting and the moist cake without tearing the crumb. Repeat the dipping and wiping process for every single slice. It takes a little extra time, but the presentation of a clean, dark chocolate cross-section is well worth the effort.
Frequently Asked Questions
Can I substitute the coffee with water?
Yes, you can use plain hot water if you are sensitive to caffeine. However, the coffee is there to enhance the chocolate flavor, not to make the cake taste like coffee. Using water will result in a slightly flatter flavor profile, but the texture will remain just as moist and fudgy.
Why use both baking soda and baking powder?
This recipe uses both to achieve the perfect balance of lift and browning. The baking soda reacts immediately with the acidic buttermilk to provide an initial rise. The baking powder provides a second “boost” of lift once the cake hits the heat of the oven, ensuring it doesn’t turn out too dense.
Can I make this into cupcakes?
Absolutely! This batter makes excellent cupcakes. Simply line a muffin tin with liners and fill them about two-thirds full. Reduce the baking time to 18–22 minutes. Because the batter is thin, using a cookie scoop or a pitcher to pour the batter into the liners will prevent a mess.
How do I make the frosting darker?
If you want a near-black frosting to match the cake, you can add two tablespoons of melted (and cooled) dark chocolate to your buttercream. Alternatively, using “Extra Dark” or “Black” cocoa powder in the frosting will give you that dramatic, deep color without changing the consistency.
My batter is very thin, did I do something wrong?
Not at all! This is the most common concern for first-time bakers of this recipe. The batter should be very liquid, almost like a heavy cream. This high hydration is the “Secret Moisture Lock” that prevents the cake from being dry. Trust the process and get it into the oven; it will set up beautifully.
How should I store the cake if I live in a humid climate?
In very humid or hot environments, the fudge frosting can become too soft. It is best to store the cake in the refrigerator in an airtight container. To prevent the cake from drying out in the fridge, make sure the “cut” sides of the cake are covered with a piece of plastic wrap or extra frosting to seal in the moisture.
Ultimate Double Chocolate Birthday Cake
Course: DessertCuisine: AmericanDifficulty: easy12
servings20
minutes35
minutes55
Minutes540
kcalAmerican
Ingredients
2 cups all-purpose flour
2 cups granulated sugar
3/4 cup Dutch-processed cocoa powder (for that dark, rich color)
2 teaspoons baking soda
1 teaspoon baking powder
1 teaspoon salt
1 cup full-fat buttermilk, room temperature
1/2 cup vegetable oil
2 large eggs, room temperature
2 teaspoons vanilla extract
1 cup hot brewed coffee (The Secret Moisture Lock)
3 cups chocolate fudge buttercream frosting (increased for thick visual coverage)
1 cup rainbow sprinkles
Directions
- Preheat your oven to 350 degrees F. Grease and line two 8-inch or 9-inch round cake pans with parchment paper to ensure the moist edges do not stick.
- In a large bowl, sift together the flour, sugar, cocoa, baking soda, baking powder, and salt. Sifting is essential to prevent cocoa clumps in this thin batter.
- Add the buttermilk, oil, eggs, and vanilla. Mix on medium speed for about 2 minutes until the batter is smooth and slightly aerated.
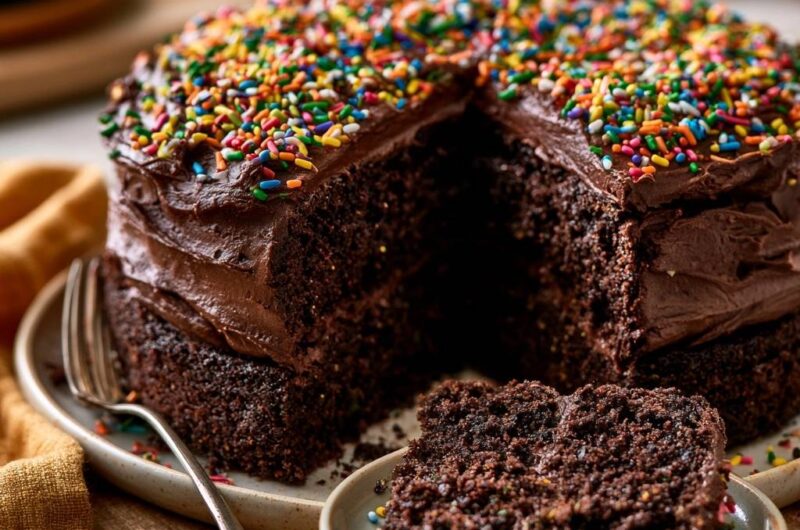
- To solve the dry crumb problem, use the blooming method: slowly pour the hot coffee into the batter while whisking by hand. The hot liquid “blooms” the cocoa powder, releasing deep aromatic oils and creating a very thin batter. This high hydration level is what creates the fudgy, tight crumb shown in the image.
- Pour the batter evenly into the prepared pans. Bake for 30 to 35 minutes. Because this is a high-moisture cake, a toothpick should come out with a few moist crumbs attached-do not overbake until bone dry.
- Cool in the pans for 15 minutes. This allows the structure to set so the cake doesn’t fall apart. Transfer to wire racks to cool completely before frosting.
- Place the first layer on a plate. Spread a thick layer of chocolate buttercream (about 3/4 inch thick) to match the visual ratio of the filling. Top with the second layer.
- Frost the top and sides with the remaining buttercream, using a spatula to create the thick, textured swirls seen in the photo.
- While the frosting is still fresh and tacky, generously cover the entire top surface with rainbow sprinkles, allowing some to spill over the edges. Slice with a warm knife for the cleanest presentation of the moist interior.
Notes
- The hot coffee is the secret moisture lock that creates a high hydration level for a fudgy, tight crumb. Use a warm knife when slicing to maintain the clean presentation of the moist interior.