Most taco casseroles promise a fiesta but deliver a soggy, greasy disappointment. You’ve likely experienced it before: you dig your spatula into a beautiful layer of melted cheese only to find a mushy, waterlogged mess of corn chips at the bottom. It’s a common kitchen heartbreak that happens when meat juices and steam collide with delicate chips.
This Loaded Beef Taco Bake isn’t just another dump-and-bake dinner; it’s a structural engineering feat for your kitchen. We’re approaching this dish with an “Anti-Soggy Bottom” philosophy that treats the layers like a skyscraper. By focusing on moisture control and heat barriers, we ensure every bite maintains that satisfying crunch you crave from a real taco.
For an even richer experience, explore how to achieve delicious results with loaded taco cornbread bake.
The secret to success lies in the pre-bake “seal.” By toasting the chips with a light dusting of cheese before adding any protein, you create a hydrophobic barrier. This simple five-minute step transforms the dish from a standard casserole into a professional-grade meal that holds its integrity from the oven to the dinner table.
The Anatomy of a Perfect Loaded Beef Taco Bake
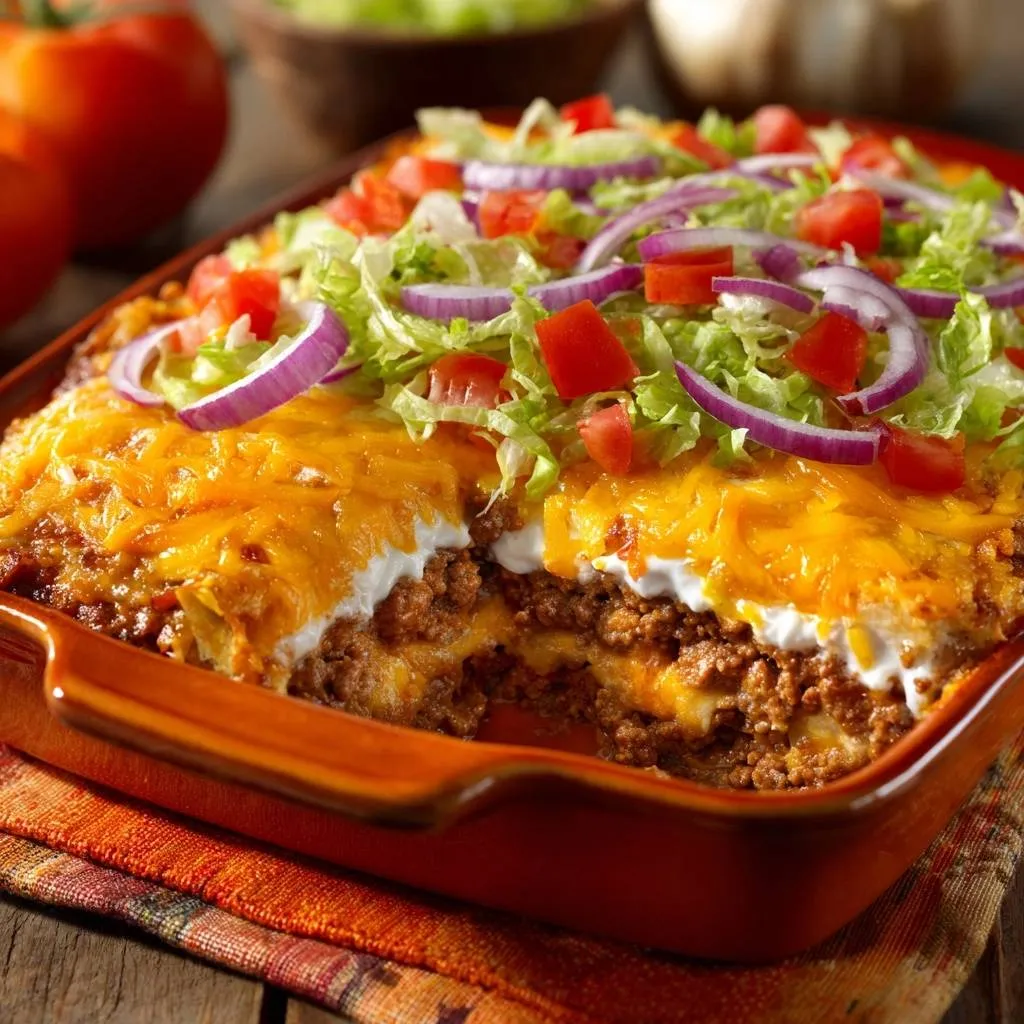
A truly great taco bake relies on a dramatic contrast of temperatures and textures. You want the base to be hot, savory, and firm, while the toppings should remain cold, crisp, and vibrant. When you bite into a slice, you should experience the snap of fresh iceberg lettuce followed by the creamy richness of sour cream and the salty crunch of toasted corn.
This recipe bridges the gap between a traditional taco and a hearty family casserole. While a standard taco is gone in three bites, this bake offers a dense, satisfying meal that feeds a crowd. However, it keeps the soul of the taco alive by refusing to let the fresh ingredients cook or wilt into the beef.
Why Traditional Taco Casseroles Often Fail
The failure of most casseroles comes down to the science of moisture migration. When you place hot, seasoned ground beef directly onto room-temperature chips, the steam has nowhere to go but down. The corn chips act like sponges, soaking up every drop of fat and water until they turn into a salty paste.
Furthermore, many recipes call for baking the lettuce and tomatoes directly in the oven. This is a culinary crime that results in slimy greens and watery tomatoes. To fix this, we treat the “hot” and “cold” components as two separate entities that only meet at the very end of the process.
Essential Components for the Beef Taco Base
Quality ingredients are the foundation of this structural masterpiece. You’ll need 1.5 lbs of lean ground beef, which provides the perfect meat-to-chip ratio for a standard 9×13 baking dish. If you use too much meat, the weight will crush the chips; too little, and the dish feels unsubstantial.
The choice of chip is equally vital. You must use thick-cut, sturdy corn tortilla chips. Avoid the thin, “restaurant-style” chips that are designed for light dipping. Those thin varieties will disintegrate almost instantly under the weight of the beef and cheese. You need a chip that can stand its ground.
Freshness matters for the produce as well. Since the lettuce and tomatoes aren’t being cooked, their water content and crispness define the final mouthfeel. Use a head of iceberg lettuce rather than romaine for that classic, watery crunch that balances the heavy, seasoned beef.
Selecting the Right Fat Content for Ground Beef
While fat usually equals flavor in the world of burgers, it’s the enemy of a crisp taco bake. I recommend using 90/10 or 93/7 lean ground beef. This ensures you get plenty of protein without a pool of yellow grease forming at the bottom of your dish.
Even with lean beef, you’ll still encounter some rendered fat. Using a higher fat content like 80/20 will overwhelm the “moisture barrier” we’re building. Stick to the leaner cuts and let the taco seasoning and sharp cheddar provide the punch of flavor you’re looking for.
The Importance of High-Moisture vs. Low-Moisture Cheeses
For the best results, grab a block of sharp cheddar and grate it yourself. Pre-shredded “Mexican blends” are coated in potato starch or cellulose to prevent clumping in the bag. This coating prevents the cheese from melting into a smooth, cohesive sheet.
Real, freshly grated cheddar contains natural oils that help create our moisture barrier. When that cheese melts onto the chips during the pre-bake, it fills the nooks and crannies, effectively waterproofing the corn. Sharp cheddar also provides a tangy bite that cuts through the richness of the sour cream.
The Secret Moisture Barrier: Pre-Baking Your Base
This is the core value-add that will change how you make casseroles forever. Before you even touch the meat, spread your crushed chips in the baking dish and sprinkle them with a half-cup of cheese. Pop them into the 375°F oven for about five to seven minutes.
This process does two things. First, it toasts the corn, deepening the flavor and making the chips more rigid. Second, the cheese melts and hardens slightly, creating a “seal” over the chips. This layer acts as a shield, preventing the beef juices from penetrating the corn once the layers are assembled.
Step-by-Step: Preparing the Seasoned Beef Filling
While your chips are toasting, it’s time to focus on the beef. Heat your olive oil in a large skillet until it shimmers. Add the beef and break it apart with a wooden spoon. You’re looking for a deep brown color, which indicates the Maillard reaction is adding savory depth to the meat.
Once the meat is browned, perform the “Crucial Drain.” Do not just tip the pan and hope for the best. Pour the meat into a colander set over a bowl. This ensures every bit of excess liquid is removed. This is your second line of defense against a soggy base, so don’t skip it.
Return the drained meat to the pan and add your seasoning and water. Simmer the mixture over medium heat. You’ll notice the liquid bubbling away, concentrating the spices. Keep cooking until the water has fully evaporated and the meat looks “dry” but glossy. This concentrated flavor is what makes the bake stand out.
Achieving Maximum Flavor with Taco Seasoning
The goal of the simmering process is to infuse the beef fibers with spice without leaving behind loose liquid. If you see a pool of water at the bottom of your skillet, keep simmering. You want the seasoning to cling to the meat like a thick glaze.
If you’re using a store-bought packet, the cornstarch in the mix will help thicken the juices. If you’re using a homemade blend, ensure you cook it down until the beef is highly aromatic. This “dry” seasoning method ensures that when you slice the bake, no orange liquid leaks out onto the plate.
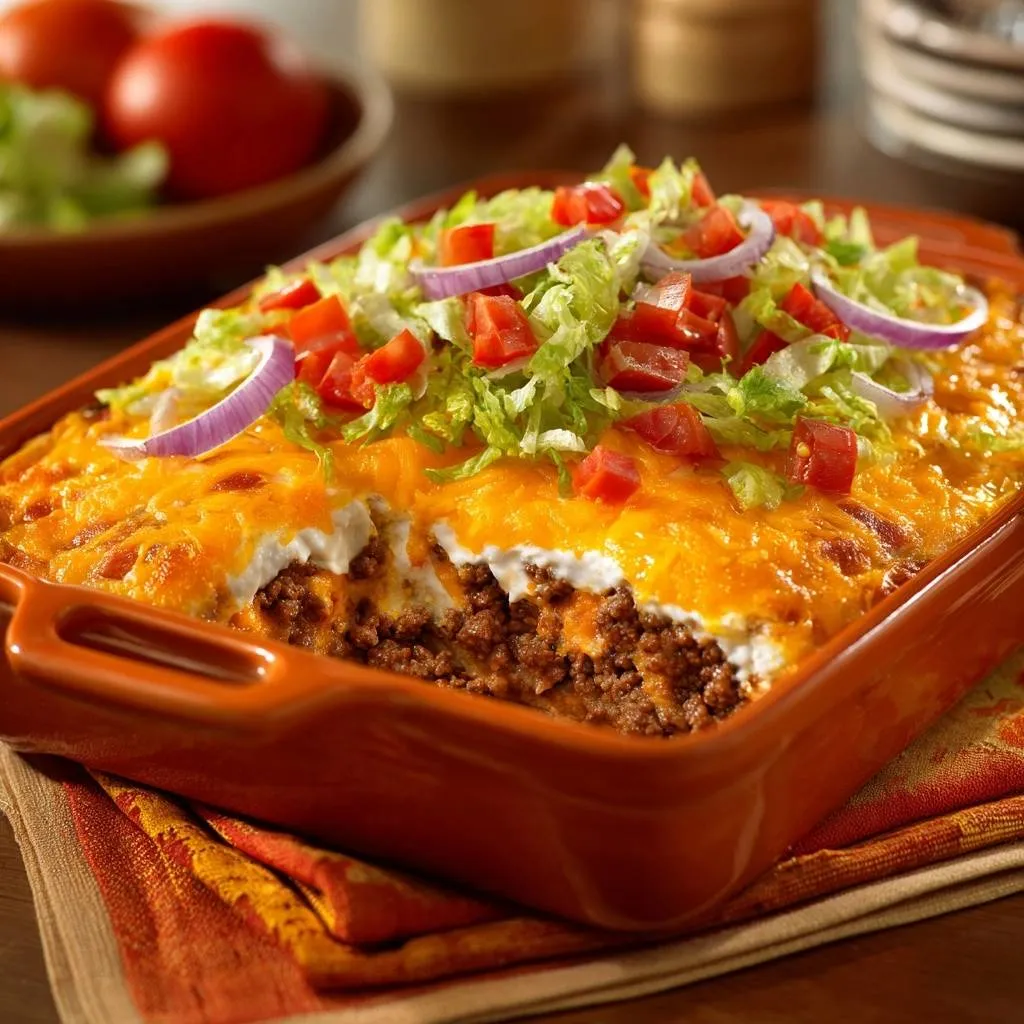
The Thermal Barrier: Layering Sour Cream and Cheese
After the beef and the first layer of cheese have baked together, you’ll add the sour cream. This isn’t just for flavor; it’s a thermal barrier. Spread the sour cream in a thick, edge-to-edge layer over the hot melted cheese. It acts as an insulator.
By creating this cool middle layer, you protect the fresh lettuce and tomatoes from the residual heat of the beef. This prevents the lettuce from wilting and turning into a soggy green mess. It keeps the “top” of your bake refreshing and the “bottom” of your bake hearty and warm.
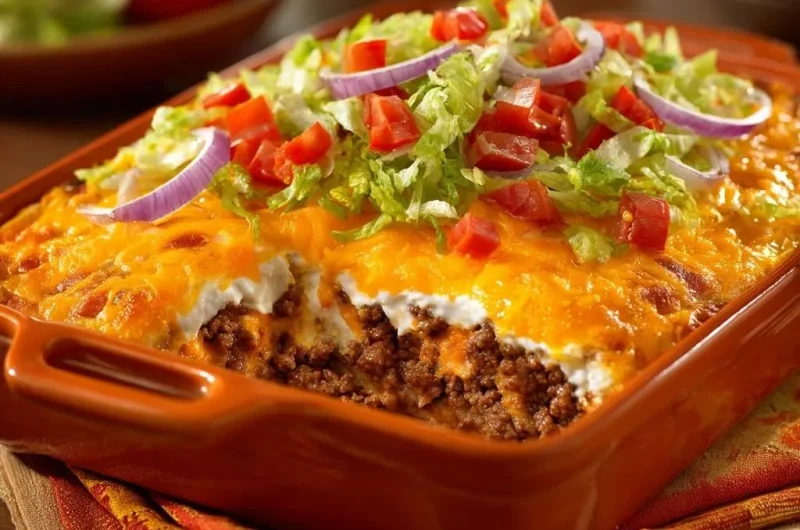
Assembling the Loaded Beef Taco Bake for Maximum Crunch
Final assembly is all about timing. Once the beef and cheese layer comes out of the oven, the cheese should be bubbling and slightly golden at the edges. This indicates the layers have “set” and won’t shift when you apply the toppings.
Apply the sour cream immediately, then follow with the remaining cheese. The heat from the beef will gently soften this top layer of cheese without melting it into a liquid. Finally, pile the lettuce, tomatoes, and red onion rings high. The red onion rings should be sliced thin so they provide a sharp, crisp bite without overpowering the other flavors.
Troubleshooting Your Taco Bake
If you find your chips are still a bit soft, it usually means the pre-bake wasn’t long enough or the beef wasn’t drained thoroughly. Ensure the chips feel firm to the touch after their initial five minutes in the oven. If they still feel flexible, give them another two minutes.
If your cheese isn’t melting into that beautiful, stretchy blanket, check your ingredients. Pre-shredded cheese with too much anti-caking agent is almost always the culprit. For the ultimate melt, always grate your own sharp cheddar from a block. It makes a world of difference in the final texture.
Flavor Variations and Ingredient Swaps
You can easily adapt this recipe to suit your preferences. If you want a leaner profile, ground turkey or ground bison work beautifully as beef alternatives. Both are very lean, so you’ll need to be extra vigilant about not overcooking them during the browning phase.
For those who love heat, don’t be afraid to customize the meat mixture. Adding a small can of diced green chiles or some fresh chopped jalapeños to the beef while it simmers will add a nice kick. Just ensure you drain the canned chiles well to maintain our “anti-soggy” standards.
Vegetable Additions for Extra Bulk
If you need to feed a larger crowd, you can stretch the beef by adding black beans or corn. Rinse and drain the black beans thoroughly before adding them to the skillet with the taco seasoning. This adds fiber and texture without compromising the structural integrity of the bake.
Adding corn provides a nice sweetness that complements the salty chips. Use frozen or canned corn, but again, make sure it is completely dry before it hits the pan. Any extra moisture introduced at this stage will fight against our crispy chip goal.
What to Serve with Your Loaded Beef Taco Bake
Since this bake is quite rich and savory, it pairs best with bright, acidic side dishes. A simple lime-dressed slaw with shredded cabbage and cilantro provides a refreshing contrast to the heavy beef and cheese. The acidity of the lime helps cleanse the palate between bites.
For a similar satisfying bake without the sogginess, explore cheesy sweet potato and beef.
A fresh fruit salsa made with mango or pineapple is another excellent choice. The sweetness of the fruit plays well against the salty taco seasoning. If you want something more traditional, a side of cilantro-lime rice works well, though the bake is usually filling enough to stand on its own as a complete meal.
Serving Suggestions
Round out your meal with these complementary dishes.
- For another satisfying beef and cheese creation, try this Epic Baked Taco Dip, layered for great taste.
- If you’re craving more crunch alongside your taco bake, the Loaded Beef Nachos offer a crisp texture.
Make-Ahead Strategies and Storage Guidelines
This dish is at its absolute peak the moment it leaves the oven. However, you can prep the components in advance. Brown and season the beef a day early and store it in the fridge. You can also chop your lettuce, onions, and tomatoes ahead of time and keep them in airtight containers.
If you have leftovers, I recommend a “deconstructed” storage method. Scrape off the cold lettuce and tomatoes before putting the beef and chip base into a container. When you’re ready to eat, reheat the base in the oven or air fryer to crisp up the chips, then add fresh cold toppings. This prevents the dreaded “microwaved lettuce” texture.
Expert Tips for the Perfect Texture
To achieve the perfect bake, remember the three pillars: The Chip Toast, The Meat Drain, and The Sour Cream Insulation. If you master these three steps, you’ll never have a soggy casserole again. These techniques ensure that the textures remain distinct rather than blending into a singular mush.
One final pro-tip: use a heavy-duty ceramic or glass 9×13 dish. These materials hold heat more evenly than thin metal pans. This even heat distribution ensures the cheese melts uniformly and the chips at the center of the dish get just as toasted as the ones at the edges. It’s the little details that turn a good dinner into a great one.
Frequently Asked Questions
Can I use flour tortillas instead of chips?
You can, but it will completely change the character of the dish. Flour tortillas will turn this into more of an enchilada-style bake. You will lose the signature crunch that defines a taco bake. If you do use tortillas, I recommend lightly toasting them in a dry pan first to give them some structural integrity.
How do I reheat leftovers without the lettuce getting gross?
The best way to reheat this is to remove the cold toppings (lettuce, tomatoes, sour cream) from the portion you want to eat. Heat the beef and chip base in an air fryer at 350°F for 3-4 minutes or in a toaster oven. This recrisps the chips. Once hot, add fresh lettuce and a new dollop of sour cream.
Is there a way to make this spicier?
Absolutely. You can add red pepper flakes or cayenne pepper to the beef while it simmers. Another great way to add heat is to use a “Pepper Jack” cheese instead of cheddar for the middle layer. Serving the bake with a side of hot sauce or sliced fresh habaneros will also do the trick.
Can I use homemade taco seasoning?
Yes, and it often tastes better! A quick ratio for 1.5 lbs of beef is 2 tablespoons chili powder, 1 teaspoon cumin, 1/2 teaspoon garlic powder, 1/2 teaspoon onion powder, and a pinch of salt and pepper. If you want it thicker, add 1 teaspoon of cornstarch to the mix before adding the water to the pan.
Can I freeze this taco bake?
I do not recommend freezing the fully assembled bake because the lettuce and sour cream do not freeze well. However, you can freeze the seasoned beef mixture easily. When you’re ready for dinner, thaw the meat, toast fresh chips, and assemble the bake as directed for the best texture.
Beef Taco Bake
Course: Main CourseCuisine: AmericanDifficulty: easy8
servings15
minutes25
minutes440
kcal40
MinutesThis family-favorite taco bake uses a specific layering technique and a pre-bake ‘seal’ to keep the corn tortilla base firm and flavorful while maintaining fresh, crisp toppings.
Ingredients
1.5 lbs lean ground beef
1 packet taco seasoning
1/2 cup water
3 cups shredded sharp cheddar cheese, divided
1 cup sour cream
1 bag (approx. 10 oz) thick-cut corn tortilla chips, crushed
2 cups shredded iceberg lettuce
1 cup diced fresh tomatoes
1/2 red onion, sliced into rings
1 tablespoon olive oil
Directions
- Preheat your oven to 375 degrees F. Lightly grease a 9×13 inch baking dish.
- The Secret Step: Spread your crushed tortilla chips in an even layer at the bottom of the dish. Sprinkle 1/2 cup of the shredded cheese directly onto the chips. Bake the chips and cheese alone for 5-7 minutes. This toasts the chips and creates a melted cheese “moisture barrier” that prevents the base from getting soggy once the meat is added.
- While chips toast, heat olive oil in a large skillet over medium-high heat. Add the ground beef and cook until fully browned.
- Crucial Drain: Drain the excess fat thoroughly using a colander. This is the second defense against a soggy bake. Return the meat to the pan, add taco seasoning and water, and simmer for 5-8 minutes until the liquid is fully evaporated and the meat is highly seasoned and “dry.”
- Spread the seasoned beef evenly over the toasted, cheese-sealed chips.
- Top the beef with 1 cup of the shredded cheddar cheese. Bake for 10 minutes until the cheese is bubbling and the layers are set.
- Remove from the oven. Spread the sour cream in a thick, smooth, edge-to-edge layer over the melted cheese. This acts as a thermal barrier for the cold toppings.
- Immediately sprinkle the remaining 1.5 cups of shredded cheddar cheese over the sour cream. The residual heat will soften the cheese without making the lettuce wilt.
- Finish by piling on the fresh shredded lettuce, diced tomatoes, and red onion rings. Serve immediately to enjoy the perfect contrast of the warm, firm base and cold, crisp toppings shown in the image.
Notes
- The secret to preventing a soggy base is the ‘moisture barrier’ created by pre-baking cheese onto the chips and ensuring the meat is drained and simmered until the liquid is fully evaporated.