Forget those watery, flavorless tubs of dip from the grocery store. When you want a real centerpiece, you need a Loaded Mediterranean Hummus Platter that actually stands its ground. This isn’t just a side dish; it’s a vibrant, textured experience that brings the warmth of a Mediterranean kitchen right to your table.
The secret to a truly impressive platter lies in the “rustic-creamy” balance. While many people aim for a thin, liquid-smooth consistency, an authentic platter requires a hummus with enough body to hold its shape. You want a base that can support a mountain of fresh vegetables, salty olives, and tangy feta without collapsing into a puddle.
The real pro move here is all about the garlic. Most people just toss raw garlic into the processor, which leads to a harsh, biting aftertaste that lingers for hours. Instead, let your smashed garlic sit in the lemon juice for a few minutes before blending. This simple step “cooks” the garlic slightly, mellowing the flavor so it complements the nutty tahini rather than overpowering it.
The Structural Secret of Rustic-Creamy Hummus
Texture is the most important element of a loaded platter. If your hummus is too thin, your toppings will simply sink to the bottom, and the olive oil will run right off the plate. We are looking for a “structurally sound” dip that feels rich and velvety on the tongue but remains stiff enough to hold a peak.
This structural integrity comes from a high ratio of premium tahini and a controlled amount of liquid. By keeping the base thick, you create a canvas that can handle the weight of diced cucumbers and heavy Kalamata olives. It’s the difference between a dip that looks like soup and one that looks like it belongs in a high-end bistro.
Why Simmering Canned Chickpeas is Non-Negotiable
Even though we’re using canned chickpeas for speed, a quick five-minute simmer with a pinch of baking soda is the ultimate game-changer. The baking soda raises the pH of the water, which helps break down the pectin in the chickpea skins. You’ll see the skins start to look slightly ragged and soft.

This softening process ensures that when you blend them, the skins disappear into the mix. You get that ultra-creamy finish without having to peel every individual bean by hand. However, because we only simmer them for five minutes, the interior of the chickpea stays firm enough to provide that essential “rustic” body.
The Role of Ice-Cold Water in Emulsification
Temperature plays a massive role in how your hummus looks and feels. When you drizzle ice-cold water into the food processor while the motor is running, it creates a mechanical emulsion with the fats in the tahini. This process aerates the mixture, turning it from a dark tan to a beautiful, pale ivory color.
The cold water also helps the hummus stay stable at room temperature. If you use warm water, the fats can sometimes separate, leading to a greasy texture. The result of the cold-water technique is a fluffy, whipped consistency that feels light but remains incredibly sturdy on the platter.
Essential Components for the Loaded Mediterranean Hummus Platter
Since this recipe has so few ingredients, the quality of each one is magnified. You want to look for “premium” tahini, which should be runny and pourable, not a thick, bitter paste at the bottom of the jar. Give it a good stir before measuring to ensure the oils are fully incorporated.
Freshly squeezed lemon juice is another non-negotiable. Bottled juice often has a metallic or overly acidic tang that can ruin the delicate balance of the chickpeas. A fresh lemon provides a bright, floral acidity that cuts through the richness of the tahini and olive oil perfectly.
Selecting the Right Chickpea Base
While dried chickpeas are traditional, canned chickpeas are the hero of the 20-minute meal. They provide a consistent texture and save hours of soaking and boiling. By using the simmering technique mentioned earlier, you bridge the gap between “convenience food” and “gourmet quality” in just a few minutes.
And for a similarly satisfying chilled dish, explore this Mediterranean penne pasta salad.
When shopping, look for “no salt added” varieties if possible. This gives you total control over the seasoning. If you can only find standard canned chickpeas, just be sure to rinse them thoroughly to remove the metallic-tasting canning liquid before you start simmering.
The Topping Architecture: Freshness and Brine
The toppings provide the necessary contrast to the creamy base. English cucumbers are the best choice here because they have thinner skins and fewer seeds than standard field cucumbers. This means they stay crunchy and don’t release as much water, keeping your platter tidy.
Pair that crunch with the acidity of quartered cherry tomatoes and the salty, briny punch of Kalamata olives. The olives act as little “flavor bombs” that wake up the palate. Finally, the crumbled feta adds a creamy, sharp finish that ties the vegetables and the hummus together into one cohesive bite.
For a similarly juicy main course, consider making a Mediterranean grilled chicken bowl.
Step-by-Step: Building the Perfect Platter Base
Start by processing your lemon juice, garlic, and salt first. Let that mixture hang out for a couple of minutes. You’ll notice the aroma change from sharp and pungent to something much softer. Then, add your tahini and blend until it turns into a thick, pale paste before the chickpeas even enter the picture.
Once the chickpeas and cumin are in, let the processor run for a full 2 to 3 minutes. Patience is key here. You might think it’s done after 30 seconds, but the extra time ensures every bit of chickpea skin is pulverized. The mixture will look very thick and almost dry until you start adding that ice-cold water.
Achieving the High-Rim Plating Technique
Plating is where the “Loaded” part of the Loaded Mediterranean Hummus Platter really comes to life. Transfer the hummus to a large slate or flat plate. Use the back of a large spoon to swirl it in a circular motion, pushing the hummus toward the edges of the plate.
You want to create a high, textured rim around the outside and a deep “well” in the center. This well acts as a bowl for your toppings and olive oil. If your hummus has the right consistency, that rim will stand tall and won’t slump over, creating a beautiful, professional look.
The Order of Operations for Toppings
Don’t just throw everything on at once. Start by spooning your cucumber and tomato mixture into the center well. Because these are the heaviest and “wettest” ingredients, they need to be anchored in the middle. This prevents their juices from running all over the plate.
Next, scatter your olives and feta over the top. These smaller items fill in the gaps and add visual height. Finish with a heavy sprinkle of fresh parsley and a very generous drizzle of extra virgin olive oil. The oil should pool slightly in the crevices of the hummus, making it look irresistible.
Flavor Variations and Regional Swaps
Once you master the base, you can easily pivot the flavors. For a Spicy Levantine version, swirl a tablespoon of harissa paste into the hummus before plating and top with roasted red peppers. The smoky heat of the peppers pairs beautifully with the cool cucumber.
If you want something more vibrant, try a Herbal Green version. Blend a handful of fresh cilantro and mint directly into the hummus. This gives it a bright green hue and a refreshing flavor profile that is perfect for summer gatherings. You can even swap the feta for toasted pine nuts for an extra crunch.
What to Serve with Your Mediterranean Platter
While standard pita bread is the classic choice, toasted pita triangles offer a much better structural match for thick hummus. Brush them with a little olive oil and a sprinkle of za’atar before popping them in the oven for a few minutes. The crunch of the toast against the creamy dip is pure perfection.
For a lighter or lower-carb approach, vegetable dippers are fantastic. Carrot batons, radish coins, and endive leaves provide a sturdy “scoop” for the loaded toppings. Blanched asparagus spears also make an elegant addition to the platter, offering a sophisticated earthy flavor that complements the lemon and garlic.
Round Out Your Meal
To complete your Mediterranean spread, consider these complementary dishes.
- For a fresh and vibrant addition, try this Classic Greek Salad which shares the bright, zesty flavors of the region.
- If you’re looking for a heartier main to accompany your hummus platter, explore this Mediterranean Sheet Pan Chicken and Potatoes for a complete meal.
Troubleshooting Your Hummus Consistency
If your hummus feels grainy, it usually means one of two things: the chickpeas weren’t simmered long enough, or you didn’t process it for long enough. Try running the food processor for another two minutes. If it’s still grainy, add one more tablespoon of tahini to help smooth things out.
On the flip side, if the mixture is too thin, don’t panic. You can thicken it by adding more tahini or a few more chickpeas if you have them. Remember that hummus will also firm up slightly as it sits, so if it’s just a little bit loose, give it ten minutes on the counter before plating.
Managing Garlic Intensity
Garlic cloves vary wildly in strength depending on their age and variety. If you find the garlic flavor is still too strong for your liking, you can blanch the whole cloves in boiling water for one minute before adding them to the lemon juice. This further deactivates the enzymes that cause that sharp “burn.”
Alternatively, if you love garlic, you can add a third clove, but always stick to the lemon-soaking method. It ensures the flavor is distributed evenly throughout the dip rather than leaving you with spicy “hot spots” of raw garlic bits.
Preventing a Watery Topping Mix
One common mistake is having a “puddle” form in the middle of your platter after 20 minutes. This happens because tomatoes and cucumbers release water once they are salted. To prevent this, toss your diced veggies in a small bowl with a pinch of salt and let them sit for five minutes.
Drain off any excess liquid that collects at the bottom of the bowl before spooning the vegetables onto the hummus. This pro tip keeps your platter looking fresh and vibrant for the entire duration of your party, rather than becoming soggy halfway through.
Make-Ahead Strategies and Storage Logistics
You can absolutely make the hummus base up to three days in advance. In fact, the flavors often improve after a night in the fridge. Just store it in an airtight container and give it a good stir before plating. However, do not add the toppings until you are ready to serve.
The vegetables will lose their crunch and the feta will soften if they sit on the hummus for too long. For the best results, prep the hummus and chop the veggies ahead of time, but keep them in separate containers. When your guests arrive, you can assemble the whole “loaded” platter in less than two minutes.
Expert Plating FAQ
Can I use lime instead of lemon?
You can, but it will significantly change the flavor profile. Lemon has a bright, sunny acidity that is traditional to Mediterranean cooking. Lime is more “zesty” and tropical, which might clash with the cumin and tahini. If you’re in a pinch, it works, but lemon is definitely the superior choice for this specific platter.
Why is my hummus grey instead of pale yellow?
This usually happens due to oxidation or using a very dark, toasted tahini. To keep your hummus bright and pale, ensure you are using “light” tahini and that you incorporate the ice-cold water during the blending process. The aeration from the cold water is what creates that beautiful, light ivory color you see in professional kitchens.
How do I make this ahead for a party?
Make the hummus base and store it in the fridge. Chop your cucumbers, tomatoes, and parsley, and keep them in separate airtight containers. About 15 minutes before serving, take the hummus out to take the chill off, then assemble the platter. This ensures the base is creamy and the toppings are perfectly crisp.
Can I freeze the hummus base?
Yes, you can freeze the plain hummus base for up to two months. However, the texture may change slightly upon thawing, becoming a bit more grainy. To fix this, simply pop the thawed hummus back into the food processor with a tiny splash of cold water and blend until it regains its creamy consistency. Never freeze the hummus with the toppings already on it.
What if my tahini is too bitter?
High-quality tahini should be nutty and slightly sweet, but some brands can be quite bitter. If your batch tastes too sharp, add a tiny drizzle of honey or maple syrup (just half a teaspoon) to the food processor. The hint of sweetness will neutralize the bitterness without making the hummus taste sugary.

Hummus
Course: AppetizerCuisine: MediterraneanDifficulty: easy6
servings20
minutes5
minutes265
kcal25
MinutesThis authentic Mediterranean platter features a thick, structured hummus base achieved by simmering chickpeas with baking soda. It is served on a flat platter with a deep well to hold a mountain of fresh toppings and a generous drizzle of olive oil.
Ingredients
2 cans (15 oz each) chickpeas, drained and rinsed
1/2 teaspoon baking soda (for simmering)
1/2 cup premium tahini, well-stirred
1/4 cup fresh lemon juice
2 cloves garlic, smashed and peeled
1/2 teaspoon salt
1/2 teaspoon ground cumin
2-3 tablespoons ice-cold water
1/2 cup English cucumber, finely diced
1/2 cup cherry tomatoes, quartered
1/4 cup whole and sliced Kalamata olives
1/4 cup crumbled feta cheese
2 tablespoons fresh parsley, roughly chopped
2 tablespoons extra virgin olive oil
Pita triangles and carrot batons for serving
Directions
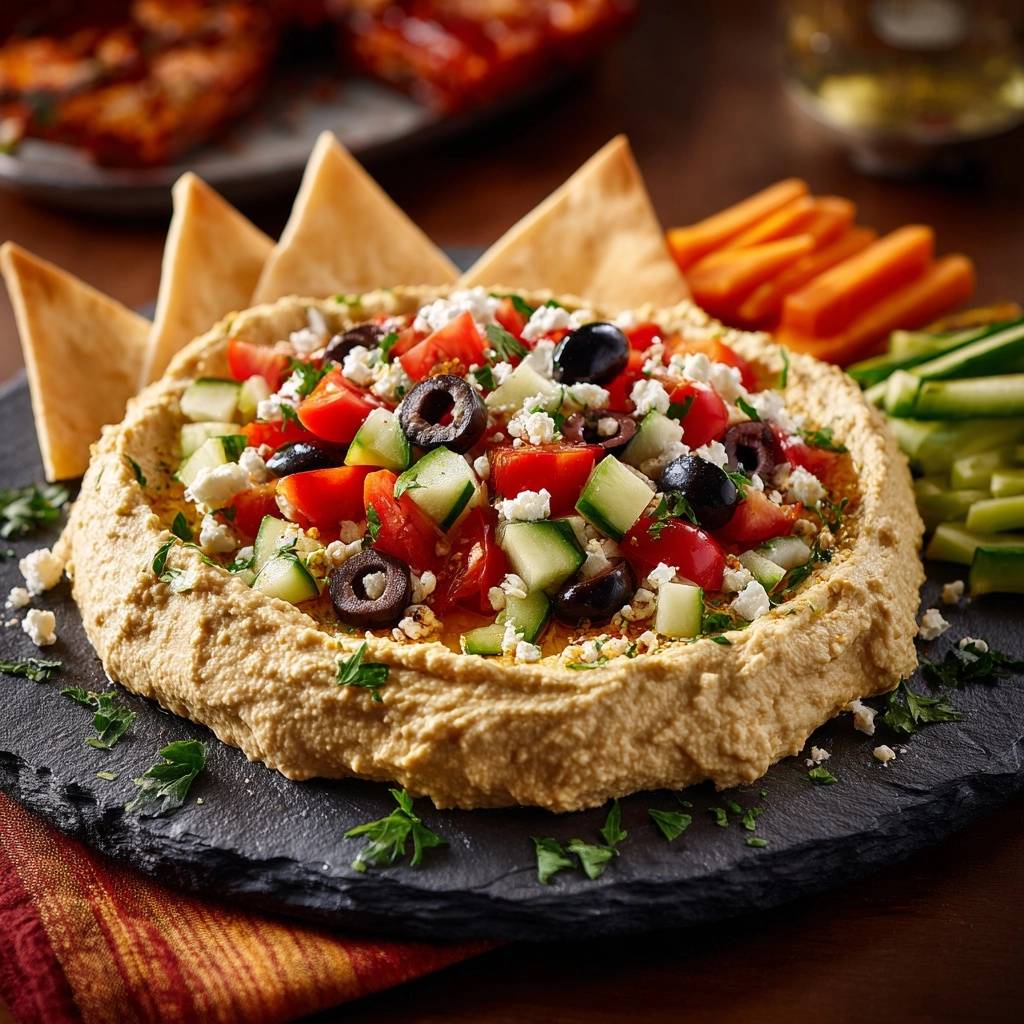
- To achieve the thick, structured texture seen in the image, place the rinsed chickpeas in a small pot, cover with water, and add the baking soda. Simmer for 5 minutes. This softens the outer skins just enough to ensure creaminess without losing the “body” of the dip. Drain and rinse with cool water.
- In a food processor, combine the lemon juice, garlic, and salt. Process for 30 seconds. Let the mixture sit for 2 minutes to allow the lemon juice to “mellow” the raw garlic bite.
- Add the tahini to the processor and blend until the mixture is thick and pale.
- Add the softened chickpeas and cumin. Process for 2-3 minutes. The mixture will be very thick.
- While the motor is running, drizzle in the ice-cold water one tablespoon at a time. Stop as soon as the hummus is pale and smooth but still stiff enough to hold a peak. Do not over-thin; the hummus in the image is structurally sound and thick.
- Transfer the hummus to a slate or flat platter. Use the back of a large spoon to spread it into a thick circle, pushing the hummus outward to create a high, textured rim and a deep well in the center.
- In a small bowl, toss the diced cucumbers and tomatoes. Spoon them generously into the center well.
- Scatter the whole and sliced olives and the crumbled feta over the top.
- Garnish with a heavy sprinkle of chopped parsley and a generous drizzle of extra virgin olive oil. Serve with toasted pita triangles and carrot sticks as pictured.
Notes
- The secret to the rustic texture is the high ratio of tahini and the use of ice-cold water added slowly to maintain structural integrity.