For years, I struggled with homemade rolls that were irresistibly delicious while warm but became disappointingly dense and dry the moment they cooled. Mastering the technique of delayed butter incorporation was my breakthrough, guaranteeing an open, moist crumb every time.
For a different kind of comforting bake, check out this Old-Fashioned Gingerbread Cake.
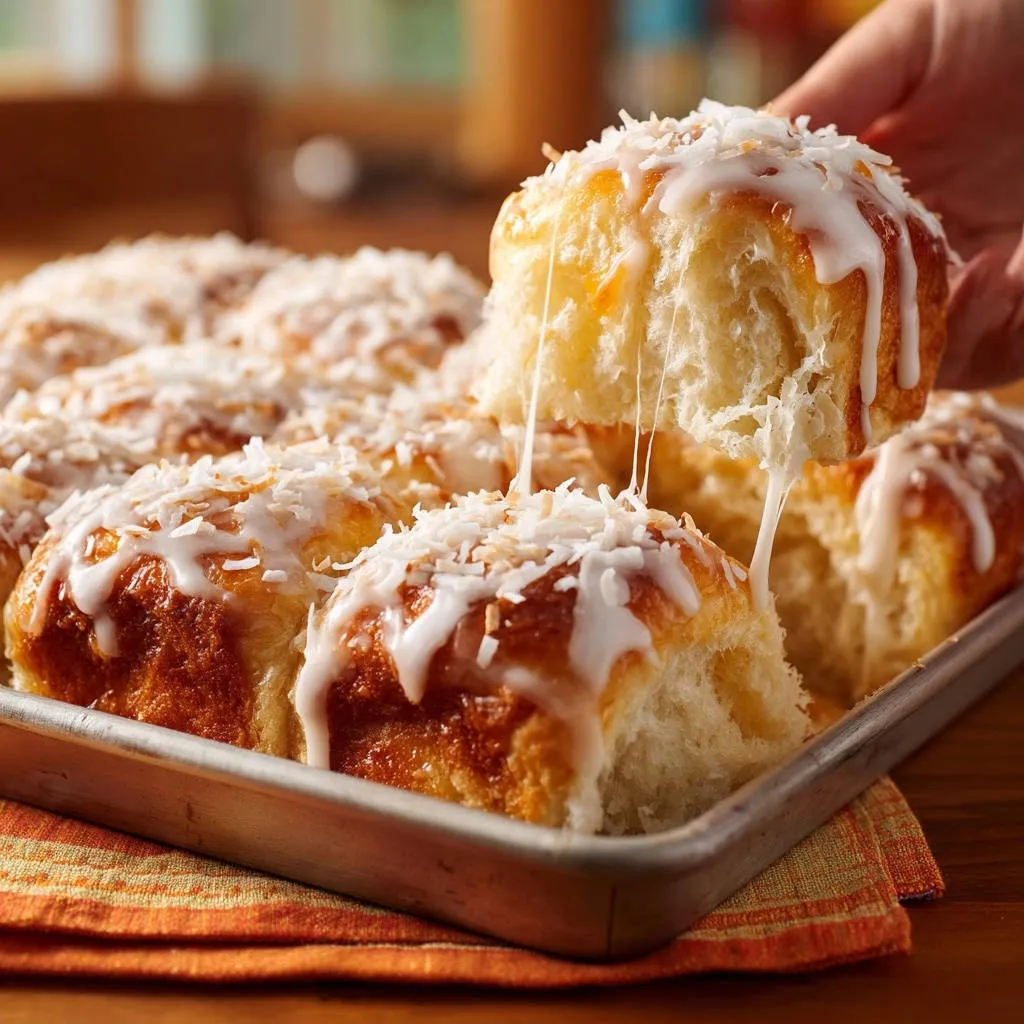
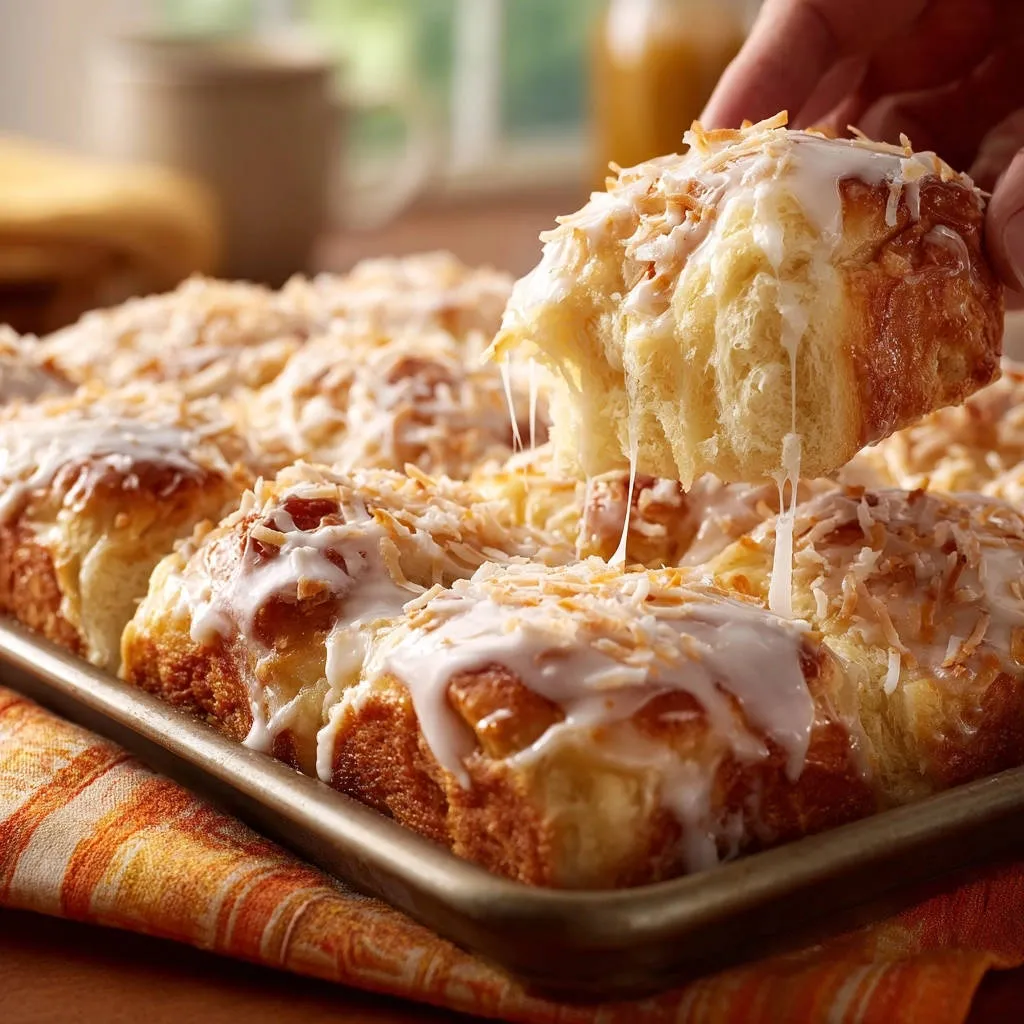
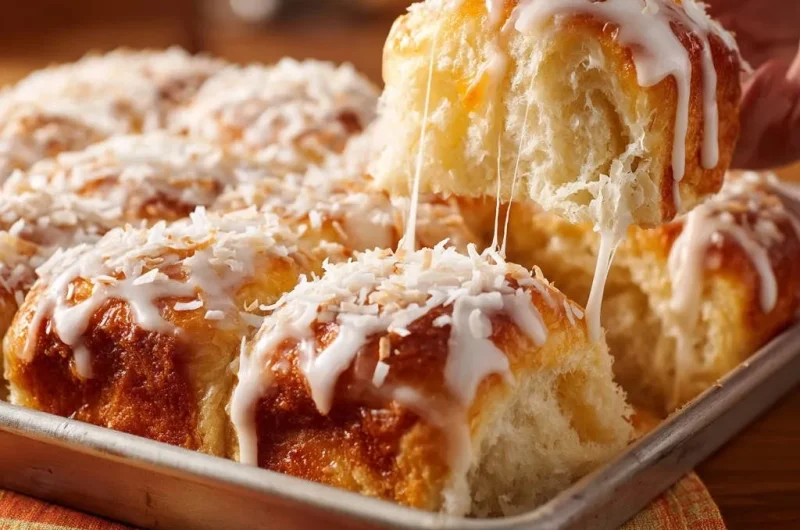
This method is the secret weapon behind these unforgettable Tropical Coconut Pull-Apart Rolls, yielding a cottony soft texture perfectly balanced by bright coconut flavor and a decadent glaze. You are about to bake the fluffiest rolls of your life.
Why This Recipe Rises Above the Rest (And Achieves “Cottony Soft” Status)
The Fluffiness Technique: Understanding Delayed Butter Incorporation
The standard bread method instructs you to add all fats at the beginning, but this hinders the initial development of strong gluten strands needed for structure.
For a wonderfully flaky crust on your next bake, check out glazed pecan cinnamon rolls.
In this specialized technique, we knead the dough slightly before introducing the butter. This allows the essential gluten network to develop, giving the dough foundational strength.
Adding the softened butter afterward interrupts the gluten development process and coats the strands, resulting in what bakers call an “enriched dough.” This high-fat inclusion creates an open, rich, and tender crumb structure that resists drying out.
A Flavor Vacation: Capturing Authentic Tropical Sweetness
Many sweet roll recipes rely only on vanilla, but these rolls transport you straight to the tropics with layered flavor.
Beyond the Rolls
Looking for more sweet treats to enjoy?
- For a breakfast or brunch option with a warm spice, consider these Cinnamon Sugar Waffles, offering a delightful crispness.
- If you enjoy tender baked goods with a hint of sweetness, these Glazed Carrot Walnut Muffins are a great choice.
The coconut extract, though optional, provides a deep, authentic coconut note infused directly into the dough.
Combined with the textural contrast of the lightly toasted shredded coconut on top, the flavor profile is bright, unique, and perfectly balanced against the rich, soft interior.
Speed and Simplicity: Making Artisan Rolls Accessible
While the texture of these rolls feels highly professional, the process itself is surprisingly straightforward.
Once you understand the ‘delayed butter’ concept, the remaining steps are standard for enriched doughs. No complex folds or shaping techniques are required; just simple rolling into balls.
Essential Tools for Your Tropical Baking Success
While these rolls can be made by hand, the right tools ensure consistency, especially during the long kneading process required for high-fat doughs.
Stand Mixer with Dough Hook: This is highly recommended for achieving proper gluten development without exhausting yourself during the 8-10 minutes of post-butter kneading.
9×13 Inch Baking Pan: This size is mandatory. It ensures the rolls are packed tightly enough to rise upward and pull apart easily without becoming overly flat.
Kitchen Scale: For truly consistent results, weighing the flour (rather than relying on volume measures) guarantees you hit the precise moisture ratio needed for a soft dough.
Wire Whisk and Silicone Brush: Essential for quickly activating the yeast and evenly coating the rolls with the sugar and butter mixture before baking, encouraging beautiful caramelization.
Gathering Your Tropical Ingredients: A Pantry Checklist
The Foundation of Fluff: Yeast, Milk, and Sweeteners
Use instant dry yeast, as it can be mixed directly with the liquid and sugar without needing to ‘proof’ separately, though we let it sit until foamy to confirm its vitality.
Whole milk is crucial; the higher fat content enriches the dough, contributing directly to the final tenderness and flavor.
Ensure the milk is just warm (around 105°F to 115°F), never hot, or you risk killing the yeast, which leads immediately to dense rolls.
Elevating the Dough: Flour, Butter, and Coconut Flavor Boost
All-purpose flour works perfectly here, providing enough protein for structure without the chewiness of bread flour.
The six tablespoons of unsalted butter must be truly soft and cubed to be easily incorporated one piece at a time during the critical delayed kneading stage.
The optional coconut extract concentrates the tropical flavor within the dough itself, offering an aromatic foundation that complements the toasted coconut topping.
Crafting the Sweet Topping and Signature Glaze
The pre-bake coating, a simple mixture of melted butter and sugar, promotes deep golden-brown tops and a slightly caramelized crust when baked.
The final glaze, made from powdered sugar and liquid, locks in moisture and adds necessary sweetness after baking.
Toasted coconut adds both crunch and a deeper, nuttier tropical note; toast it gently in a dry pan or quick oven until just lightly golden for maximum fragrance.
Tropical Coconut Pull-Apart Rolls: A Detailed Guide to Perfection
-
Building the Base and Activating the Yeast:
In a large mixing bowl, gently whisk the warm milk, yeast, and granulated sugar together. The milk should feel warm to the touch, not hot.
Allow this mixture to rest for 5 to 10 minutes. It should become distinctly foamy or frothy; this effervescence confirms the yeast is alive and ready to work. Add the lightly beaten egg, vanilla, and coconut extract.
-
Starting the Dough Structure:
Whisk the measured flour and salt together in a separate bowl to ensure even distribution. Gradually incorporate the dry ingredients into the wet mixture, mixing only until a shaggy, uneven dough forms.
Do not over-mix at this stage; we need a basic structure before we enrich it with fat.
-
Mastering the Delayed Butter Kneading Technique (The Secret Step):
Turn the shaggy dough out onto a lightly floured surface. Knead the dough vigorously for about 5 minutes, establishing the initial gluten structure.
Now, begin incorporating the softened butter, adding only one cube at a time. The dough will become very messy and slick initially-do not be tempted to add flour.
Continue kneading until each cube is fully absorbed and the dough is soft but manageable before adding the next piece. Knead for an additional 8 to 10 minutes until the dough is silky smooth, elastic, and passes the windowpane test.
-
First Rise: Monitoring the Dough’s Doubling Time:
Place the newly enriched dough in a lightly oiled bowl, turning to coat all sides, and cover tightly with plastic wrap.
Find a warm, draft-free location (like an oven with the light on) and let the dough rise until precisely doubled in size, which typically takes between 60 to 90 minutes, depending on the ambient temperature.
-
Shaping, Arranging, and Preparing the Rolls:
Gently punch down the dough to release the air. Divide the dough into 12 equal portions-use a scale if possible for perfectly uniform rolls.
Roll each portion into a smooth, tight ball and arrange them snugly in a greased 9×13 inch baking pan. Close proximity ensures they rise against each other, staying tall and fluffy.
-
The Final Proofing and Pre-Bake Coating:
Whisk together the melted butter and sugar coating. Brush this mixture generously over the tops of the rolls.
Cover the pan loosely and allow the rolls to rest for their crucial second rise for about 30 to 45 minutes until noticeably puffy. Preheat your oven to 350°F during the last 15 minutes of proofing.
-
Baking to a Deep Golden Finish:
Bake the Tropical Coconut Pull-Apart Rolls for 20 to 25 minutes. The goal is a deep, rich golden-brown color, which indicates full caramelization and proper internal cooking.
If the rolls begin to brown too quickly, immediately tent the pan loosely with aluminum foil for the remainder of the baking time to prevent burning the tops.
-
Glazing and Finishing with Toasted Coconut:
Remove the rolls from the oven and let them cool for only about 10 minutes. While they are cooling, whisk together the powdered sugar and milk/cream until smooth.
Drizzle the glaze over the warm rolls and immediately sprinkle the toasted coconut over the wet glaze before it has a chance to set, ensuring maximum adhesion and flavor.
Chef’s Secrets: Elevate Your Pull-Apart Roll Game
The Windowpane Test Explained: How to Check for Proper Gluten Development
The windowpane test is the definitive measure of properly developed gluten structure after kneading the butter in. Pinch a small piece of dough and gently stretch it with your fingers.
If you can stretch the dough thin enough to see light pass through it without tearing-like a taut membrane-the dough is properly kneaded and elastic. If it tears easily, continue kneading for another 2-3 minutes.
Why Temperature is King: Achieving a Consistent Rise
Yeast is highly sensitive to temperature. The ideal environment for proofing is consistently warm, around 75°F to 80°F.
If your kitchen is cold, use a trick: place the covered bowl in a cold oven with the oven light turned on; the bulb generates just enough consistent heat to encourage a quick, reliable rise.
Ingredient Precision: Weighing vs. Measuring Flour
Flour can be easily over-measured when scooped, potentially adding an extra half-cup of dry ingredients and leading directly to dense, dry rolls.
To prevent this common baking pitfall and ensure your rolls are never dense, use a kitchen scale to measure the flour precisely (390-410 grams is ideal for 3 1/4 cups).
Preventing a Sticky Situation: Handling the High-Fat Dough
The dough is significantly wetter and stickier immediately after incorporating the butter, which is normal for an enriched formula.
Avoid the temptation to add excessive flour; use a bench scraper to gather the dough and only a very light dusting of flour on your hands and surface until the dough eventually smooths out with continued kneading.
Solving Common Baking Queries (FAQ)
Can I substitute a different type of flour?
While you can use bread flour, it contains more protein, which will lead to a slightly chewier roll, compromising the desired cottony-soft texture.
We highly advise against whole wheat flour, as the bran cuts the gluten strands, making it nearly impossible to achieve the required lightness in these sweet pull-apart rolls.
My rolls came out dense-what went wrong?
Density is usually traced back to inadequate kneading, specifically after the butter was added. You must develop a strong gluten network to support the high-fat content.
Ensure your dough passes the windowpane test, indicating it can hold its structure during the rise and the bake.
How do I properly toast the shredded coconut without burning it?
The easiest method is the stovetop: place the coconut in a dry (no oil needed) skillet over medium-low heat.
Toss or stir constantly for 3 to 5 minutes until the flakes turn light golden and become highly fragrant. Remove immediately from the pan to stop the cooking process.
What are the best non-dairy substitutes for milk in this recipe?
For high-fat alternatives that maintain the tenderness, full-fat oat milk or enriched soy milk work best in yeast doughs.
If using lighter non-dairy milks, you may consider adding an extra teaspoon of melted vegan butter or oil to the recipe to compensate for the lost fat content.
Serving, Storage, and Make-Ahead Brilliance
Best Ways to Serve for Maximum Fluffiness
These Tropical Coconut Pull-Apart Rolls are truly best enjoyed while still warm, allowing the fat and sugar within the dough to contribute to the ultimate soft experience.
Serve them immediately after glazing alongside strong coffee or a vibrant tropical fruit platter for a perfect brunch spread.
Storage and Reheating Guidelines for Leftovers
Store leftover rolls, fully cooled, in an airtight container at room temperature for up to three days. The high-fat dough helps them stay fresh longer than standard rolls.
To revive the cottony texture, reheat individual rolls in the microwave for 15-20 seconds, or heat the entire pan, covered loosely with foil, in a 300°F oven for 10 minutes.
Can I Prepare the Dough Ahead of Time?
Yes, this recipe is excellent for make-ahead baking. Complete the mixing and kneading through Step 3.
Instead of the first rise at room temperature, place the oiled, covered dough in the refrigerator for a slow cold proof overnight (up to 24 hours). The next morning, let the dough warm up for 30-60 minutes before punching down and proceeding with the shaping and second rise.
Ready to Bake? Share Your Tropical Creation!
The secret to incredible, non-dense baked goods lies in understanding foundational techniques like delayed butter incorporation.
Once you try this revolutionary method for these soft Tropical Coconut Pull-Apart Rolls, you’ll never settle for a dry, disappointing roll again. Go ahead, experience the fluffiness, and bring a little tropical vacation to your kitchen today!
Pull-Apart Rolls
Course: DessertCuisine: AmericanDifficulty: medium4
12 rolls45
minutes25
minutes450
kcal180
minutesThese rolls are unbelievably soft, thanks to a key technique involving delayed butter incorporation. They feature a hint of tropical flavor with coconut extract and are finished with a sweet glaze and toasted coconut topping. You’ll never buy rolls again!
Ingredients
For the Rolls:
1 cup whole milk, slightly warmed (not hot)
2 1/4 teaspoons instant dry yeast
1/4 cup granulated sugar
1 large egg, lightly beaten
1 teaspoon vanilla extract
3 1/4 cups all-purpose flour, plus more for dusting
1 teaspoon fine sea salt
6 tablespoons unsalted butter, softened and cubed
2 tablespoons coconut extract (optional, for flavor boost)
For the Topping:
1/4 cup melted butter
1/4 cup granulated sugar
1/2 cup shredded coconut, lightly toasted
For the Glaze:
1 1/2 cups powdered sugar
3 tablespoons whole milk or heavy cream
Directions
- Activate the Yeast: In a large bowl, whisk together the warm milk, yeast, and the 1/4 cup of granulated sugar. Let this mixture sit for 5 to 10 minutes until foamy. Add the beaten egg, vanilla extract, and coconut extract (if using).
- Start the Dough: In a separate bowl, whisk the flour and salt together. Gradually add the dry mixture to the wet mixture, mixing until a shaggy dough forms.
- The Fluffiness Technique (Delayed Butter Incorporation): Turn the dough out onto a lightly floured surface. Knead the dough for about 5 minutes until it just starts to smooth out. Now, begin incorporating the softened butter, adding one cube at a time, kneading until each piece is fully absorbed before adding the next. This high-fat inclusion, added after initial gluten development, is the key to creating an open, fluffy, and rich crumb structure. Knead for an additional 8 to 10 minutes until the dough is very smooth, soft, and elastic (it should pass the windowpane test).
- First Rise: Place the dough in a lightly oiled bowl, turning to coat. Cover tightly with plastic wrap and let it rise in a warm, draft-free spot until doubled in size, approximately 1 hour to 1 hour 30 minutes.
- Shape and Second Rise: Gently punch down the dough and divide it into 12 equal pieces. Roll each piece into a smooth, tight ball. Arrange the balls tightly in a greased 9×13 inch baking pan.
- Prepare the Coating and Proof: Whisk together the 1/4 cup melted butter and 1/4 cup sugar. Brush this mixture generously over the rolls. Cover the pan loosely and let the rolls rest for a second rise, about 30 to 45 minutes, until puffy. Preheat the oven to 350 degrees F.
- Bake: Bake the rolls for 20 to 25 minutes, or until the tops are deeply golden brown. If they begin browning too quickly, lightly tent the pan with aluminum foil.
- Glaze and Finish: While the rolls are cooling slightly (about 10 minutes), whisk together the powdered sugar and 3 tablespoons of milk or cream until smooth. Drizzle the glaze generously over the warm rolls. Sprinkle immediately with the toasted shredded coconut before the glaze sets. Serve warm for maximum fluffiness.
Notes
- The key to softness is incorporating the butter one cube at a time after the initial gluten development stage.