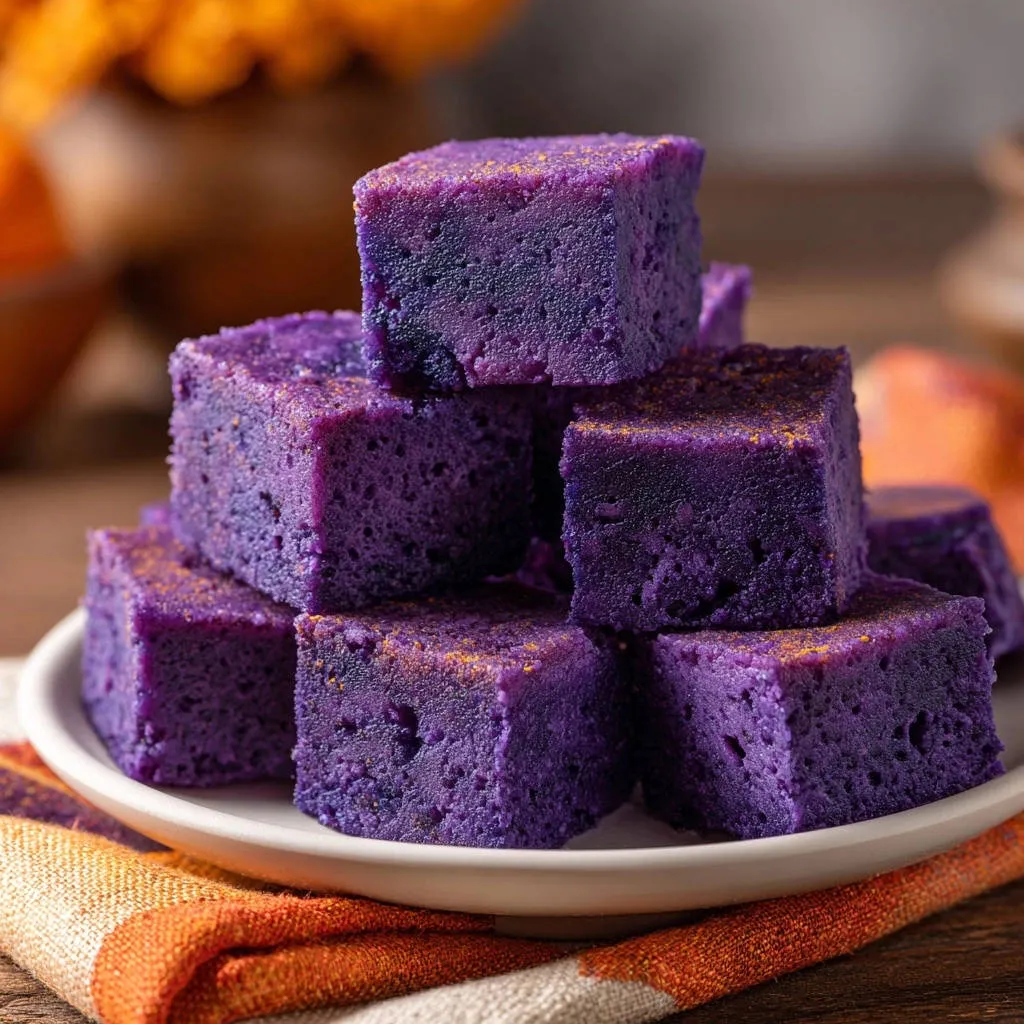
Many home bakers discover the unique challenge of ube: achieving that ethereal, moist texture without it becoming disappointingly dense. After years of perfecting, I’ve finally cracked the code to creating the most wonderfully fluffy Ube Cake Squares that truly melt in your mouth, a vibrant purple delight everyone will adore.
This recipe promises a tender, light crumb every single time, transforming the often tricky ube into an effortless baking triumph.
Mastering Ube: Why This Recipe Guarantees Light & Fluffy Cake Squares
The “Never Dense” Promise: Our Secret Baking Philosophy
The common pitfall with ube cakes is ending up with a heavy, dense texture. Our specific techniques, particularly the creaming of butter and sugar and a unique alternating mixing method, meticulously incorporate air into the batter.
This careful process directly combats density, resulting in a cake that’s consistently light and airy.
Unlocking Authentic Ube Flavor and Vibrant Color
This recipe thoughtfully combines both ube halaya and ube extract to deliver a truly authentic experience. The ube halaya provides a rich, sweet, and earthy base, while the extract intensifies that distinct ube flavor and boosts its iconic purple hue.
This dual approach ensures both deep flavor and stunning visual appeal in every bite.
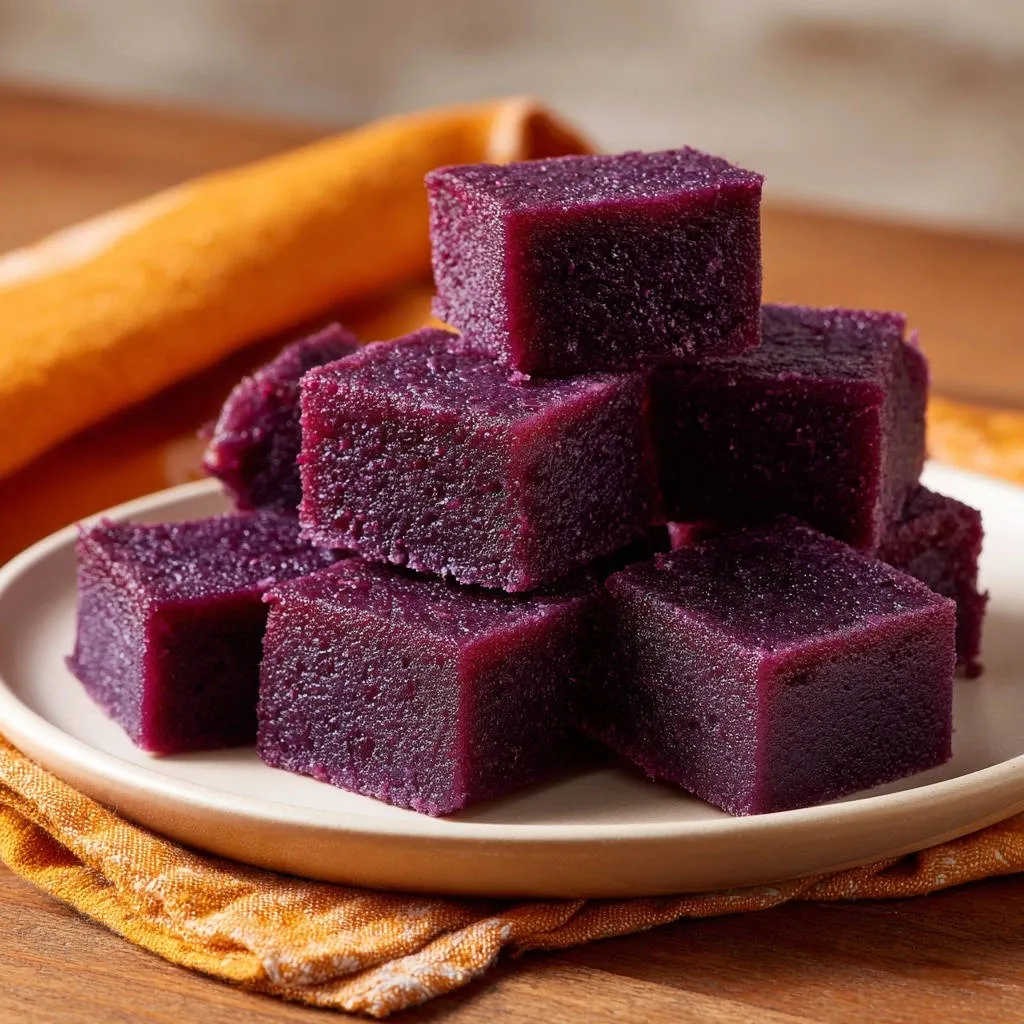
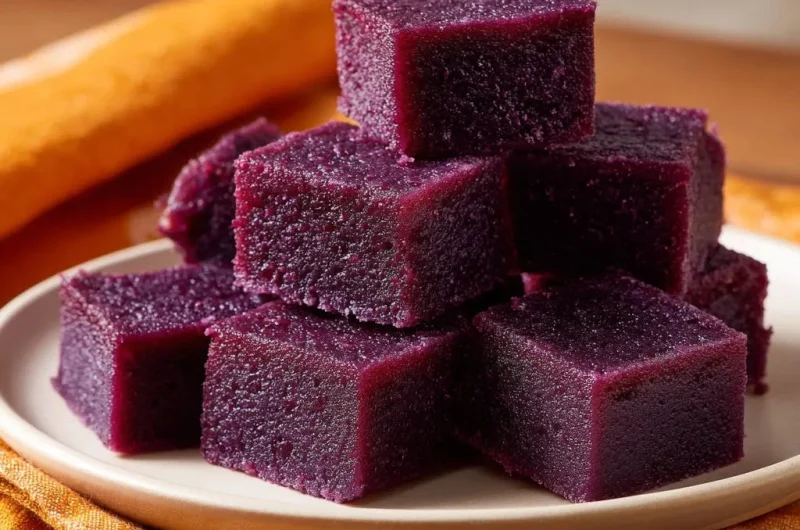
Perfectly Portioned: The Joy of Individual Cake Squares
Serving this delightful dessert as individual cake squares offers both convenience and elegance. They are ideal for easy grab-and-go treats, perfectly portioned snacks, or a charming addition to any dessert platter.
The neat squares make sharing effortless and presentation beautiful.
The Heart of the Recipe: Essential Ingredients for Ube Cake Squares
Foundation of Flour & Leavening: Achieving the Perfect Lift
All-purpose flour provides the necessary structure for our Ube Cake Squares, creating a tender yet stable foundation. Baking powder is the leavening agent responsible for the cake’s beautiful rise and airy texture.
A touch of salt balances the sweetness and enhances all the flavors.
The Creamy Core: Butter & Sugar’s Role in Texture
Softened unsalted butter is crucial for proper creaming, allowing it to easily whip with granulated sugar. This creaming process incorporates air, a fundamental step for achieving a light and tender crumb in the finished cake.
Purple Power: Ube Halaya & Extract for Flavor and Hue
Ube halaya, a sweet purple yam jam, provides the primary, authentic ube flavor and much of its natural purple color. Ube extract further intensifies both the vibrant purple hue and the distinct, subtly sweet taste of the ube.
Together, they create the signature taste and look of these delicious purple yam cake squares.
Moisture Makers: Eggs & Milk for a Tender Crumb
Large, room temperature eggs act as a binder, add richness, and contribute to the cake’s structure. Milk, whether whole milk or coconut milk, provides essential moisture, ensuring a tender and succulent crumb.
Coconut milk also adds a subtle tropical note that beautifully complements the ube.
A Touch of Vanilla: The Classic Flavor Enhancer
Vanilla extract works as a classic flavor enhancer, subtly rounding out the complex taste of the ube. It adds a warm, comforting note without overpowering the star ingredient.
Gearing Up: Tools for Seamless Ube Cake Square Baking
Having the right tools ready makes the baking process enjoyable and efficient. Here are the essentials for crafting your perfect Ube Cake Squares:
Baking Pan Perfection: Size Matters for Even Baking
An 8×8 inch baking pan is ideal for this recipe, ensuring the cake bakes evenly to the perfect thickness. Preparing it with grease, flour, and a parchment paper overhang guarantees easy, clean removal once baked.
Mixing Magic: Electric Mixer vs. Hand Whisk
An electric mixer is invaluable for creaming the butter and sugar until light and fluffy, efficiently incorporating air. For adding dry ingredients and milk, a hand whisk or spatula allows for gentle mixing, preventing over-development of gluten.
From Bowls to Spatulas: Essential Kitchen Companions
You’ll need several mixing bowls of varying sizes, precise measuring cups and spoons for accuracy, and a flexible rubber spatula for scraping bowls and gently folding. A wire rack is also crucial for cooling the cake completely, preventing it from becoming soggy.
Crafting Your Ube Cake Squares: A Step-by-Step Culinary Journey
- Prepare Your Pan & Preheat the Oven:
Set your oven to 350°F (175°C) and meticulously prepare an 8×8 inch baking pan with grease and flour, or line it completely with parchment paper leaving an overhang on two sides. This critical step ensures the cake won’t stick and allows for effortless removal.
- Combine Dry Ingredients:
In a medium bowl, thoroughly whisk together the all-purpose flour, baking powder, and salt. This initial blending prevents pockets of leavening agents and ensures a uniform rise and even distribution of flavor throughout the cake.
- Cream Butter & Sugar for Fluffiness:
In a large bowl, using an electric mixer, cream the softened unsalted butter and granulated sugar together on medium speed until the mixture is visibly light, pale, and fluffy (about 2-3 minutes). This crucial step incorporates significant air, which is fundamental for achieving a tender, non-dense crumb in your ube cake.
- Incorporate Wet Flavors:
Beat in the large eggs one at a time, mixing well after each addition until fully incorporated. Then, stir in the vanilla extract, ube halaya, and ube extract until just combined. Don’t be alarmed if the mixture appears slightly curdled at this point; it’s perfectly normal.
- The Alternating Secret to a Light Batter:
Now for the secret to a perfectly light batter: gradually add the whisked dry ingredient mixture to the wet ingredients, alternating with the milk. Begin by adding about one-third of the flour, mix on low speed just until almost combined. Then, add half of the milk, mixing briefly. Repeat with another third of the flour, then the remaining milk, and finally the last of the flour.
- Avoid Overmixing: The Golden Rule:
Stop mixing as soon as the last streaks of flour disappear. Overmixing develops gluten, which directly leads to a dense, tough cake texture. If necessary, gently fold any remaining flour by hand with a spatula, ensuring the batter remains thick but light and beautifully purple.
For a similar focus on avoiding moisture issues, check out this perfect Tres Leches cake.
- Pour & Bake:
Pour the prepared batter evenly into your 8×8 inch baking pan, gently spreading it to the corners to ensure an even bake. Bake for 25-30 minutes, or until a wooden skewer or toothpick inserted into the center comes out completely clean, indicating it’s fully cooked and moist inside.
- Cooling for Structure:
Let the baked cake cool in the pan on a wire rack for 10-15 minutes. This allows the cake’s delicate structure to set and firm up before you attempt to remove it. Afterward, carefully lift the cake out using the parchment paper overhang and transfer it to the wire rack to cool completely to room temperature.
- Slice & Serve Your Purple Delights:
Once the Ube Cake has completely cooled to room temperature, use a sharp, non-serrated knife to cut it into desired squares. For an optional elegant touch, lightly dust with ube powder or fine granulated sugar just before serving, enhancing its visual appeal and adding a hint of extra sweetness.
Elevate Your Ube Cake Squares: Expert Tips for Perfection
Room Temperature Ingredients: The Unsung Hero
Ensuring ingredients like butter and eggs are at room temperature (around 68-70°F or 20-21°C) is more important than you might think. This allows them to emulsify properly, creating a smoother, more uniform batter that traps air efficiently, leading to a much better texture.
The Art of Creaming: Don’t Rush This Step
The creaming of butter and sugar until it’s truly light and fluffy is not just a suggestion; it’s a critical step. This process is where the majority of the air responsible for your cake’s tenderness is incorporated, so take your time and don’t cut it short.
Gentle Folding: Protecting That Air!
Always adhere to the “stop mixing as soon as combined” rule, especially when adding dry ingredients. Overmixing develops gluten, leading to a tough cake. Gently folding in any remaining dry streaks with a spatula is key to maintaining the delicate air you’ve built into the batter, ensuring a light and fluffy result.
Testing for Doneness: Beyond the Skewer
While the wooden skewer test is reliable, also look for other cues: the cake should spring back when lightly touched in the center, and the edges might begin to pull away slightly from the sides of the pan. These indicators together ensure your cake is perfectly baked, neither under nor overdone.
Enhancing Ube Flavor & Color: Beyond the Basics
To achieve an even more intense purple or deeper flavor, consider using a high-quality ube food coloring (gel works best) for a vibrant hue. You can also experiment with different brands of ube halaya, as their intensity can vary, to find your preferred depth of flavor.
Baking Blunders Busted: Common Ube Cake Square Problems Solved
Why is My Ube Cake Dense and Dry?
A dense and dry ube cake is often a sign of overmixing the batter, which develops too much gluten. It can also result from using too much flour or simply overbaking the cake. Ensure your ingredients are measured precisely and you stop mixing as soon as the flour disappears.
My Cake Isn’t as Purple as I’d Hoped!
The intensity of ube color can vary significantly depending on the brand and natural pigments of your ube halaya and extract. For a more vibrant hue, consider adding a small amount of ube-specific gel food coloring; it delivers concentrated color without altering the batter consistency.
The Cake Sunk in the Middle! What Happened?
A sunken cake often indicates underbaking, meaning the center didn’t fully set. Opening the oven door too early during baking can also cause a sudden temperature drop and collapse. Always ensure your skewer comes out clean, and try to avoid disturbing the oven until the last 5-10 minutes of baking.
Why Are My Cake Squares Sticky or Gummy?
If your Ube Cake Squares turn out sticky or gummy, it’s typically a result of overmixing the batter. This process develops the gluten, leading to a chewy, gummy texture rather than a light and tender one. Ensure you mix only until the ingredients are just combined, and no longer.
Beyond the Oven: Serving Suggestions & Storage for Your Ube Cake Squares
Creative Ways to Serve Your Ube Delights
For a simple yet elegant touch, dust your cooled Ube Cake Squares with a light layer of powdered sugar or fine granulated sugar. A dollop of freshly whipped cream or a sprinkle of toasted coconut flakes makes for a delightful pairing.
For an ultimate ube experience, serve them alongside a scoop of creamy ube ice cream.
Storing Your Fluffy Ube Cake Squares for Freshness
To maintain their moisture and delicious texture, store your Ube Cake Squares in an airtight container at room temperature for up to 2-3 days. If you need to keep them longer, they can be refrigerated for up to 5-7 days; bring them to room temperature before serving for optimal flavor.
Can I Make Ube Cake Squares Ahead of Time or Freeze Them?
Yes, this cake can be baked a day in advance, allowing flavors to meld beautifully. For longer storage, individual squares or the whole cooled cake can be tightly wrapped in plastic wrap and then foil, then frozen for up to 2-3 months. Thaw overnight in the refrigerator before serving. If you enjoy preparing desserts in advance, you might also love our no-bake peanut butter bars that are perfect for making ahead.
Your Ube Cake Squares Questions Answered: FAQs
What is ube halaya and where can I find it?
Ube halaya is a sweet, jam-like spread made from mashed purple yam, often cooked with coconut milk and sugar. It’s a staple in Filipino desserts and can commonly be found in the international aisle of larger grocery stores, specialty Asian markets, or conveniently online through various food retailers.
Can I make this recipe gluten-free or dairy-free?
Yes, you can absolutely adapt this recipe. For a gluten-free version, substitute a 1:1 gluten-free baking flour blend, ensuring it contains xanthan gum. For dairy-free Ube Cake Squares, swap regular milk for coconut milk or almond milk, and use a high-quality plant-based butter. While the texture might slightly vary, the flavor will still be wonderfully ube. For more dairy-free ideas, check out our guide to delicious coconut bars.
Is ube extract necessary, or can I skip it?
While ube halaya provides the primary ube flavor, ube extract plays a significant role in intensifying both the vibrant purple color and the distinct, slightly nutty taste of the ube. It’s highly recommended for achieving the most authentic and visually appealing Ube Cake Squares.
How can I make the cake even more moist?
To ensure maximum moisture, first and foremost, avoid overbaking your cake by meticulously watching the bake time and using the skewer test. Using full-fat milk will also contribute to a richer, moister crumb. Additionally, a touch more ube halaya can boost richness, but be mindful of batter consistency. For more tips on achieving the perfect texture, explore our classic lemon cake guide.
Can I use fresh ube instead of ube halaya?
While technically possible, using fresh ube instead of ube halaya would add significant prep time to this recipe. Fresh ube needs to be peeled, boiled until tender, then mashed and sweetened before it can be incorporated into the cake batter. Ube halaya is specifically used in this recipe for its convenience and consistent texture, making the baking process much simpler.
Ready to Bake? Share Your Ube Cake Squares Masterpiece!
Your Journey to Perfectly Fluffy Ube Cake Starts Now
You now have all the knowledge and expert tips to confidently create the most wonderfully fluffy and flavorful Ube Cake Squares at home. Say goodbye to dense cakes and hello to tender, melt-in-your-mouth perfection.
Embrace the vibrant purple magic and delight everyone with this exceptional dessert.
Join Our Community: Share Your Ube Baking Success!
I can’t wait to see your beautiful creations! Try this recipe for Ube Cake Squares and share your results in the comments below, or tag us on social media.
Connect with fellow ube enthusiasts and celebrate your baking triumphs together!
Ube Cake
Course: DessertCuisine: AsianDifficulty: medium9
squares20
minutes25
minutes240
kcal60
minutesDiscover the secret to perfectly fluffy Ube Cake Squares that are moist and tender. This recipe ensures a light, melt-in-your-mouth texture every time, avoiding common baking pitfalls. Get ready to enjoy beautiful purple treats!
Ingredients
1.5 cups all-purpose flour
1 teaspoon baking powder
0.5 teaspoon salt
0.5 cup unsalted butter, softened
1 cup granulated sugar
2 large eggs, room temperature
1 teaspoon vanilla extract
0.5 cup ube halaya (purple yam jam)
1 teaspoon ube extract (for enhanced color and flavor)
0.5 cup milk (whole milk or coconut milk)
Optional: A pinch of ube powder or fine granulated sugar for dusting
Directions
- Preheat your oven to 350°F (175°C). Lightly grease and flour an 8×8 inch baking pan, or line with parchment paper leaving an overhang for easy removal.
- In a medium bowl, whisk together the flour, baking powder, and salt. Set aside.
- In a large bowl, using an electric mixer, cream the softened butter and granulated sugar together until light and fluffy. This step incorporates air and is key for a tender crumb.
- Beat in the eggs one at a time, mixing well after each addition. Stir in the vanilla extract, ube halaya, and ube extract until well combined. The mixture may look a little curdled at this point, which is fine.
- Now for the secret to fluffiness: Gradually add the dry ingredient mixture to the wet ingredients, alternating with the milk. Start by adding about one-third of the flour mixture, mix on low speed just until almost combined. Then add half of the milk, mix briefly. Repeat with another third of the flour, then the remaining milk, and finally the last of the flour.
- The Fluffy Cake Trick: Stop mixing as soon as the last streaks of flour disappear. Overmixing develops gluten, leading to a dense cake. Gently fold any remaining flour by hand with a spatula if needed. The batter should be thick but light.
- Pour the batter evenly into your prepared baking pan.
- Bake for 25-30 minutes, or until a wooden skewer inserted into the center comes out clean.
- Let the cake cool in the pan on a wire rack for 10-15 minutes before carefully lifting it out using the parchment paper overhang.
- Once completely cooled, cut the cake into squares. If desired, lightly dust with ube powder or fine granulated sugar before serving. Enjoy your perfectly fluffy Ube cake!
Notes
- The key to a fluffy cake is not to overmix the batter; stop as soon as the last streaks of flour disappear.