For years, I struggled with banana bread that was either perfectly light or disappointingly dense and gummy-a frustrating 50/50 chance every time I baked.
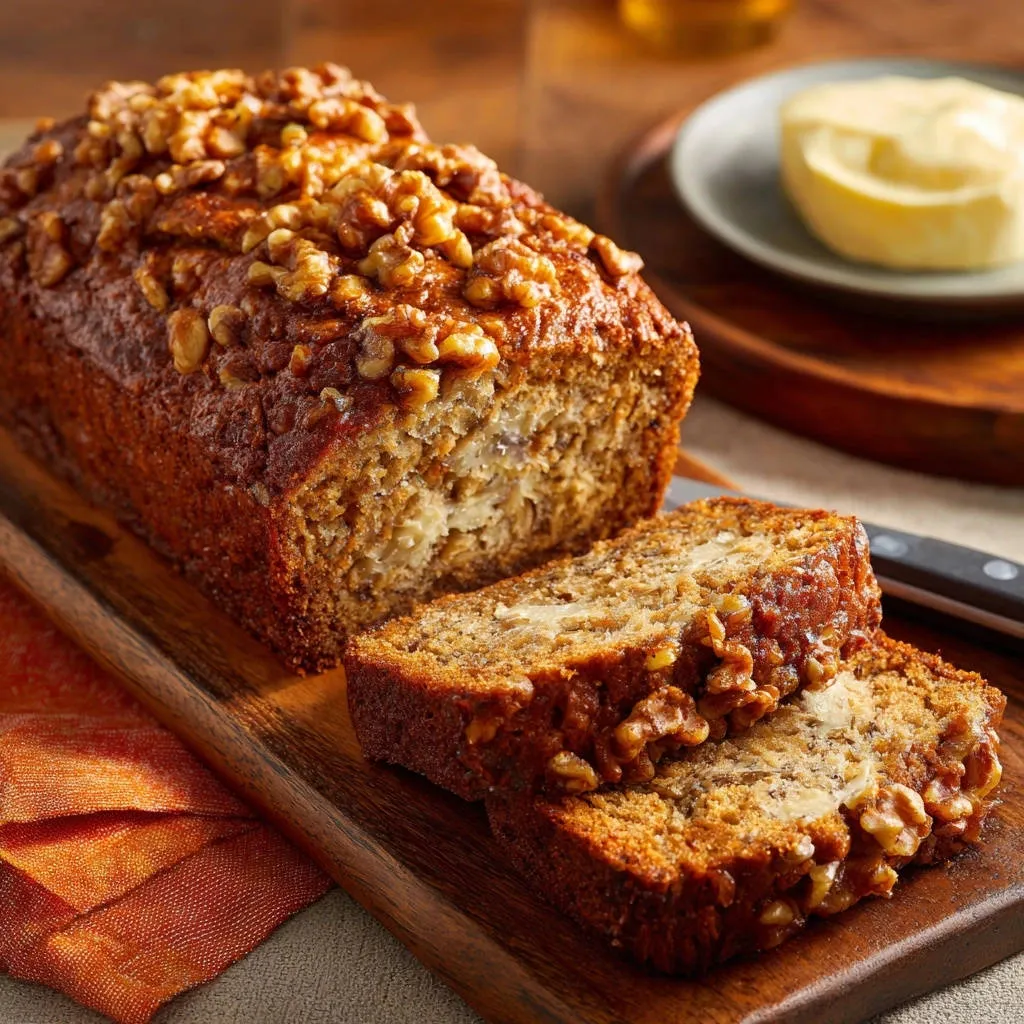
I finally cracked the code, and this Ultimate Walnut Banana Bread recipe guarantees a loaf that is flawlessly moist yet irresistibly fluffy every single time. My secret technique focuses on minimizing gluten development, transforming the texture into something truly light and airy that will impress everyone.
For a different kind of sweet, explore these decadent caramel bars that also require careful baking.
Beyond Dense: Why This Banana Bread Recipe Is Guaranteed Fluffy
Quick breads often fail due to structural weaknesses caused by improper mixing or incorrect ratios of wet to dry ingredients. This recipe focuses on three core pillars to ensure impeccable texture and rise.
The Power of Proper Aeration
Proper creaming is not just mixing; it’s an essential step where air bubbles are whipped into the solid fat (butter) and sugar mixture.
These tiny air pockets expand rapidly during baking, providing critical lift and ensuring a tender, open crumb structure in the final bread. A full three to four minutes of beating until the mixture is truly pale and fluffy is non-negotiable for achieving maximum volume.
The Essential Moisture Agents: Sour Cream and Ripe Bananas
Sour cream or Greek yogurt adds critical fat and acidity, both of which inhibit gluten formation while delivering luxurious moisture to the final loaf.
This acidity is also crucial because it helps to effectively activate the baking soda, further aiding in a superior, quick rise. Only use bananas that are heavily speckled or even black; this ensures maximum sweetness and intense banana flavor, while providing the necessary liquid for tenderness.
The Single Most Important Secret: Stopping at the Right Moment
The moment the dry ingredients meet the wet mixture, we begin the race against density and toughness. We minimize mixing time to the extreme.
We only mix until the last streak of flour disappears-this is the single most critical technique for a light loaf, which we will detail in the instructions below.
Essential Tools for Your Ultimate Walnut Banana Bread Adventure
Choosing the Right Loaf Pan (9×5 Inches)
A light-colored metal pan is generally ideal as it conducts heat evenly and results in a lighter crust than a dark or glass pan. Ensure the pan is the specified 9×5 inches; using a smaller pan will require a longer bake time and risks a sunken or dense center.
Hand Mixer vs. Stand Mixer
A stand mixer makes the multi-minute creaming process effortless and consistent, guaranteeing even aeration. A robust hand mixer works perfectly well, but ensure your butter is genuinely softened for either method to achieve the desired airy texture.
The Best Whisk for Dry Ingredients
Use a balloon whisk to thoroughly combine the flour, baking soda, salt, and cinnamon before they are added to the wet mixture. This thorough whisking ensures leavening agents are distributed evenly, preventing inconsistent rising and potential metallic flavor spots.
The Building Blocks of Flavor: Sourcing Your Ingredients
The quality and preparation of your components are just as important as the mixing technique.
Choosing Very Ripe Bananas: Understanding the Sugar-Starch Conversion
The perfect banana for baking is soft, deeply fragrant, and features many brown or black spots on the peel.
This high ripeness ensures the starches have converted to natural sugars, resulting in a significantly sweeter and more intense banana flavor. Because banana sizes vary drastically, rely on the 1.5 cup measurement guideline rather than counting three bananas to maintain consistency in your batter’s moisture level.
Flour and Leavening: Creating the Perfect Rise
We rely on baking soda, which reacts instantly with the acids present in the sour cream and bananas, to give this quick bread its necessary lift.
The addition of salt not only balances the sweetness but also controls the gluten development, keeping the structure sound without becoming tough. Always measure flour using the spoon-and-level method to avoid unintentionally adding too much and making the bread dry.
Walnuts: Preparing for Maximum Crunch and Flavor
For superior flavor and better texture contrast against the soft loaf, briefly toasting the walnuts in a dry skillet before chopping is highly recommended.
Toasting deepens their natural nuttiness and ensures they stay beautifully crunchy after baking. Tossing the nuts in a teaspoon of the flour mixture before folding them in helps prevent them from sinking to the bottom of the pan.
Mastering the Method: Step-by-Step to Banana Bread Success
Preparation and Preheat
Preheat the oven to 350°F (175°C) immediately. Use softened butter or non-stick spray, then dust the inside of the 9×5 inch pan lightly with flour, tapping out the excess.
This double preparation prevents sticking and ensures your Ultimate Walnut Banana Bread releases cleanly after baking.
Combining the Dry Ingredients
In a medium bowl, whisk the 1 cup of all-purpose flour, baking soda, salt, and ground cinnamon together thoroughly. Set this bowl aside.
This step ensures that the leavening agents are perfectly distributed and ready to be added quickly later, minimizing the mixing time when it counts most.
Creaming for Maximum Fluff
In a large bowl, use a stand mixer or hand mixer to beat the softened butter, granulated sugar, and brown sugar on medium speed for 3 to 4 minutes.
Stop when the mixture is noticeably pale yellow, lightened in texture, and visibly increased in volume; this visual cue confirms you have incorporated enough air for a light loaf.
Incorporating Eggs and Wet Ingredients
Add the large eggs one at a time, mixing briefly after each until just incorporated into the creamed mixture. Next, mix in the 1.5 cups of mashed bananas, sour cream or Greek yogurt, and vanilla extract on low speed.
It is perfectly normal and acceptable if the mixture looks slightly broken or curdled at this stage due to the high liquid content; do not worry about correcting it.
The Critical Step: Folding in the Dry Mix
Add all of the whisked dry ingredients to the wet batter. Mix on the absolute lowest speed or fold by hand with a rubber spatula.
Mix until the very last streak of flour disappears, then stop the mixer immediately. This brief interaction is the secret to preventing gluten over-development and maintaining that highly desired fluffy texture.
Adding Walnuts and Filling the Pan
Gently fold in the 1/2 cup of chopped walnuts with a rubber spatula, distributing them evenly without stirring excessively. Pour the completed batter into the prepared loaf pan.
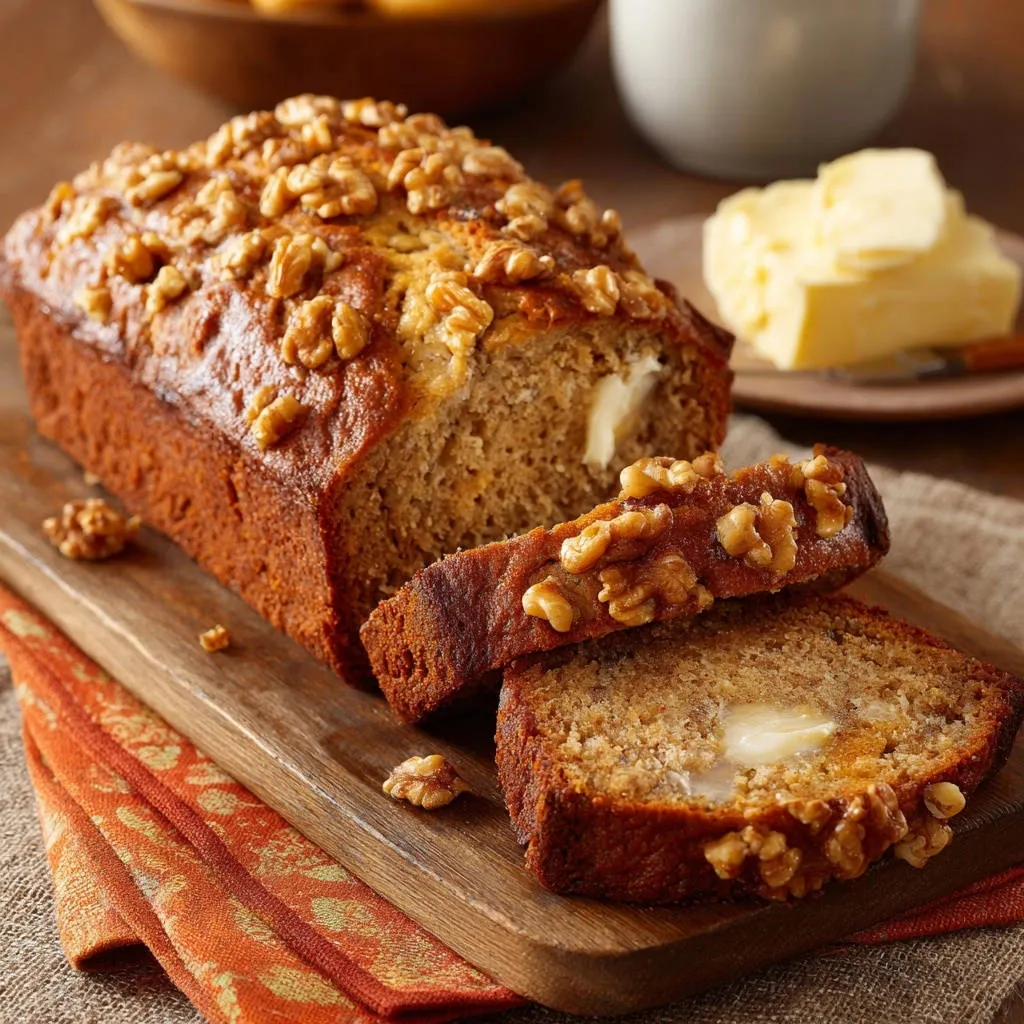
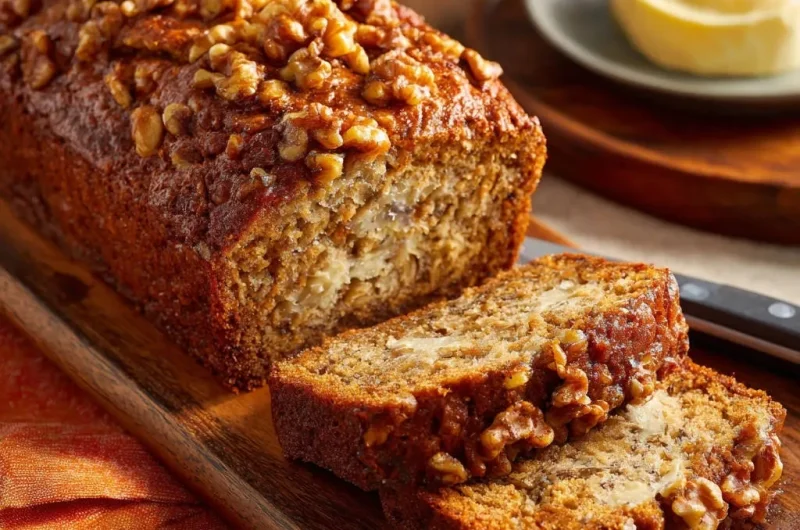
Sprinkle the remaining walnuts evenly across the top for maximum visual appeal and a crunchy topping.
Baking and Tent Monitoring
Bake for 55 to 65 minutes. Use the toothpick test; if it comes out clean (a few moist crumbs are acceptable), the bread is done.
If the top begins to darken too quickly, usually around the 40-minute mark, lightly tent the loaf with aluminum foil to protect the crust from burning.
Glazing and Cooling (Optional)
For the optional glaze, gently heat the two tablespoons of brown sugar and one tablespoon of milk in a small saucepan until the sugar dissolves completely.
Brush this thin, shiny glaze over the warm loaf immediately upon removing it from the oven. Let the bread cool in the pan for 10 minutes before gently transferring it to a wire rack to finish cooling completely before slicing.
The “Fluffy” Code Cracked: Understanding the No-Overmixing Rule
The difference between a stellar banana bread and a dense brick lies entirely in your mixing discipline during the final steps.
What Happens When Gluten Over-Develops?
Flour contains two proteins-gliadin and glutenin-which, when hydrated and agitated, form strong, elastic gluten strands.
In quick breads, we aim for minimal gluten development to keep the crumb soft, delicate, and tender. Excessive mixing toughens these strands, creating a dense structure that traps gas and results in a heavy, tough, or gummy interior.
The Visual Cue: How to Know When to Stop Mixing Immediately
The critical visual cue is the disappearance of the last patch of dry flour streaks in the batter. You should stop the mixer the instant this occurs.
When mixing on the lowest speed, this entire process should take no longer than 15-20 seconds. It is always better to err on the side of slightly undermixed-a few tiny lumps are preferable to the irreversible error of overmixing.
Mixing Wet Ingredients Fully Before Adding Dry
It is essential that all liquids, including the mashed bananas, sour cream, eggs, and vanilla, are perfectly homogenized before introducing the dry flour mixture.
This allows all the necessary mixing of high-fat ingredients to happen without developing the gluten. If the wet ingredients are uneven, you will be forced to mix longer after the flour is added, thus overworking the batter unintentionally.
Troubleshooting and Expert Baking Tips
Why is My Loaf Sinking in the Middle?
The primary cause of a sunken center is often incomplete baking, where the center has not fully set before being cooled. Always ensure your oven temperature is accurate and you use the full baking time.
Sinking can also result from the batter being drastically overmixed, creating a weak internal structure that collapses under its own weight after removal from the oven.
Preventing a Burnt or Dry Crust
Always utilize the middle rack position in your oven, as this is the most stable and even temperature zone. If you notice rapid browning, immediately create a loose aluminum foil tent over the loaf for the remainder of the baking time.
If you use an extremely dark metal pan, consider reducing the oven temperature by 25°F as darker materials absorb heat more quickly.
Ingredient Swaps: Can I Use Oil Instead of Butter?
Substituting a neutral oil (like vegetable or canola) for butter will yield a bread that is marginally moister and stays soft longer due to the higher fat content.
However, oil does not aerate like creamed butter, so the resulting texture will be slightly less structurally fluffy and more uniformly dense.
Gluten-Free Flour Adjustments
For the best results, use a high-quality 1:1 gluten-free baking blend that already contains a binder like xanthan gum.
Allowing the finished gluten-free batter to rest for 15 minutes before placing it in the oven helps the alternative flours fully absorb the moisture, preventing a gritty final texture.
Make-Ahead, Storage, and Best Serving Suggestions
How Long Does Ultimate Walnut Banana Bread Stay Fresh?
Store the completely cooled loaf tightly wrapped in plastic wrap and placed inside an airtight container on the countertop for up to four days.
Refrigeration is generally discouraged for quick breads, as the cool temperatures can quickly accelerate staling, drying out the tender crumb.
Freezing Instructions for Long-Term Storage
To freeze, ensure the loaf is completely cool, then wrap it tightly first in plastic wrap, followed by a layer of aluminum foil or freezer paper to prevent freezer burn. Label clearly with the date.
Frozen banana bread maintains its quality best within three months. Thaw it overnight on the counter while still wrapped to prevent condensation and moisture loss.
Creative Ways to Serve Your Fresh Loaf
Slicing and lightly toasting the bread brings out the nutty flavor of the walnuts and adds a wonderful textural contrast.
Serve warm with a smear of high-quality salted butter or a dusting of confectioner’s sugar for a perfect morning or evening treat.
Frequently Asked Questions About Quick Breads
Can I Make This Batter Ahead of Time?
No, the batter should be baked immediately after mixing the wet and dry ingredients. Baking soda begins its chemical reaction with the acids in the sour cream and bananas the moment they are combined.
If the batter sits for an extended period, the vital leavening gases dissipate before baking, resulting in a flat, dense, and heavy final product.
What is the Best Substitute for Sour Cream?
Plain whole-milk Greek yogurt is the best 1:1 substitute, offering the same acidity, high-fat content, and creamy consistency necessary for a moist loaf.
Full-fat buttermilk is also acceptable, though its higher liquidity may mean you need to add slightly less of the milk component to the optional glaze.
How Do I Know When the Banana Bread is Truly Done?
Insert a clean wooden toothpick or skewer directly into the exact center of the loaf. When removed, the toothpick should have only a few moist, sticky crumbs clinging to it.
If you prefer precision, the internal temperature of a fully baked quick bread should reach 200°F (93°C).
Ready to Impress? Share Your Ultimate Walnut Banana Bread Masterpiece!
This Ultimate Walnut Banana Bread recipe eliminates the guesswork, delivering a tender crumb and perfect texture every time, thanks to the precision of proper creaming and the no-overmixing rule.
Embrace the expert method, trust the visual cues, and you will be rewarded with a moist, flavorful loaf that will quickly become your new favorite quick bread recipe.
I encourage you to try this technique today and share your flawless, fluffy baking results in the comments below!
Walnut Banana Bread
Course: BreadCuisine: AmericanDifficulty: medium1
loaf (10-12 servings)15
minutes1
hour310
kcal60
minutesThis recipe finally cracks the code on making banana bread that is perfectly fluffy and moist without being gummy. The secret technique (stopping mixing immediately) guarantees a light, tender texture. Loaded with walnuts and an optional brown sugar glaze.
Ingredients
1 cup All-purpose flour
1 teaspoon Baking soda
1/2 teaspoon Salt
1/2 teaspoon Ground cinnamon
1/2 cup Unsalted butter, softened
1/2 cup Granulated sugar
1/4 cup Packed light brown sugar
2 large Eggs
3 very ripe large Bananas, mashed (about 1.5 cups)
1/4 cup Sour cream or plain Greek yogurt
1 teaspoon Vanilla extract
1/2 cup Chopped walnuts, plus extra for topping
2 tablespoons Brown sugar for glaze (optional)
1 tablespoon Milk for glaze (optional)
Directions
- Prepare the oven and pan. Preheat your oven to 350 degrees F. Grease and lightly flour a 9×5 inch loaf pan.
- Whisk dry ingredients. In a medium bowl, whisk together the flour, baking soda, salt, and cinnamon. Set aside.
- Cream the butter and sugars. In a large bowl, use a stand mixer or hand mixer to beat the softened butter, granulated sugar, and brown sugar on medium speed until the mixture is pale and visibly fluffy, about 3 to 4 minutes. This process incorporates the air needed for a light texture.
- Add eggs and moisture. Beat in the eggs one at a time, mixing well after each addition. Then, add the mashed bananas, sour cream or Greek yogurt, and vanilla extract. Mix on low speed just until combined. The mixture may look slightly curdled, which is fine.
- Solve the density problem (The Fluffy Technique). Add the dry ingredients to the wet mixture. Mix on the lowest speed possible or use a spatula and fold gently until just combined. The most important step for a fluffy loaf is to stop mixing the very second you see the last streak of flour disappear. Overmixing develops the gluten, resulting in a dense, tough texture.
- Fold and finish. Gently fold in the 1/2 cup of chopped walnuts. Pour the batter into the prepared loaf pan and sprinkle the remaining walnuts evenly across the top.
- Bake. Bake for 55 to 65 minutes, or until a toothpick inserted into the center comes out clean. If the top begins to brown too quickly, lightly tent it with aluminum foil after about 40 minutes.
- Glaze and cool (optional). If using the glaze shown in the image, heat the 2 tablespoons of brown sugar and 1 tablespoon of milk in a small saucepan until the sugar dissolves. Once the bread is out of the oven, brush this thin glaze over the warm loaf immediately.
- Serve. Let the bread cool in the pan for 10 minutes before transferring it to a wire rack to cool completely before slicing.
Notes
- The key to this recipe is thoroughly creaming the butter and sugar, followed by strictly minimal mixing of the dry ingredients to prevent density.