Most red velvet cakes look stunning on a plate but leave you reaching for a glass of water after the first bite. It’s the great red velvet paradox: a cake that promises luxury but often delivers a dry, flavorless crumb that feels more like bread than dessert. This happens because many recipes rely on food coloring for identity rather than focusing on the delicate chemical balance required for that signature texture.
The goal of this recipe is to achieve a tight, moist crumb through absolute chemical precision. We aren’t just making a chocolate cake dyed red; we’re engineering a specific mouthfeel that is dense yet soft, and rich without being heavy. When you bite into these squares, you’ll notice a velvety smoothness that holds its shape while practically melting away, thanks to a controlled reaction between acidity and cocoa.
The secret lies in the interaction between buttermilk, vinegar, and cocoa powder. By managing these acidic components, we ensure the proteins in the flour stay tender. You’ll get a deep, vibrant hue and a moisture level that stays consistent even twenty-four hours after baking. This isn’t just a cake; it’s a masterclass in moisture retention.
The Chemistry of Acid and Cocoa
Historically, red velvet wasn’t created with a bottle of dye. It was a chemical fluke. When old-fashioned, non-alkalized cocoa powder met acidic ingredients like buttermilk and vinegar, it triggered a color change in the cocoa’s anthocyanins, turning the batter a reddish-brown. Modern Dutch-process cocoa is treated with alkali, which neutralizes this acidity and prevents that natural color shift, which is why we now use food coloring to achieve that iconic look.
However, the vinegar-buttermilk-cocoa ratio remains the structural backbone of this sheet cake. The acid doesn’t just affect color; it breaks down gluten strands. This process is what creates the “velvet” in the name. By keeping the pH level slightly acidic, we ensure the crumb remains tight and fine rather than coarse and crumbly. This specific balance is what separates a professional-grade sheet cake from a standard boxed mix.
Essential Components for Velvet Red Sheet Cake Squares
Choosing the right fats and liquids determines whether your cake is a success or a dry disappointment. We use vegetable oil instead of butter in the batter because oil remains liquid at room temperature. This ensures the cake feels incredibly moist on the tongue, whereas butter-based cakes can feel firm or even dry when cooled. The oil coats the flour proteins effectively, preventing a tough texture from developing.
Room temperature buttermilk and eggs are non-negotiable for a perfect emulsion. If you add cold eggs to your oil and buttermilk, the fats will seize up and the batter won’t incorporate smoothly. This leads to an uneven bake and a greasy finish. For the color, I highly recommend gel food coloring. It provides a concentrated, deep crimson without adding excess liquid that could thin out your batter and mess with the rise.
Sifting for Aeration and Uniformity
Sifting the cocoa and flour isn’t just an extra step; it’s a requirement for a uniform crumb. Cocoa powder is notorious for clumping, and those tiny dry pockets will stay in the cake through the baking process, leaving you with bitter spots. Sifting aerates the dry ingredients, changing the density of the flour so it folds into the wet ingredients without requiring heavy mixing. This results in a more even rise across the 9×13 pan.
The Role of Distilled White Vinegar
The addition of distilled white vinegar might seem odd for a dessert, but it provides a critical leavening boost. When the vinegar hits the baking soda, it creates an immediate release of carbon dioxide. This reaction provides the “lift” needed to keep a dense, moist sheet cake from becoming a heavy brick. It ensures the cake is sturdy enough to hold a thick layer of frosting while remaining light enough to be pleasant to eat.
Step-by-Step: Mastering the Anti-Dry Crumb Technique
To master this cake, you have to watch the batter transform. Start by whisking your wet ingredients until they are a bright, uniform red. You want to see a smooth, emulsified liquid before it ever touches the flour. When you combine the two, the batter will look thin at first, but as the flour hydrates, it will turn into a glossy, vibrant red ribbon that flows smoothly from your spatula.
The most important part of the process is the transition from liquid to solid. As the cake bakes, the kitchen will fill with a mild, tangy cocoa aroma. You are looking for the moment the edges just begin to pull away from the pan. The center should feel springy but not hard. If you see the top starting to crack, you’ve likely gone a minute too long, so keep a close eye on the clock starting at the 28-minute mark.
Preparing the 9×13 Baking Surface
For a sheet cake, I prefer greasing and flouring the pan over using parchment paper. This method helps the batter “climb” the sides of the pan evenly, resulting in a flatter top that is easier to frost. If you use a metal pan, the heat will distribute more quickly, creating a slightly crisper edge. A glass pan takes longer to heat up but holds heat longer, which can lead to overbaking if you aren’t careful to pull it out on time.
The Folding Method vs. High-Speed Mixing
This is where most people ruin their red velvet. High-speed mixing develops gluten, which is great for chewy bread but terrible for velvet cake. When you use an electric mixer on high, you create a web of proteins that makes the cake tough and dry. Instead, use a large spatula to fold the ingredients together. Stop the very second the last streaks of white flour disappear into the red batter. This preserves the tender crumb you’re after.
Precision Baking and the Carryover Heat Factor
Precision is everything during the 28-32 minute window. Use the toothpick test, but don’t wait for it to come out completely clean. You want a few moist crumbs clinging to the toothpick. If it’s bone dry, the cake is already overdone. Remember that the cake continues to cook for several minutes after it leaves the oven due to carryover heat trapped in the dense sponge.
Leaving the cake to cool completely in the pan is a functional step for moisture trapping. As the cake cools, the steam that would normally escape into the air is pulled back into the sponge. This “sweating” process is actually beneficial here, as it ensures the edges stay as soft as the center. Never attempt to frost a warm cake, or the cream cheese frosting will melt into a sugary soup.
Crafting the Stable Cream Cheese Frosting
A great cream cheese frosting needs a high fat-to-sugar ratio to stay stable. Start by beating your softened butter and cream cheese until they are pale and incredibly fluffy. This aeration is what gives the frosting its cloud-like texture. If you skip this and just stir them together, the frosting will be heavy and greasy rather than light and sweet.
For more ideas that play with texture, explore creamy pumpkin swirl cheesecake.
Sifting your powdered sugar is mandatory here. Even tiny lumps of sugar will clog your piping tip and ruin the professional finish. Gradually add the sugar on low speed so you don’t end up in a white cloud, then crank it up to high for at least two minutes. This final whip builds the structure needed to hold those beautiful decorative swirls on top of each square.
Achieving Piping Consistency
If your frosting feels too stiff to squeeze through a piping bag, add heavy cream one teaspoon at a time. You are looking for “stiff peaks”—where the frosting stands up on its own when you lift the whisk. Be careful with the temperature of your kitchen; cream cheese frosting is sensitive to heat. If it feels too soft, pop the whole bowl in the fridge for 15 minutes before you start piping.
Professional Finishing: The Crumble and Square Cut
To get that high-end bakery look, start by trimming the very outer edges of the cooled cake. These bits are often a little darker and firmer. Take those scraps and crumble them between your fingers until they look like fine red sand. This “cake dust” is the perfect garnish, providing a pop of color against the white frosting without adding extra weight.
For perfectly uniform squares, use a ruler to mark out your cuts. A 9×13 pan easily yields 12 large squares or 24 bite-sized pieces. Wipe your knife with a warm, damp cloth between every single cut. This prevents the frosting from smearing down the sides of the cake, keeping the red and white layers distinct and sharp for a stunning presentation.
Troubleshooting Common Red Velvet Issues
If your cake turned brown instead of red, it’s usually a pH issue. Too much cocoa or using a different type of cocoa can throw off the balance. Stick to the two tablespoons of unsweetened cocoa powder to ensure the red dye can shine through. If the center of your cake sinks, you likely over-mixed the batter or opened the oven door too early, causing a sudden temperature drop before the structure was set.
For more ideas on rich red velvet, explore red velvet cheesecake cookies.
Runny frosting is almost always caused by over-beating the cream cheese or using cream cheese that was too warm. Cream cheese has a different molecular structure than butter; if you beat it too long, it breaks down and becomes liquid. If your crumb feels coarse or grainy, check the expiration date on your baking soda. Old leavening agents won’t create the fine bubbles needed for a velvet texture.
Storage and Moisture Retention Strategies
Because of the cream cheese frosting, these squares must be stored in the refrigerator. Place them in an airtight container to prevent the cake from absorbing any “fridge smells.” While the cake needs to stay cold for safety, it tastes best when it has sat at room temperature for about 20 minutes before serving. This allows the fats in the cake and frosting to soften slightly, improving the flavor.
More to Explore
If you enjoyed the rich flavors of this cake, consider these other satisfying dishes.
- To continue with hearty, savory options, check out the Loaded Sausage Gravy Tater Tot Bowl, offering a similar comfort food feel.
- For a delightful brunch or light meal, the Cheesy Ham Croissant Bake provides a warm, satisfying experience.
If you want to make these ahead of time, you can freeze the unfrosted cake. Wrap it tightly in plastic wrap and then foil; it will stay fresh for up to three months. You can also freeze the fully assembled squares. Place them on a baking sheet in the freezer for an hour until the frosting is hard, then wrap them individually. Just thaw them in the fridge overnight before you plan to eat them.
How should I store leftovers?
Store your Velvet Red Sheet Cake Squares in an airtight container in the refrigerator for up to 5 days. The cream cheese frosting contains dairy and will spoil if left at room temperature for more than two hours. To keep the sponge from drying out, make sure the container lid is sealed tightly. For the best texture, let a square sit on the counter for 15-20 minutes before eating so the frosting softens.
Why is my red velvet cake dry?
The most common reason for a dry cake is over-mixing the batter or over-baking. When you mix the flour into the wet ingredients, do it by hand with a spatula and stop as soon as the flour is incorporated. Over-mixing creates gluten, which makes the cake tough. Additionally, check your oven temperature with a thermometer; even five extra minutes in the oven can evaporate the moisture that gives the cake its velvet feel.
Can I use a different type of oil or butter?
While you can use melted butter, I strongly recommend sticking with vegetable oil or another neutral oil like canola. Oil is 100% fat and remains liquid at room temperature, which is the secret to the “anti-dry” crumb. Butter contains water and milk solids, which can make the cake feel firmer and drier once it cools. If you must substitute, use a high-quality neutral oil to maintain the intended texture.
What can I use if I don’t have buttermilk?
If you don’t have buttermilk, you can make a quick substitute by adding one tablespoon of lemon juice or white vinegar to a cup of whole milk. Let it sit for 5-10 minutes until it looks slightly curdled. This acidity is vital because it reacts with the baking soda to make the cake rise and tenderizes the flour. Do not use plain milk as a direct 1:1 swap, or the cake will be heavy and won’t rise properly.
Why did my frosting turn out runny?
Runny cream cheese frosting usually happens if the cream cheese or butter was too soft (nearly melting) before you started, or if you over-beat the mixture. Cream cheese becomes thin if it is overworked. To fix it, try chilling the frosting in the fridge for 30 minutes to firm up the fats. If it’s still too thin, you can beat in an extra half-cup of powdered sugar to add more structure.
Can I make this recipe as cupcakes instead?
Yes, this batter works beautifully for cupcakes. Line a cupcake tin with liners and fill them about two-thirds full. Reduce the baking time to 18-22 minutes. Use the same toothpick test to check for doneness. Since cupcakes have more surface area exposed to heat, be extra careful not to over-bake them, or you will lose that signature moist center that makes this sheet cake so special.
Red Sheet Cake
Course: DessertCuisine: AmericanDifficulty: medium12
servings20
minutes30
minutes410
kcal50
MinutesThis recipe solves the common issue of dry red velvet cake by using a specific chemical reaction between acid and cocoa. The result is a tight, moist crumb that stays fresh for days, finished with decorative cream cheese swirls and cake crumbles.
Ingredients
2 and 1/2 cups all-purpose flour
1 and 1/2 cups granulated sugar
1 teaspoon baking soda
1 teaspoon salt
2 tablespoons unsweetened cocoa powder
1 cup vegetable oil
1 cup room temperature buttermilk
2 large eggs, room temperature
2 tablespoons red food coloring (gel preferred for deep color)
1 teaspoon white distilled vinegar
1 teaspoon vanilla extract
Frosting:
8 ounces cream cheese, softened
1/2 cup unsalted butter, softened
3 and 1/2 cups powdered sugar, sifted
1 teaspoon vanilla extract
1 tablespoon heavy cream (optional, for piping consistency)
Directions
- Preheat your oven to 350 degrees F. Grease and flour a 9×13 inch baking pan.
- In a large bowl, sift together the flour, sugar, baking soda, salt, and cocoa powder. Sifting is vital to aerate the dry ingredients and prevent dry pockets in the finished cake.
- In a separate bowl, whisk the oil, buttermilk, eggs, food coloring, vinegar, and vanilla until fully combined and bright red.
- To solve the dry crumb issue, slowly fold the wet ingredients into the dry ingredients using a spatula. Do not use a high-speed electric mixer for this step. Over-mixing develops gluten, which leads to a tough, dry texture. Mix only until the streaks of flour disappear.
- Pour the batter into the prepared pan and bake for 28-32 minutes, or until a toothpick inserted into the center comes out with a few moist crumbs attached. Do not overbake.
- Allow the cake to cool completely in the pan. This traps the remaining moisture inside the sponge.
- For the frosting, beat the cream cheese and butter until smooth and pale. Gradually add powdered sugar and vanilla. Beat on high for 2 minutes until fluffy. If the frosting is too stiff to pipe, add the heavy cream.
- Trim the very edges of the cooled cake. Set these scraps aside and crumble them into fine red dust.
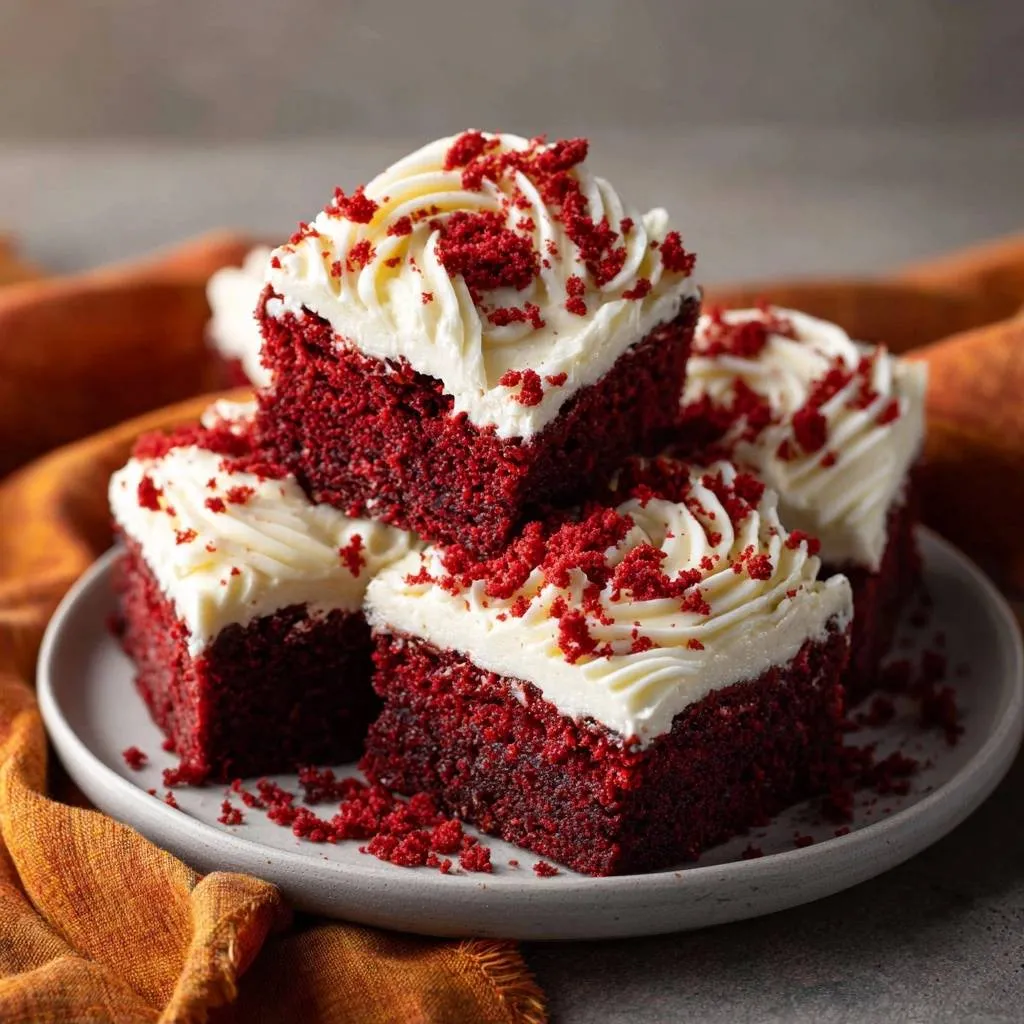
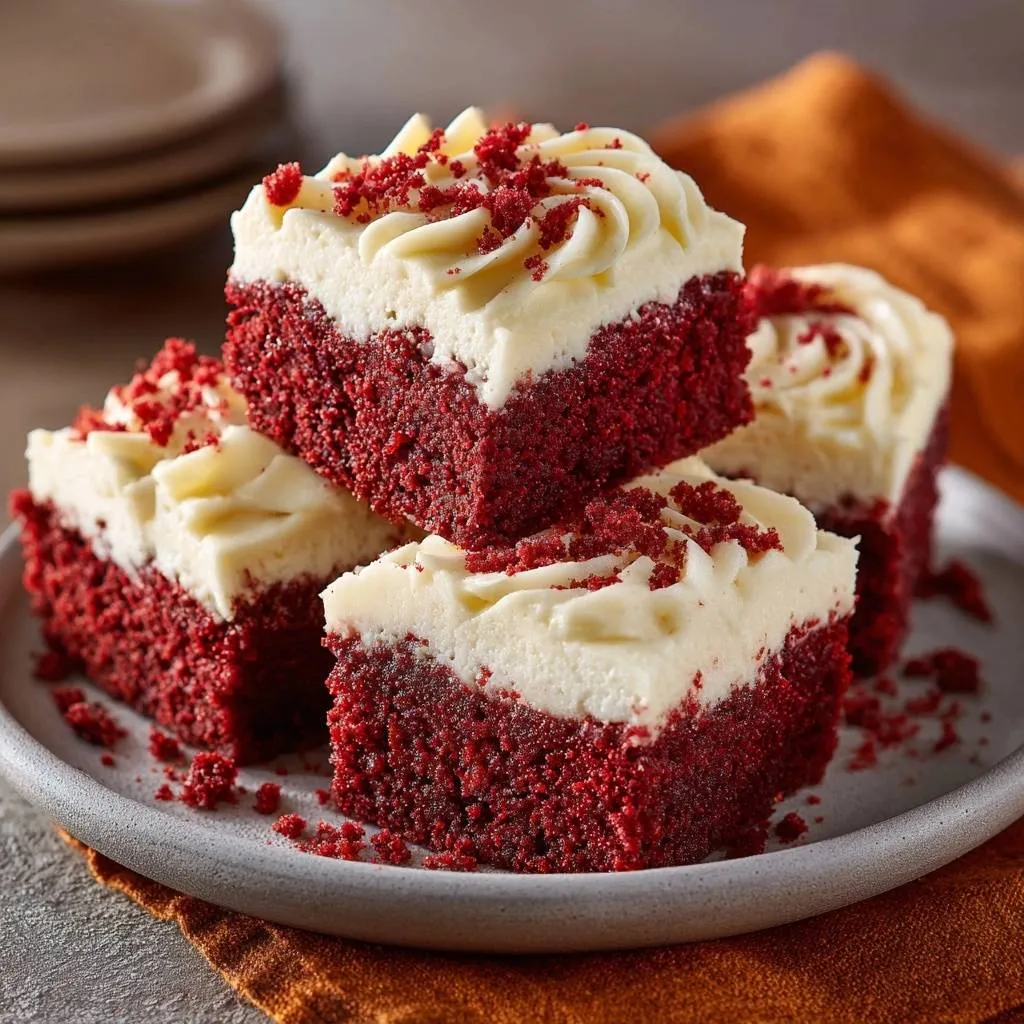
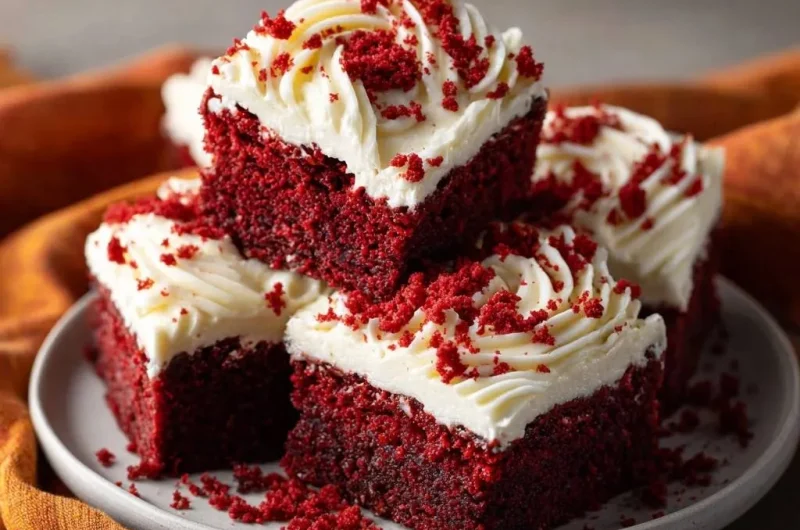
- To match the visual style: Transfer the frosting to a piping bag fitted with a large open star tip. Pipe generous, decorative swirls onto each square.
- Generously sprinkle the reserved cake crumbles over the piped frosting. Cut into uniform squares and serve.
Notes
- To ensure a velvet texture, avoid high-speed mixing when combining wet and dry ingredients to prevent gluten development. Sifting dry ingredients is vital for aeration.