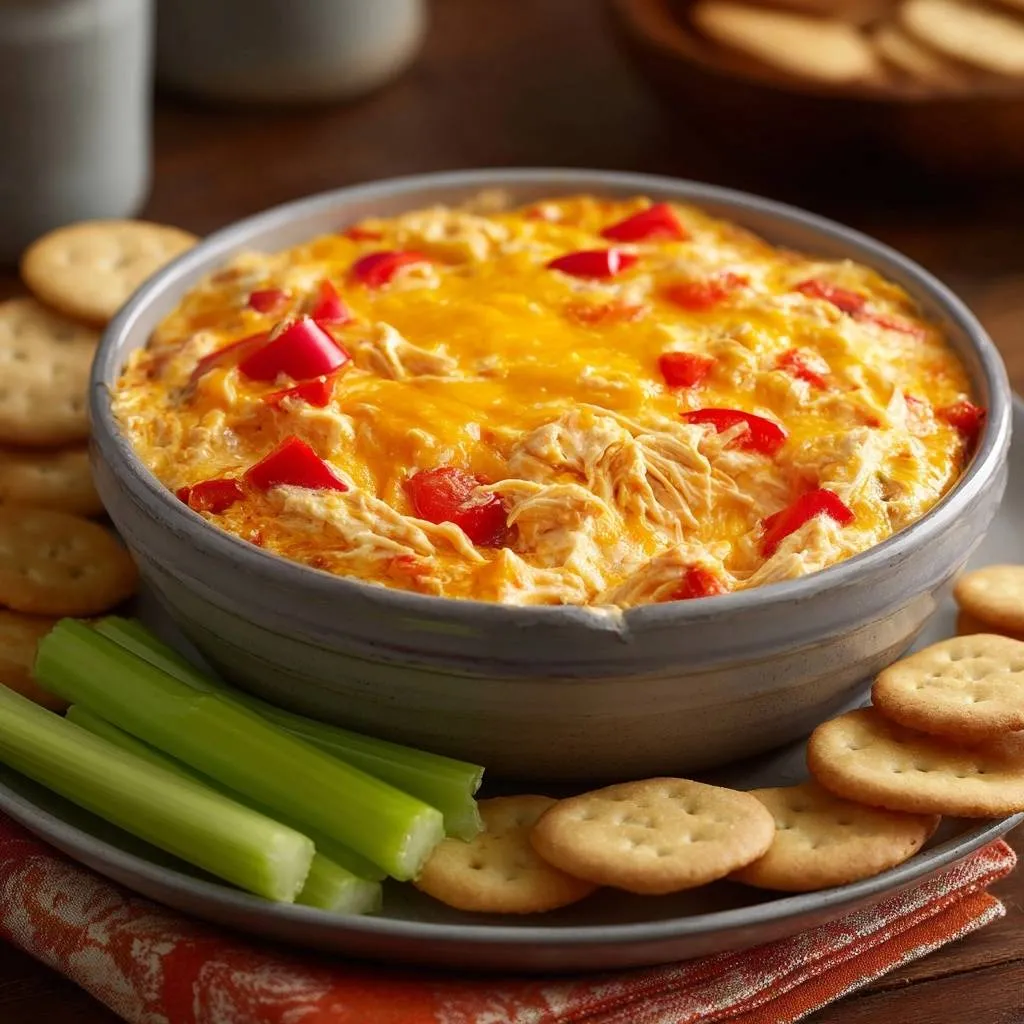
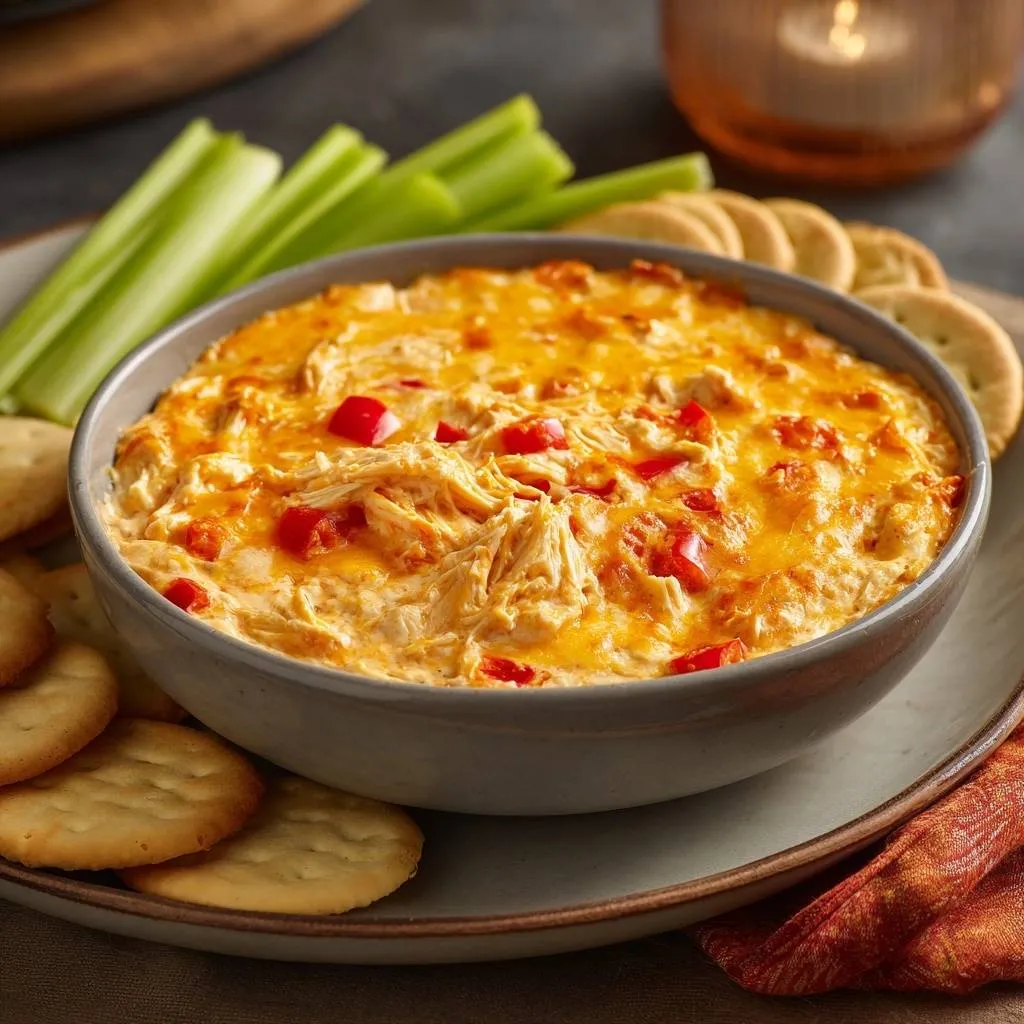
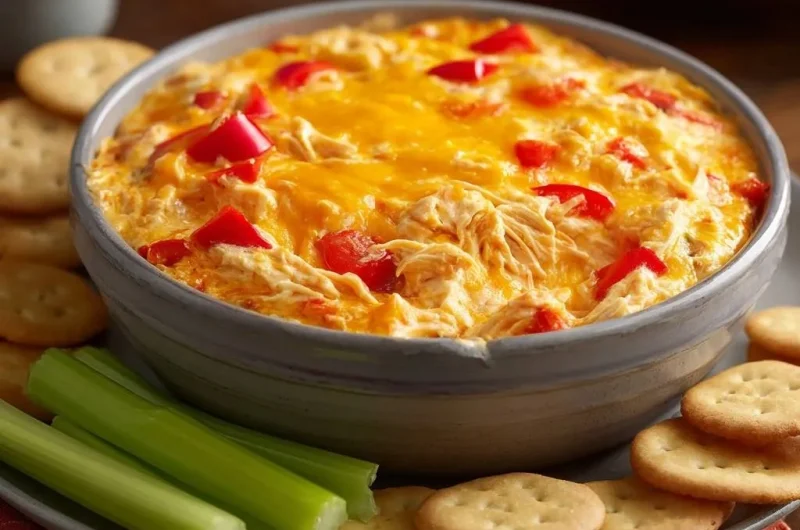
Ever scooped into a buffalo chicken dip only to find it greasy and separated? This Buffalo Chicken Red Pepper Dip fixes that frustration completely. You’ll get a creamy, stable texture that holds up hot or cold, perfect for game day or parties. It serves 8-10 people with just 10 minutes prep and 25 minutes bake time.
Therefore, you won’t deal with the usual oily mess from watery versions. Instead, fresh red peppers add crunch and sweetness, while golden cheddar bubbles on top for eye-catching appeal. It’s the dip that keeps everyone coming back.
The secret lies in beating softened cream cheese fluffy first, then slowly drizzling in buffalo sauce. This creates a stable emulsion that locks everything together. No more separation worries!
Why This Buffalo Chicken Red Pepper Dip Stays Creamy
Most buffalo chicken dips turn greasy because the sauce’s oils don’t bind properly with the dairy. However, this recipe’s technique changes that. You beat the cream cheese ultra smooth before adding anything else.
In addition, folding in shredded chicken, diced red peppers, and cheese keeps the consistency perfect. The result looks vibrant with red flecks against melted cheddar. It beats watery, separated versions every time.
Emulsion Science in Buffalo Chicken Red Pepper Dip
Cream cheese’s fat proteins grab the buffalo sauce’s vinegar and oils during beating. This forms a stable fat-in-water emulsion. Therefore, it won’t break apart even after hours.
Beating fluffy first incorporates air, which stabilizes the mix. You’ll see it thicken to ribbons. That’s your cue it’s ready for the rest.
Key Ingredients for Stable Buffalo Chicken Red Pepper Dip
Here’s what you need: 2 cups shredded cooked chicken, 1 cup diced red bell peppers, 8 oz softened cream cheese, 1/2 cup buffalo wing sauce, 1 cup shredded cheddar cheese (divided), 1/2 cup sour cream, salt and pepper to taste. Celery sticks and crackers for serving.
Softened cream cheese is non-negotiable; it emulsifies best at room temp. Red bell peppers bring sweetness that balances the heat. No sour cream? Greek yogurt works fine for tang.
Shredded cheddar melts smoothly, unlike blocks. Use sharp for bold flavor without greasiness. These choices ensure your Buffalo Chicken Red Pepper Dip stays creamy.
Choosing Chicken and Peppers for Texture
Shredded rotisserie chicken absorbs flavors without drying out. Poached works too, but shred finely for even mix. It integrates seamlessly into the base.
Fresh diced red bell peppers give crunch and color over jarred ones. They don’t water down the dip. Plus, their sweetness cuts the spice perfectly.
Cream Cheese and Buffalo Sauce Emulsion Base
Start with room-temp cream cheese; cold lumps ruin the emulsion. Beat on medium for fluffiness. Frank’s sauce has ideal viscosity for binding.
This 8 oz cheese to 1/2 cup sauce ratio prevents separation. You’ll get a thick base that holds chicken and peppers. It’s foolproof.
Equipment for Perfect Buffalo Chicken Red Pepper Dip
An electric mixer beats cream cheese fluffy fast; a hand whisk takes forever and risks poor emulsion. Grab an 8-inch baking dish for even heating. Glass or ceramic both work great.
Preheat your oven to exactly 350°F with a thermometer for accuracy. Grease with avocado oil spray to avoid sticking. No fancy tools needed beyond basics.
Therefore, you’ll nail the texture every time. Pro tip: Line the dish with parchment for easy cleanup.
Step-by-Step Buffalo Chicken Red Pepper Dip Assembly
This 6-phase process takes 10 minutes active time. Follow timing closely to keep the emulsion intact. Handle hot dishes with mitts for safety.
Phase 1: Preheat and Prep Baking Dish
Set oven to 350°F for bubbly melt without curdling. Grease the 8-inch dish thoroughly. Glass heats evenly, but ceramic holds heat longer.
This prevents sticking so your Buffalo Chicken Red Pepper Dip scoops cleanly. Smell the oven warming up; it’s game time.
Phase 2: Beat Cream Cheese to Fluffy Base
Beat softened cream cheese on medium speed for 2 minutes. It turns pale and fluffy with soft peaks. Air incorporation here stabilizes everything.
Avoid overbeating, or it gets grainy. Listen for the mixer’s hum slowing as it thickens. Perfect base achieved.
Phase 3: Drizzle Buffalo Sauce for Emulsion
Slowly drizzle in buffalo sauce while beating another 2 minutes. Continuous mixing blends oils and water phases smoothly. Test by lifting the beater; it should ribbon.
This step prevents 99% of separation. The mix smells tangy and spicy now. You’re halfway there.
Phase 4: Fold in Fillings Evenly
Gently fold in sour cream, chicken, peppers, and 1/2 cup cheddar. Use a spatula to preserve the emulsion. Season with salt and pepper last to avoid clumping.
Everything combines evenly without deflating. The red peppers pop against the creamy base. So inviting.
For that same velvety texture, explore how to achieve creamy Buffalo chicken dip perfection.
Phase 5: Layer and Top with Cheddar
Spread mixture into the dish smoothly. Sprinkle remaining 1/2 cup cheddar evenly. Sharp cheddar melts to a golden crust without oiliness.
Press lightly for full coverage. It looks ready to bake and devour.
Phase 6: Bake and Rest for Set Texture
Bake 20-25 minutes until edges bubble and top turns golden. Rest 5 minutes; starches set for scoopable creaminess. Internal temp hits 160°F safely.
The aroma fills your kitchen, spicy and cheesy. Patience pays off here.
Avoiding Separation in Buffalo Chicken Red Pepper Dip
Top mistakes include cold cream cheese, dumping sauce fast, overbaking, or skipping rest. Fixes: Warm cheese gently, drizzle slowly, watch time, always rest. This method forgives small slips.
However, follow the beat-and-drizzle exactly for perfection. Your dip stays emulsified hot or cold. Game changer.
Troubleshooting Grainy or Greasy Dips
Grainy means underbeaten; re-beat with a splash of milk. Greasy signals poor emulsion from fast pouring. Prevention: Room-temp ingredients and slow drizzle.
Temp control keeps your Buffalo Chicken Red Pepper Dip smooth. Rescue works, but technique trumps fixes.
Flavor Variations for Buffalo Chicken Red Pepper Dip
Swap for blue cheese dressing in place of some sour cream. Use roasted peppers for smokiness. Try pepper jack for heat, or add ranch seasoning.
Green onions bring freshness; skip bacon bits to keep it simple. Adjust heat with less sauce or honey. Emulsion stays intact every time.
These tweaks make it your own without risking separation. Test small batches first.
Make It Milder or Spicier
Reduce sauce to 1/3 cup or stir in honey for mild. Pepper jack amps heat perfectly. Taste as you go for party crowds.
Your Buffalo Chicken Red Pepper Dip adapts easily. Everyone wins.
Make-Ahead Guide for Buffalo Chicken Red Pepper Dip
Assemble up to 2 days ahead, cover, and chill. Bake from cold adds 5-10 minutes. Freezes up to 2 months in airtight container; thaw overnight.
Reheat in oven at 350°F to avoid separation. Party timeline: Prep morning of, bake right before serving. Stress-free hosting.
Best Pairings for Buffalo Chicken Red Pepper Dip
Celery sticks cut through creaminess with crunch. Crackers stay neutral. Add carrots, cucumber, pita chips, or tortilla chips.
Iced tea or sparkling water refreshes the palate. Fits any game day spread perfectly.
Crunchy Dippers That Complement
Sturdy celery balances richness. Baked chips keep it light. Skip soft breads that sog up.
Build a colorful board; the dip shines center stage.
Buffalo Chicken Red Pepper Dip FAQ
Can I Make Buffalo Chicken Red Pepper Dip Dairy-Free?
Yes, use cashew cream for the cheese base and vegan shreds. Blend cashews smooth first for emulsion. It mimics creaminess well, though tang is milder.
How Long Does Buffalo Chicken Red Pepper Dip Last?
Store in an airtight container in the fridge for 3-4 days. Reheat in oven at 350°F to keep emulsion intact; microwave risks separation. Freezes up to 2 months, thaw overnight and stir well.
Why Won’t My Dip Stay Emulsified?
Usually from cold cream cheese or fast sauce pour. Beat fluffy first and drizzle slowly while mixing continuously. Refer to the emulsion phase for ribbon test; it locks everything.
Instant Pot or Crockpot Adaptation?
Crockpot on low for 2-3 hours, stir top cheese in last 30 minutes, no bake needed. Instant Pot: Sauté to mix, then slow cook; pressure can break emulsion, so avoid high pressure.
Scaling Up for Large Parties?
Double for 9×13 dish, bake time plus 5 minutes. Emulsion scales perfectly. Costs about $15-20 for 16-20 servings, cheaper than takeout.
Buffalo Chicken Dip
Course: AppetizerCuisine: AmericanDifficulty: easy8
servings15
minutes25
minutes240
kcal40
MinutesSick of buffalo chicken dip turning into a greasy, separated mess? This recipe’s foolproof emulsion technique beats the cream cheese base ultra smooth with buffalo sauce first, locking in chicken, peppers, and cheese for perfect creaminess that stays together hot or cold. Game day win!
Ingredients
2 cups shredded cooked chicken
1 cup diced red bell peppers
8 oz cream cheese, softened
1/2 cup buffalo wing sauce
1 cup shredded cheddar cheese, divided
1/2 cup sour cream
Salt and pepper to taste
Celery sticks and crackers for serving
Directions
- Preheat oven to 350 degrees F. Grease an 8-inch baking dish.
- In a large bowl, beat softened cream cheese with an electric mixer on medium speed for 2 minutes until fluffy. This is the key step: slowly drizzle in buffalo sauce while beating continuously for another 2 minutes to create a thick, stable emulsion that prevents separation no matter what.
- Fold in sour cream, shredded chicken, diced red bell peppers, and 1/2 cup cheddar cheese until evenly combined. Season with salt and pepper.
- Spread mixture into prepared dish. Top with remaining 1/2 cup cheddar cheese.
- Bake for 20-25 minutes until bubbly and cheese is melted and golden. Let rest 5 minutes to set the creamy texture.
- Serve warm with celery sticks and crackers. Dip stays perfectly emulsified for hours!
Notes
- Key step: Beat cream cheese fluffy first, then slowly drizzle in buffalo sauce while beating to create stable emulsion. Dip stays perfectly emulsified for hours hot or cold.