We’ve all experienced the frustration of attempting homemade candied almonds, only to end up with a sticky, clumpy mess. That disappointing outcome can make you want to give up!
However, I’ve cracked the code to achieving individual, perfectly crisp Candied Almonds every single time, all thanks to one crucial, yet simple, technique.
This recipe transforms a few basic ingredients into an irresistible, gourmet snack or topping that’s surprisingly easy to master and guaranteed to impress.
Why You’ll Love This Candied Almonds Recipe (No More Sticky Situations!)
This isn’t just another candied almonds recipe; it’s a solution to the most common homemade candy woes.
You’ll consistently achieve beautifully separated, crunchy almonds without the usual sticky struggle or frustrating cleanup.
The ‘One Simple Trick’ for Flawless Separation
The secret lies in swiftly spreading the almonds onto parchment paper the moment they come off the heat. This rapid cooling and separation prevent any clumping, ensuring each almond stands alone in its sugary glory.
It’s a small step that makes all the difference, guaranteeing a perfect outcome every time.
Effortless Elegance: Gourmet Snacking Made Easy
Despite their sophisticated appearance and delightful crunch, these candied almonds require minimal effort. They elevate simple ingredients into a treat that feels gourmet, perfect for entertaining or a special personal snack.
Minimal Ingredients, Maximum Impact
You only need three pantry staples to create these addictive treats. This recipe proves that extraordinary flavor and texture don’t require a complex list of components.
The simple combination of almonds, sugar, and water yields a rich, caramelized taste that’s deeply satisfying.
Essential Ingredients for Your Candied Almonds
Starting with quality ingredients is the first step toward perfect candied almonds.
The Star: Raw Almonds
Opt for raw almonds for this recipe. Their unadulterated flavor and texture are ideal for absorbing the sweet caramel coating and developing that signature crisp bite.
There’s no need to blanch or pre-roast; they will cook perfectly in the sugar mixture.
Sweet Foundation: Granulated Sugar and Water
Granulated sugar forms the base of our candy coating. It melts smoothly and caramelizes beautifully, creating that glossy, golden finish.
A small amount of water is essential to initially dissolve the sugar, allowing it to coat the almonds evenly before transforming into the sandy then caramelized stages.
Your Candied Almonds Tool Kit
Having the right equipment ensures a smooth and successful candying process.
Crucial for Success: Parchment Paper & Baking Sheet
A large baking sheet lined completely with parchment paper is non-negotiable for this recipe. The parchment provides a non-stick surface, which is absolutely critical for separating the hot, sticky almonds.
It allows them to cool rapidly without adhering to the pan or each other.
Heavy-Bottomed Skillet & Heatproof Spatula
A heavy-bottomed skillet or pot is essential for even heat distribution, preventing the sugar from scorching in spots. Its sturdy construction also helps maintain a consistent temperature.
A wooden spoon or heatproof spatula is necessary for constant stirring, ensuring the almonds are evenly coated and the sugar cooks perfectly without burning your hands.
Crafting Crunchy Perfection: A Step-by-Step Guide
Follow these detailed steps closely, paying attention to the nuances for perfectly separated candied almonds.
- Line Your Baking Sheet:
Completely cover a large baking sheet with parchment paper. This step is non-negotiable for ensuring your almonds don’t stick later.
- Combine Sugar & Water:
In a large, heavy-bottomed skillet or pot, combine 1 cup granulated sugar and 1/4 cup water. Place over medium heat and stir gently until the sugar completely dissolves and the mixture comes to a rolling boil.
Using a heavy-bottomed skillet helps distribute heat evenly, preventing scorching and ensuring a consistent syrup.
- Add Almonds & Crystallize:
Add 2 cups of raw almonds to the boiling sugar syrup. Continue to cook, stirring constantly with a wooden spoon or heatproof spatula.
The water will evaporate, and the sugar will crystallize around the almonds, giving them a distinct sandy, white coating. Keep stirring to ensure every almond is evenly covered.
- Melt & Coat:
Reduce the heat to medium-low. Continue stirring constantly. The crystallized sugar will begin to melt again, transforming into a glossy, caramel-like coating that adheres beautifully to the almonds.
Do not stop stirring at this stage; continuous movement is absolutely essential for even coating and to prevent the delicate sugar from burning.
- Achieve Golden Perfection:
Once all the almonds are evenly coated and have a rich, golden brown, shiny appearance, immediately remove the skillet from the heat.
Overcooking past this point can lead to a bitter taste, so watch them closely for that perfect sheen and deep golden hue.
- The Crucial Separation Step:
Quickly pour the coated almonds onto the prepared parchment-lined baking sheet. Use two forks or spatulas to spread the almonds out into a single, thin layer as rapidly as possible.
Working fast here is paramount, as they will cool and harden very quickly, solidifying any clumps and preventing individual Candied Almonds.
- Cool Completely:
Allow the almonds to cool completely and harden on the parchment paper, undisturbed. This usually takes about 15-20 minutes.
Resist the urge to touch them until they are fully crisp to ensure their delicate coating sets properly and maintains its crunch.
- Break Apart Clumps:
Once fully cooled and crisp, gently break apart any remaining clumps. They will separate easily, ensuring you have individual, perfectly crunchy candied almonds every time.
Preparation is Key: Setting the Stage
Building the Sugar Base: Syrup Creation
The First Transformation: Sandy Almonds
The Second Transformation: Golden Caramel
Timing is Everything: When to Remove
The Separation Secret: Rapid Spreading
Cooling for Crispness
Final Breakup: Enjoying Individual Bites
Expert Tips for Candied Almonds Success
Mastering these nuances will guarantee perfect candied almonds every time.
Don’t Stop Stirring! The Key to Even Coating
Constant stirring is the most critical technique in this recipe. It ensures the sugar dissolves evenly, crystallizes uniformly, and then melts into a smooth caramel without burning.
Think of it as a continuous dance for your almonds, ensuring every single one gets its perfect coat.
Temperature Control is Crucial
Start on medium heat to dissolve the sugar, then reduce to medium-low when the sugar begins its second melt into caramel. Too high heat will burn the sugar, while too low will prolong the process and might not achieve the desired caramelization.
Patience During Crystallization, Speed During Separation
The process has two distinct rhythms. Be patient during the constant stirring, allowing the sugar to transform fully through its sandy and then molten caramel stages. However, once off the heat, act with extreme speed to spread the almonds for separation.
Flavor Variations to Spark Your Creativity
Elevate your candied almonds with simple additions. A pinch of sea salt added at the end enhances the sweetness, creating a delightful sweet-and-salty balance.
For warm spices, add 1/2 teaspoon of ground cinnamon or nutmeg along with the almonds in step 3. You can even experiment with other candied delights; for another festive treat, consider making candied cranberries.
Candied Almonds Troubleshooting: Solving Common Issues
Don’t worry if your first batch isn’t perfect; these common fixes will help.
Why Are My Almonds Sticky or Clumpy?
The most common culprit is not spreading the almonds out quickly enough, or not spreading them thinly enough on the parchment paper immediately after removing them from the heat. Speed is essential here!
The almonds solidify very fast, so work rapidly to separate them into a single layer.
My Sugar Burned – What Happened?
Burnt sugar usually indicates the heat was too high, or you stopped stirring. Burnt sugar is bitter and cannot be salvaged, so it’s best to start over.
Next time, ensure you maintain medium-low heat during the caramelization phase and keep that spatula moving constantly.
Almonds Aren’t Getting Crunchy Enough
If your almonds lack crispness, they might have been undercooked, meaning the sugar didn’t fully caramelize, or they weren’t allowed to cool completely. Ensure they achieve that rich, golden-brown sheen before removing from heat.
Always allow ample time for them to cool undisturbed on the parchment until fully hardened.
Serving and Storing Your Delicious Candied Almonds
Once perfected, these candied almonds offer endless possibilities.
Creative Ways to Enjoy Your Candied Almonds
Snacking: They are perfect on their own for a satisfying crunch whenever a sweet craving hits.
Dessert Topping: Sprinkle over ice cream, yogurt parfaits, or even a simple fruit salad for added texture and sweetness.
Salad Garnish: Add a surprising crunch to savory salads, especially those with apples, pears, or goat cheese.
Baking Inclusion: Chop them and fold into cookie dough, muffin batter, or sprinkle over cakes for an extra layer of flavor and texture.
Gifting: Pack them into decorative bags or jars for a thoughtful homemade gift that’s always appreciated.
Proper Storage for Lasting Freshness
To maintain their crispness and flavor, store candied almonds in an airtight container at room temperature. Keep them in a cool, dry place away from direct sunlight and humidity, which can make them sticky.
Can I Make Candied Almonds Ahead?
Absolutely! Candied almonds are an excellent make-ahead treat. When stored properly, they will maintain their crunch and delicious flavor for up to 2-3 weeks, making them perfect for holiday preparations or meal prepping.
Your Candied Almonds Questions Answered
Can I use a different type of nut?
Yes, this method works beautifully with other nuts! Pecans, walnuts, and cashews can be candied using the same steps. You might need to adjust cooking times slightly depending on the size and density of the nut, watching carefully for that perfect golden caramelization.
What if I don’t have parchment paper?
A silicone baking mat is the best alternative to parchment paper. It provides an excellent non-stick surface for spreading your candied almonds. Avoid using aluminum foil or an unlined baking sheet, as the almonds will stick stubbornly.
Can I add spices like cinnamon?
Absolutely! Adding spices is a fantastic way to customize your candied almonds. Stir in 1/2 teaspoon of ground cinnamon, nutmeg, or even a pinch of cayenne pepper for a spicy kick, along with the raw almonds in step 3.
If you love sweet treats that defy sticking, you might also enjoy our recipe for foolproof honeycomb bites that never stick.
Ready to Create Your Own Candied Almonds Masterpiece?
Now you hold the secret to perfectly crunchy, perfectly separated candied almonds. Say goodbye to sticky messes and hello to an effortlessly elegant treat that will become a staple in your kitchen.
Gather your simple ingredients, trust the process, and prepare to delight in the irresistible crunch you’re about to create. Don’t forget, if you’re looking for more comforting sweet treats, our amazing chewy spiced molasses cookies are always a hit!
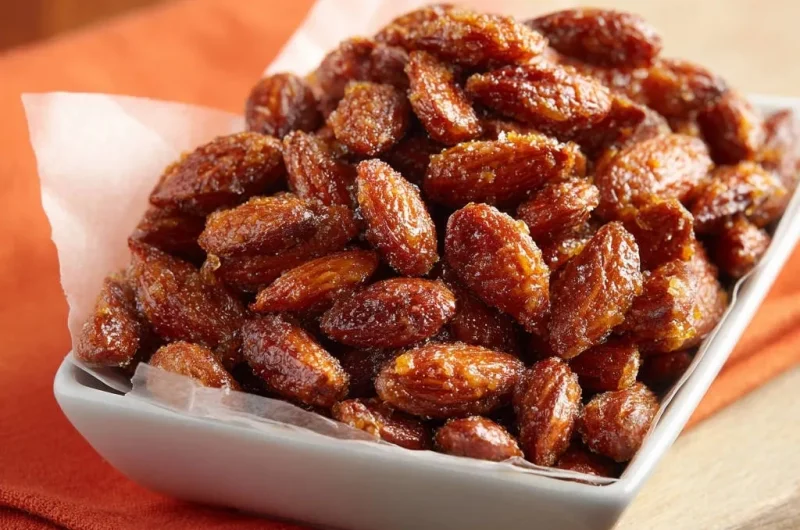
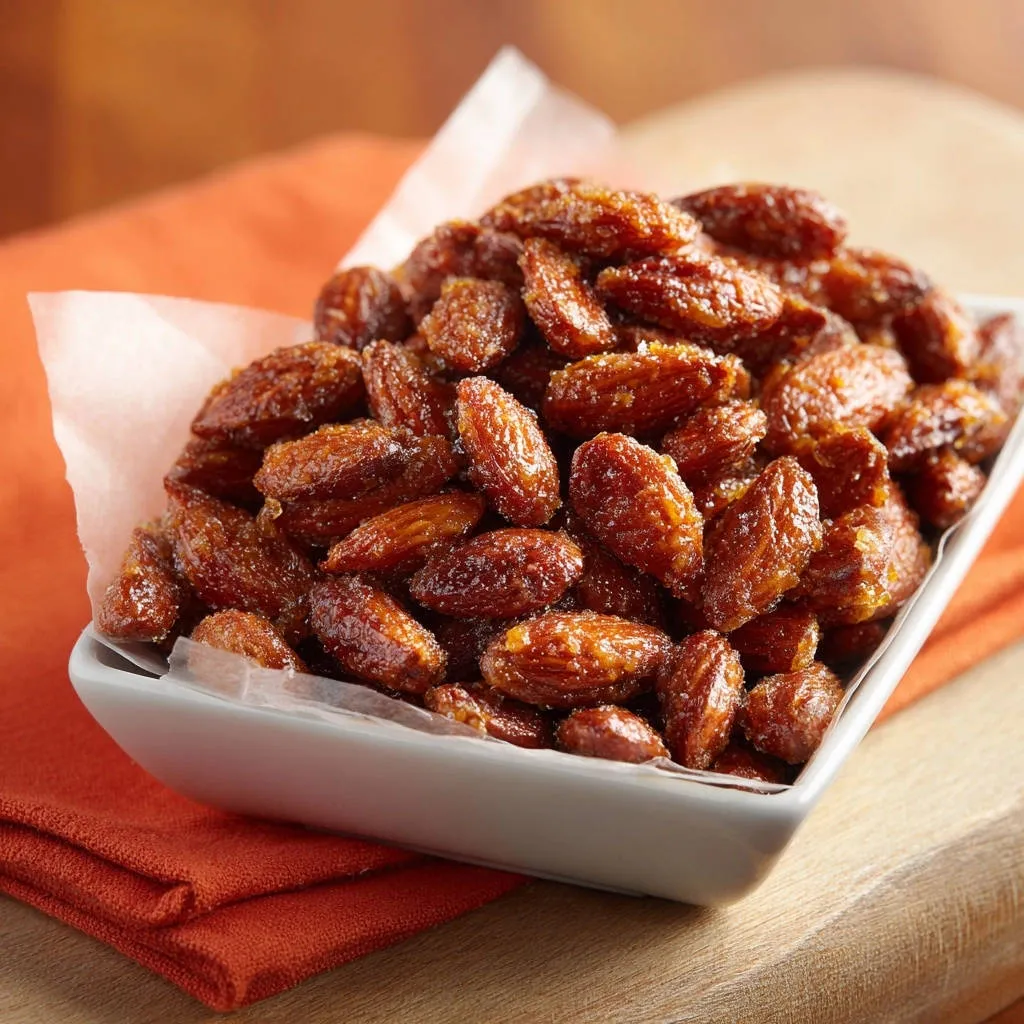
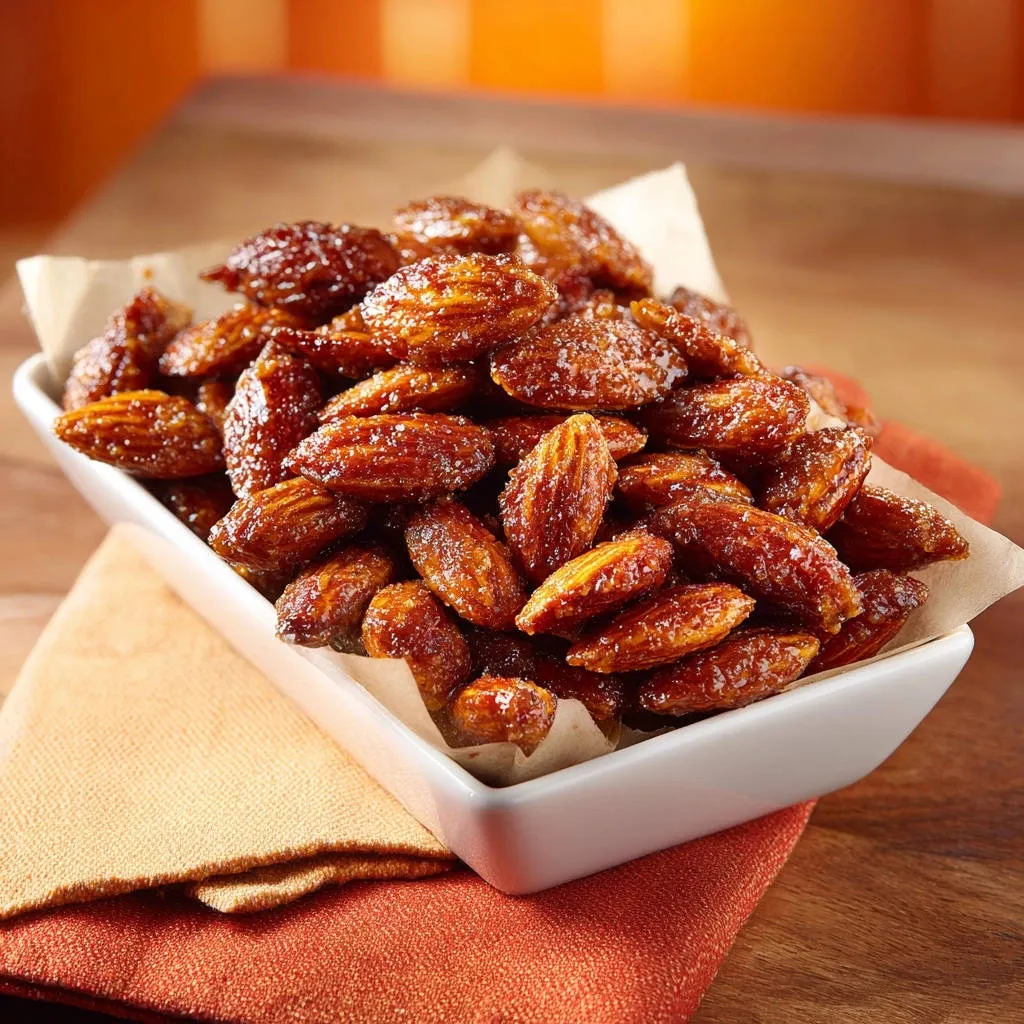
Candied Almonds
Course: SnacksCuisine: AmericanDifficulty: easy4
2 cups candied almonds5
minutes10
minutes350
kcal35
minutesTired of sticky candied almonds? This foolproof recipe guarantees perfectly separated, crunchy candied almonds every time. Discover the simple trick to achieve a beautiful, golden-brown coating without the clumps.
Ingredients
2 cups raw almonds
1 cup granulated sugar
1/4 cup water
Directions
- Prepare a large baking sheet by lining it completely with parchment paper. This will be essential for preventing sticking later.
- In a large, heavy-bottomed skillet or pot, combine the granulated sugar and water. Place the skillet over medium heat and stir gently until the sugar completely dissolves and the mixture comes to a boil.
- Add the raw almonds to the skillet. Continue to cook, stirring constantly with a wooden spoon or heatproof spatula. The water will evaporate, and the sugar will crystallize around the almonds, giving them a sandy, white coating. Keep stirring.
- Reduce the heat to medium-low. Continue stirring constantly. The crystallized sugar will begin to melt again, turning into a glossy, caramel-like coating that adheres to the almonds. Do not stop stirring to ensure even coating and prevent burning.
- Once all the almonds are evenly coated and have a rich, golden brown, shiny appearance, immediately remove the skillet from the heat.
- This is the crucial step for separation: Quickly pour the coated almonds onto the prepared parchment-lined baking sheet. Use two forks or spatulas to spread the almonds out into a single, thin layer as rapidly as possible. Work fast, as they will cool and harden very quickly.
- Allow the almonds to cool completely and harden on the parchment paper, undisturbed. This usually takes about 15-20 minutes.
- Once fully cooled and crisp, gently break apart any remaining clumps. They will separate easily, ensuring you have individual, perfectly crunchy candied almonds every time.
Notes
- Crucial for separation: Spread almonds quickly and thinly on parchment paper after cooking.