There is nothing more frustrating than spending hours building the perfect layered bar, only to have the chocolate crack and the gooey caramel ooze out when you try to cut it. I used to dread the slicing process! But once I finally figured out the key to getting those clean, sharp, bakery-perfect edges, these Caramel Chocolate Decadence Bars became my absolute favorite treat to make.
This foolproof recipe delivers a stunning combination of rich cocoa shortbread, thick, chewy caramel, and a glossy chocolate shell, guaranteed to slice beautifully every time, building instant trust in your baking expertise.
Say Goodbye to Oozy Messes: Why This Recipe Works
The standard bar cookie often fails at the finish line because bakers don’t allow sufficient chilling time or they skip the crucial step that handles the differential melting points of chocolate and caramel.
For more citrusy delights, check out these creamy lemon crumble bars.
This recipe focuses intensely on structural integrity, ensuring that every layer-from the firm shortbread base to the set chocolate topping-is engineered for clean separation.
The Bakery-Perfect Edges Technique: Our Secret Weapon
The mandatory long chill ensures the entire bar is completely set, but the real secret lies in the heat application. Dipping a long, sharp chef’s knife into hot water and immediately wiping it dry is the key.
This technique warms the chocolate just enough to prevent micro-fractures upon impact, while the heat prevents the knife from dragging the sticky caramel layer, resulting in clean, non-oozy slices.
Unlike simply using a cold knife or allowing the bars to warm slightly before cutting-which leads to smearing and cracking-this method provides precision control, mimicking professional bakery efficiency.
Layers of Flavor: Understanding the Texture Profile
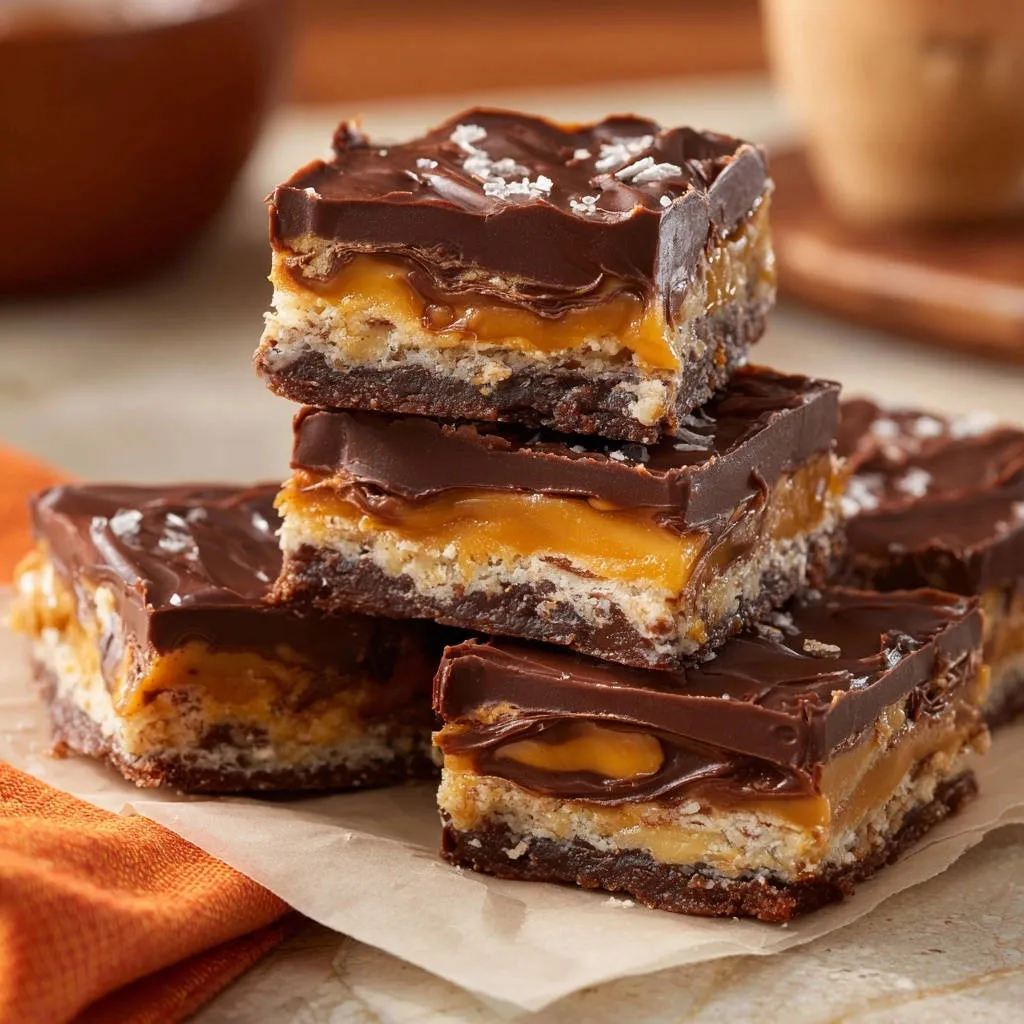
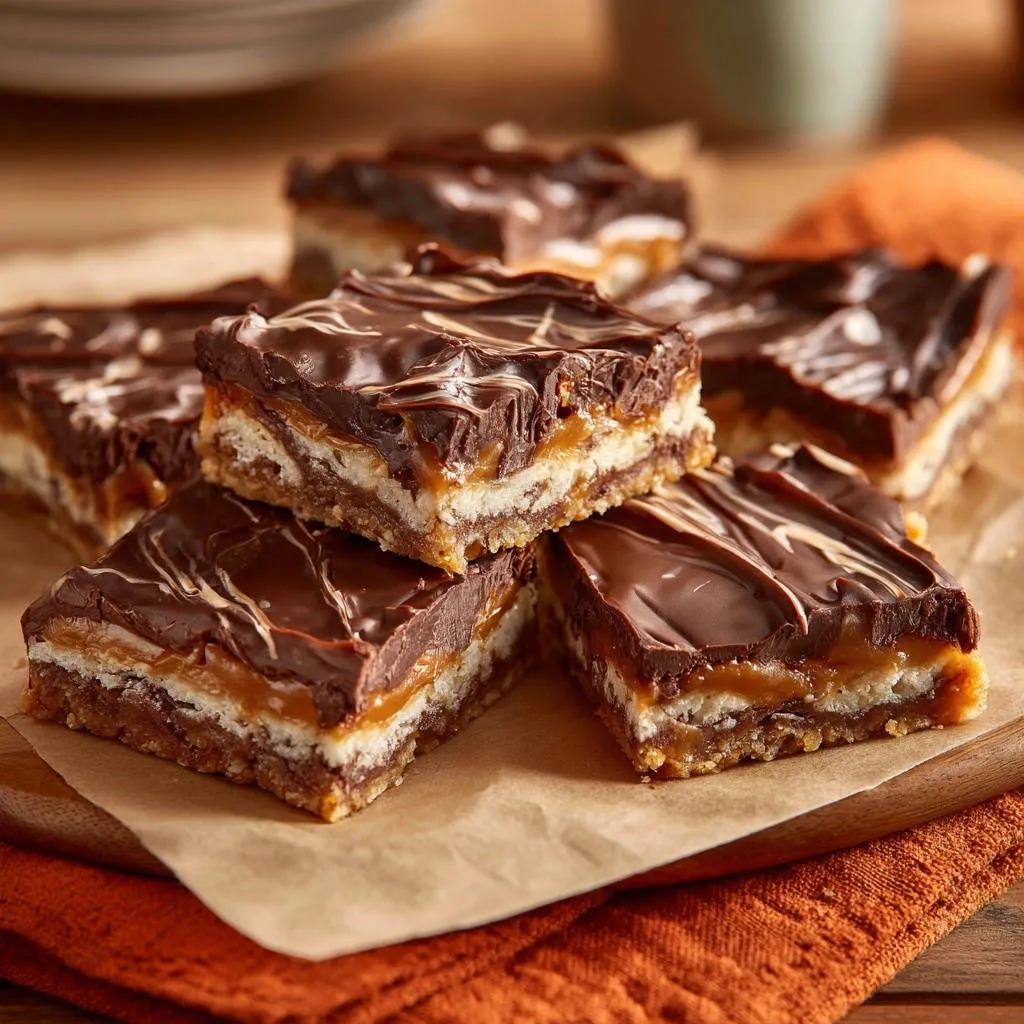
The magic of these Caramel Chocolate Decadence Bars is the dynamic textural contrast between the three distinct layers.
If you appreciate the textural contrast in these bars, explore how to achieve similar results in White Chocolate Cranberry Bliss Bars.
The base is a dense, buttery cocoa shortbread that provides a firm, slightly sandy counterpoint to the softer fillings, ensuring the entire bar holds together when sliced and handled.
The caramel layer, thickened by continuous boiling and sweetened condensed milk, delivers a signature deep chewiness that is satisfyingly gooey without running when warm.
Why Oil or Shortening is Critical for the Topping
Adding a small amount of vegetable oil or shortening (like Crisco) to the melted chocolate is a non-negotiable step for a perfect finish.
This added fat slightly thins the chocolate, preventing it from seizing, but most importantly, it lowers the overall cocoa butter ratio, resulting in a chocolate shell that is soft enough to yield cleanly under a knife without shattering or cracking.
Essential Ingredients for Layered Excellence
The Rich Cocoa Shortbread Base
The small amount of unsweetened cocoa powder works alongside the all-purpose flour to provide not only flavor but also a slightly tender texture that doesn’t become rock-hard after baking.
Using softened butter ensures that when combined with the sugar and cocoa, a pliable, easily pressed dough forms, guaranteeing a uniform and stable foundation for the heavier layers to come.
The Chew Factor: Building the Signature Caramel
Sweetened condensed milk is the backbone of this caramel, providing the necessary milk solids and sweetness for that signature smooth, incredibly chewy texture.
Continuous stirring is crucial during the initial boil to prevent the milk solids and sugar from scorching on the bottom, which would introduce a grainy texture and off-flavor.
The brown sugar, rather than granulated white sugar, adds a deeper molasses note and helps achieve that essential deep amber color and signature butterscotch flavor that defines truly decadent caramel.
The Optional Crumb Layer (For Texture Enthusiasts)
Combining shredded coconut, flour, and melted butter creates a thin, slightly crunchy barrier between the base and the caramel.
This coconut layer, which should be spread lightly over the warm baked shortbread, provides an extra layer of textural complexity and helps absorb any residual moisture from the caramel during cooking.
Essential Tools for Your Decadence Bars Adventure
The Right Pan Size (8×8):
An 8×8 inch square metal pan provides the perfect depth for thick, satisfying layered bars; for easy removal, line it completely with parchment paper, leaving generous overhangs on two sides.
Saucepan for Caramel:
A heavy-bottomed, medium-sized saucepan is highly recommended because it distributes heat evenly, drastically reducing the risk of your condensed milk and sugar mixture scorching, ensuring a smooth, clean caramel flavor.
The Hot Knife:
Use a long, straight-edged, sharp chef’s knife or slicing knife; its length allows you to make one continuous, clean cut, which is key to avoiding ragged edges.
Crafting Your Caramel Chocolate Decadence Bars: Step-by-Step
- Phase 1: Preparing and Pre-Baking the Base
In a medium bowl, combine the softened butter, sugar, flour, cocoa, and salt until a cohesive, slightly crumbly dough forms; press this mixture firmly and evenly into the bottom of your prepared 8×8 pan.
Bake the base for just 12 to 15 minutes at 350°F; the base is ready when the surface appears lightly set and feels dry to the touch, but is not yet browned or hard.
- Phase 2: Achieving the Perfect Caramel Consistency (The Chew Factor)
After melting the butter, incorporate the brown sugar and sweetened condensed milk and bring the mixture to a gentle, rolling boil over medium heat, stirring constantly for 5 to 7 minutes until it visibly thickens and shifts to a darker, amber tone.
Monitor the heat carefully-if the caramel boils too vigorously, the moisture will evaporate too quickly, resulting in a hard, potentially grainy layer rather than a chewy one; remove from heat before stirring in the vanilla and salt.
- Phase 3: Adding the Crumb Layer (If Applicable)
If using the optional coconut crumb layer, sprinkle the mixture of coconut, flour, and melted butter lightly and evenly over the warm, pre-baked shortbread base immediately after it comes out of the oven, but prior to pouring the hot caramel.
- Phase 4: The Critical Initial Chill and Topping
Pour the hot caramel over the prepared base and immediately transfer the pan to the refrigerator for at least 30 minutes; this critical initial chill allows the caramel to firm slightly, preventing the heavy chocolate topping from sinking into it.
While chilling, melt the chocolate chips with the required vegetable oil or shortening until perfectly smooth and glossy; the added fat ensures maximum sliceability later on.
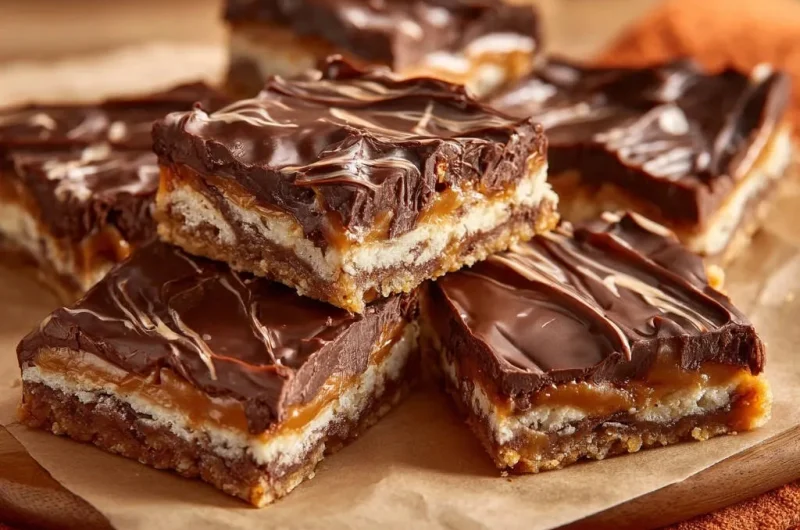
Pour the chocolate evenly over the stabilized caramel and immediately sprinkle the top with flaky sea salt for necessary texture, visual contrast, and a pop of flavor contrast.
Mastering the Cut: Achieving Truly Clean, Sharp Edges
This is the most crucial segment of the process for mastering truly impressive, bakery-quality Caramel Chocolate Decadence Bars.
Why Long Chilling is Non-Negotiable (4 Hours Minimum)
Layered bar recipes require extended chilling time-a minimum of four hours, but preferably overnight-to fully stabilize the structure.
This extended cooling period ensures that the thick caramel sets firmly and the chocolate topping reaches its maximum hardness, preventing both layers from dragging or oozing when the knife is applied.
The Hot Knife Method: Step-by-Step Execution
The hot knife method guarantees a perfect cut through all three layers.
Heat the Knife: Fill a tall glass with very hot tap water-almost boiling, if possible-and fully submerge the sharp blade of your chef’s knife for about 30 seconds.
Dry Immediately: Use a clean paper towel or kitchen cloth to wipe the knife completely dry, ensuring there is absolutely no moisture remaining, as water can cause chocolate to seize or leave streaks.
Firm, Single Slice: Place the hot, dry knife straight onto the bar surface and press down firmly and decisively in one straight motion to slice, then lift the knife straight up and out of the pan.
Repeat: Dip the knife back into the hot water, dry it thoroughly, and slice again for EVERY single subsequent cut; this constant repetition is key to maintaining a warm blade and achieving uniformly clean edges.
Troubleshooting Common Caramel Bar Challenges
Problem: My Caramel Layer is Too Hard or Grainy
If your caramel is grainy, it often means the sugar did not fully dissolve before you began boiling, or tiny sugar crystals splashed up onto the sides of the pan during the boil and fell back in, causing crystallization.
If the caramel is too hard, it means you boiled the mixture too long or over heat that was too high, evaporating too much moisture; next time, reduce the boil time by 1-2 minutes and look for the deep amber color, not excessive thickness.
Problem: The Chocolate Topping Cracked When I Sliced It
The most common cause of cracking is insufficient chilling time; if the caramel underneath is still slightly soft, the pressure from the knife can shift the bar, fracturing the chocolate.
Always ensure you are using the mandatory addition of vegetable oil or shortening in the topping mixture; this additive prevents the chocolate from becoming brittle and hard.
If the bars were well-chilled, the cracking is due to an insufficiently warmed knife; strictly adhere to the dip, dry, and slice process before EVERY single cut to temper the topping slightly.
Customizing Your Decadence: Substitutions and Variations
Gluten-Free and Dairy-Free Swaps
For a gluten-free base, substitute the all-purpose flour with a high-quality 1:1 gluten-free baking blend that contains xanthan gum, or use almond flour, increasing the butter slightly if the dough seems dry.
Dairy-free butter sticks can be used in both the base and caramel, and look for widely available dairy-free sweetened condensed coconut milk for the caramel layer.
Flavor Upgrades: Nuts, Spices, and Liqueurs
For added crunch and complexity, toast and chop pecans or walnuts and fold them into the crumb layer mixture before spreading it over the base.
A teaspoon of finely ground espresso powder mixed into the melted chocolate topping will dramatically deepen the cocoa flavor, and a small dash of high-quality bourbon or dark rum added to the caramel at the end (before vanilla) provides a nuanced, warming note.
Serving, Storing, and Making Ahead
Ideal Storage for Maximum Freshness
Due to the rich butter and condensed milk content of the chewy caramel, these bars are best stored in an airtight container in the refrigerator, where they will maintain peak freshness for up to 7 days.
If serving immediately, you can allow them to stand at cool room temperature for 30 minutes before serving; otherwise, keep them chilled to maintain the sharp structural integrity of the layers.
Make-Ahead Tips for Stress-Free Entertaining
These bars freeze beautifully once completely set and cut; wrap them individually or stacked with parchment paper in between, then place them in an airtight, freezer-safe container.
When you are ready to serve, thaw the frozen bars overnight in the refrigerator, or allow them to come to room temperature for about an hour for the best texture.
Frequently Asked Questions About Caramel Chocolate Decadence Bars
Can I use different types of chocolate for the topping?
Yes, you can substitute semi-sweet chocolate chips with milk chocolate or dark chocolate, depending on your preference for sweetness.
If using very dark chocolate, you may want to reduce the added oil/shortening slightly, as dark chocolate tends to be naturally more fluid when melted; taste and adjust accordingly.
How do I know when the caramel has thickened enough?
The caramel is ready when it has significantly reduced in volume, takes on a distinct amber hue, and is thick enough to coat the back of a spoon heavily, pulling away from the sides of the saucepan when stirred.
If using a candy thermometer, aim for approximately 225°F (soft-ball stage), though the visual cues of thickening and color change are often more reliable due to the nature of condensed milk.
Is the 8×8 pan size mandatory?
The 8×8 pan size is ideal for achieving the thick, decadent layers shown in the recipe; using a larger 9×13 pan will result in thinner layers.
If scaling up to a 9×13, you should increase all ingredients by 1.5 times to maintain thickness, and remember that baking times, particularly for the base, will likely decrease slightly.
Ready to Impress? Share Your Decadence Bars Masterpiece!
You now possess the expert knowledge required to overcome the most common frustration in layered bar baking-achieving the perfect, clean slice.
Try this recipe for Caramel Chocolate Decadence Bars and experience the joy of presenting a treat that looks as impressive as it tastes; we encourage you to use the hot knife technique and share your flawless results!
What to Try Next
To complement your Caramel Chocolate Decadence Bars, consider these breakfast treats.
- For a morning meal that balances sweetness, try these Fluffy Diner-Style Pancakes, offering a soft texture to contrast the rich bars.
- If you’re after a light and airy start, these Fluffy Golden Pancakes provide a delightful base that complements the chocolate notes.
Get ready for that glorious bite: the crisp, chocolate base, the deep, chewy caramel, and the smooth, satisfying chocolate shell-pure decadence in a square.
Caramel Chocolate Bars
Course: DessertCuisine: AmericanDifficulty: medium16
Bars (using 8×8 pan)25
minutes20
minutes450
kcal300
minutesThese layered bars feature a dense chocolate base, a thick, gooey homemade caramel, and a smooth chocolate topping. Learn the critical secret technique for cutting these bars without cracking the chocolate or having the caramel ooze out.
Ingredients
For the Base:
1 cup all purpose flour
1/4 cup unsweetened cocoa powder
1/2 cup butter, softened
1/4 cup granulated sugar
1/4 teaspoon salt
For the Caramel Layer:
1 cup butter (2 sticks)
1 cup packed light brown sugar
1 (14 ounce) can sweetened condensed milk
1 teaspoon vanilla extract
1/2 teaspoon salt
For the Crumb/Coconut Layer (Optional based on visual):
1 cup sweetened shredded coconut
2 tablespoons melted butter
1/4 cup all purpose flour
For the Chocolate Topping:
2 cups semi-sweet chocolate chips
2 tablespoons vegetable oil or shortening
Flaky sea salt, for garnish
Directions
- Prepare the Base: Preheat the oven to 350 degrees F. Line an 8×8 inch baking pan with parchment paper, leaving an overhang on two sides for easy removal. In a medium bowl, combine the flour, cocoa powder, softened butter, sugar, and salt until a dough forms. Press the dough evenly into the bottom of the prepared pan. Bake for 12 to 15 minutes, until lightly set. Remove from oven and set aside.
- Make the Crumb Layer (Optional but recommended for texture): While the base bakes, combine the coconut, melted butter, and flour until well mixed. Sprinkle this mixture lightly over the warm baked base.
- Create the Caramel Layer (The Chew Factor): In a medium saucepan, melt the butter over medium heat. Stir in the brown sugar and sweetened condensed milk. Bring the mixture to a gentle boil, stirring constantly for 5 to 7 minutes until the mixture thickens significantly and takes on a deep amber color. Stir in the vanilla and salt. Immediately pour the hot caramel evenly over the baked base layer.
- Chill and Top: Place the pan in the refrigerator for at least 30 minutes to allow the caramel to firm slightly. While chilling, melt the chocolate chips and vegetable oil/shortening together either in a microwave in 30 second intervals or over a double boiler until smooth and glossy. The oil/shortening is critical for a smooth sliceable topping. Pour the melted chocolate evenly over the cooled caramel layer. Sprinkle immediately with flaky sea salt.
- The Secret to Clean Slices (Addressing the Pain Point): Return the bars to the refrigerator and chill for a minimum of 4 hours, or ideally overnight, until the caramel and chocolate are completely firm. This long chilling period is mandatory for a non-oozy slice. When ready to cut, fill a tall glass with very hot water. Dip a long, sharp chef’s knife into the hot water, wiping it completely dry with a paper towel immediately before each cut. Press the hot, dry knife down firmly to slice the bars into squares. Repeat the dipping and wiping process before every single cut. This technique warms the chocolate slightly, preventing cracking and ensuring the knife passes cleanly through the caramel without dragging or sticking, resulting in bakery-perfect edges every time.
Notes
- Mandatory minimum 4-hour chill time. Use the hot, dry knife technique for perfect cuts.