There’s nothing quite like craving a warm, chocolatey breakfast that feels like a decadent dessert, only to end up with dry, crumbly oats. I’ve faced this frustration countless times, but after much experimentation, I finally cracked the code to truly exceptional Chocolate Peppermint Baked Oats. This recipe guarantees a deeply chocolatey, perfectly moist, and utterly satisfying result every single time, making it a true game-changer for your mornings or a delightful holiday treat.
Why This Chocolate Peppermint Baked Oats Recipe Is a Game-Changer
Say Goodbye to Dry, Crumbly Oats Forever
Many baked oat recipes fall short, leaving you with a texture that’s more like a dry cake than a luscious bowl of oats. This method focuses on moisture retention from start to finish.
For a similar texture, check out these chewy chocolate chip granola bars.
You’ll discover the simple yet powerful tricks that ensure your oats are always tender, moist, and never dry, transforming your baked oatmeal experience.
The “Deeply Chocolatey & Perfectly Moist” Promise
Beyond texture, this recipe delivers on flavor, promising a rich, intense chocolate experience balanced with refreshing peppermint. Each bite is a harmonious blend of indulgence.
The combination of quality ingredients and specific baking techniques ensures that perfect balance, making these Chocolate Peppermint Baked Oats a true delight.
A Holiday-Inspired Treat, Effortlessly Achieved
The classic pairing of chocolate and peppermint evokes a festive spirit, making this dish ideal for cozy holiday mornings or special brunches. Despite its impressive flavor, it’s incredibly simple to prepare.
Enjoy a sophisticated, festive breakfast without any complex steps, perfect for busy schedules yet impressive enough for guests.
Gather Your Indulgent Essentials: What You’ll Need
The Hearty Base: Rolled Oats
Rolled oats are the star here, providing a chewy, satisfying texture that holds up beautifully during baking. They absorb moisture wonderfully without turning mushy.
While quick oats can be a substitute, they will yield a softer, less substantial baked oat. Steel-cut oats are not recommended for this recipe due to their different cooking requirements.
Cocoa & Sweeteners: Crafting Rich Chocolate Flavor
Unsweetened cocoa powder is crucial for achieving a deep, authentic chocolate flavor without excessive sweetness. Its bitter notes provide a perfect contrast to the sugar.
Light brown sugar, packed, adds both sweetness and essential moisture. Packing the brown sugar ensures you get the correct quantity for optimal flavor and texture.
Moisture Makers: Milk & Vanilla
Milk, whether dairy or your preferred non-dairy alternative, is vital for hydrating the oats and creating that creamy, moist consistency. It acts as the primary liquid base.
Vanilla extract enhances the overall flavor profile, complementing the chocolate and peppermint beautifully while adding a subtle warmth.
The Festive Finish: Chocolate Chips & Crushed Candy Canes
Chocolate chips are mixed into the batter, melting into luscious pockets throughout the oats during baking, boosting the richness and providing gooey texture.
Crushed candy canes are reserved for topping, offering a delightful crunchy texture and that signature cool, refreshing peppermint burst on top.
The Essential Leavener: Baking Powder
Baking powder is a key ingredient, giving the oats a light lift and helping them achieve a fluffy, slightly cake-like texture rather than being dense or heavy. It creates tiny air pockets.
Essential Tools for Baked Oats Success
You don’t need fancy equipment to create these delightful baked oats, but having the right tools makes the process smoother and more enjoyable. Here’s what you’ll want on hand:
Small Oven-Safe Dish or Ramekin: An 8-ounce ramekin is ideal for a single serving, providing a perfectly portioned treat. Any small oven-safe baking dish will also work effectively for this recipe.
Medium Mixing Bowl: This is essential for comfortably combining all your dry and wet ingredients without any spills or mess. Choose one large enough to allow for thorough whisking and stirring.
Whisk: A good whisk is perfect for thoroughly incorporating dry ingredients, ensuring that the cocoa powder is evenly distributed and there are no lumps. It’s also great for initial wet ingredient mixing.
Spatula or Spoon: Use a spatula or sturdy spoon for gently stirring the wet ingredients into the dry, and for carefully folding in the chocolate chips. This helps prevent overmixing.
Measuring Cups and Spoons: Accuracy is key in baking! Using precise measuring cups and spoons ensures consistent results every single time, from flavor to texture.
Aluminum Foil: This is your secret weapon for locking in moisture during baking. It creates a steamy environment, preventing the oats from drying out prematurely.
Your Guide to Flawless Chocolate Peppermint Baked Oats: Step-by-Step
- Preheat & Prepare:
Preheat your oven to 375°F (190°C) to ensure it reaches the correct temperature before your oats go in. This consistent heat is vital for proper baking.
Lightly grease your chosen oven-safe dish, like an 8-ounce ramekin or a small baking dish, to prevent the oats from sticking and ensure easy removal.
- Combine Dry Ingredients:
In a medium bowl, thoroughly whisk together the rolled oats, cocoa powder, light brown sugar (remember it’s packed!), baking powder, and a pinch of salt. This crucial step ensures the cocoa powder is completely incorporated, preventing any dry pockets and distributing flavor evenly.
- Add Wet Ingredients:
Pour in the milk (dairy or non-dairy), maple syrup (if using), and vanilla extract into the bowl with your dry ingredients. Stir everything together gently until just combined. Be careful not to overmix; a gentle hand is key to maintaining a tender, moist texture in the final baked oats.
- Fold in Chocolate Chips:
Gently fold in the 1/4 cup of chocolate chips. These will melt beautifully as the oats bake, creating rich pockets of chocolate that enhance the decadent and moist consistency throughout your serving of Chocolate Peppermint Baked Oats.
- Transfer to Dish:
Carefully pour the oat mixture into your prepared baking dish. Spread it evenly to ensure uniform baking and consistent texture from edge to center.
- The Moistness Secret: Bake with Foil!
Bake for 20-25 minutes. For the ultimate rich and moist texture, cover the dish with aluminum foil for the first 15 minutes of baking. This steams the oats and locks in moisture, preventing them from drying out.
Then, remove the foil for the remaining 5-10 minutes to allow the top to set slightly and achieve a desirable texture without losing internal moisture.
- Rest & Absorb:
Once baked, remove the dish from the oven and let it cool for a few minutes. This resting period is vital, as the oats will continue to absorb liquid, becoming even more luscious, fully set, and satisfyingly tender.
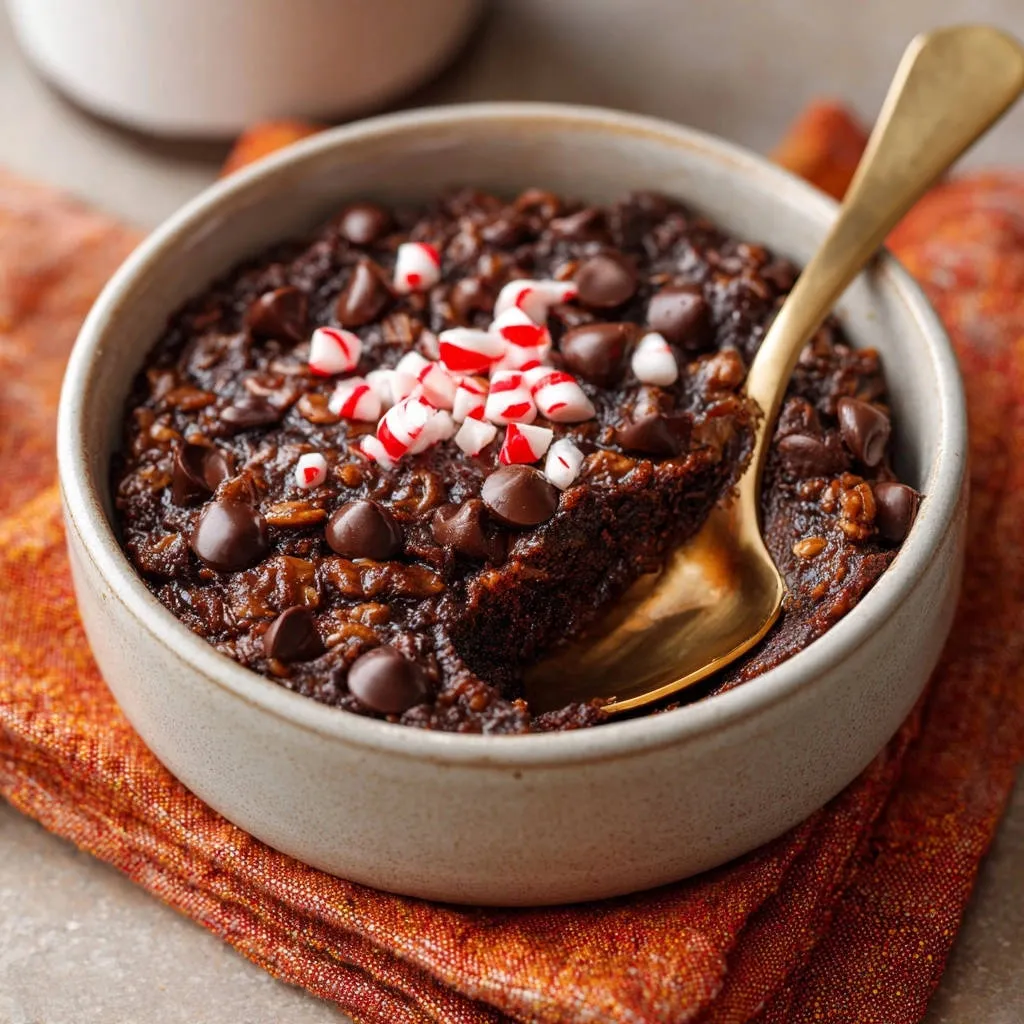
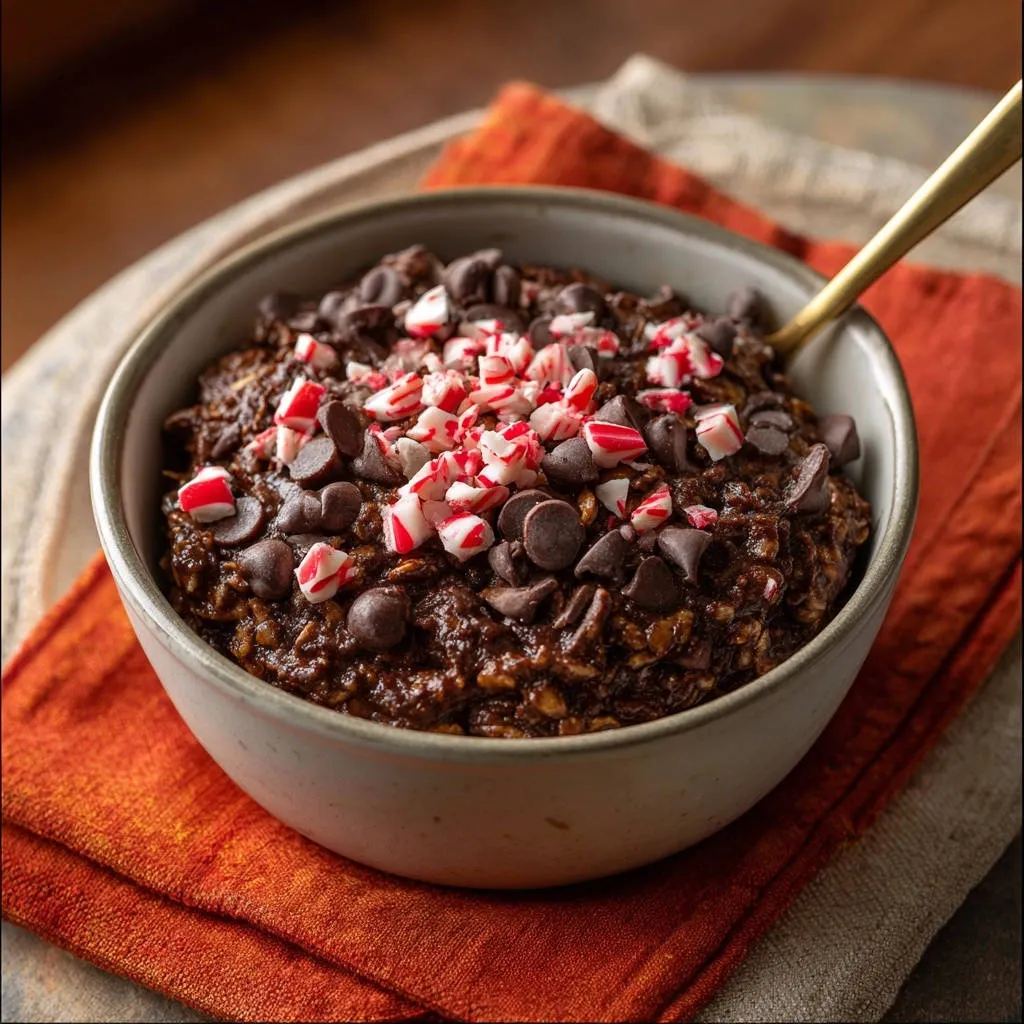
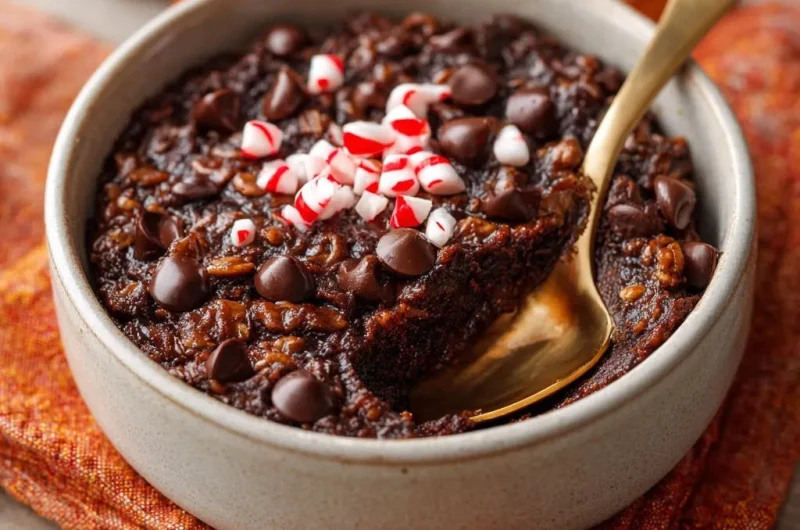
- Garnish & Serve:
Before serving, generously top your warm Chocolate Peppermint Baked Oats with additional chocolate chips (they’ll melt beautifully) and crushed candy canes for that iconic festive crunch and cool peppermint kick. Enjoy this incredibly rich, moist, and deeply satisfying treat!
Unlock the Secret to Unforgettable Moist Baked Oats
Why the Foil Matters: Steaming for Ultimate Softness
Covering your baking dish with aluminum foil creates a miniature steamy environment, mimicking a double boiler effect. This traps moisture inside, ensuring the oats cook through evenly without drying out.
The steam helps to gently cook the oats, resulting in a much softer and more tender texture, preventing a crusty or hard surface from forming too quickly.
Don’t Overmix: Preserving Tender Texture
Overmixing the batter can develop the gluten in the oats, leading to a tougher, chewier texture, which is undesirable for moist baked oats. A gentle stir until just combined is all that’s needed.
Aim for a mixture where all ingredients are incorporated, but stop as soon as you no longer see streaks of dry ingredients. This preserves the delicate structure and keeps the oats tender.
The Importance of Resting: A Final Hydration Boost
Allowing your baked oats to rest for a few minutes after baking is a critical, often overlooked step. During this time, the hot oats continue to absorb any residual liquid.
This final absorption process ensures a perfectly set, yet still incredibly moist and luscious consistency, preventing a watery bottom or dry top.
Beyond the Classic: Creative Variations & Clever Substitutions
Dairy-Free & Gluten-Free Adaptations
This Chocolate Peppermint Baked Oats recipe is easily adaptable for various dietary needs. For dairy-free versions, simply use any plant-based milk like almond, soy, or oat milk.
To make it gluten-free, ensure you use certified gluten-free rolled oats, as regular oats can sometimes be processed in facilities that handle wheat. The rest of the ingredients are naturally gluten-free.
Amping Up the Chocolate Factor
For an even more intense chocolate experience, consider adding a tablespoon of chocolate syrup swirled into the batter before baking. You could also use dark chocolate chips for a richer, less sweet flavor.
A sprinkle of good quality cocoa powder over the top before serving, or a dusting of shaved chocolate, will also add another layer of chocolatey indulgence.
Customizing Your Peppermint Punch
To adjust the peppermint intensity, you can add a tiny drop of pure peppermint extract to the wet ingredients. Start with just a quarter teaspoon and adjust to your preference, as extracts are potent.
Beyond candy canes, consider adding a sprinkle of mini peppermint patties (chopped) for a softer, more melt-in-your-mouth peppermint experience.
Adding Protein & Fiber Boosts
To enhance the nutritional profile of your Chocolate Peppermint Baked Oats, stir in a scoop of your favorite chocolate or vanilla protein powder with the dry ingredients. You might need a tiny splash more milk to maintain consistency.
For an extra fiber boost, a tablespoon of chia seeds or ground flax seeds can be added. They also contribute to the moistness by absorbing liquid.
Enjoying Your Baked Oats: Serving, Storage & Make-Ahead Tips
The Best Ways to Serve Your Festive Treat
These Chocolate Peppermint Baked Oats are fantastic on their own, but can be elevated with various toppings. A dollop of fresh whipped cream or a scoop of vanilla ice cream makes it an even more indulgent dessert.
For breakfast, a drizzle of extra maple syrup or a sprinkle of chopped nuts can add another layer of flavor and texture. Pair it with fresh berries for a bright contrast.
Storing Leftovers for Future Indulgence
Any leftover baked oats can be stored in an airtight container in the refrigerator for up to 3-4 days. This makes them perfect for quick, delicious breakfasts throughout the week.
Ensure they are completely cooled before transferring to storage to prevent condensation, which can make them soggy.
Make-Ahead Magic: Prep for Busy Mornings
To save time on busy mornings, you can prepare the oat mixture the night before. Simply mix all the ingredients as directed, cover the dish, and refrigerate overnight.
In the morning, give it a quick stir and bake as usual. This overnight soak can even enhance the texture, making your baked oats exceptionally moist and flavorful.
Reheating for Fresh-Baked Warmth
For individual servings, the easiest way to reheat your baked oats is in the microwave. Heat on medium power for 60-90 seconds, or until warmed through, checking halfway.
If reheating a larger portion, cover it loosely with foil and warm in a preheated oven at 300°F (150°C) for about 10-15 minutes, or until heated evenly.
Baked Oats Not Quite Right? Troubleshooting Common Issues
Why Are My Chocolate Peppermint Baked Oats Dry or Crumbly?
The most common culprits for dry baked oats are overbaking or not using the foil during the initial baking phase. Overbaking removes too much moisture, while skipping the foil prevents essential steaming.
Ensure your oven temperature is accurate and always adhere to the foil-baking step. You can also add an extra tablespoon of milk next time to increase the liquid content slightly.
My Baked Oats Didn’t Set Properly or Are Too Gooey!
If your baked oats are too gooey, they likely need more baking time. Ovens vary, so the specified time is a guideline; bake until the center is mostly set and liquid is absorbed.
Another reason could be insufficient resting time. Always allow the oats to cool and absorb remaining liquid before serving for a perfectly set texture.
The Peppermint Flavor is Overpowering (or Too Subtle)
The intensity of peppermint flavor primarily comes from the candy canes. If it’s too strong, reduce the amount of crushed candy canes used as a topping in future batches.
If you prefer a stronger kick, you can crush more candy canes or even carefully add a tiny drop of food-grade peppermint extract to the wet ingredients, starting with a very small amount.
My Baked Oats Tasted Bland or Not Chocolatey Enough
Ensure you’re using good quality unsweetened cocoa powder; the quality significantly impacts flavor. Also, make sure it’s thoroughly whisked into the dry ingredients for even distribution.
For more chocolate intensity, you can add an extra tablespoon of cocoa powder or increase the amount of chocolate chips folded into the batter. Consider a mix of milk and dark chocolate chips for complexity.
Your Top Questions Answered: Chocolate Peppermint Baked Oats FAQs
Can I use quick oats instead of rolled oats for this recipe?
While rolled oats are recommended for their chewy texture and ability to absorb liquid without becoming mushy, quick oats can be used in a pinch. However, they will result in a softer, less textured baked oat. Adjust baking time accordingly as quick oats cook faster.
Is this recipe suitable for meal prepping for the week?
Absolutely! These Chocolate Peppermint Baked Oats are excellent for meal prepping. You can bake individual servings and store them in airtight containers for up to 3-4 days in the refrigerator. Reheat gently in the microwave when you’re ready to enjoy.
Can I make a larger batch of Chocolate Peppermint Baked Oats?
Yes, you can easily scale up this recipe! Simply multiply the ingredients by the desired number of servings and bake in a larger oven-safe dish. Be sure to adjust the baking time, as a larger batch will likely require more time in the oven. Keep an eye on it to prevent drying out.
What other festive toppings would be good?
Beyond chocolate chips and candy canes, consider a drizzle of white chocolate, a dollop of whipped cream, a sprinkle of sea salt flakes to enhance the chocolate, or even a few mini marshmallows for extra sweetness and texture. For more topping ideas, check out our guide to breakfast garnishes!
Can I prepare the mixture the night before?
Yes, you can prepare the oat mixture the night before and store it covered in the refrigerator. This allows the oats to soak up the liquid even more, sometimes resulting in an even moister texture. Just give it a good stir before baking as directed in the morning.
Indulge in the Magic of Chocolate Peppermint Baked Oats
There’s a unique satisfaction in creating something truly delicious and knowing it’s guaranteed to be perfectly moist and deeply flavorful. This Chocolate Peppermint Baked Oats recipe promises just that – a festive, indulgent treat that will banish dry, bland oats from your kitchen forever. Whether it’s a cozy morning breakfast or a delightful dessert, you’re now equipped with the secret to baked oats perfection.
Don’t wait! Whip up a batch, savor the chocolatey peppermint bliss, and share your creations with us. We love seeing your culinary triumphs!
Baked Oats
Course: BreakfastCuisine: AmericanDifficulty: easy1
serving10
minutes20
minutes650
kcal30
minutesCraving a warm, dessert-like bowl of chocolate oats that’s never dry or bland? This recipe guarantees deeply chocolatey, perfectly moist baked oats every single time, with a secret trick for decadent results. Enjoy this satisfying chocolate peppermint treat!
Ingredients
1 cup rolled oats
2 tablespoons unsweetened cocoa powder
1/4 cup light brown sugar, packed
1/2 teaspoon baking powder
Pinch of salt
1 cup milk (dairy or non-dairy)
1 tablespoon maple syrup (optional, for extra sweetness)
1 teaspoon vanilla extract
1/4 cup chocolate chips, plus extra for topping
2 tablespoons crushed candy canes, for topping
Directions
- Preheat your oven to 375°F (190°C). Lightly grease a small oven-safe dish (such as an 8-ounce ramekin or a small baking dish).
- In a medium bowl, combine the rolled oats, cocoa powder, brown sugar, baking powder, and salt. Whisk everything together thoroughly until the cocoa powder is completely incorporated into the dry ingredients. This step ensures even flavor distribution and prevents any dry pockets in your finished oats.
- Add the milk, maple syrup (if using), and vanilla extract to the dry ingredients. Stir well until everything is just combined. Be careful not to overmix; a gentle stir is key to maintaining a tender, moist texture.
- Stir in the 1/4 cup of chocolate chips. These will melt beautifully into the oats during baking, contributing to the rich, decadent, and moist consistency throughout.
- Pour the oat mixture into your prepared baking dish.
- Bake for 20-25 minutes, or until the oats are set and most of the liquid has been absorbed. For the ultimate rich and moist texture, cover the dish with aluminum foil for the first 15 minutes of baking. This steams the oats and locks in moisture. Then, remove the foil for the remaining 5-10 minutes to allow the top to set slightly without drying out.
- Once baked, remove from the oven. Let it cool for a few minutes. The oats will continue to absorb liquid as they rest, becoming even more luscious and satisfying.
- Top with additional chocolate chips and crushed candy canes before serving. Enjoy this incredibly rich, moist, and deeply satisfying chocolate peppermint treat!
Notes
- For a creamier texture, consider using whole milk or a richer non-dairy milk like oat or cashew milk. Don’t overmix the batter after adding the wet ingredients; just stir until combined to keep the oats tender.