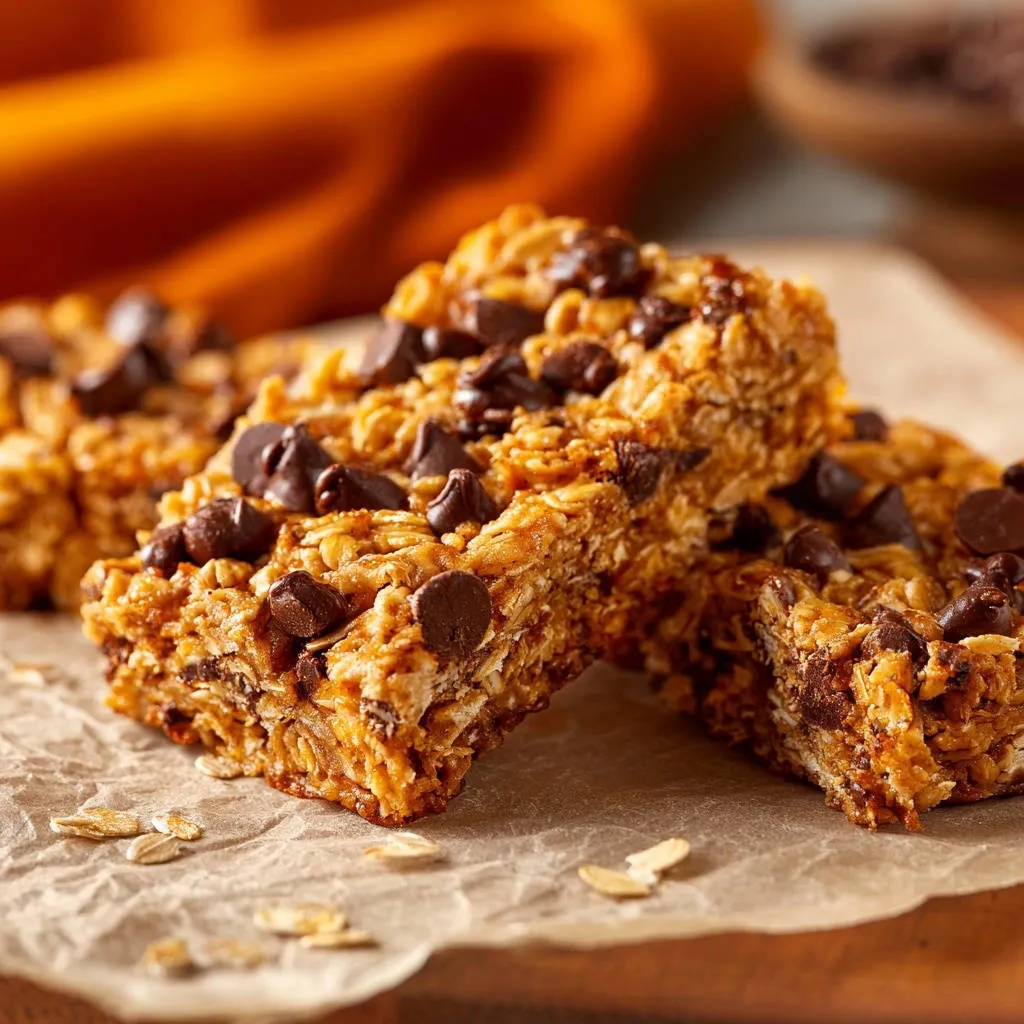
I know the frustration of homemade granola bars that promise so much, only to fall apart at the first bite. That’s why I perfected these Chewy Chocolate Chip Granola Bars – they’re incredibly delicious, packed with flavor, and most importantly, they hold together beautifully every single time.
This recipe ensures you get that satisfyingly chewy texture without any crumbling, making them the ultimate grab-and-go snack for busy mornings or an afternoon pick-me-up.
Why You’ll Love These Perfectly Sturdy Granola Bars
These aren’t just any granola bars; they’re a reliable, satisfying solution for wholesome snacking.
You’ll appreciate their consistent chewiness and rich flavor, perfect for both kids and adults.
They are an ideal candidate for meal prepping, ensuring you always have a quick, healthy-ish treat on hand.
The no-bake nature of this recipe makes them incredibly easy to assemble, minimizing time in the kitchen.
The Simple Secret to Granola Bars That Actually Hold Together
The magic behind these non-crumbly bars lies in a few crucial, yet simple, techniques.
Understanding these steps guarantees a perfectly cohesive bar every time you make them.
Pressing for Perfection: The Foundation of Sturdiness
Firmly pressing the mixture into the pan is the single most critical step for bar integrity.
This action compacts the oats and other ingredients, creating a dense, interlocked structure.
Without sufficient pressure, air pockets remain, weakening the overall binder and leading to crumbling.
The Chilling Factor: Why Patience Pays Off
Refrigeration solidifies the fats and binders within the mixture, transforming it from loose to firm.
As the butter and peanut butter cool, they act like glue, locking all the ingredients into place.
Adequate chilling time is essential; impatiently cutting warm bars will undoubtedly result in breakage.
Gather Your Goodness: What You’ll Need
High-quality ingredients are the foundation for delicious Chewy Chocolate Chip Granola Bars.
Each component plays a specific role in achieving the desired taste and texture.
The Rolled Oats Advantage
Old-fashioned rolled oats are essential for their texture and absorbency.
They soften without becoming mushy, providing the classic chewy base for your granola bars.
If you enjoy chewy textures, you might also like the satisfying crunch of this peanut butter krispie fudge.
Avoid instant or quick-cook oats, as they can result in a gummier texture and don’t bind as effectively.
Sweet & Sticky Binders: Peanut Butter & Honey
Creamy peanut butter adds rich flavor and is a fantastic binding agent.
Honey contributes natural sweetness and significant stickiness, crucial for holding the bars together.
If you enjoy adding sweetness to your bars, consider trying these caramel oat squares for a similar chewy texture.
For a nut-free option, sunflower seed butter works well, or try maple syrup as a vegan alternative to honey, adjusting consistency as needed.
Flavor Enhancers & Fat: Butter, Vanilla, Salt
Unsalted butter provides richness and aids in the overall binding of the ingredients as it chills.
Vanilla extract adds warmth and depth of flavor, making the chocolate chips shine.
A pinch of salt balances the sweetness, enhancing all the other flavors without making the bars salty.
Coconut oil can be used in place of butter for a slightly different flavor profile and to keep the bars dairy-free.
The Indulgent Touch: Chocolate Chips
Semi-sweet chocolate chips melt slightly into the warm oat mixture, then firm up for delightful pockets of chocolate.
These provide classic flavor and satisfying bursts of sweetness.
Consider using dark chocolate chips for a less sweet bar, or mini chips for more even distribution throughout.
More Chocolatey Goodness
If you loved these chewy chocolate chip granola bars, you’ll want to explore more rich chocolate creations.
- For another satisfying chocolate treat, try the Triple Chocolate Oatmeal Cookies, known for their chewy texture.
- If you’re in the mood for a warm chocolate dessert, consider the Chocolate Peppermint Baked Oats for a moist and comforting option.
Essential Tools for Granola Bar Success
Having the right kitchen tools makes preparing these granola bars effortless.
Each item contributes to a smooth and successful baking process.
8×8 inch baking pan: This size ensures the correct thickness for sturdy bars.
Parchment paper: Crucial for easy removal and prevents sticking.
Medium saucepan: For gently melting the wet ingredients without scorching.
Sturdy spatula or wooden spoon: Essential for thorough mixing and firm pressing.
Measuring cups and spoons: Accurate measurements are key for consistent results.
Crafting Your Chewy Chocolate Chip Granola Bars: A Step-by-Step Guide
Follow these detailed instructions for perfectly Chewy Chocolate Chip Granola Bars that never crumble.
Each step is designed for ease and guaranteed success.
Prep Work: Setting the Stage for Easy Release
Line an 8×8 inch baking pan with parchment paper, allowing a generous overhang on all sides.
This overhang acts as handles, making it incredibly easy to lift the entire slab of bars out of the pan once chilled.
The Melt: Creating Your Sticky Base
In a medium saucepan, combine the peanut butter, honey, and butter (or coconut oil).
Heat this mixture over low heat, stirring constantly, until the ingredients are completely melted and smooth; this usually takes just a few minutes.
Crucial Tip: Do not boil the mixture, as this can alter the texture of the binders and make the bars too hard.
Infusing Flavor: Vanilla & Salt
Remove the saucepan from the heat immediately after the mixture is smooth.
Stir in the vanilla extract and salt at this stage; adding vanilla off the heat preserves its delicate flavor.
Coating Every Oat: The Anti-Crumble Strategy
Add the 2 cups of old-fashioned rolled oats to the warm wet mixture in the saucepan.
Stir very vigorously, using a sturdy spatula, until every single oat flake is thoroughly coated; this complete coating is absolutely vital to ensure the bars bind together and don’t fall apart.
The Sweet Add-in: Folding in Chocolate Chips
Gently fold in the 1/2 cup of semi-sweet chocolate chips, distributing them evenly throughout the mixture.
If you’re looking for more delicious variations, consider adding chopped nuts, dried fruit, or even mini marshmallows-similar to how you might customize chewy apricot granola bars for a different flavor profile.
Press, Press, Press: The Crucial Compacting Step
Transfer the oat mixture to your prepared baking pan.
Using the back of a spatula, or even another piece of parchment paper on top, press the mixture down very, very firmly and evenly into the pan.
This firm pressing compacts the ingredients, eliminating air pockets and ensuring your bars hold together perfectly when cut.
The Chill Out: Setting for Success
Place the entire pan in the refrigerator.
Chill for a minimum of 2 hours, or until the bars are completely firm to the touch; this chilling time is absolutely crucial for the fats to solidify and for the bars to properly set.
Cut & Enjoy: The Sweet Reward
Once completely firm, use the parchment paper overhang to lift the entire slab out of the pan and onto a cutting board.
Cut into your desired bar sizes using a sharp knife for clean edges; store leftover bars in an airtight container in the refrigerator for optimal freshness.
Expert Tips for Granola Bar Perfection
Elevate your Chewy Chocolate Chip Granola Bars with these simple, effective tips.
These insights will help you achieve consistent excellence in flavor and texture.
Customizing Your Bars: Endless Possibilities
Beyond chocolate chips, consider folding in a 1/4 cup of chopped nuts like almonds or walnuts for added crunch and protein.
Dried fruits such as cranberries, raisins, or chopped apricots are excellent additions, offering a pleasant chew and natural sweetness.
A sprinkle of chia seeds or flax seeds can boost nutritional value without altering the texture significantly.
For a different flavor, try adding a pinch of cinnamon or a touch of orange zest to the wet mixture.
Achieving the Ideal Texture Every Time
Ensure your peanut butter and honey mixture is warm but not boiling; overheating can make the bars too hard, while too cool will prevent proper coating.
Do not skimp on stirring the oats; every single oat must be glazed with the binder for maximum hold.
Patience during the chilling phase is paramount; cold bars are strong bars.
Ensuring Clean Cuts and Perfect Portions
Use a very sharp knife to cut your chilled bars; a dull knife can drag and crumble the edges.
For extra clean cuts, run your knife under hot water and wipe it dry between slices.
Measure your cuts to achieve uniform bar sizes, which is especially helpful for portion control or packing lunches.
Troubleshooting Common Granola Bar Mishaps
Even expert recipe writers encounter issues sometimes, but armed with knowledge, you can fix them.
Here are solutions to common problems when making Chewy Chocolate Chip Granola Bars.
Why Are My Granola Bars Falling Apart?
The most common culprit is insufficient pressing; you truly need to exert significant force to compact the mixture.
Another reason could be not chilling the bars long enough; the binders need ample time to fully set.
Ensure all oats are thoroughly coated with the wet mixture; any dry spots will create weak points.
My Bars Are Too Hard/Soft, What Happened?
Bars that are too hard might be a result of overheating the peanut butter and honey mixture, which can cause the sugars to crystallize excessively.
If your bars are too soft or sticky, it might indicate an imbalance in ingredients, perhaps too much binder or not enough dry oats for absorption.
Make sure your measurements are precise, especially for the liquid ingredients.
The Chocolate Chips Melted Completely!
Adding the chocolate chips while the oat mixture is still very hot will cause them to melt entirely.
Allow the mixture to cool for a few minutes after coating the oats, before folding in the chocolate chips, to ensure they remain distinct pieces.
Storage, Serving, and Make-Ahead Magic
These Chewy Chocolate Chip Granola Bars are incredibly versatile for storage and enjoyment.
Plan ahead to always have a delicious, homemade snack ready.
Keeping Your Bars Fresh: Optimal Storage Solutions
Store your homemade granola bars in an airtight container in the refrigerator for up to 1-2 weeks.
Placing parchment paper between layers of bars can prevent them from sticking together.
Beyond the Snack: Creative Ways to Enjoy
While perfect on their own, these granola bars can be crumbled over a bowl of yogurt or a scoop of vanilla ice cream for a delightful dessert.
Enjoy them as a quick breakfast component alongside fruit, or pack them in lunchboxes for a wholesome treat.
Prep Ahead: Your Future Self Will Thank You
These bars are fantastic for make-ahead planning. You can prepare a double batch and keep them in the fridge for daily enjoyment.
They also freeze exceptionally well; wrap individual bars tightly in plastic wrap, then store them in a freezer-safe bag for up to 3 months, thawing at room temperature or in the fridge.
Your Burning Questions Answered: Granola Bar FAQs
I often get asked about substitutions and specific details for these Chewy Chocolate Chip Granola Bars.
Here are some of the most common inquiries addressed by an expert.
Can I Substitute the Peanut Butter?
Absolutely! Almond butter, cashew butter, or even a sunflower seed butter work beautifully as alternatives.
Be aware that some nut butters can be thicker or thinner, potentially requiring slight adjustments to the honey or oat quantities for the perfect consistency.
Are These Granola Bars Gluten-Free?
Yes, as long as you use certified gluten-free old-fashioned rolled oats, this recipe is naturally gluten-free.
Always check ingredient labels to ensure no hidden gluten-containing additives, especially for severe allergies, as with many other oat-based treats like chewy oatmeal bars.
How Long Do Homemade Granola Bars Last?
Stored in an airtight container in the refrigerator, these bars will stay fresh and delicious for 1 to 2 weeks.
Their firm texture actually holds up very well over time, especially compared to store-bought options.
Can I Freeze These Bars?
Yes, these bars freeze wonderfully! Wrap each bar individually in plastic wrap, then place them in a freezer-safe bag or container.
They can be frozen for up to 3 months; simply thaw them in the refrigerator or at room temperature for a quick snack.
Is There a Vegan Option for This Recipe?
Yes, you can easily make these vegan. Substitute the unsalted butter with an equal amount of coconut oil or a vegan butter alternative.
Replace the honey with maple syrup or agave nectar for a completely plant-based binder.
Ready to Transform Your Snacking?
I am confident that these Chewy Chocolate Chip Granola Bars will become a staple in your kitchen, ending your quest for a homemade granola bar that actually holds together.
Give this recipe a try and rediscover the joy of perfectly chewy, never-crumbly treats!
Don’t forget to share your creations with us on social media or leave a comment below; your success stories are my favorite part of sharing these recipes.
Granola Bars
Course: SnacksCuisine: AmericanDifficulty: easy4
12-16 bars15
minutes350
kcal120
minutesTired of crumbly homemade granola bars? This easy recipe reveals simple tricks to create perfectly sturdy, chewy chocolate chip granola bars that hold together every time. A delicious and satisfying snack!
Ingredients
2 cups old-fashioned rolled oats
1/2 cup creamy peanut butter
1/3 cup honey
2 tablespoons unsalted butter (or coconut oil)
1 teaspoon vanilla extract
1/4 teaspoon salt
1/2 cup semi-sweet chocolate chips
Directions
- Line an 8×8 inch baking pan with parchment paper, leaving an overhang on the sides for easy lifting.
- In a medium saucepan, combine the peanut butter, honey, and butter. Heat over low heat, stirring constantly, until the ingredients are melted and smooth. Do not boil.
- Remove the saucepan from the heat and stir in the vanilla extract and salt.
- Add the rolled oats to the saucepan. Stir vigorously until every single oat flake is thoroughly coated with the wet mixture. This even coating is key to preventing your bars from crumbling.
- Fold in the chocolate chips, distributing them evenly throughout the mixture.
- Transfer the oat mixture to the prepared baking pan. Using the back of a spatula or a piece of parchment paper, press the mixture down very, very firmly and evenly into the pan. This firm pressing is absolutely essential for compacting the ingredients and ensuring your bars hold together perfectly.
- Place the pan in the refrigerator and chill for at least 2 hours, or until the bars are completely firm. This chilling time is crucial for the bars to set and prevent crumbling when cut.
- Once firm, use the parchment paper overhang to lift the entire slab out of the pan. Place it on a cutting board and cut into desired bar sizes. Store leftover bars in an airtight container in the refrigerator.
Notes
- Firm pressing and thorough chilling are crucial for bars to hold together.