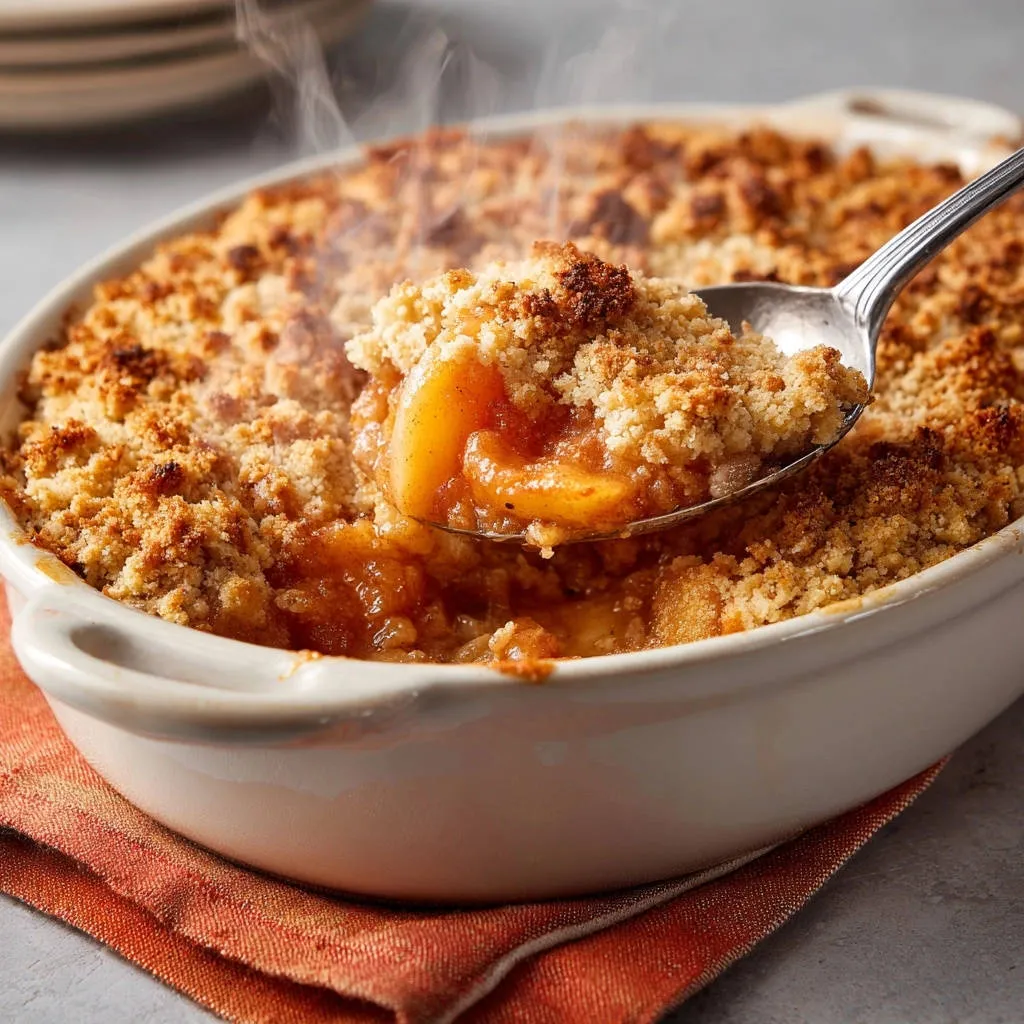
If you have ever baked a traditional crumble only to pull it from the oven and find the fruit swimming in a watery, sad mess, you know the disappointment. I used to struggle with that too, but this specific method for Classic Apple Crumble permanently solves that issue.
This recipe guarantees a thick, luscious, caramelized fruit filling that stands up beautifully to the crunchy topping, thanks to one crucial preparation trick we call the “thickening lock.”
The Secret Weapon Against Soggy Fruit Fillings
Why This Classic Apple Crumble Recipe Guarantees Perfection
The core innovation here is the strategic use of both all-purpose flour and cornstarch applied directly to the fruit mixture just before baking.
This dual-thickener approach ensures the liquid released by the apples converts into a perfectly set, syrupy consistency, preventing any watery residue at the bottom of your dish.
Quick Prep for Maximum Comfort
Despite the incredible, professional results, the preparation for this rich, warming dessert is straightforward and requires minimal effort.
It’s the ideal comforting treat suitable for a relaxed weekend or a quick weeknight dessert assembly.
Essential Components: What You Need for the Ultimate Crumble
Choosing the Best Baking Apples for Structure and Flavor
A mix of apples offers the best texture and flavor complexity in your Classic Apple Crumble.
Granny Smith apples provide essential tartness to balance the sweetness, while Honeycrisp maintains a firm texture even after extended baking.
The Double-Act Thickener: Flour and Cornstarch Synergy
We use flour primarily for volume and opacity, creating a classic, slightly cloudy richness in the sauce.
Cornstarch is the powerhouse thickener; it gels powerfully when heated, guaranteeing the filling achieves its jammy consistency.
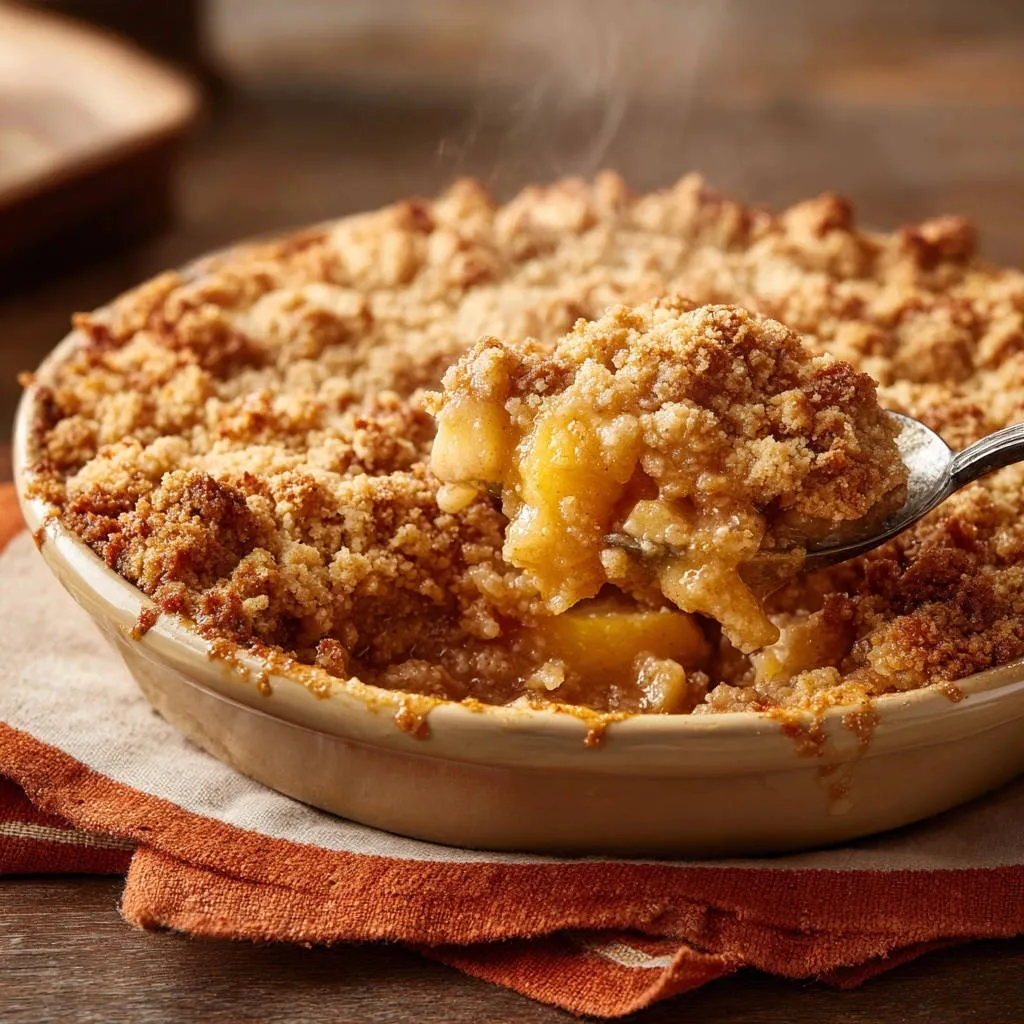
Achieving That Signature Coarse, Golden Topping
The butter must be added cold and cubed, which allows it to steam and separate the crumbs during baking rather than blending into a dough.
Using a mix of white sugar and packed light brown sugar imparts deep molasses notes and ensures a beautiful, golden-brown caramelized crunch.
Step-by-Step: Crafting Your Classic Apple Crumble Perfection
-
Preparation: Preheat and Grease
Preheat your oven to 375 degrees F (190°C) and lightly grease your 8 or 9-inch baking dish.
A little grease prevents the caramelized sugars from sticking to the edges during the long bubbling phase.
-
The Key Prep: Setting Up the Filling Solution
In a very large bowl, combine the sliced apples, brown and granulated sugars, spices, lemon juice, and vanilla extract; toss gently to coat everything.
Now, sprinkle the measured flour and cornstarch directly over the wet, coated apples-this is the secret thickening lock.
Toss again until the apples are evenly coated with the white thickening powder mixture, ensuring the filling thickens dramatically and evenly while baking.
-
Mastering the Cold Butter Technique for Crumbly Texture
In a separate medium bowl, whisk together the dry topping ingredients: flour, sugars, cinnamon, and salt.
Add the cold butter cubes and, using your fingertips or a pastry blender, quickly cut the butter into the flour mixture.
You are aiming for large, coarse crumbs that resemble damp sand mixed with some slightly larger, pea-sized clumps-do not overwork it into a smooth paste.
-
Assemble and Bake: Visual Cues for Success
Sprinkle the prepared crumble topping evenly over the fruit filling in the baking dish; avoid pressing or compacting it down.
Place the dish on a baking sheet to catch any potential drips, and bake for 40 to 50 minutes.
Baking is complete when the topping is deep golden brown and the fruit filling is visibly bubbling thickly and aggressively around the edges, signaling the starches have fully activated.
-
The Final Critical Step: Cooling Time is Non-Negotiable
Remove the Classic Apple Crumble from the oven and allow it to cool for a minimum of 15 to 20 minutes before serving.
Do not skip this critical cooling time! If you serve too soon, the cornstarch and flour won’t have fully set, risking a slightly runny outcome even with the thickening lock.
For a similar crumbly texture, explore creamy lemon crumble bars with a crisp crust.
Chef’s Corner: Advanced Tips to Elevate Your Bake
Optimize Your Spice Blend: For deeper flavor, gently toast your cinnamon and nutmeg in a dry pan for 30 seconds before mixing them into the filling.
You can also incorporate a pinch of ground cardamom for a sophisticated, warming complexity that complements the apple and brown sugar.
Chill the Topping (Optional, but Recommended): If your kitchen is warm, place the prepared crumble topping in the freezer for 10 minutes before assembly.
This ensures the butter remains hard and maximizes crumb separation, resulting in the ultimate flaky, crumbly topping once baked.
A Gluten-Free Option That Works: Easily substitute the all-purpose flour in both the topping and filling with a quality, reliable 1:1 gluten-free baking blend.
For a similar texture focus, check out Glazed Orange Creamsicle Cookies next.
Adding Oats for Texture: While this is a Classic Apple Crumble, you can add 1/4 cup of rolled oats to the topping mixture for an extra chewy dimension and appealing nuttiness.
Troubleshooting: Fixing Common Crumble Catastrophes
Why is the topping still pale after 40 minutes?
If the filling is clearly bubbling but the topping lacks color, move the dish to the top rack of the oven for the last 5 to 10 minutes.
Alternatively, your oven temperature might be running low; always use an external oven thermometer to verify accuracy.
The Filling Tastes Flat or Too Sweet
The tablespoon of lemon juice is non-negotiable; the acid cuts through the richness of the sugar and makes the flavor vibrant and bright.
If the apples you chose were naturally very sweet (like Fuji or Gala), next time decrease the granulated sugar slightly in the filling mixture for better balance.
My Topping Baked into One Solid Sheet
This typically signals that you overworked the butter mixture and allowed the butter to melt or blend too much with the flour.
Ensure the butter is exceptionally cold, and use a light, rapid, cutting motion when incorporating it-you want distinct chunks, not a smooth, cohesive dough.
Presentation and Preservation: Serving Your Masterpiece
The Best Accompaniments for Classic Apple Crumble
A classic vanilla bean ice cream that melts into the warm fruit is always highly recommended, providing a luscious temperature contrast.
For a sophisticated tang, consider serving the warm crumble with a dollop of fresh crème fraîche, or enhance the caramelized notes with a drizzle of simple whiskey caramel sauce.
Complementary Treats
Continue your dessert exploration with these sweet ideas.
- For a fun breakfast twist, try these Cinnamon Sugar Churro Waffles, offering a spiced sweetness that pairs well with fruit flavors.
- If you enjoy spiced baked goods, you’ll like the Fluffy Pumpkin Spice Pancakes, featuring warm spices similar to those in apple crumble.
Make-Ahead Tips for Easy Entertaining
You can prepare the apple filling (combined with sugar and spices, but without the flour/cornstarch thickeners) up to 24 hours ahead and store it covered in the refrigerator.
The crumble topping itself can be made and frozen for up to two months; sprinkle it directly onto the fruit while frozen before baking, adding 5-10 minutes to the total bake time.
Storage and Reheating Instructions
Store cooled leftovers tightly covered at room temperature for up to two days, or refrigerated for up to four days for maximum freshness.
For the best texture, reheat individual portions in a toaster oven or standard oven at 350°F (175°C) for 10-15 minutes until the topping is wonderfully crisp again.
Frequently Asked Questions About Apple Crumble
Can I use frozen apples for the filling?
Yes, but you must completely thaw them first and drain off every bit of excess liquid they release.
If you skip the draining step, the filling will be too wet, even with the thickening lock technique applied.
What is the difference between a Crumble and a Crisp?
A true crumble, like this recipe, uses a simple mixture of butter, flour, and sugar to create a soft, streusel-like topping.
A crisp contains oats or sometimes nuts mixed into the flour-butter blend, giving it a rougher, grainier, “crispier” texture once baked.
How do I know when the crumble is perfectly done?
Look for three simultaneous signs: the topping is deeply golden brown, the fruit underneath is bubbling thickly (meaning the starch has set), and you can smell the deep, caramelized apple aroma filling your kitchen.
Ready to Impress? Share Your Classic Apple Crumble Masterpiece!
This recipe transforms a simple, rustic dessert into an effortlessly perfect treat by eliminating the common fear of soggy fruit filling.
Whether you’re serving it at a holiday gathering or enjoying a quiet moment of comfort, you now hold the reliable secret to the best Classic Apple Crumble you will ever bake.
Don’t forget to share your delicious, never-soggy results with us!
Apple Crumble
Course: DessertCuisine: AmericanDifficulty: medium8
servings20
minutes40
minutes450
kcal60
minutesTired of watery fruit fillings? This Classic Apple Crumble recipe guarantees a thick, luscious, caramelized fruit filling every time by utilizing a simple thickening lock method. Featuring spiced apples beneath a perfect buttery, coarse crumb topping.
Ingredients
For the Filling:
6 medium baking apples (like Granny Smith or Honeycrisp), peeled, cored, and sliced
1/2 cup packed light brown sugar
1/4 cup granulated sugar
2 tablespoons all-purpose flour
1 tablespoon cornstarch
1 teaspoon ground cinnamon
1/4 teaspoon ground nutmeg
1 tablespoon lemon juice
1/2 teaspoon pure vanilla extract
For the Topping:
1 1/2 cups all-purpose flour
1/2 cup granulated sugar
1/2 cup packed light brown sugar
1/2 teaspoon ground cinnamon
1/4 teaspoon salt
3/4 cup (1 1/2 sticks) cold unsalted butter, cut into 1/2 inch cubes
Directions
- Prepare the Oven and Dish: Preheat your oven to 375 degrees F. Lightly grease an 8 or 9 inch baking dish.
- The Filling Solution (The Thickening Lock): In a very large bowl, combine the sliced apples, brown sugar, granulated sugar, cinnamon, nutmeg, lemon juice, and vanilla extract. Toss gently to coat. Now, sprinkle the 2 tablespoons of all-purpose flour and the 1 tablespoon of cornstarch directly over the fruit mixture. Toss again until all the apple slices are evenly coated. This combination of flours will ensure the fruit liquid thickens dramatically while baking, preventing a watery filling. Pour the fruit mixture into the prepared baking dish.
- Make the Topping: In a separate medium bowl, whisk together the flour, both sugars, cinnamon, and salt. Add the cold butter cubes. Using your fingers or a pastry blender, quickly cut the butter into the flour mixture until large, coarse crumbs form. You want the mixture to look like damp sand with some slightly larger pea-sized clumps. Do not over mix, keep the mixture cold and crumbly.
- Assemble and Bake: Sprinkle the crumble topping evenly over the fruit filling in the baking dish. Place the dish on a baking sheet (to catch any potential drips). Bake for 40 to 50 minutes, or until the topping is golden brown and the fruit filling is visibly bubbling thickly around the edges.
- Cool and Serve: Remove from the oven and allow the crumble to cool for at least 15 to 20 minutes before serving. This cooling time is essential, allowing the cornstarch and flour to set the thickened fruit juices fully, guaranteeing a perfect, non-watery result. Serve warm with ice cream or whipped cream.
Notes
- Cooling time (15-20 minutes) is essential for the filling to fully set and achieve a non-watery result.