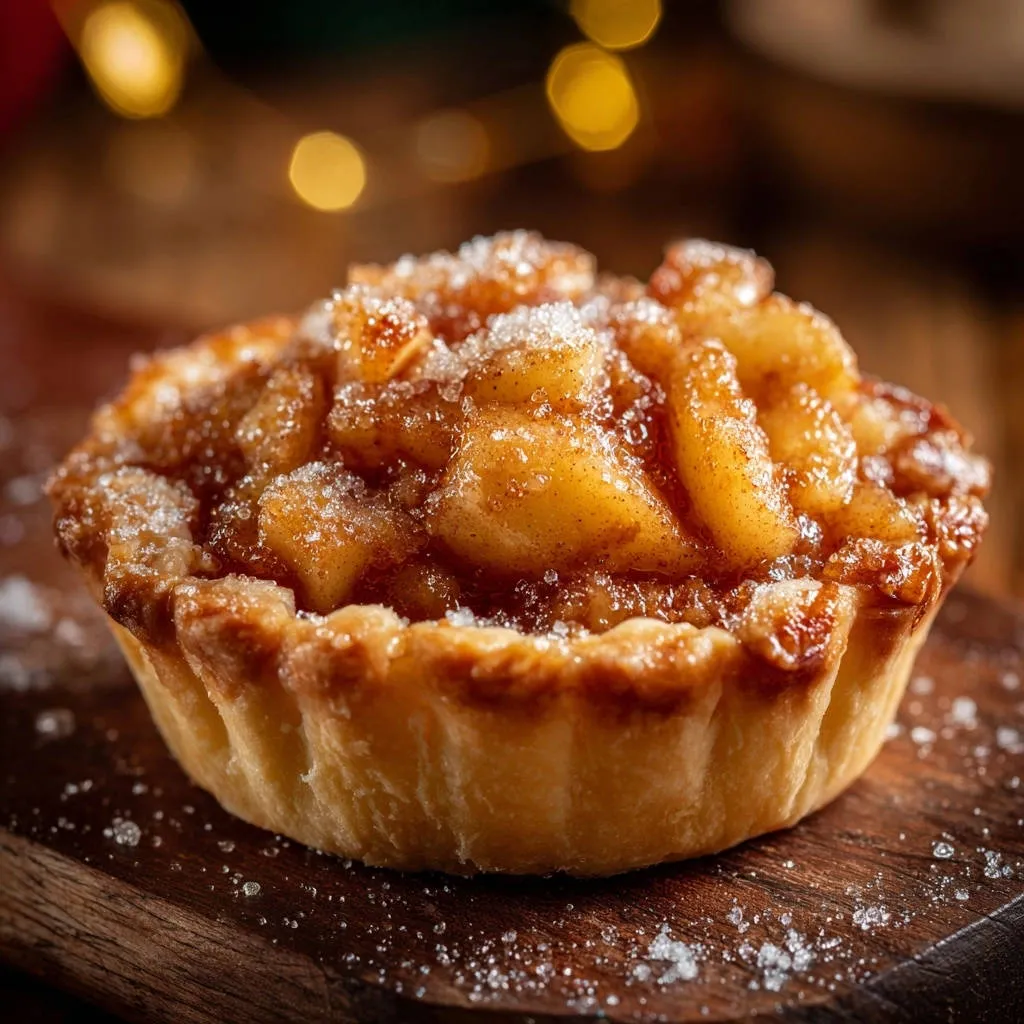
There’s a unique satisfaction in biting into a perfectly golden, crisp crust filled with warm, spiced apples. For years, the elusive “no soggy bottom” seemed like a baker’s myth, until I perfected this `Classic Apple Tartlet` recipe. It’s a delightful individual dessert that promises a reliably crisp crust, making every bite a testament to simple baking brilliance. This recipe transforms a common baking frustration into pure joy.
Why This Classic Apple Tartlet Recipe Will Be Your Go-To
The Secret Weapon: Eliminating Soggy Bottoms
A soggy crust can ruin an otherwise perfect apple tart. This recipe directly tackles that challenge with two key strategies, ensuring every `apple tartlet` comes out perfectly.
We employ blind baking the crust, creating a sturdy, moisture-resistant barrier from the start. This ensures a firm foundation that won’t absorb liquids from the filling.
Additionally, the apple filling is thoroughly cooked and thickened to reduce any excess liquid, preventing it from soaking into the crust during the final bake. This dual approach guarantees crispness.
Beyond Crisp: Flavor and Simplicity in Every Bite
Beyond the satisfying crunch, this `Classic Apple Tartlet` offers a harmonious blend of sweet, tender apples and warm cinnamon. The hint of lemon juice brightens the flavors beautifully, adding a zesty counterpoint.
For more crisp apple goodness, explore these apple oatmeal cookies.
Its individual size makes it a charming and manageable dessert, perfect for portion control, elegant serving, or a quick sweet treat. Using a store-bought crust also streamlines the process without compromising quality.
Gather Your Essentials: Ingredients for a Perfect Tartlet
For the Irresistible Crust
1 store-bought or homemade pie crust: Sufficient for one 4-inch tartlet. Opt for a high-quality store-bought crust for convenience, or embrace a homemade one for unparalleled flavor and texture in your `apple tartlet`.
The Sweet and Tangy Apple Filling
1 large apple (Honeycrisp or Fuji): Peeled, cored, and finely diced. These varieties hold their shape well and offer a balanced sweet-tart flavor, essential for a delicious filling.
2 tablespoons granulated sugar, plus extra for dusting: Sweetens the apples and aids in caramelization, enhancing their natural flavors and creating a beautiful glaze.
1/2 teaspoon ground cinnamon: The quintessential spice for apple desserts, providing warmth, depth, and that comforting aroma everyone loves.
1 tablespoon unsalted butter: Adds richness to the filling and helps the apples cook down beautifully, imparting a luscious texture.
1 teaspoon fresh lemon juice: Crucial for brightening the apple flavor and preventing browning, ensuring a vibrant and fresh-tasting filling.
1 teaspoon all-purpose flour: Key for thickening the filling and absorbing excess moisture, directly combating a soggy crust. It creates a cohesive, spoonable texture.
Choosing the Best Apples for Baking
Honeycrisp and Fuji apples are ideal choices due to their firm texture, which prevents them from turning to mush during baking. They also offer a delightful balance of sweetness and a hint of tartness, providing complex flavor in your `apple tartlet`.
Other excellent options include Granny Smith for a tarter profile, or Braeburn and Gala for a slightly sweeter, still firm result. Feel free to mix varieties for a more complex and nuanced `apple tartlet` flavor experience.
For a similarly comforting sweetness, explore how gooey cinnamon rolls transform simple ingredients.
Balancing Sweetness and Spice
The granulated sugar caramelizes with the apples, intensifying their natural sweetness and contributing to the filling’s texture. Ground cinnamon provides that comforting, classic apple pie spice aroma and taste that perfectly complements the fruit.
A touch of fresh lemon juice is vital; it prevents the apples from oxidizing and adds a zesty brightness, cutting through the sweetness and enhancing the overall flavor profile of your `apple tartlet`.
Baking Brilliance: Essential Tools for Your Tartlet Adventure
Must-Have Tartlet Equipment
4-inch Tart Pan with Removable Bottom: Essential for shaping your `Classic Apple Tartlet` and allowing for easy, damage-free removal once baked and cooled. A removable bottom is key for effortless presentation.
Parchment Paper: Used during blind baking to protect the crust and contain pie weights, ensuring even baking and preventing any sticking.
Pie Weights (or dried beans/rice): Crucial for blind baking. They prevent the pie crust from puffing up and shrinking, ensuring a perfectly flat and crisp bottom for your `apple tartlet`.
Medium Skillet: For cooking down the apple filling until it’s tender and properly thickened. A good non-stick skillet makes this process smoother and prevents scorching.
Wire Rack: Necessary for cooling the tartlet evenly after baking. This allows air circulation around the entire tartlet, preventing the bottom from becoming steamy and losing its desired crispness.
Your Path to Classic Apple Tartlet Perfection: A Detailed Guide
- Step 1: Prep and Preheat Your Oven.
Begin by preheating your oven to 375°F (190°C). Simultaneously, lightly grease a 4-inch tart pan with a removable bottom. This small step ensures your `apple tartlet` will release cleanly from the pan later, preserving its perfect shape and integrity.
- Step 2: The Crucial Blind Baking Foundation.
Gently press your pie crust into the prepared tart pan, ensuring it fits snugly against the sides and bottom. Trim any excess dough and crimp the edges to create a beautiful finish. Then, use a fork to pierce the bottom of the crust all over, about 10-12 times. This vital step allows steam to escape during baking, preventing the crust from puffing up and guaranteeing a perfectly flat, crisp base for your tartlet.
- Step 3: First Bake for Unrivaled Crispness.
Line the crust with parchment paper and fill it with your chosen pie weights, dried beans, or uncooked rice. Bake for 15 minutes. Afterward, carefully remove the parchment paper and weights and continue baking the crust for another 8-10 minutes, or until the bottom is lightly golden and feels dry to the touch. This creates a robust, moisture-proof barrier, essential for preventing a soggy bottom on your `Classic Apple Tartlet`.
- Step 4: Crafting the Sweet Apple Filling.
While the crust cools slightly, prepare your filling. In a medium skillet over medium heat, melt the unsalted butter. Add the finely diced apples, the 2 tablespoons of granulated sugar, and ground cinnamon. Cook, stirring occasionally, for 8-10 minutes. The apples should become slightly tender and release some of their natural liquid during this stage, softening for the perfect texture.
- Step 5: Thicken and Flavor for a Perfect Core.
Stir in the fresh lemon juice and the 1 teaspoon of all-purpose flour. Continue to cook for another 2-3 minutes, stirring constantly. You’ll notice the filling thickening significantly and any remaining liquid being absorbed. This is the second key defense against a soggy crust, as it ensures your filling won’t release excess moisture into the baked pastry, maintaining that crisp crust.
- Step 6: Assemble Your Delicious Tartlet.
Spoon the prepared apple filling evenly into the pre-baked tart crust. Mound it slightly in the center; this creates an appealing dome and allows for a generous, satisfying amount of filling in each `apple tartlet` bite.
- Step 7: Final Bake to Golden Perfection.
Return the tartlet to the oven and bake for an additional 15-20 minutes. Watch for the apple filling to become bubbly and the crust to achieve a beautiful, deep golden brown. This indicates the tartlet is thoroughly cooked, the flavors are melded, and the crust is wonderfully caramelized and crisp.
- Step 8: Cool Before Serving.
Once baked, remove the `Classic Apple Tartlet` from the oven and let it cool in the pan on a wire rack for at least 15 minutes. This cooling period is vital; it allows the tartlet to set properly, making it much easier to carefully remove from the pan without breakage or crumbling.
- Step 9: The Finishing Touch.
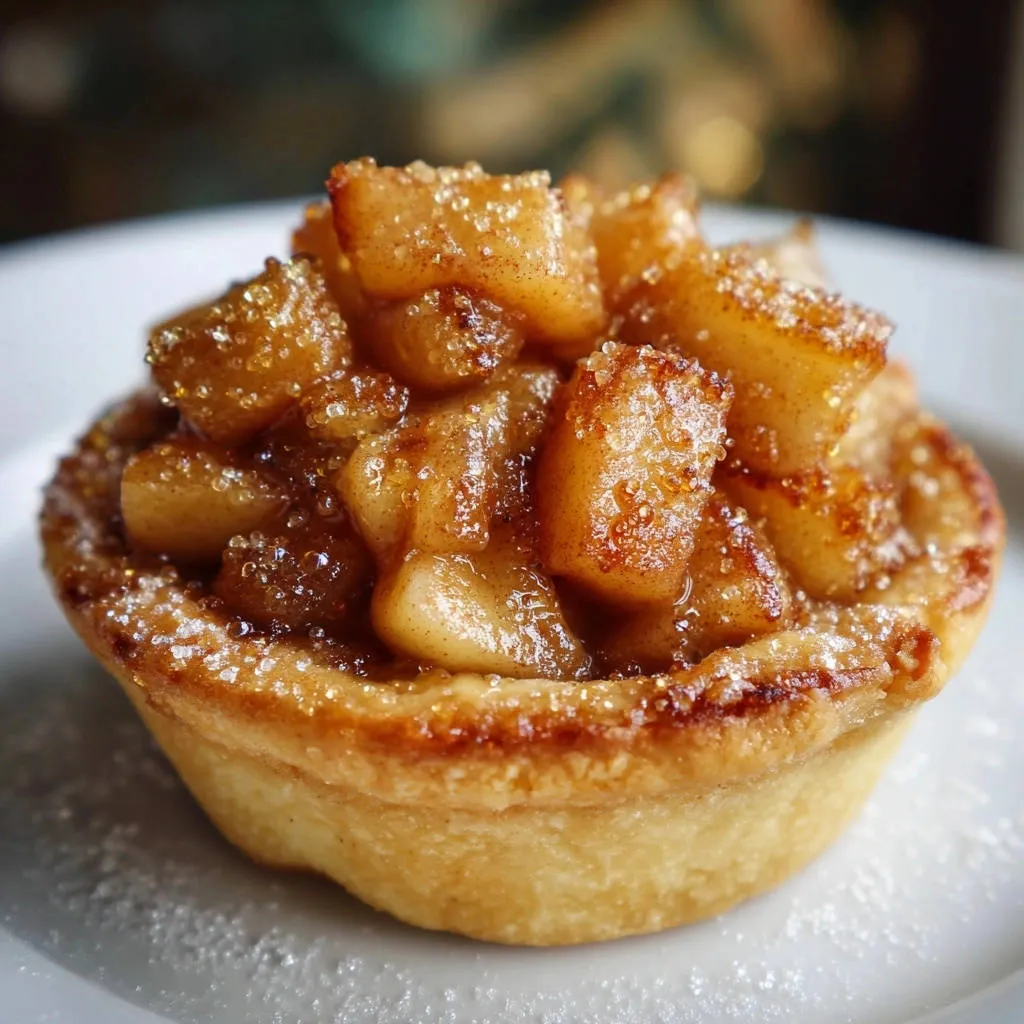
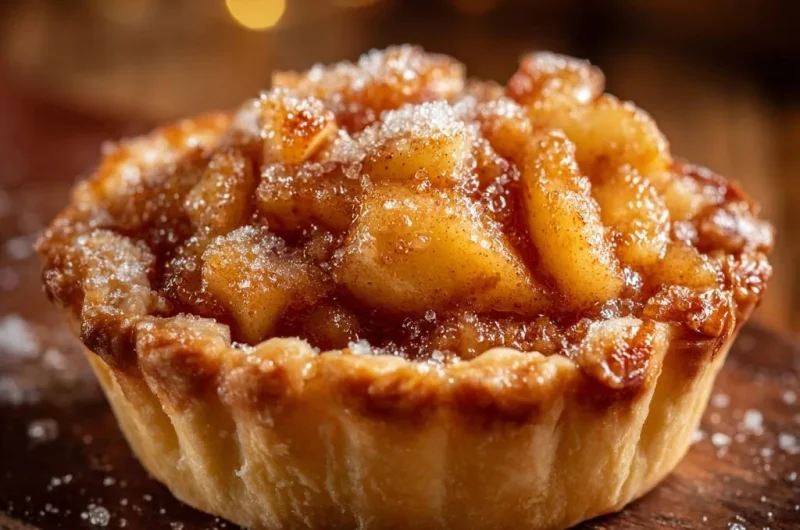
Just before serving, dust your `Classic Apple Tartlet` generously with extra granulated sugar. This simple final touch adds a sparkling visual appeal and a delightful extra hint of sweetness that truly elevates the experience. Enjoy your perfectly crisp apple tartlet!
Chef’s Secrets: Elevating Your Classic Apple Tartlet Game
Master the Blind Bake: Don’t rush this step. An adequately blind-baked crust is the ultimate defense against sogginess. Ensure it’s truly light golden and feels dry to the touch, not just baked for the recommended time. A fully baked crust creates a strong, impenetrable barrier for your `apple tartlet`.
Perfect Apple Dicing: Uniformly diced apples cook evenly, preventing some pieces from being too soft and others too firm. Aim for small, consistent cubes (about ¼-inch) for optimal texture in your filling and a cohesive bite in your `apple tartlet`.
Flavor Boosters: A tiny pinch of nutmeg, a dash of allspice, or a splash of vanilla extract can complement the cinnamon and apple beautifully. Experiment sparingly to find your perfect balance, enhancing the complexity of your `Classic Apple Tartlet` without overpowering it.
Homemade vs. Store-Bought Crust: While store-bought crust offers incredible convenience, a homemade crust provides superior flavor and texture. If you have time, it’s a rewarding effort that truly elevates the entire tartlet experience. For tips on making your own, explore our Classic Apple Pie recipe, which covers fundamental, foolproof crust techniques.
Don’t Overfill: While a mounded top is desirable, overfilling can lead to spillage during baking, creating a messy tartlet and potentially a burnt crust. Leave a little room around the edges of your `apple tartlet` for the filling to bubble safely and set without overflow.
Troubleshooting Common Classic Apple Tartlet Issues
Problem: My Tartlet Crust is Still Soggy!
Revisit your blind baking technique. The crust must be fully baked until it’s light golden and feels dry to the touch before adding the filling. Additionally, ensure your apple filling is properly thickened and free of excess liquid; undercooked flour won’t absorb moisture effectively, leading to a compromised crust for your `Classic Apple Tartlet`.
Problem: The Apple Filling is Too Runny.
This typically indicates that the flour in the filling didn’t have enough time to cook and properly thicken the apple liquids. Continue cooking the apple mixture for a few more minutes, stirring constantly, until it reaches a thick, jam-like consistency. The filling should cling to the back of a spoon, not run off.
Problem: My Apples Are Hard or Too Mushy.
If apples are hard, they likely needed more cooking time in the skillet before baking. If they’re mushy, they might have been cooked too long initially or were diced too small. Adjust your initial cooking time for the apples in the skillet to achieve your desired tenderness for the `apple tartlet` filling, aiming for soft but not disintegrated.
Problem: The Tartlet Stuck to the Pan.
Ensure your tart pan was adequately greased, especially if it’s not non-stick. Crucially, allow the `Classic Apple Tartlet` to cool sufficiently in the pan on a wire rack for at least 15 minutes before attempting to remove it; a warm tartlet is more fragile and prone to breaking during removal.
Serving Your Classic Apple Tartlet: Ideas & Perfect Pairings
Classic Ways to Indulge
A warm `Classic Apple Tartlet` is truly delightful on its own, simply dusted with a generous amount of powdered sugar for an elegant finish. For an extra touch of decadence, serve it with a scoop of premium vanilla bean ice cream that slowly melts into the warm apples, or a dollop of freshly whipped cream.
More Sweet Ideas
Round out your dessert spread with these delightful sweet treats.
- For a light and airy start to your morning or brunch, explore these fluffy diner-style pancakes, reminiscent of the comforting feel of a warm tartlet.
- If you’re craving more fluffy baked goods, try these fluffy golden pancakes for a similar comforting texture.
Perfect Beverage Pairings
Consider enhancing your tartlet experience by pairing it with a hot cup of coffee, a comforting mug of spiced cider, or a robust black tea. For an unexpected yet elegant complement, a glass of sparkling wine also pairs beautifully with the sweet and tangy notes of the `apple tartlet`.
Storing and Making Ahead Your Apple Tartlet
Optimal Storage for Freshness
Store leftover tartlets at room temperature for up to 2 days, loosely covered to maintain crust crispness. For longer storage, refrigerate for up to 4 days. Reheat gently in a warm oven for a few minutes to bring back that “freshly baked” taste and texture, especially the crispness of the crust, ensuring your `apple tartlet` remains delicious.
Can You Prepare Tartlets in Advance?
Absolutely! You can prepare the apple filling a day in advance and store it in an airtight container in the refrigerator. The blind-baked crusts can also be made a day ahead and stored at room temperature in an airtight container, ready for assembly and final baking, making your `apple tartlet` preparation seamless and stress-free.
Frequently Asked Questions About Classic Apple Tartlets
Can I use different types of apples for the filling?
Yes, absolutely! While Honeycrisp or Fuji are recommended for their ideal balance of sweetness and firmness, other excellent baking apples include Granny Smith (for a tarter flavor), Gala, Braeburn, or even a mix of varieties for more complex flavor in your `Classic Apple Tartlet`.
What if I don’t have pie weights for blind baking?
No problem at all! You can easily substitute dried beans, uncooked rice, or even granulated sugar as alternative pie weights. Just make sure to line the crust with parchment paper first to prevent any sticking or absorption of flavors into your `apple tartlet` crust.
Can I make this a full-sized apple tart instead of individual tartlets?
Yes, you can certainly adapt this recipe for a full-sized tart. You will need more pie crust and significantly more apple filling, and the baking times for both the blind bake and the final bake will need to be adjusted accordingly (likely longer). The core principles for achieving a perfectly crisp, non-soggy crust remain the same for a larger `apple tart`.
Is this recipe suitable for gluten-free diets?
With a simple substitution, yes! You will need to use a high-quality gluten-free pie crust, and ensure that the 1 teaspoon of all-purpose flour used to thicken the filling is also a gluten-free all-purpose blend. The other ingredients are naturally gluten-free, making it easy to enjoy a delicious gluten-free `Classic Apple Tartlet`.
Ready to Bake Your Best Classic Apple Tartlet Yet?
Armed with these expert techniques and insider tips, you are now perfectly equipped to craft a `Classic Apple Tartlet` that will impress with its perfectly crisp, never-soggy crust and luscious, flavorful apple filling. Say goodbye to baking disappointments forever!
We absolutely love seeing your culinary creations! Share your masterpiece with us on social media using #ClassicAppleTartlet and be sure to tag us. Don’t forget to explore our other decadent dessert recipes for even more baking inspiration and sweet delights.
Apple Tartlet
Course: DessertCuisine: AmericanDifficulty: medium1
tartlet20
minutes1
hour350
kcal60
minutesDiscover the secret to a perfectly crisp apple tartlet every time. This recipe includes crucial steps like blind baking and thickening the filling to ensure a golden, sturdy crust that beautifully complements the sweet apple filling, free from any sogginess.
Ingredients
1 store-bought or homemade pie crust, sufficient for one 4-inch tartlet
1 large apple, such as Honeycrisp or Fuji, peeled, cored, and finely diced
2 tablespoons granulated sugar, plus extra for dusting
1/2 teaspoon ground cinnamon
1 tablespoon unsalted butter
1 teaspoon fresh lemon juice
1 teaspoon all-purpose flour
Directions
- Preheat your oven to 375°F (190°C). Lightly grease a 4-inch tart pan with a removable bottom.
- To prevent a soggy bottom, the first crucial step is blind baking the crust. Gently press the pie crust into the prepared tart pan, making sure it fits snugly against the sides and bottom. Trim any excess dough and crimp the edges as desired. Use a fork to pierce the bottom of the crust all over, about 10-12 times. This allows steam to escape and prevents puffing.
- Line the crust with parchment paper and fill it with pie weights, dried beans, or uncooked rice. Bake for 15 minutes, then carefully remove the parchment paper and weights. Continue baking the crust for another 8-10 minutes, or until the bottom is lightly golden and feels dry to the touch. This creates a solid barrier against moisture. Remove from oven and let cool slightly.
- While the crust is baking, prepare the apple filling. In a medium skillet over medium heat, melt the unsalted butter. Add the diced apples, 2 tablespoons of granulated sugar, and cinnamon. Cook, stirring occasionally, for 8-10 minutes, or until the apples are slightly tender and have released some of their liquid.
- Stir in the fresh lemon juice and the 1 teaspoon of all-purpose flour. Continue to cook for another 2-3 minutes, stirring constantly, until the filling has thickened and any remaining liquid has been absorbed. This is the second key step to preventing a soggy crust, as it reduces excess moisture from the filling. Remove from heat.
- Spoon the prepared apple filling into the pre-baked tart crust, mounding it slightly in the center.
- Return the tartlet to the oven and bake for an additional 15-20 minutes, or until the apple filling is bubbly and the crust is a deep golden brown.
- Remove the tartlet from the oven and let it cool in the pan on a wire rack for at least 15 minutes before carefully removing it from the pan.
- Dust generously with extra granulated sugar before serving. Enjoy your perfectly crisp apple tartlet!
Notes
- Features blind baking and a thickened apple filling to prevent a soggy bottom crust, ensuring a perfect texture.