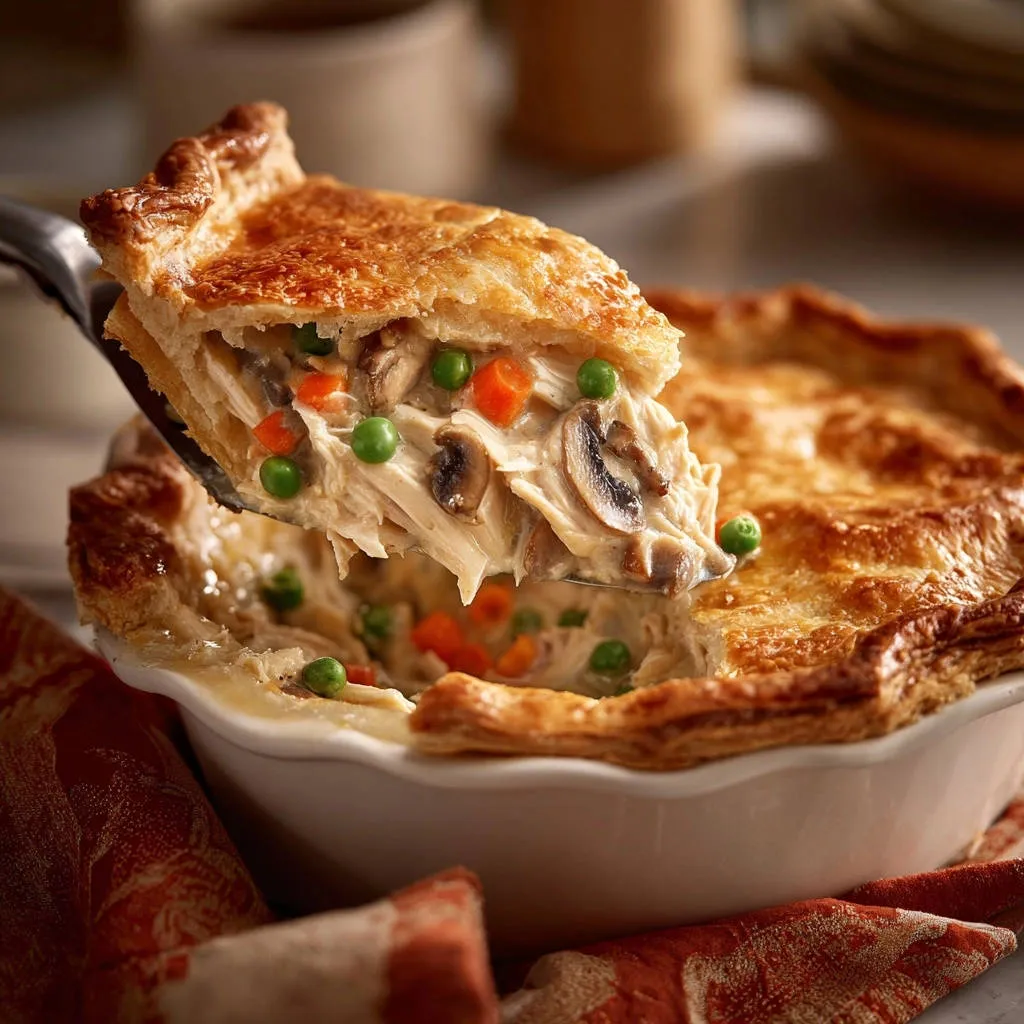
I remember the frustration of preparing a beautiful Classic Chicken Pot Pie, only to find the bottom crust sadly soggy. This common culinary challenge inspired me to perfect a foolproof method that guarantees a golden, crisp crust with every single slice. Get ready to bake a comforting classic that will impress everyone, from your family to your pickiest dinner guests.
The Secret to a Flawless Pot Pie: No More Soggy Bottoms!
Why Par-Baking Changes Everything
Par-baking the bottom crust before adding the filling is the game-changing secret to pot pie perfection. This initial bake creates a protective, partially cooked barrier against moisture. It’s the essential step that ensures your bottom crust stays beautifully crisp, never turning soft or gummy.
The Magic of a Perfectly Thickened Filling
A perfectly thickened filling is equally vital for achieving the ultimate Classic Chicken Pot Pie. A well-made roux forms the base of a rich, substantial sauce that clings beautifully to the ingredients. This prevents any watery liquid from soaking into your par-baked crust, preserving its delightful texture.
Gather Your Ingredients: Essential Building Blocks for Flavor
For the Rich and Savory Filling
The heart of our Classic Chicken Pot Pie is a robust, flavorful medley of proteins and vegetables.
Shredded Cooked Chicken Breast: Provides the comforting, savory star of the dish. This is easily adaptable from leftover roast chicken or freshly prepared breasts.
Cremini Mushrooms: These add a deep, earthy umami flavor and a pleasant, meaty texture. Their presence enriches the overall savory profile of the filling.
Diced Carrots: Offer natural sweetness, vibrant color, and a tender bite. They contribute essential nutrients and a classic taste to the pot pie.
Frozen Green Peas: Introduce a delightful pop of sweetness and bright green color. These tiny gems perfectly round out the traditional vegetable combination.
Creating the Silky, Thick Sauce Base
A silky, well-seasoned sauce binds the filling, transforming it into a cohesive and luxurious experience.
Unsalted Butter & All-Purpose Flour: These two form the classic roux, the crucial thickening agent for the sauce. Cooking them together also builds a foundational, nutty flavor.
Chicken Broth & Whole Milk: Provide the rich, savory liquid base for the sauce. The broth adds deep flavor, while whole milk contributes a creamy texture and richness.
Dried Thyme, Salt, & Black Pepper: These seasonings elevate the savory profile. Thyme, in particular, adds a distinct aromatic warmth essential to Classic Chicken Pot Pie.
The All-Important Crust and Finish
The crust defines the pot pie, offering a satisfying texture contrast and visual appeal for this homemade comfort food.
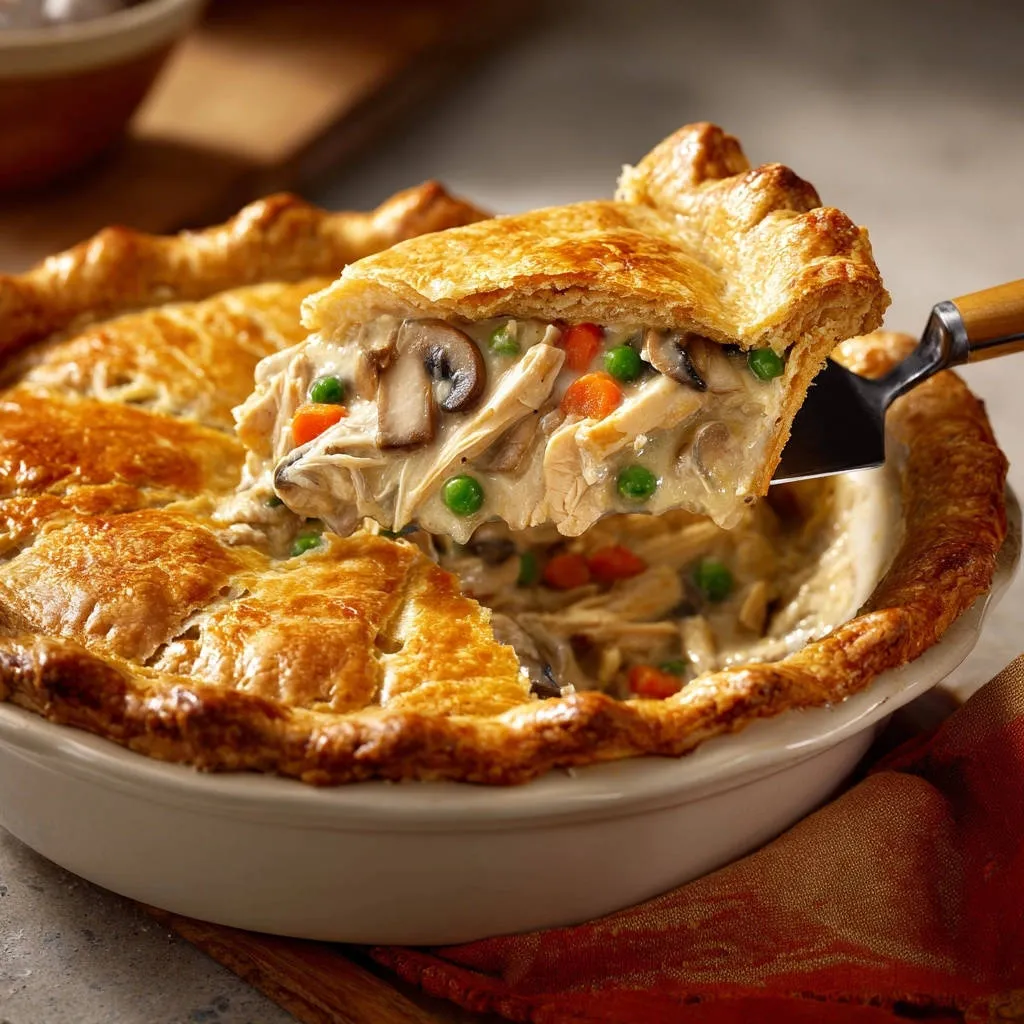
Refrigerated Pie Crusts: Using store-bought crusts offers incredible convenience without sacrificing quality. They provide a delicious, flaky pastry with minimal effort.
Beaten Egg (Egg Wash): Brushed on the top crust, it creates that signature glossy, deep golden-brown finish. This simple step enhances both the appearance and adds a subtle richness.
Crafting Your Masterpiece: A Step-by-Step Guide
- Preheat and Prepare:
Preheat your oven to 400°F (200°C). Gently place one refrigerated pie crust into a 9-inch pie dish, pressing it to fit the contours smoothly.
- The Critical Par-Bake:
Pierce the bottom and sides of the crust all over with a fork to prevent it from bubbling during baking. Line the crust with parchment paper and fill it evenly with pie weights or dried beans.
Bake for 12 to 15 minutes, or until the edges are lightly golden. This par-baking step is absolutely essential for creating that desired crisp bottom crust.
For an even crispier crust on your skillet chicken pot pie, discover skillet chicken pot pie perfection.
- Cool and Adjust:
Carefully remove the pie weights and parchment paper, then let the par-baked crust cool slightly. Reduce your oven temperature to 375°F (190°C) for the main bake.
- Soften the Aromatics:
While the crust cools, heat the olive oil in a large pot or Dutch oven over medium heat. Add the sliced cremini mushrooms and diced carrots to the hot oil.
Cook for 5 to 7 minutes, stirring occasionally, until the vegetables begin to soften and release their fragrant flavors.
- Add the Peas:
Stir in the frozen green peas and cook for another 2 minutes. This ensures they are heated through but still retain some vibrant color and a slight bite.
- Set Aside:
Remove the cooked vegetables from the pot and transfer them to a bowl. Set them aside for later combination with the creamy sauce.
- Melt the Butter:
In the same pot, melt the unsalted butter over medium heat until it’s fully liquefied and shimmering lightly.
- Whisk in Flour for Roux:
Whisk in the all-purpose flour and cook for 1 minute, stirring constantly. This creates a roux, cooking out the raw flour taste and beginning the thickening process.
- Gradually Add Liquids:
Gradually whisk in the chicken broth and whole milk until the mixture is completely smooth and lump-free. Continue whisking to ensure even incorporation.
- Thicken the Sauce:
Bring the mixture to a gentle simmer, stirring frequently, and cook for 5 to 7 minutes, until the sauce has thickened considerably. It should be thick enough to coat the back of a spoon.
This thick consistency is crucial; it prevents a watery filling from soaking and compromising your beautifully par-baked crust.
- Season the Sauce:
Stir in the dried thyme, salt, and black pepper. Taste and adjust the seasoning as needed to ensure a perfectly balanced flavor profile.
- Combine Ingredients:
Return the cooked vegetables and shredded cooked chicken to the pot with the thickened, creamy sauce.
- Mix Well:
Stir everything gently until it’s well combined and thoroughly heated through. Ensure all components are evenly distributed throughout the luscious sauce.
- Fill the Crust:
Pour the hot chicken and vegetable filling into the par-baked pie crust in the pie dish, distributing it evenly with a spatula.
- Top with Second Crust:
Carefully place the second refrigerated pie crust over the filling, centering it nicely.
- Seal and Vent:
Trim any excess dough from the edges and then crimp the edges of both crusts together firmly to seal the pot pie. Use a fork or your fingers for a decorative edge.
Cut several slits in the top crust with a sharp knife to allow steam to escape during baking. This prevents a soggy top crust and ensures even cooking.
- Apply Egg Wash:
Brush the top crust evenly with the beaten egg wash. This will give your Classic Chicken Pot Pie a beautiful, professional-looking golden finish and a lovely sheen.
- Bake to Perfection:
Bake for 30 to 40 minutes, or until the top crust is deeply golden brown and the filling is visibly bubbly around the edges.
- Prevent Over-Browning:
If the crust begins to brown too quickly before the filling is fully heated and bubbling, you can loosely tent it with aluminum foil.
- Crucial Cooling Step:
Let the pot pie cool for at least 15 minutes before serving. This allows the creamy filling to set properly, resulting in clean, firm slices and ensuring that perfectly firm bottom crust you worked so hard for!
Setting the Stage: Oven Prep and Par-Baking Your Crust
Building the Hearty Filling: Sautéing Vegetables
Mastering the Roux: The Foundation of Flavorful Gravy
Bringing It All Together: Combining Filling & Sauce
Assembling for Perfection: The Final Touches
The Golden Bake and Essential Cooling
Chef’s Secrets: Tips for Your Best Chicken Pot Pie Yet
Elevate your pot pie game with these expert tips, ensuring a perfect Classic Chicken Pot Pie every time.
Optimize Your Par-Baking: Ensure your pie weights cover the entire bottom of the crust for even baking and to prevent shrinking. Never rush this initial bake; it truly is the foundation of crispness for your savory pie.
For more ideas on achieving an extra-crisp crust, explore this flaky chicken pot pie.
Flavorful Chicken Choices: While shredded chicken breast is convenient, consider using leftover rotisserie chicken for extra flavor and moisture. Poached chicken thighs can also add a richer, more tender texture to the creamy filling.
Vegetable Variations: Feel free to customize your vegetable mix based on preference or what’s in season. Diced celery, potatoes, or corn can also be delicious additions. Just ensure any harder vegetables are cooked until tender before combining with the sauce.
A Richer Egg Wash: For an even deeper golden color and more brilliant shine on your flaky crust, add a teaspoon of water or milk to your beaten egg before brushing it on.
Preventing a Runny Filling: If your sauce seems too thin after simmering, allow it to bubble gently for a few more minutes to reduce further. Remember, it will thicken slightly more as it cools.
Troubleshooting Over-Browning: Do not hesitate to use aluminum foil to tent the edges or even the whole pie if the crust is browning too quickly. This protects it while the filling finishes cooking through.
Resting is Key: The 15-minute cooling period isn’t just a suggestion; it’s absolutely essential for the filling to set. Cutting into the pot pie too early can result in a messy, liquidy disaster.
Common Questions & Troubleshooting for Pot Pie Success
“My Bottom Crust is Still Soggy!”
A soggy bottom crust typically indicates insufficient par-baking. Ensure you bake the crust with weights until the edges are lightly golden and the bottom appears dry. Also, verify your filling is thick enough and allow adequate cooling time before serving.
“Why is My Filling Too Thin?”
A thin filling usually means the roux wasn’t cooked long enough, or the sauce didn’t simmer sufficiently to thicken. Make sure your roux cooks for at least a minute, and allow the broth and milk mixture to simmer until it coats the back of a spoon thickly.
“How Do I Get My Crust Evenly Golden?”
For an evenly golden crust, ensure your egg wash is applied uniformly over the entire top crust. Rotate your pie halfway through baking to account for potential oven hot spots. If one part browns faster, use small pieces of foil to shield just those areas.
“Can I Make This Ahead?”
Yes, you can prepare the filling completely ahead of time and store it in the refrigerator for up to 2-3 days. You can also par-bake the bottom crust and cool it. Assemble the Classic Chicken Pot Pie just before baking for the freshest result and optimal crust crispness.
Serving, Storage, and Enjoying Your Homemade Delight
Perfect Pairings and Serving Suggestions
This hearty Classic Chicken Pot Pie is a complete meal in itself, offering ultimate homemade comfort. It pairs wonderfully with a simple, crisp green salad dressed with a light vinaigrette to balance the richness. A side of tart cranberry sauce or tender steamed green beans can also be lovely additions.
What Else to Try
Round out your chicken pot pie meal with these other comforting dishes.
- For a rich starter, consider this Creamy Lobster Clam Chowder, sharing a similar creamy texture.
- Pair your pot pie with these Fluffy Mashed Potatoes with Gravy for a classic combination.
Storing Leftovers for Lasting Enjoyment
Allow any leftover Classic Chicken Pot Pie to cool completely to room temperature before covering it tightly with plastic wrap or aluminum foil. Store it in the refrigerator for up to 3-4 days. Reheat individual slices gently in the oven or microwave until thoroughly warmed through.
Freezing for Future Feasts
To freeze, you can either bake the pie completely, cool it, then wrap tightly in plastic wrap and foil before freezing for up to 3 months. Alternatively, assemble the pie (without baking), wrap it well, and freeze. Bake from frozen, adding an extra 30-45 minutes to the bake time, or thaw overnight in the fridge before baking as directed.
Ready to Impress? Share Your Chicken Pot Pie Creation!
There’s nothing quite as comforting and satisfying as a homemade Classic Chicken Pot Pie, especially when you know it’s going to have that coveted crisp bottom crust every single time. This recipe is designed to bring you success and delight, transforming a beloved classic dish into your new culinary triumph.
Now that you’re armed with the secrets to a perfectly crisp crust and a luscious, thick filling, it’s time to preheat your oven and create your own pot pie perfection. We can’t wait to hear about your delightful experiences!
Chicken Pot Pie
Course: Main CourseCuisine: AmericanDifficulty: medium6
servings30
minutes45
minutes750
kcal75
minutesMaster the ultimate Classic Chicken Pot Pie with a simple trick for a guaranteed crisp bottom crust! This comforting recipe boasts a rich, creamy filling of chicken and vegetables, all baked in a golden, flaky pastry.
Ingredients
1 tablespoon olive oil
1 cup sliced cremini mushrooms
1 cup diced carrots
1/2 cup frozen green peas
2 cups shredded cooked chicken breast
1/2 cup unsalted butter
1/2 cup all purpose flour
3 cups chicken broth
1 cup whole milk
1/2 teaspoon dried thyme
1/2 teaspoon salt
1/4 teaspoon black pepper
2 refrigerated pie crusts (store bought is fine)
1 egg, beaten (for egg wash)
Directions
- Preheat your oven to 400 degrees F (200 degrees C). Place one pie crust into a 9 inch pie dish. Pierce the bottom and sides all over with a fork. Line the crust with parchment paper and fill with pie weights or dried beans. Bake for 12 to 15 minutes, or until the edges are lightly golden. This critical step, called par baking, creates a barrier that prevents your bottom crust from getting soggy. Remove the weights and parchment paper and let the crust cool slightly. Reduce oven temperature to 375 degrees F (190 degrees C).
- While the bottom crust cools, prepare the filling. In a large pot or Dutch oven, heat the olive oil over medium heat. Add the sliced mushrooms and diced carrots. Cook for 5 to 7 minutes, stirring occasionally, until the vegetables begin to soften. Stir in the frozen green peas and cook for another 2 minutes. Remove the vegetables from the pot and set aside.
- In the same pot, melt the butter over medium heat. Whisk in the flour and cook for 1 minute, stirring constantly, to create a roux. Gradually whisk in the chicken broth and whole milk until smooth. Bring the mixture to a gentle simmer, stirring frequently, and cook for 5 to 7 minutes, until the sauce has thickened considerably. This thick sauce is key to preventing a watery filling from soaking your par baked crust. Stir in the dried thyme, salt, and black pepper.
- Return the cooked vegetables and shredded chicken to the pot with the thickened sauce. Stir until everything is well combined and heated through.
- Pour the hot chicken and vegetable filling into the par baked pie crust in the pie dish.
- Place the second pie crust over the filling. Trim and crimp the edges of both crusts together to seal. Cut several slits in the top crust to allow steam to escape. Brush the top crust evenly with the beaten egg wash for a beautiful golden finish.
- Bake for 30 to 40 minutes, or until the crust is deeply golden brown and the filling is bubbly. If the crust begins to brown too quickly, you can loosely tent it with aluminum foil.
- Let the pot pie cool for at least 15 minutes before serving. This allows the filling to set properly, giving you clean slices and ensuring that perfectly firm bottom crust you worked so hard for!
Notes
- To ensure a flaky bottom crust, par-baking it until lightly golden before adding the filling will prevent sogginess. For a richer flavor, consider using a combination of chicken broth and a splash of heavy cream for the sauce.