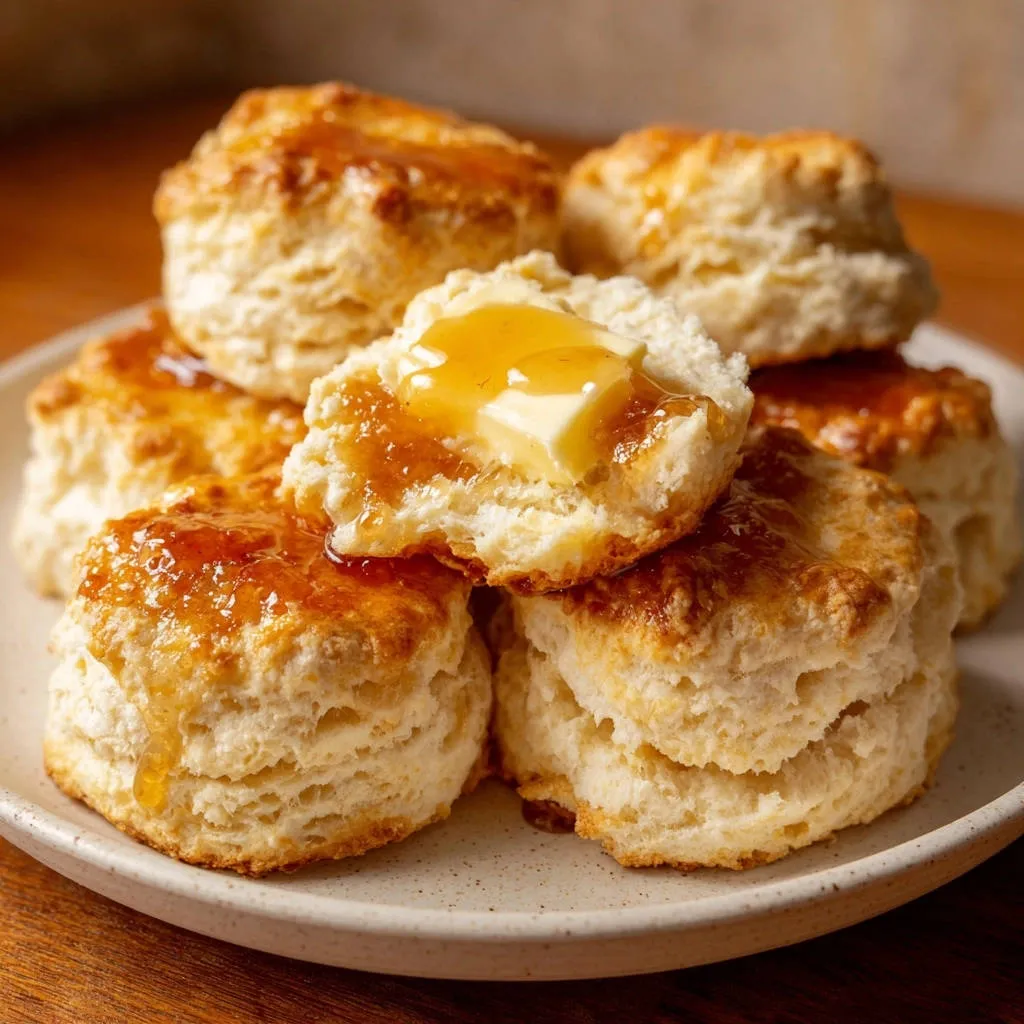
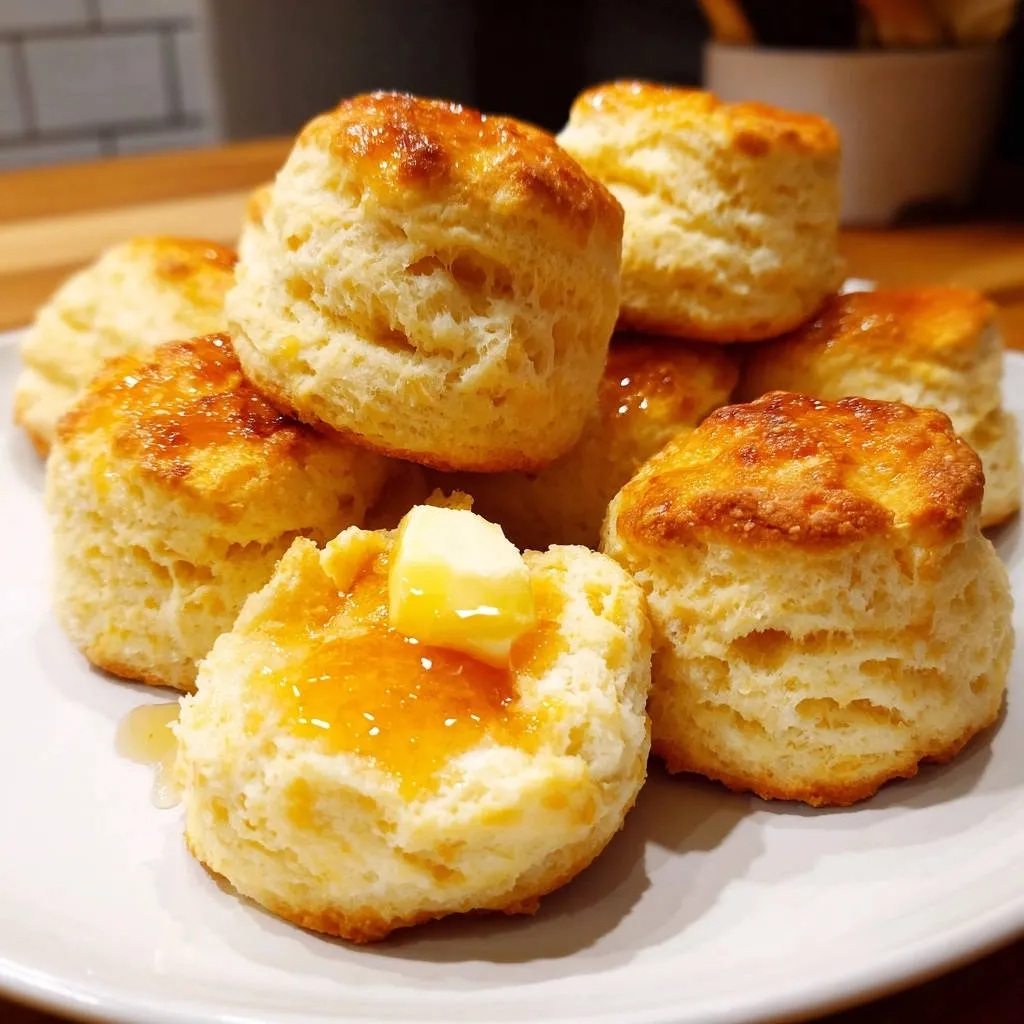
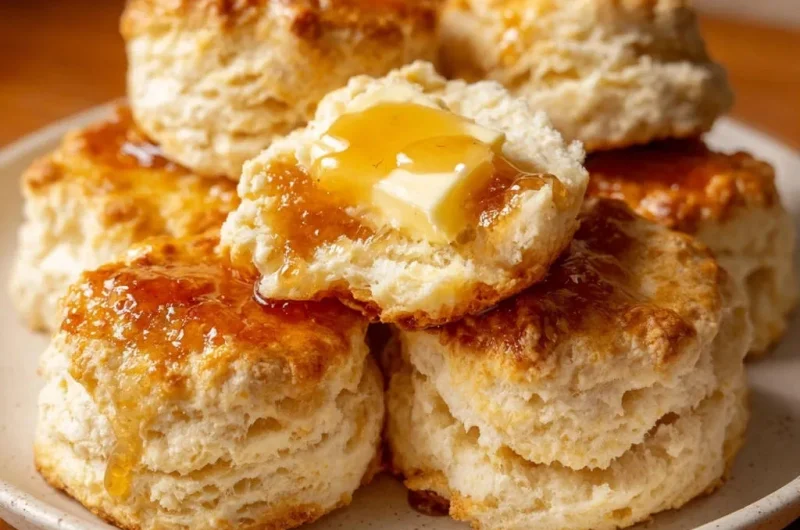
There’s nothing quite like a warm, homemade biscuit, especially when it’s perfectly light and airy instead of dense and tough. For years, I struggled to achieve that elusive fluffiness until I discovered a simple, game-changing technique. This recipe for Classic Fluffy Biscuits consistently delivers the most tender crumb and a beautiful rise, making every batch a triumph.
Why This Classic Fluffy Biscuits Recipe Will Transform Your Baking
This isn’t just another biscuit recipe; it’s a blueprint for consistent success, designed to eliminate common pitfalls. We’ll leverage specific techniques that ensure incredible lift and a melt-in-your-mouth texture. Get ready for biscuits that are golden on the outside and wonderfully soft within.
When you’re aiming for that perfect texture, consider the secrets behind a truly moist chocolate cake.
The secret lies in managing butter temperature and gentle handling, which we’ll explore in detail. This approach guarantees those desirable flaky layers every single time. You’ll be proud to serve these biscuits for any meal.
The Essential Ingredients for Unforgettable Biscuits
Quality ingredients are the cornerstone of truly exceptional Classic Fluffy Biscuits. Understanding why each component is important will elevate your baking.
Flour: The Foundation of Fluff
All-purpose flour provides the necessary structure for your biscuits. Avoid using bread flour, as its higher protein content develops too much gluten, leading to a tougher biscuit.
The Cold Butter Method: A Game-Changer for Texture
Unsalted butter, kept very cold, is crucial for creating steam pockets during baking. These pockets are what give biscuits their signature flaky, airy layers.
Buttermilk: For Tender Crumb and Tang
Cold buttermilk reacts with the baking soda and powder to create lift, while its acidity helps tenderize the dough. The slight tang also adds a wonderful depth of flavor.
Leavening Agents: The Rise to Perfection
Baking powder and baking soda are the workhorses here, responsible for the impressive rise of your Classic Fluffy Biscuits. Ensure they are fresh for maximum potency.
Sweetness (Optional): A Touch of Granulated Sugar
A small amount of granulated sugar adds a subtle sweetness that complements savory dishes beautifully. It also aids in browning for a golden crust.
Tools for Your Classic Fluffy Biscuits Adventure
Having the right equipment makes the biscuit-making process smoother and more enjoyable.
Large Mixing Bowl: Essential for combining your dry ingredients and forming the dough.
Box Grater or Pastry Blender: Crucial for incorporating cold butter efficiently without overworking it. The grater is my preferred method for ultimate fluffiness.
Biscuit Cutter (2.5-3 inch): Ensures uniform biscuits that bake evenly. A floured glass rim can work in a pinch.
Baking Sheet and Parchment Paper: For easy cleanup and preventing sticking, parchment paper is highly recommended.
Crafting Your Classic Fluffy Biscuits: Step-by-Step Excellence
Follow these steps closely, paying special attention to the tips for handling your dough, and you’ll achieve biscuit perfection.
Prepare Your Oven: Preheat your oven to 425 degrees Fahrenheit (220°C). High heat is essential for a rapid rise and crisp exterior. Line a baking sheet with parchment paper or lightly grease it.
Combine Dry Ingredients: In a large bowl, whisk together 2 cups all-purpose flour, 1 tablespoon baking powder, 1/2 teaspoon baking soda, 1 teaspoon salt, and 1/4 cup granulated sugar (if using). Whisking ensures an even distribution of leavening agents.
Incorporate Cold Butter: This is the secret to fluffy biscuits! Grate 8 tablespoons (1 stick) of very cold unsalted butter directly into the flour mixture using a box grater. Alternatively, cut the cold butter into very small, pea-sized pieces. Use your fingers to quickly toss the butter pieces with the dry ingredients until each piece is coated. This keeps the butter cold and separate, creating those vital steam pockets during baking for maximum rise and flakiness.
Add Buttermilk: Make a well in the center of the dry ingredients and pour in 3/4 cup cold buttermilk. Stir gently with a fork until just combined and a shaggy dough forms. Be careful not to overmix, as excessive stirring develops gluten, which leads to tough biscuits. The dough should still look a little rough and sticky; that’s perfect.
Shape the Dough: Turn the dough out onto a lightly floured surface. Gently knead it just a few times (about 4-5 folds) until it mostly comes together. Avoid excessive handling, as warmth from your hands can melt the butter and toughen the dough. Pat the dough into a roughly 3/4 to 1-inch thick rectangle.
Cut the Biscuits: Using a biscuit cutter or a floured glass, press straight down through the dough to cut out biscuits. Do not twist the cutter, as twisting seals the edges and prevents the biscuits from rising properly and creating beautiful layers. Reroll scraps gently only once, if absolutely needed, for additional biscuits, but understand these may not be as fluffy.
Arrange and Bake: Place the cut biscuits on the prepared baking sheet. For softer sides, arrange them so they are touching slightly. For crispier edges, space them apart. Bake for 12-15 minutes, or until the tops are golden brown and the biscuits have risen beautifully. The high temperature creates a crisp exterior while the interior cooks to tender perfection.
Serve Warm: Enjoy your Classic Fluffy Biscuits warm, fresh from the oven, with your favorite toppings like butter, honey, or a savory gravy. For an excellent breakfast, these are perfect for homemade breakfast biscuit sandwiches.
Mastering the Art: Expert Tips for Perfect Classic Fluffy Biscuits
Beyond the steps, these insights will help you consistently achieve biscuit perfection.
The Butter Secret: Grating vs. Cutting Explained
Grating cold butter ensures tiny, uniform pieces that are evenly distributed and remain very cold. This maximizes steam creation, leading to unparalleled fluffiness and distinct layers. While cutting butter into pea-sized pieces works, grating offers a superior texture.
The Gentle Touch: Avoiding Overmixing for Tender Results
Overmixing develops gluten, which is desirable in bread but disastrous for biscuits. A shaggy, slightly sticky dough is your friend. Mix only until the ingredients are just combined, letting the magic of cold butter and leavening do the rest.
The No-Twist Cut: Maximizing Biscuit Rise
Twisting the biscuit cutter seals the edges of the dough, preventing it from expanding fully in the oven. A straight push down and pull up ensures open edges, allowing for maximum vertical rise and those coveted flaky layers.
Don’t Overbake! Knowing When Your Biscuits Are Done
Overbaked biscuits become dry and crumbly. Look for a beautiful golden-brown top and fully risen sides. A light tap on the bottom should yield a hollow sound, indicating they are cooked through.
Embrace the Cold: Why Temperature is Key
Keeping all your ingredients, especially the butter and buttermilk, as cold as possible is paramount. Cold ingredients prevent butter from melting prematurely, preserving its ability to create steam pockets and ensuring a flaky, tender crumb.
Troubleshooting Common Biscuit Blunders
Don’t worry if your first batch isn’t perfect; mastering biscuits takes a little practice. Here are solutions to common issues.
Why are my biscuits dense or tough?
This is almost always due to overmixing the dough. Too much handling develops gluten, which makes biscuits tough. Ensure you mix only until just combined and handle the dough minimally when shaping.
My Classic Fluffy Biscuits didn’t rise properly. What went wrong?
Lack of rise can be caused by old or inactive baking powder/soda, or by warm butter. Ensure your leavening agents are fresh, and keep your butter and buttermilk as cold as possible throughout the process.
Why are my biscuits dry?
Dry biscuits are usually a sign of too much flour during mixing or on your work surface, or overbaking. Measure your flour accurately, use minimal flour for dusting, and avoid overcooking them.
My biscuits spread too much. How can I fix this?
Biscuits spreading often indicates butter that was too warm or dough that was overworked. The butter melts before it can create steam, causing the biscuits to flatten. Ensure all ingredients are very cold and handle the dough gently.
Serving Suggestions & Flavor Pairings
These Classic Fluffy Biscuits are incredibly versatile and can be enjoyed in countless ways.
Classic Companion: Serve warm with butter, honey, or your favorite fruit preserves for a delightful breakfast or brunch.
Savory Side: Pair them with rich gravies, stews, or a hearty bowl of chili. Their absorbent texture is perfect for soaking up delicious sauces.
Breakfast Sandwiches: Split them open and fill with crispy bacon, scrambled eggs, and cheese for an incredible homemade breakfast sandwich. These are also delicious with a side of creamy country gravy.
Dessert Delight: Split and top with whipped cream and fresh berries for a quick and easy shortcake-like dessert.
Storage and Make-Ahead Tips for Your Classic Fluffy Biscuits
Plan ahead or save leftovers with these convenient tips.
Storing Baked Biscuits for Freshness
Baked biscuits are best enjoyed warm and fresh. If you have leftovers, store them in an airtight container at room temperature for up to 2 days. They will lose some of their crispness but remain tender.
Freezing Unbaked Dough for Future Enjoyment
Cut unbaked biscuits can be frozen on a baking sheet until solid, then transferred to a freezer bag. Bake directly from frozen, adding a few extra minutes to the baking time, for fresh biscuits anytime.
Reheating Baked Biscuits for That Fresh-Out-of-the-Oven Taste
To revive day-old biscuits, wrap them loosely in foil and reheat in a 300°F (150°C) oven for 5-10 minutes. Alternatively, a quick zap in the microwave (15-30 seconds) can soften them, though they won’t regain their crispness.
Classic Fluffy Biscuits FAQs
Here are answers to some common questions about making these wonderful biscuits.
Can I use milk instead of buttermilk?
While buttermilk is highly recommended for its tenderness and tang, you can make a substitute by adding 1 tablespoon of lemon juice or white vinegar to regular milk and letting it sit for 5-10 minutes until it curdles. This won’t perfectly replicate buttermilk’s texture but is a good alternative.
What kind of flour is best for Classic Fluffy Biscuits?
All-purpose flour is ideal for these biscuits. Its protein content provides just enough structure without making the biscuits tough. Self-rising flour can be used, but you would need to adjust or omit the baking powder and baking soda.
Can I make these Classic Fluffy Biscuits gluten-free?
Yes, you can substitute a high-quality gluten-free all-purpose flour blend (one that contains xanthan gum) for the regular flour. Results may vary slightly in texture, but many gluten-free blends work very well for biscuits.
How do I know when my Classic Fluffy Biscuits are done baking?
Biscuits are done when they are risen, golden brown on top, and sound hollow when lightly tapped on the bottom. Avoid underbaking, which can lead to a raw doughy center, or overbaking, which results in dry biscuits.
Can I add herbs or cheese to this biscuit recipe?
Absolutely! This recipe is a fantastic base for savory variations. You can gently fold in 1/2 cup of shredded cheddar cheese and 1-2 tablespoons of chopped fresh herbs like chives or rosemary with the dry ingredients. For another delightful savory option, consider our cheesy garlic herb drop biscuits.
Ready to Impress? Share Your Classic Fluffy Biscuits Masterpiece!
With these expert tips and a little practice, you’ll be baking perfect Classic Fluffy Biscuits that rival any bakery. The joy of warm, homemade biscuits, fresh from your oven, is truly unmatched. Don’t be shy – share your culinary creation and savor every tender bite!
Biscuits
Course: BreadCuisine: AmericanDifficulty: easy4
8-10 biscuits20
minutes15
minutes240
kcal35
minutesThere’s nothing quite like a homemade biscuit, but I know how frustrating it can be when they turn out hard or dense instead of light and airy. I used to struggle with that too, until I cracked the code on one simple, game-changing technique. Now, my biscuits are perfectly fluffy every single time, and I can’t wait for you to experience that difference!
Ingredients
2 cups all-purpose flour
1 tablespoon baking powder
1/2 teaspoon baking soda
1 teaspoon salt
1/4 cup granulated sugar (optional, for slightly sweet biscuits)
8 tablespoons (1 stick) unsalted butter, very cold
3/4 cup cold buttermilk
Directions
- Preheat your oven to 425 degrees Fahrenheit. Line a baking sheet with parchment paper or lightly grease it.
- In a large bowl, whisk together the flour, baking powder, baking soda, salt, and sugar (if using).
- For the secret to fluffiness, grate the very cold butter directly into the flour mixture using a box grater, or cut it into very small, pea-sized pieces. Toss the butter pieces with the dry ingredients until each piece is coated. This ensures the butter stays cold and separate, creating steam pockets for maximum rise.
- Make a well in the center of the dry ingredients and pour in the cold buttermilk. Stir gently with a fork until just combined and a shaggy dough forms. Be careful not to overmix, as this develops gluten and makes biscuits tough. The dough should still look a little rough.
- Turn the dough out onto a lightly floured surface. Gently knead it just a few times (about 4-5 folds) until it mostly comes together. Avoid excessive handling. Pat the dough into a roughly 3/4 to 1-inch thick rectangle.
- Using a biscuit cutter or a floured glass, press straight down through the dough to cut out biscuits. Do not twist the cutter, as this seals the edges and prevents the biscuits from rising properly. Reroll scraps gently once, if needed, for additional biscuits.
- Place the cut biscuits on the prepared baking sheet, allowing them to touch slightly if you want softer sides, or spaced apart for crispier edges.
- Bake for 12-15 minutes, or until the tops are golden brown and the biscuits have risen beautifully. Serve warm with your favorite toppings like butter and honey.
Notes
- Serve warm with your favorite toppings like butter and honey.