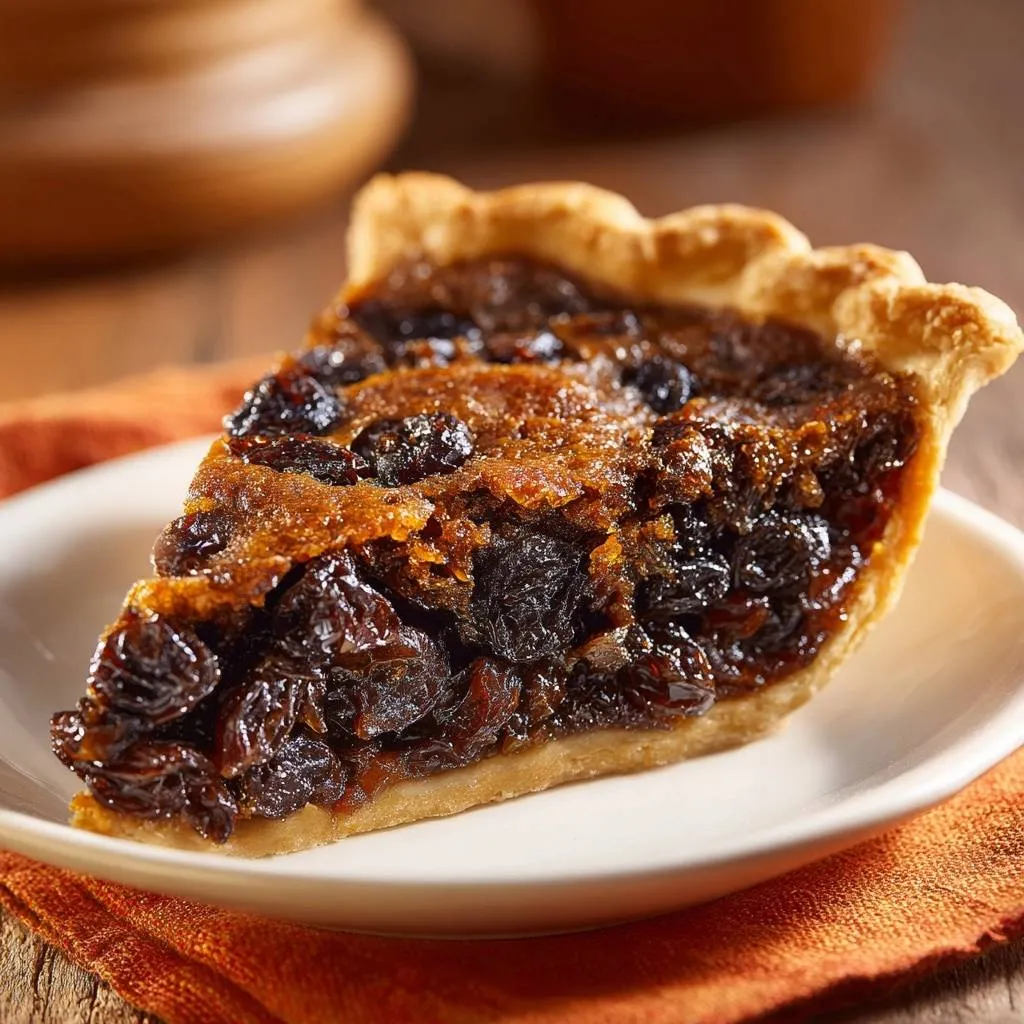
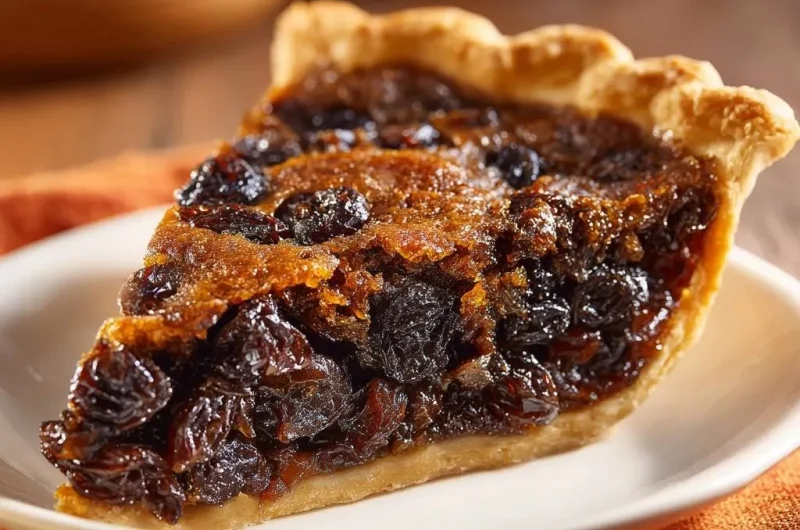
Ever sliced into a classic raisin pie only to watch the filling ooze out and soak the crust? That frustration ends here. This stovetop thickening trick turns raisins into a jam-like filling that sets perfectly, no leaks. You’ll get clean slices every time.
Therefore, you skip the common pitfalls of raw fillings that weep. Instead, pre-cooking evaporates excess moisture for that ideal texture. Classic raisin pie shines as a Depression-era staple, now foolproof.
Here’s the expertise booster: simmer until the mixture mounds on a spoon like jam. That visual cue activates cornstarch fully. Get ready for pie perfection.
Roots of Classic Raisin Pie Tradition
Classic raisin pie emerged in 1930s America when fresh fruits were scarce. Families turned to pantry raisins for affordable comfort. However, many modern versions suffer runny fillings that ruin the experience.
In addition, raisins plump beautifully in this stovetop method. They deliver chewy sweetness without sogginess. This fix honors the tradition while delivering reliable results.
From Pantry Staples to Pie Icon
Raisins replaced pricey apples and oranges during tough times. Regional twists appeared in Midwest farm kitchens. Classic raisin pie became a symbol of ingenuity with everyday goods.
Evolution of the Stovetop Method
Old cookbooks often skipped pre-cooking, leading to weeping pies. This stovetop simmer prevents that by fully hydrating and thickening raisins first. Consequently, your classic raisin pie holds its shape.
Gathering Ingredients for Flawless Classic Raisin Pie
Start with 2 unbaked 9-inch pie crusts. They form the sturdy base. Next, 2 cups raisins provide the chewy heart; Thompson work best for plumpness.
Then, mix 1 cup water, 1 cup packed brown sugar for caramel depth, 2 tablespoons cornstarch to lock in thickness, 1 tablespoon lemon juice for balance, 1 teaspoon cinnamon, 1/2 teaspoon salt, 1 tablespoon butter pieces, and optional 1 teaspoon orange zest. Brown sugar adds chew that white can’t match. Lemon cuts sweetness perfectly.
Fresh raisins absorb flavors better than dusty ones. Therefore, check your pantry and you’re set for classic raisin pie success.
Crusts: Store-Bought vs. Homemade Debate
Store-bought saves time and rolls evenly. Homemade lets you control flakiness with cold butter. Either way, parbaking prevents sogginess in classic raisin pie.
Raisins and Thickening Agents Breakdown
Golden raisins offer milder sweetness; Thompson give classic depth. Cornstarch gelatinizes at boil for a firm set. Don’t swap arrowroot; it weakens here.
Brightness Boosters: Citrus and Spices
Lemon juice tenderizes raisins with acidity. Cinnamon warms the filling. Butter adds gloss, salt enhances everything. Orange zest brightens without overpowering.
Science of Stovetop Thickened Raisin Filling
Cornstarch gelatinizes fully at boiling, trapping starches for thickness. Evaporation reduces water, creating jam consistency. That’s why classic raisin pie slices cleanly.
Moreover, cooling 15 minutes before assembly stops crust meltdown. Oven heat then triggers Maillard browning for golden edges. This method guarantees no-runny results.
Why Runny Fillings Fail and This Succeeds
Skipping the simmer leaves cornstarch inactive and liquid loose. Perform the spoon test: it mounds, not slides. Thermodynamics ensure a stable set.
Temperature Control for Perfect Set
Medium boil, then low simmer at 180-200°F. Look for glossy shine and slow bubbles. Pull off heat promptly to avoid gumminess.
Parbaking Crust for Classic Raisin Pie Stability
Preheat to 425°F. Fit bottom crust into 9-inch pie plate, trim, crimp. Prick with fork to vent steam.
Line with parchment, add pie weights. Bake 15 minutes till lightly golden. Remove weights, bake 5 more. Cool slightly, drop oven to 375°F. This step blocks sogginess.
Essential Tools for Even Crust Baking
Glass pie plates conduct heat evenly; metal browns faster. Use dried beans if no weights. Parchment prevents sticking.
Cooking the No-Run Raisin Filling Phase
In saucepan, combine raisins, water, sugar, cornstarch, lemon, cinnamon, salt, zest. Bring to boil over medium, stirring constantly. Reduce to simmer 10-12 minutes till thickened.
Stir in butter off heat till melted. Cool 15 minutes. You’ll smell sweet cinnamon as it transforms to jam.
Monitoring Thickness Without Guesswork
Ready when it mounds on spoon. Stir every minute to prevent scorching. Overcooking turns it rubbery, so watch closely.
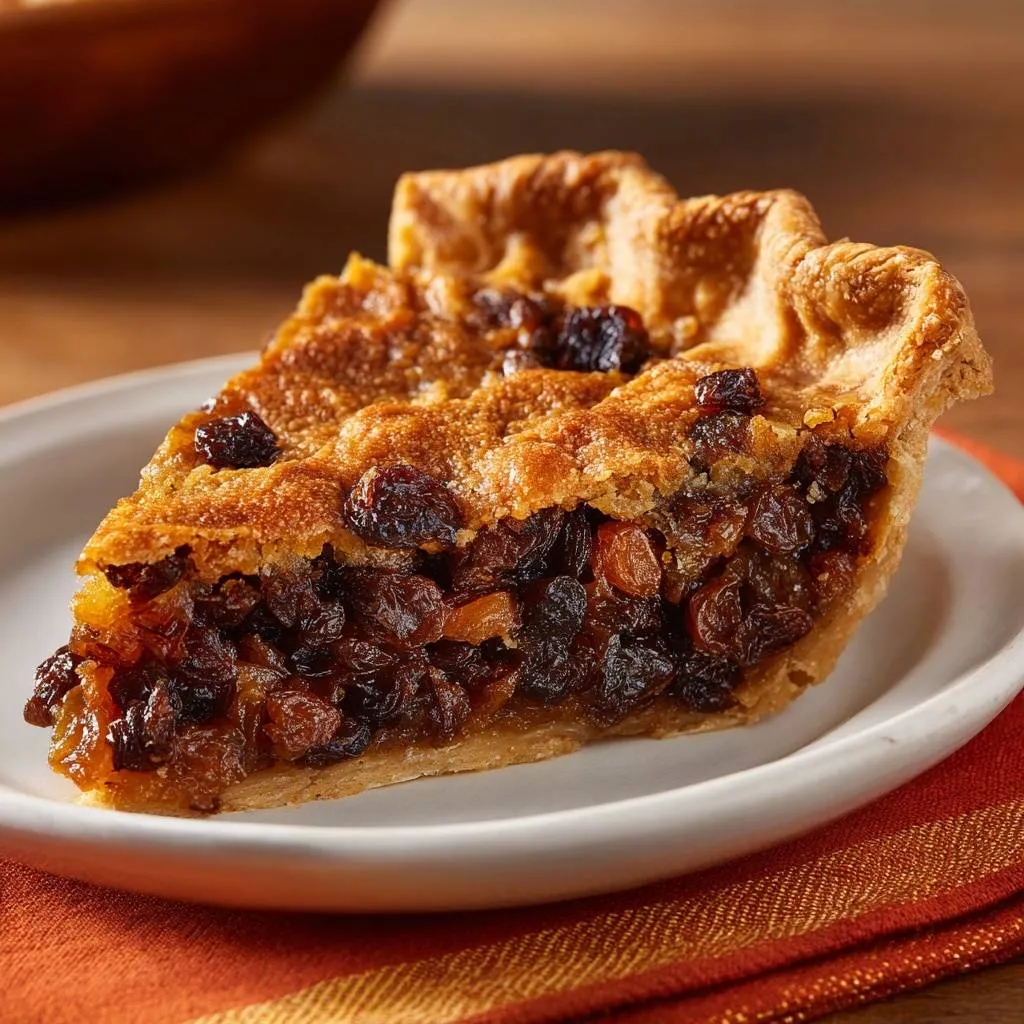
Assembling and Baking Full Classic Raisin Pie
Pour cooled filling into parbaked crust. Top with second crust, crimp edges, cut 4-5 vents for steam. Brush with water, sprinkle sugar.
Bake at 375°F 35-40 minutes till golden and bubbling. Cool 3+ hours. Pro tip: chill overnight for easiest slicing.
Crimping and Venting Techniques
Fork crimp for rustic look, pinch for flutes, rope for fancy. Star or radial vents release pressure evenly.
Avoiding Classic Raisin Pie Pitfalls
Don’t pour hot filling; it sogs crust. Undercook stovetop and it weeps. Skip parbake for mushy bottoms. Slice early for crumbling.
However, follow temps exactly and cool fully. These fixes make classic raisin pie reliable. Taste the difference in every bite.
For a different take on fruit pies, explore Grandma’s Apple Crumble Pie.
Soggy Bottom Rescue Strategies
Parbake thoroughly. Always cool filling to warm. Elevate rack if needed for crisp base.
Weeping Filling Prevention Guide
Simmer fully till mounding. Lemon stabilizes proteins. No shortcuts on stovetop time.
Flavor Twists on Classic Raisin Pie
Swap in vanilla extract for depth. Add chopped walnuts for crunch. Mix dried cranberries for tart pop.
Therefore, nutmeg boosts spice warmth. Keep classic raisin pie core intact for authenticity. Experiment small to nail balance.
Nutty and Fruit Enhancements
Toasted pecans add buttery notes. Cranberries cut richness. Toast nuts first for max flavor.
Pairing Sides with Classic Raisin Pie
Sharp cheddar slices cut sweetness historically. Vanilla ice cream melts creamy contrast. Whipped cream adds fluff.
Coffee balances richness. Fresh berries brighten plates seasonally.
Cheese and Dairy Pairings
Cheddar’s tang echoes Depression roots. Aged works best against sugar.
Storage and Make-Ahead for Classic Raisin Pie
Store at room temp up to 2 days in dome. Fridge holds 5 days; cover loosely. Freeze whole up to 3 months.
Thaw overnight, reheat at 300°F for crisp crust. Slices freeze well too.
Freezing Slices vs. Whole Pie
Wrap slices individually for grab-and-go. Whole pie in foil then bag. Thaw in fridge.
Troubleshooting Classic Raisin Pie Issues
Runny? Likely under-simmered. Recook scraps on stove. Tough crust? Overworked dough; handle gently next time.
Bubbles over? More vents needed. Too sweet? Up lemon to 1.5 tablespoons. Overbaked edges? Foil shield after 25 minutes.
Filling Too Thin After Cooling?
Recook on stove with 1 tsp extra cornstarch slurry. Simmer till mounding. Chill fully after.
Crust Browning Unevenly?
Tent edges with foil midway. Rotate pan halfway. Lower rack if tops brown fast.
Pie Not Slicing Cleanly?
Cool 4+ hours or chill. Dip knife in hot water, wipe between cuts.
Too Tart or Sweet Balance?
Tart? Add 2 tbsp sugar. Sweet? Extra 1/2 tbsp lemon. Taste filling pre-pour.
FAQ
How do I store leftovers of classic raisin pie?
Keep at room temperature under a dome for up to 2 days. Refrigerate in an airtight container for 5 days; the filling firms more when cold. For freezing, wrap the whole pie tightly in plastic then foil and store up to 3 months. Thaw in the fridge overnight and reheat slices at 300°F for 10 minutes to crisp the crust. Avoid freezing if you want peak texture, as crust can soften slightly.
Why is my classic raisin pie filling runny?
The most common issue is not simmering long enough to fully activate cornstarch and evaporate water. It must mound on a spoon like jam, not drip like sauce; cook 10-12 minutes stirring constantly. If it cooled thin, recook leftovers on the stove with a cornstarch slurry (1 tsp cornstarch in 1 tbsp water), boil 2 minutes, then chill. Skipping the boil ruins the set every time.
Can I substitute ingredients in classic raisin pie?
No raisins? Use chopped dates or dried cranberries, but plump them similarly. Out of brown sugar? Light works but lacks chew; mix white with 1 tbsp molasses. Cornstarch swap to tapioca fails here; it needs boil activation. Lemon essential for balance; vinegar works in pinch but alters tang. Crust must be parbaked regardless of store-bought or homemade.
Why is the bottom crust soggy in my pie?
Skipping parbaking lets moisture steam the base. Always blind bake 20 minutes total at 425°F with weights. Pour only cooled filling (15 minutes off heat) to avoid meltdown. Pro move: brush parbaked crust with beaten egg white before filling for a moisture barrier. Glass plates help conduct heat better too.
How long does classic raisin pie need to cool before slicing?
Minimum 3 hours at room temp for starch to set fully; overnight in fridge is ideal for clean cuts. Hot slicing causes crumbling and leaks. Use a sharp knife dipped in hot water, wiped dry between slices. If rushed, chill 1 hour post-room temp but expect slightly softer texture.
Can I make classic raisin pie ahead?
Yes, assemble and bake up to 2 days early; store covered at room temp. Filling holds perfectly. Parbake crust a day ahead, fill and bake same day for freshest crust. Freeze unbaked assembled pie up to 1 month; bake from frozen adding 10 minutes time. Thaw filling-only in fridge if pre-cooking separately.
Raisin Pie
Course: DessertCuisine: AmericanDifficulty: medium8
servings30
minutes1
hour450
kcal60
MinutesSick of raisin pie filling that leaks out and ruins the crust? This stovetop thickening trick cooks the raisins into a jam-like filling that sets perfectly, every single time.
Ingredients
2 unbaked 9-inch pie crusts (store-bought or homemade)
2 cups raisins
1 cup water
1 cup brown sugar, packed
2 tablespoons cornstarch
1 tablespoon lemon juice
1 teaspoon ground cinnamon
1/2 teaspoon salt
1 tablespoon unsalted butter, cut into small pieces
1 teaspoon orange zest (optional, for brightness)
Directions
- Preheat oven to 425 degrees F. Fit one pie crust into a 9-inch pie plate. Trim and crimp edges. Prick bottom with a fork. Line with parchment and pie weights; bake 15 minutes until lightly golden. Remove weights and bake 5 more minutes. Cool slightly. Reduce oven to 375 degrees F.
- In a medium saucepan, combine raisins, water, brown sugar, cornstarch, lemon juice, cinnamon, salt, and orange zest. Here’s the no-runny-filling secret: Bring to a boil over medium heat, stirring constantly. Reduce to simmer and cook 10-12 minutes until thickened dramatically. It’s ready when the mixture mounds on a spoon and doesn’t slide off (like jam, not sauce). This stovetop reduction evaporates excess liquid and activates the cornstarch fully for a sliceable set. Remove from heat; stir in butter until melted. Cool 15 minutes.
- Pour cooled filling into parbaked crust. Top with second crust, crimp edges, and cut vents. Brush lightly with water and sprinkle with sugar for shine.
- Bake 35-40 minutes until crust is golden and filling bubbles. Cool completely (at least 3 hours) for perfect slices. Store at room temp up to 2 days.
Notes
- Cool completely for at least 3 hours for perfect slices. Store at room temperature up to 2 days. Orange zest adds brightness but is optional.