
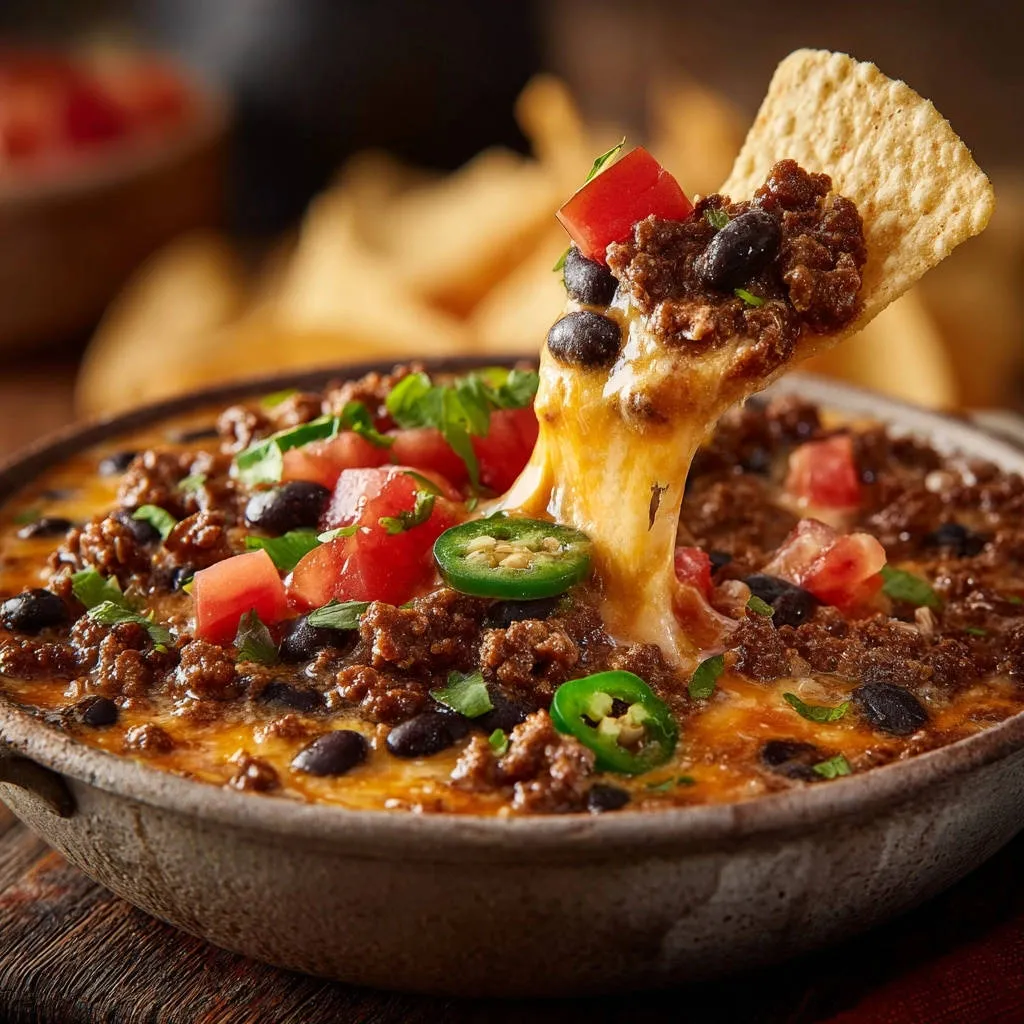
Ever faced that disappointment when your cheesy dip turns into an oily, grainy mess as it cools? I certainly have, but I’ve cracked the code to keeping this `Creamy Skillet Taco Dip` perfectly smooth and luscious from the first scoop to the very last. This recipe is truly a game-changer, ensuring a velvety texture and rich flavor that’s utterly reliable for any gathering.
Why Our Skillet Taco Dip Stays Perfectly Creamy (The Secret’s Out!)
No More Oily, Grainy Dips: A True Game-Changer
Our `Skillet Taco Dip` solves the common problem of separation by utilizing a clever combination of ingredients and techniques. The softened cream cheese acts as a powerful emulsifier, binding all the dairy elements beautifully.
This, combined with the gradual addition of shredded cheese over very low heat, prevents any oiliness or graininess. You’re guaranteed a consistently smooth and velvety texture, every single time.
Effortless Elegance for Any Occasion
This `cheesy dip` is impressively delicious yet incredibly simple to prepare, making it ideal for various occasions. It’s the ultimate crowd-pleaser for game nights, casual parties, or even a cozy family meal.
Its robust flavors and inviting texture ensure it disappears quickly, leaving everyone satisfied. It delivers maximum impact with minimal fuss.
Gather Your Essentials: The Building Blocks of Flavor
The Savory Foundation: Ground Beef & Aromatics
Opting for lean ground beef ensures a rich, savory foundation without excess grease. Thoroughly draining any rendered fat is crucial for the dip’s final texture and appeal.
Finely diced yellow onion and minced garlic are indispensable for building a deep, aromatic base. They infuse the entire dip with their pungent, savory notes.
The Creamy Heart: Cheese Blend & Cream Cheese
Softened cream cheese is your secret weapon in this `homemade dip` for achieving that stable, non-oily, and impossibly smooth consistency. It creates the perfect canvas for the other cheeses.
A high-quality shredded cheddar and Monterey Jack blend offers the best flavor and melt. Freshly shredding your own cheese is highly recommended, as pre-shredded options can contain anti-caking agents that hinder a smooth melt.
Fresh Finishes: Tomatoes, Garnish, & Dippers
Diced fresh tomatoes introduce a bright, acidic counterpoint to the rich, creamy elements of the dip. They add a welcome burst of freshness.
Fresh jalapeño slices and chopped cilantro are not just for garnish; they provide essential visual appeal and a vibrant, peppery, herbaceous lift. They complete the flavor profile.
While classic tortilla chips are perfect for scooping, consider alternatives like sturdy vegetable sticks or pita bread for variety.
Your Kitchen Arsenal: Tools for Taco Dip Triumph
The Skillet: Choosing Your Oven-Safe Champion
A large, heavy-bottomed, oven-safe skillet, ideally cast iron, is essential for this recipe. It ensures even heat distribution and allows for seamless cooking and serving directly from the pan.
Standard Prep Gear
You’ll need a reliable cutting board and a sharp knife for precision dicing and mincing. Basic measuring cups and spoons are also necessary for accuracy.
A sturdy spoon or spatula is crucial for effectively browning meat, stirring ingredients, and ensuring all the cheese melts smoothly into the `skillet dip`.
Mastering the Melt: Step-by-Step to Creamy Skillet Taco Dip
Building the Robust Base: Brown, Drain, Sauté
In your large oven-safe skillet, brown the lean ground beef over medium-high heat, using a spoon to break it into small pieces. Cook until no pink remains, then drain off any excess fat thoroughly. This step is crucial for preventing a greasy dip.
Add the finely diced yellow onion to the skillet with the beef and cook for 3-5 minutes until it softens and becomes translucent. Stir in the minced garlic and a packet of taco seasoning, cooking for just 1 minute more until fragrant. This builds a foundational layer of rich flavor.
Infusing Flavor: Broth, Beans, and Tomatoes
Pour in the water or vegetable broth, stirring to scrape up any browned bits from the bottom of the skillet. This deglazing step captures all the caramelized flavors, enhancing the overall taste of your `taco dip recipe`.
Bring the mixture to a gentle simmer, then stir in the rinsed black beans and fresh diced tomatoes. Reduce the heat to low, preparing the base for the creamy components.
The Cream Cheese Magic: Creating a Silky Foundation
Add the softened, cubed cream cheese to the skillet. Stir continuously over very low heat until the cream cheese is fully melted and completely incorporated into the beef mixture. This creates the essential smooth, non-oily base, preventing later separation.
Gradual Gratification: Melting Cheese Without Separation
Begin adding the shredded cheddar cheese blend to the skillet, a handful at a time. Stir constantly after each addition until the cheese is completely melted and smooth before adding the next batch. This gradual addition over low heat, supported by the cream cheese, is the key to maintaining the dip’s velvety texture and preventing oiliness.
Critical Tip: Do not allow the dip to come to a boil once you’ve started adding the cheese. Keep the heat very low to ensure a perfect melt and consistent creaminess.
The Grand Finale: Garnish and Serve Hot
Once all the cheese is melted and the `Creamy Skillet Taco Dip` is gloriously smooth and hot, remove the skillet from the heat.
Garnish generously with fresh jalapeño slices and chopped cilantro for vibrant color and a burst of fresh flavor. Serve your perfectly `velvety texture` dip immediately with sturdy tortilla chips for scooping.
Unlock Next-Level Deliciousness: Expert Tips & Variations
The Right Cheese Matters: Blending for Best Results
A blend of sharp cheddar and creamy Monterey Jack offers the ideal balance of flavor and meltability. Avoid pre-shredded cheese when possible, as its anti-caking agents can hinder the smoothest texture.
Freshly shredding cheese from a block guarantees a superior melt and a richer, more authentic taste for your `party dip`.
Spice It Up (or Down): Customizing Heat
To increase the heat, add an extra sliced jalapeño, a dash of your favorite hot sauce, or a pinch of cayenne pepper with the taco seasoning. For a milder `easy taco dip`, use fewer jalapeños or substitute with bell peppers.
Beyond Taco Seasoning: Flavor Enhancements
A squeeze of fresh lime juice stirred in at the very end brightens all the flavors and adds a zesty finish. A dollop of sour cream or plain Greek yogurt stirred in just before serving also adds extra richness and tang.
Consider a pinch of smoked paprika for an additional layer of depth, or a splash of your favorite salsa for a different flavor profile. For more fresh toppings, consider making your own perfect pico de gallo.
Creative Serving Suggestions: More Than Just Chips
This versatile dip is fantastic with more than just tortilla chips. Try serving it with bell pepper strips, celery sticks, or toasted pita triangles for healthier options.
It also makes an incredible topping for baked potatoes, or as a flavorful base for loaded beef nachos.
Plan Ahead: Prep, Storage, and Reheating for Convenience
Can You Prepare it in Advance?
You can certainly prepare the ground beef base (steps 1 and 2) a day in advance. Store the cooled mixture in an airtight container in the refrigerator.
When ready to serve, reheat the beef mixture in the skillet over low heat, then proceed with adding the cream cheese and shredded cheese. This ensures the best creamy texture.
Reheating Without Losing Creaminess
Reheat any leftover `Creamy Skillet Taco Dip` gently on the stovetop over very low heat, stirring frequently. If it appears a little thick or stiff, add a tablespoon of milk or broth at a time, stirring until its original velvety consistency returns.
Safe Storage for Leftovers
Store cooled leftover `skillet dip` in an airtight container in the refrigerator. It will maintain its quality and safety for up to 3-4 days.
Troubleshooting Your Skillet Taco Dip: Quick Fixes for Common Issues
“Help! My Dip is Oily or Grainy!”
This problem usually arises from heating the cheese too quickly or at too high a temperature. To remedy, reduce the heat to very low and gently stir in a spoonful of softened cream cheese or a splash of milk to help re-emulsify the dip.
“My Dip is Too Thin/Thick!”
If your dip is too thin, simmer it gently for a few more minutes, stirring, to allow some liquid to evaporate and thicken. If it’s too thick, simply stir in a tablespoon of milk or broth at a time until you reach your desired creamy consistency.
“It Lacks That ‘Pop’ of Flavor!”
A squeeze of fresh lime juice can instantly brighten dull flavors. You can also add another pinch of taco seasoning, a dash of your favorite hot sauce, or adjust the salt to taste. Sometimes a little extra freshness, like more cilantro, is all it needs.
Your Top Questions About Creamy Skillet Taco Dip, Answered!
Can I Use Different Meats or Make it Vegetarian?
Absolutely! Ground chicken or turkey are excellent alternatives to beef, offering a lighter flavor profile. For a vegetarian version of this `taco dip recipe`, you can use plant-based ground meat, or simply increase the black beans and add sautéed mushrooms or lentils for heartiness.
What About Dairy-Free Alternatives?
While traditional dairy is key to this recipe’s specific texture, you can explore plant-based cream cheese and shredded cheese alternatives. Be aware that the texture may vary slightly, but the flavors will still be delicious. To boost the fresh element, serve with vibrant ingredients like our crispy garlic parmesan potato wedges on the side.
Can I Bake This in the Oven?
Yes, you can finish this `cheesy dip` in the oven for a golden, bubbly top. After completing all stovetop steps, transfer the dip to a baking dish (if not using an oven-safe skillet) and bake at 350°F (175°C) for 10-15 minutes, or until heated through and lightly browned on top.
Is it Freezer-Friendly?
Unfortunately, dairy-heavy dips like this one typically do not freeze well. The high fat and moisture content in the cheese can separate and become grainy upon thawing, compromising the velvety texture. It’s best enjoyed fresh or refrigerated for a few days.
Share the Creamy Skillet Taco Dip Love!
Now that you know the secrets to a truly foolproof `Creamy Skillet Taco Dip`, it’s time to whip up this velvety perfection! Trust me, this `game day appetizer` will be the star of your next gathering, guaranteed to be devoured with delight. Don’t forget to share your creations and tag us on social media.
Looking for more crowd-pleasing recipes or delicious sides? Explore our full collection for endless culinary inspiration!
Skillet Taco Dip
Course: AppetizerCuisine: MexicanDifficulty: easy6
servings15
minutes30
minutes550
kcal45
minutesNever struggle with grainy or oily cheese dip again! This Skillet Taco Dip uses a simple secret to ensure a perfectly smooth and creamy texture from the first scoop to the last. Ideal for game nights or any gathering.
Ingredients
1 pound lean ground beef
1 small yellow onion, finely diced
2 cloves garlic, minced
1 packet (1 ounce) taco seasoning mix
1/2 cup water or vegetable broth
1 can (15 ounces) black beans, rinsed and drained
1 cup diced fresh tomatoes (about 2 small roma tomatoes)
4 ounces cream cheese, softened and cut into cubes
2 cups shredded cheddar cheese blend (cheddar and Monterey Jack works great)
Fresh jalapeno slices, for garnish
Fresh cilantro, chopped, for garnish
Tortilla chips, for serving
Directions
- In a large oven-safe skillet (like cast iron), brown the ground beef over medium-high heat, breaking it apart with a spoon. Once browned, drain off any excess fat.
- Add the diced onion to the skillet with the beef and cook for 3-5 minutes until softened. Stir in the minced garlic and taco seasoning, cooking for 1 minute more until fragrant.
- Pour in the water or vegetable broth, stirring to scrape up any browned bits from the bottom of the skillet. Bring to a simmer, then stir in the rinsed black beans and diced tomatoes. Reduce the heat to low.
- The Secret to Creamy Cheese: Add the cubed cream cheese to the skillet and stir continuously until it is fully melted and incorporated, creating a smooth, creamy base. Keep the heat on very low.
- Preventing Separation: Begin adding the shredded cheese to the skillet a handful at a time. Stir constantly after each addition until the cheese is completely melted and smooth before adding the next batch. This gradual addition over low heat, combined with the cream cheese base, ensures your dip remains perfectly creamy and prevents any oiliness or separation. Do not let the dip come to a boil once the cheese is added.
- Once all the cheese is melted and the dip is gloriously smooth and hot, remove the skillet from the heat.
- Garnish generously with fresh jalapeno slices and chopped cilantro. Serve immediately with tortilla chips for scooping.
Notes
- The secret to a smooth, non-oily dip is gradually adding shredded cheese over very low heat after incorporating cream cheese.