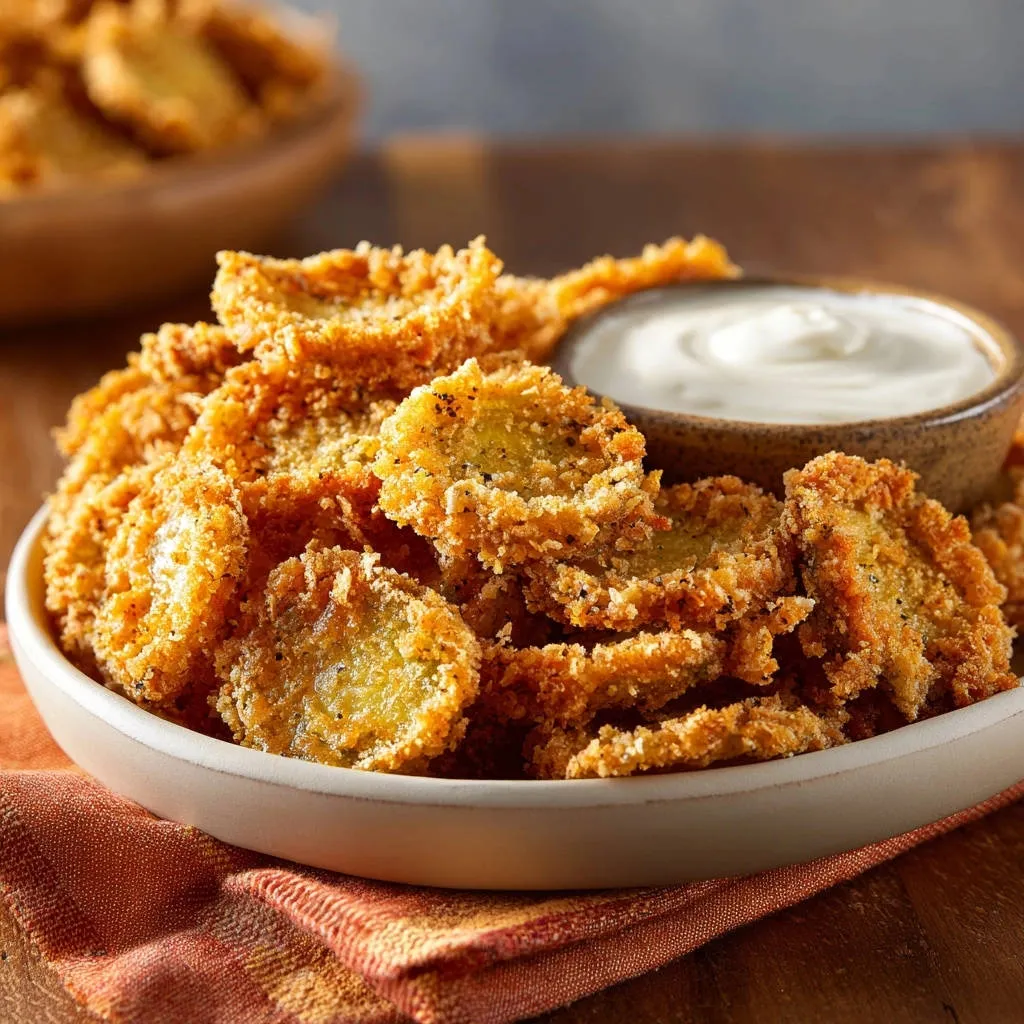
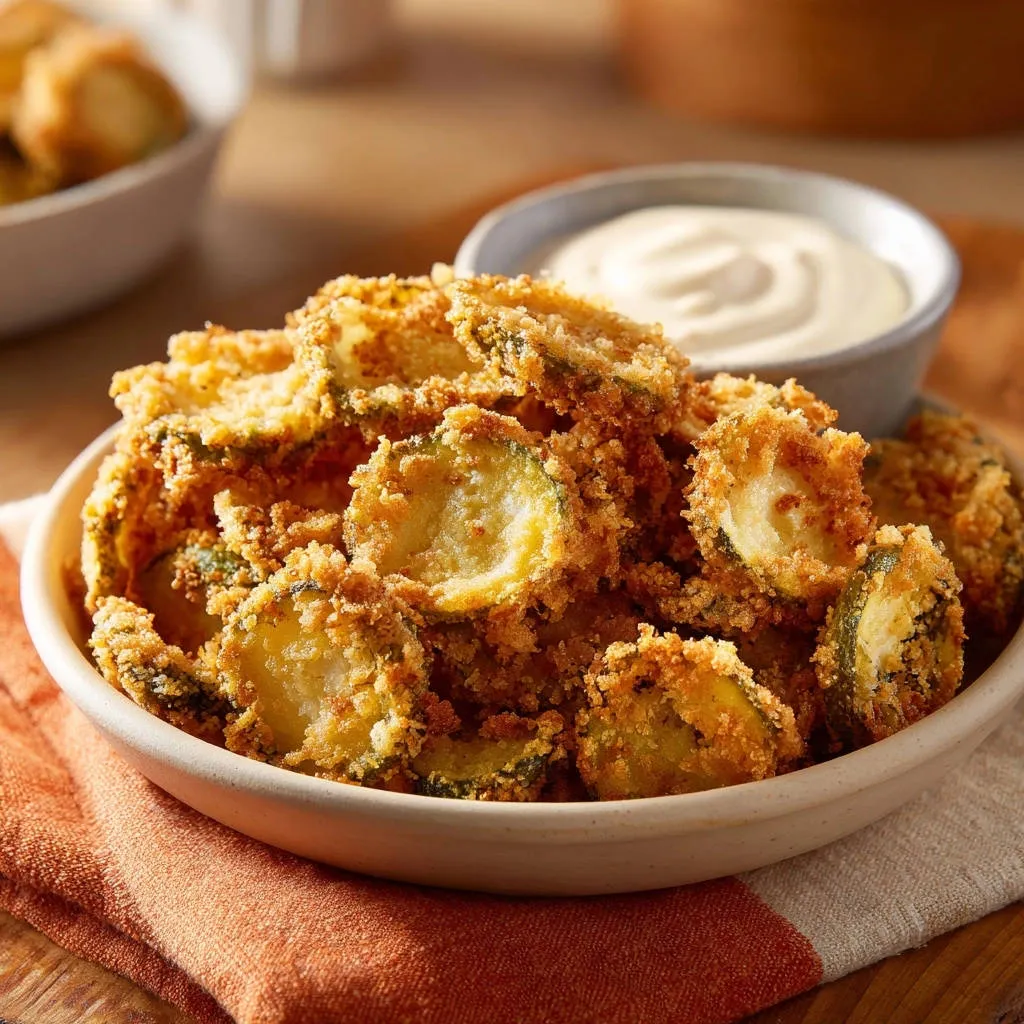
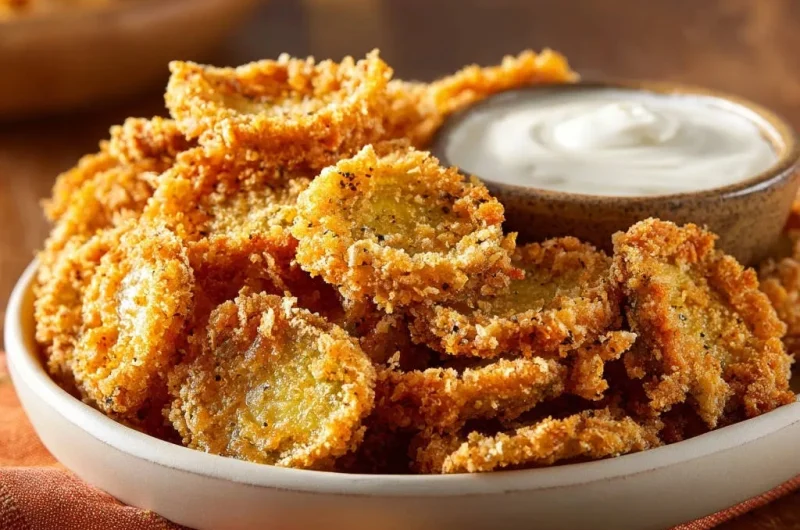
There’s nothing quite like biting into a perfectly golden, intensely crunchy fried pickle. For years, I struggled to recreate that restaurant-quality magic at home, often ending up with sadly soggy results. But after countless experiments, I finally mastered the art of truly crispy fried pickle chips that stay incredibly crunchy, bite after glorious bite.
This recipe for crispy fried pickle chips isn’t just easy; it’s a foolproof method designed to deliver that irresistible texture and flavor every single time. Get ready to elevate your snack game with an appetizer that promises no more soggy disappointments.
The Ultimate Crispy Fried Pickle Chips: Here’s Why You’ll Love This Recipe
The “No Soggy Bites” Promise: Unlocking Perfect Texture
My recipe tackles the biggest fried pickle challenge head-on: sogginess. We prioritize moisture removal and precise cooking, guaranteeing a delightfully crisp exterior that holds up beautifully.
You’ll achieve that coveted, satisfying crunch without any greasy residue. This is the secret to a genuinely memorable fried pickle experience.
Effortless Excellence: Achieve Restaurant-Quality At Home
Don’t let deep-frying intimidate you; this method is surprisingly straightforward. With clear steps and practical tips, you can confidently produce restaurant-quality crispy fried pickle chips right in your own kitchen.
The process is designed for reliability, ensuring fantastic results even for novice cooks.
A Flavor That Sticks: Coating Perfection Every Time
A common frustration is the coating falling off. This recipe employs a specific technique for maximum adhesion, ensuring every pickle chip is perfectly enveloped in its flavorful crust.
The robust seasoning blends seamlessly with the tangy pickle, creating a harmonious and utterly delicious bite.
Building Blocks of Crunch: What You’ll Need
The Pickle Base: Choosing the Right Chips
Start with a 16-ounce jar of dill pickle chips; their tangy flavor and uniform thickness are ideal. Thoroughly draining and patting them dry is the absolute most critical step for achieving optimal crispness.
Any excess moisture is the enemy of a perfectly crunchy coating.
The Coating Crew: Flour, Egg, and Panko Power
All-purpose flour forms the initial dry layer, helping the egg wash adhere. The whisked eggs and milk create a crucial binding bridge for the breadcrumbs.
Panko breadcrumbs are non-negotiable here; their unique flaky structure is key to superior crunch compared to standard breadcrumbs.
Flavor Boosters: Spice Cabinet Essentials
Garlic powder and onion powder infuse the coating with savory, aromatic depth. Black pepper adds a subtle warmth and complexity.
A touch of salt enhances all these flavors, perfectly balancing the pickle’s tang.
Frying Fat: Selecting the Best Oil
Vegetable oil is recommended for its neutral flavor and high smoke point. This makes it ideal for deep frying, allowing the pickles to crisp without imparting unwanted tastes.
Maintaining the right oil temperature is crucial for preventing oily, soggy results.
The Perfect Partner: Dipping Sauce Suggestion
A creamy ranch-style dipping sauce offers a cool, herbaceous contrast to the warm, tangy pickle. It’s the classic accompaniment that perfectly completes the experience.
Feel free to experiment with other creamy dips for a personalized touch.
Essential Tools for Perfectly Crispy Fried Pickle Chips
Heavy-Bottomed Pot or Dutch Oven: This ensures consistent heat distribution and safer deep frying by preventing sudden temperature fluctuations.
Thermometer (Clip-On Recommended): Absolutely crucial for accurately monitoring oil temperature. This prevents undercooked (soggy) or overcooked (burnt) pickles.
Wire Rack with Tray: Essential for draining excess oil after frying, allowing air to circulate, which maintains the pickles’ crisp texture.
Slotted Spoon or Spider: Use this for safely adding and removing delicate pickle chips from the hot oil without splashing.
Shallow Bowls: Set up three wide, shallow bowls to create an efficient and organized dredging station for your coating process.
Paper Towels: These are your best friends for thoroughly drying the pickle chips, which is paramount for a non-soggy, sticking coating.
Your Journey to Irresistible Crispy Fried Pickle Chips: A Detailed Guide
Preparation is Key: Drying for Superior Crisp
This initial step is the ultimate game-changer for avoiding soggy fried pickle chips. After draining the pickle chips from their jar, spread them out generously on multiple layers of paper towels.
Pat them vigorously with even more paper towels until they are as dry as humanly possible. Removing this excess moisture prevents it from steaming the coating and ensures maximum adherence and incredible crunch.
Setting Up Your Dredging Station for Efficiency
Prepare three shallow bowls for an organized coating process. In the first bowl, combine the all-purpose flour with garlic powder, onion powder, black pepper, and salt.
Whisk these dry ingredients thoroughly to ensure the seasonings are evenly distributed throughout the flour. In the second bowl, whisk together the eggs and milk or water until smooth and fully combined. Finally, place the panko breadcrumbs into the third shallow bowl.
The Art of Coating: Ensuring Maximum Adhesion
Working in small, manageable batches is key here. First, dredge the thoroughly dried pickle chips in the seasoned flour, shaking off any excess gently. Next, dip them into the egg wash, allowing any extra liquid to drip away to avoid a gummy layer.
Finally, transfer them to the panko breadcrumbs. Press the panko firmly onto both sides of each pickle chip; this firm pressure is absolutely critical for creating a thick, even coating that truly sticks and delivers that signature crisp. As you finish coating each batch, place the pickles on a wire rack.
Mastering Oil Temperature for Golden Perfection
Pour about 2 to 3 inches of vegetable oil into a large, heavy-bottomed pot or Dutch oven. Heat the oil over medium-high heat until it reaches a consistent temperature between 350-375°F.
Using a reliable thermometer is non-negotiable; maintaining this precise temperature range is vital for preventing the pickles from becoming oily or soggy, ensuring they cook to a perfect golden crisp.
Frying Your Pickle Chips to Golden Crunch
Carefully add a single layer of the coated pickle chips to the hot oil, ensuring you do not overcrowd the pot. Overcrowding dramatically lowers the oil temperature, leading to less crispy, more greasy results.
Fry for 2 to 3 minutes per side, or until the coating is a deep, appealing golden brown and feels incredibly crispy. Look for a uniform color and a buoyant float.
Drain, Serve, and Savor Immediately
Once perfectly fried, use a slotted spoon or spider to carefully remove the crispy fried pickle chips from the oil. Immediately transfer them back to the wire rack set over a tray or paper towels to drain any residual oil. This helps preserve their crunch.
Serve your perfectly golden, crispy bites immediately with the creamy ranch-style dipping sauce on the side for the ultimate flavor and texture experience.
Unlock Next-Level Crunch: Chef’s Tips for Your Fried Pickle Chips
Seasoning Beyond the Flour: Elevate Your Panko
For an extra layer of flavor and zest, consider adding a pinch of garlic powder, onion powder, or even some smoked paprika directly to your panko breadcrumbs. This ensures every part of the coating is seasoned.
The Power of Patting: Redundant, But Worth It!
Seriously, pat those pickles dry, then pat them again! If time permits, let the pickles air dry on paper towels for 15-20 minutes after patting to ensure maximum moisture evaporation.
Don’t Overcrowd the Pot: Consistency is King
Frying in small batches is crucial. Overcrowding drastically drops the oil’s temperature, causing the pickles to absorb too much oil instead of crisping up, leading to a greasy, limp result.
Maintain Oil Temperature: Your Frying Thermometer is Your Best Friend
Keep a close eye on your oil thermometer throughout the entire frying process. Adjust the heat as needed to maintain that ideal 350-375°F range, ensuring even cooking and perfect crispness.
Serve Hot, Eat Fast: The Golden Rule of Fried Snacks
Fried foods, especially these crunchy pickle chips, are always best enjoyed immediately after frying. The heat helps maintain their crispness and enhances their flavor.
Fried Pickle Fails? Quick Fixes for Common Problems
Why Are My Crispy Fried Pickle Chips Soggy?
Sogginess usually stems from insufficient pickle drying, oil that isn’t hot enough, or overcrowding the pot. Ensure your pickles are bone-dry before coating, and always use a thermometer to maintain the correct oil temperature.
Fry in small batches to keep the oil temperature stable and prevent the pickles from stewing rather than frying.
My Coating is Falling Off My Pickle Chips!
This often happens if you don’t press the panko firmly enough onto the pickle, or if there’s too much excess egg wash or flour. Shake off all excess flour and egg wash before the next coating step.
Make sure to really press and adhere that panko for a robust, sticking crust.
They’re Oily, Not Crispy, Even Though They’re Golden!
If your fried pickles are golden but still oily, your oil temperature was likely too low. The coating cooks and browns, but the lower temperature allows too much oil to seep in before it crisps up.
Always aim for that 350-375°F sweet spot, adjusting as needed between batches.
My Pickles Are Burning Too Quickly!
This indicates your oil is too hot. High temperatures burn the coating before the pickle inside properly heats through, resulting in a dark exterior and potentially a less cooked interior.
Lower the heat, allow the oil to cool slightly, and ensure you’re within the recommended temperature range with your thermometer.
Beyond Ranch: Creative Serving Suggestions for Your Crispy Fried Pickle Chips
Dipping Sauce Delights
While ranch is a classic, don’t limit yourself! Try a spicy sriracha mayo, a tangy honey mustard, or a smoky chipotle aioli for an exciting kick. A homemade creamy garlic dip also pairs wonderfully.
Even a simple spicy ketchup or a vibrant herb aioli can transform the experience, offering endless flavor combinations.
Perfect Pairings: What to Serve Them With
These crispy fried pickle chips make an incredible appetizer for game day or any gathering. Serve them alongside burgers, sandwiches, or even as a unique side dish for grilled chicken or fish.
They’re also fantastic as part of a larger snack platter, complementing other crispy finger foods.
Plan Ahead & Store Smart: Enjoying Your Fried Pickles Later
Can I Make the Coating Ahead?
You can certainly prepare the coated pickle chips a few hours in advance. Place them in a single layer on a wire rack set over a baking sheet and refrigerate them, uncovered, for up to 2-3 hours.
This helps the coating adhere even more firmly, preventing it from getting soggy before frying.
Best Way to Store Leftovers
Store any leftover fried pickle chips in an airtight container in the refrigerator for up to 2-3 days. While best fresh, proper storage helps maintain their quality.
Reheating for Maximum Crispness
To restore their crunch, reheat leftover fried pickle chips in a preheated oven or air fryer. Bake at 375°F (190°C) for 5-7 minutes, or air fry at 350°F (175°C) for 3-5 minutes, until heated through and crispy.
Avoid using a microwave, as it will make them soggy.
Your Crispy Fried Pickle Chips Questions Answered
What Kind of Pickles Work Best for Fried Pickle Chips?
Dill pickle chips are ideal due to their tangy flavor and firm texture, which holds up well during frying. Look for a brand with consistent slice thickness for even cooking.
Spears can also work, but chips are generally preferred for ease of eating and a higher crunch-to-pickle ratio.
Can I Make Crispy Fried Pickle Chips Gluten-Free?
Absolutely! Simply substitute the all-purpose flour with a 1:1 gluten-free flour blend. For the panko, use gluten-free panko breadcrumbs, which are widely available and perform just as well.
Is There an Air Fryer Option for Crispy Fried Pickle Chips?
Yes, an air fryer can produce wonderfully crispy results with less oil. Lightly spray the coated pickles with cooking spray before air frying.
Air fry at 375°F (190°C) for 8-12 minutes, flipping halfway through, until golden and crisp. The texture will be slightly different than deep-fried, but still delicious.
What Can I Use Instead of Panko Breadcrumbs?
While panko offers the best crisp, you can use crushed cornflakes or finely crushed plain crackers for a similar texture. Standard breadcrumbs will also work but may yield a slightly denser, less airy crisp.
For another crispy delight, check out our recipe for crispy roasted cauliflower, which also relies on smart coating techniques.
How Can I Make My Fried Pickles Spicier?
To add a kick, incorporate a pinch of cayenne pepper or smoked paprika into the seasoned flour mixture. For an extra layer of heat, mix a dash of hot sauce into your egg wash.
You can also serve them with a spicy dipping sauce like sriracha ranch or a homemade jalapeño aioli.
Your Ultimate Crunch Awaits: Share Your Crispy Fried Pickle Chips!
You now possess the secrets to creating truly irresistible crispy fried pickle chips that will impress everyone. Forget soggy disappointments; this recipe delivers ultimate crunch and fantastic flavor every single time.
Don’t wait any longer to treat yourself and your loved ones to this beloved snack. Give this recipe a try, savor that perfect bite, and share your golden, crunchy creations with us!
Fried Pickle Chips
Course: AppetizerCuisine: AmericanDifficulty: easy4
(Serves 4-6 as an appetizer)25
minutes15
minutes550
kcal40
minutesSay goodbye to soggy fried pickles! This recipe reveals the simple trick to achieve restaurant-quality crispiness at home, ensuring beautifully golden and crunchy pickles every time. Enjoy a consistently crispy coating that stays put.
Ingredients
1 (16-ounce) jar dill pickle chips, drained
1 cup all-purpose flour
2 large eggs
1/4 cup milk or water
1 1/2 cups panko breadcrumbs
1 teaspoon garlic powder
1/2 teaspoon onion powder
1/2 teaspoon black pepper
1/4 teaspoon salt (adjust to taste)
4 cups vegetable oil, for frying
1/2 cup creamy ranch-style dipping sauce, for serving
Directions
- Prepare the Pickles for Peak Crispiness: This is the most important step for a truly crispy coating. Drain the pickle chips thoroughly and then spread them out on several layers of paper towels. Pat them vigorously with more paper towels until they are as dry as possible. This removes excess moisture that would otherwise make your coating soggy.
- Set Up Your Dredging Stations: Get three shallow bowls ready. In the first bowl, combine the all-purpose flour, garlic powder, onion powder, black pepper, and salt. Whisk well to ensure the seasonings are evenly distributed. In the second bowl, whisk together the eggs and milk or water until well combined. In the third bowl, place the panko breadcrumbs.
- Coat for Maximum Crunch: Working in small batches, first dredge the dry pickle chips in the seasoned flour, shaking off any excess. Next, dip them into the egg wash, letting any extra drip away. Finally, transfer them to the panko breadcrumbs. Press the panko firmly onto both sides of each pickle chip, ensuring a thick, even coating. This firm press is key to making sure your coating sticks and stays crispy during frying. Place the coated pickles on a wire rack as you finish each batch.
- Heat the Oil Properly: Pour the vegetable oil into a large, heavy-bottomed pot or Dutch oven until it’s about 2 to 3 inches deep. Heat the oil over medium-high heat until it reaches 350-375°F. Using a thermometer is highly recommended here, as consistent oil temperature is crucial for preventing oily, soggy pickles and achieving that perfect crisp.
- Fry to Golden Perfection: Carefully add a single layer of coated pickles to the hot oil, making sure not to overcrowd the pot. Overcrowding will drop the oil temperature and lead to less crispy results. Fry for 2 to 3 minutes per side, or until the coating is deeply golden brown and very crispy.
- Drain and Serve Immediately: Using a slotted spoon, carefully remove the fried pickles from the oil and place them back on the wire rack set over a tray or paper towels to drain any excess oil. Serve your perfectly crispy fried pickle chips immediately with the creamy ranch-style dipping sauce on the side. Enjoy that amazing crunch!
Notes
- The most important steps for crispiness are thoroughly drying the pickles and pressing the panko firmly during coating.