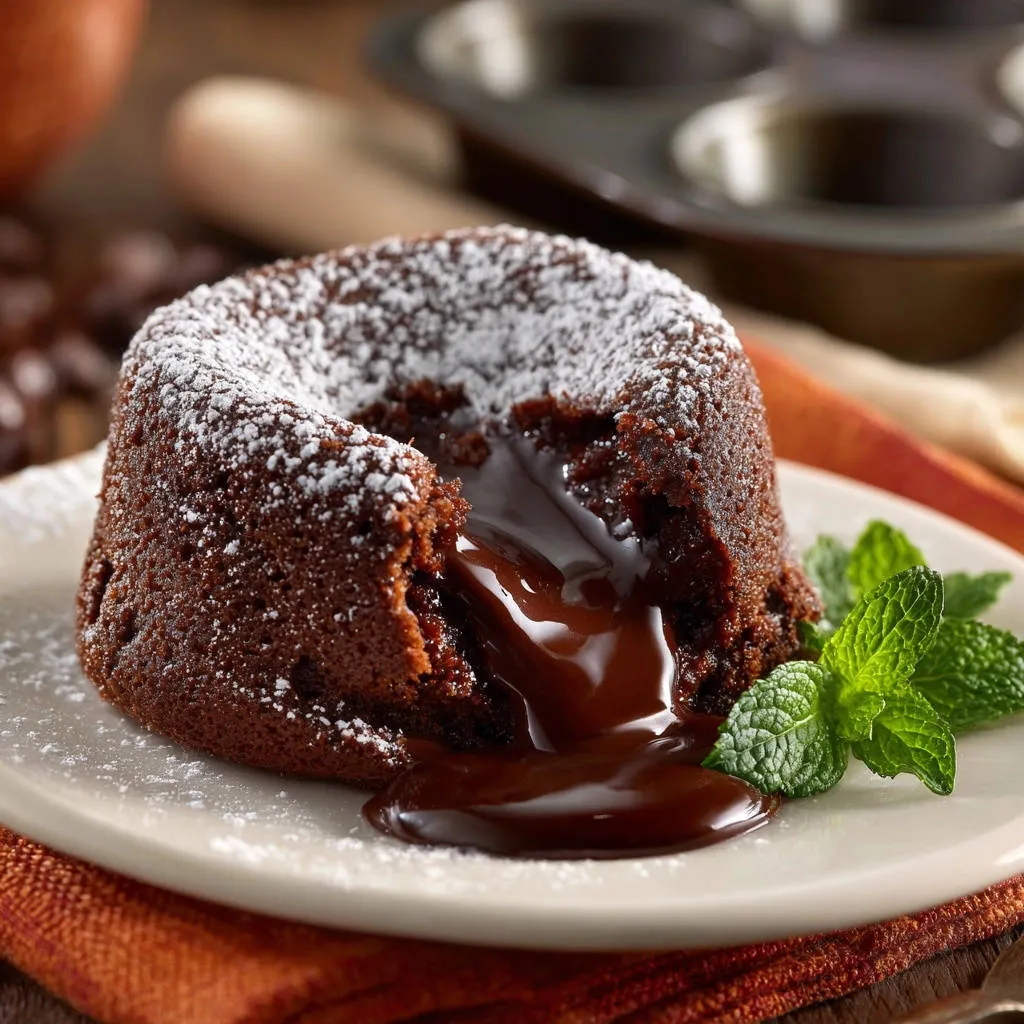
That moment you pierce a warm dessert and watch a molten chocolate river cascade out is pure magic. For many home bakers, perfecting a Decadent Chocolate Lava Cake can feel like a high-stakes challenge, but I’ve discovered a simple trick that eliminates all guesswork, ensuring a flawlessly gooey center every single time.
This foolproof method transforms a potentially intimidating dessert into an effortless indulgence, delivering restaurant-quality richness directly to your dining table. Get ready to impress with these incredible homemade lava cakes.
Why This Decadent Lava Cake Recipe is Your New Go-To
The “Wobble Test” Secret to Perfect Molten Centers
The true genius of this recipe lies in its “wobble test” – a precise visual cue for doneness. By observing the distinct jiggle of the cake’s center, you guarantee that ideal molten core without any doubt.
For more intricate chocolate creations like the chocolate glazed pistachio layer cake, mastering flour incorporation is key.
This simple technique takes all the guesswork out of baking, promising a luscious, flowing chocolate interior with every batch.
Baking Without the Guesswork: A Foolproof Method
From melting chocolate to mastering the bake, each step in this recipe is designed for ease and consistency. It’s perfect for both seasoned bakers and complete novices.
You’ll achieve consistent, delicious results every time, building your baking confidence with each perfectly baked cake.
Achieving Restaurant-Quality Indulgence at Home
Imagine serving a dessert that rivals any high-end restaurant, all created in your own kitchen. This recipe delivers an elevated experience that feels incredibly special.
These Decadent Chocolate Lava Cakes prove that gourmet indulgence is perfectly achievable for any home cook, elevating any meal.
Gathering Your Chocolatey Canvas: Key Ingredients
The Heart of the Cake: Quality Dark Chocolate
Opt for a good quality dark chocolate, ideally with a cocoa percentage between 60% and 75%. This ensures a rich, deep chocolate flavor that is the hallmark of a truly decadent lava cake.
High-quality chocolate melts more smoothly and contributes significantly to the luxurious texture of the molten center.
Eggs, Butter, and the Perfect Balance
We use both large whole eggs and large egg yolks. Whole eggs provide essential structure, while the extra yolks contribute incredible richness and a velvety texture to the molten core.
Unsalted butter adds vital moisture and a smooth, luxurious mouthfeel, ensuring the cake is tender and flavorful.
Sweetness and Structure: Sugar & Flour Insights
Granulated sugar provides the perfect level of sweetness, balancing the intensity of the dark chocolate without overwhelming it.
Just a touch of all-purpose flour gives the cake enough structure to hold its shape. Crucially, it won’t make the cake dense, preserving that delicate, tender crumb.
For a taste of spiced goodness, explore ways to create your own old-fashioned gingerbread cake.
Flavor Enhancers: Vanilla and a Pinch of Salt
Vanilla extract deepens and rounds out the complex chocolate flavors, adding an aromatic warmth.
A pinch of salt is vital; it dramatically enhances the chocolate’s natural notes and expertly balances the sweetness, making every bite more satisfying.
Your Baking Arsenal: Essential Tools for Success
Ramekins or Muffin Tins: Choosing Your Vessels
Four 4-ounce ramekins are ideal for individual servings, providing that classic elegant presentation. They ensure consistent baking for each lava cake.
Alternatively, a standard muffin tin can be used, offering a convenient option. Just be sure the wells are approximately 4 ounces to maintain the intended size.
Mixing Bowls & Whisks: Preparing Your Batter
You’ll need a heatproof bowl for melting the butter and chocolate, whether using a double boiler or microwave. This protects the chocolate from scorching.
A separate medium bowl is essential for whisking the egg mixture until light and frothy, ensuring proper aeration. A good whisk or electric mixer will make this task easy.
Beyond the Oven: Serving & Garnish Gear
A fine-mesh sieve is perfect for achieving a delicate, even dusting of powdered sugar over your finished cakes.
You might also want a small offset spatula or knife to gently loosen the edges before inverting, guaranteeing a pristine presentation.
Crafting Decadent Chocolate Lava Cakes: A Detailed Journey
Step 1: Prep Your Stage (Oven & Ramekins)
Preheat your oven to 400°F (200°C) well in advance. A thoroughly heated oven is crucial for the rapid rise and setting of the cake’s edges.
Lightly butter each 4-ounce ramekin or muffin cup, ensuring every surface is coated. Then, dust them with a little flour or cocoa powder, tapping out any excess to create a non-stick barrier that guarantees a clean release.
Step 2: The Silky Chocolate-Butter Melt
Combine the chopped dark chocolate and unsalted butter in a heatproof bowl. You can melt them gently over a saucepan of simmering water (a double boiler) or in the microwave in 30-second bursts, stirring until perfectly smooth.
Once melted and combined, remove the bowl from the heat and allow the rich chocolate mixture to cool slightly for a few minutes. This prevents the hot chocolate from cooking the eggs in the next step.
Step 3: Whipping Eggs to Frothy Perfection
In a separate medium bowl, whisk together the whole eggs, egg yolks, granulated sugar, salt, and vanilla extract. Beat vigorously for 1-2 minutes until the mixture becomes light, pale, and notably frothy.
This aeration is key to the cake’s delicate texture and helps create that signature gooey center.
Step 4: Gently Folding for a Smooth Batter (Don’t Overmix!)
Pour the slightly cooled chocolate mixture into the whisked egg mixture. Using a spatula, gently fold them together until just combined. The goal is to marry the ingredients without deflating the aerated eggs.
Next, gradually fold in the all-purpose flour until no streaks remain. This step is critical: avoid overmixing at all costs, as overworking the batter will develop gluten, leading to a tough, cake-like consistency instead of a delicate, molten one.
Step 5: The Critical Bake: Mastering the Molten Core
Carefully divide the smooth, rich batter evenly among your prepared ramekins or muffin cups.
Bake for exactly 12-14 minutes. The secret to that perfect molten center is observing the “wobble”: the edges of the cake should be set and firm, but the very center must still be noticeably wobbly when you gently shake the ramekin.
This distinctive wobble is your foolproof guarantee of a perfectly gooey, molten core. Remember, the most important rule is to absolutely NOT overbake these Decadent Chocolate Lava Cakes!
Step 6: The Grand Reveal: Inverting and Dusting
Carefully remove the ramekins from the oven and let them cool for just 1-2 minutes. This brief rest allows the cakes to firm up slightly, making them easier to handle.
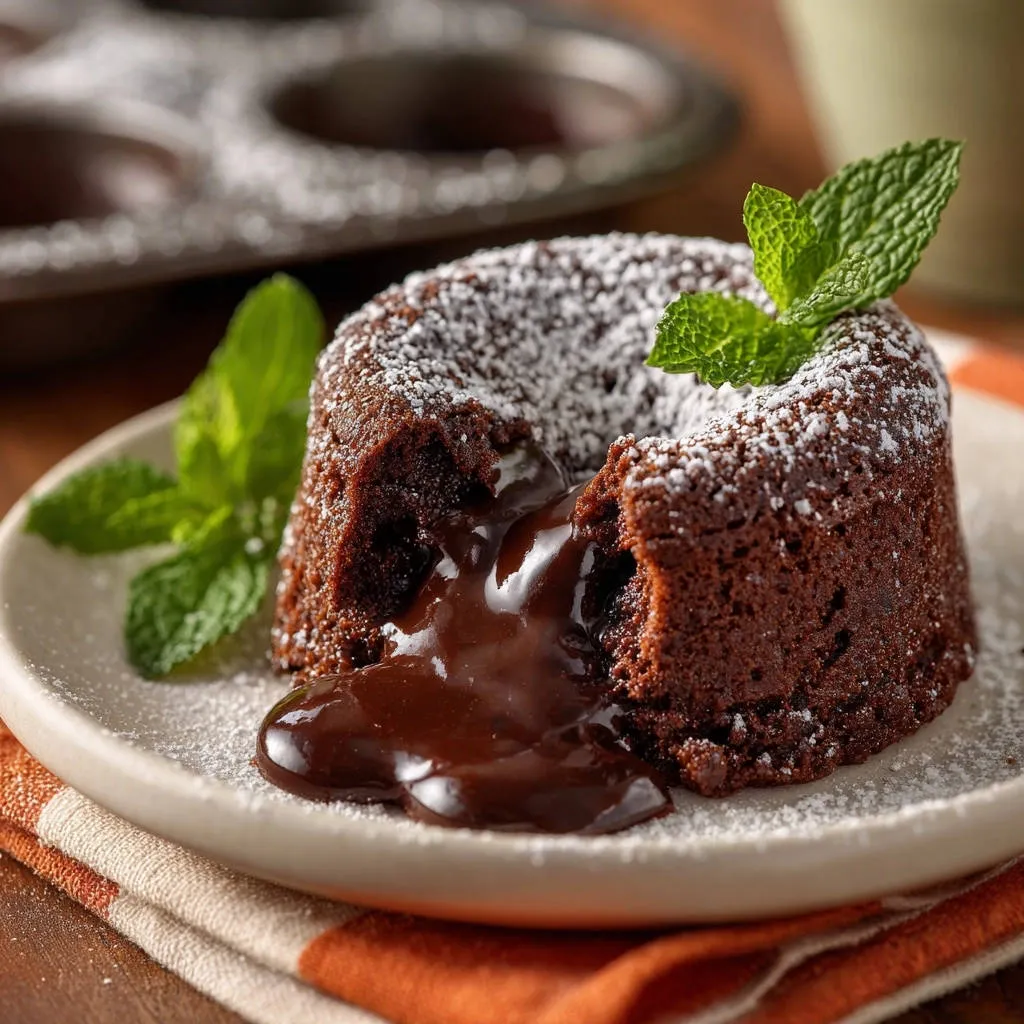
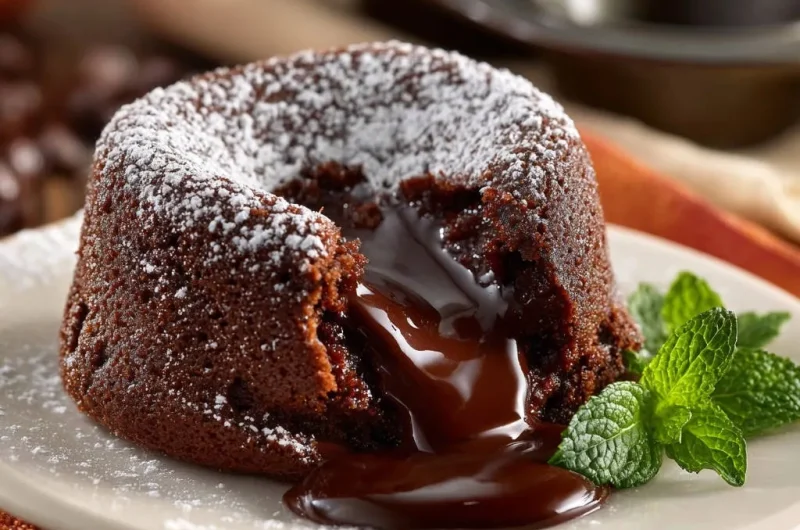
Place a serving plate upside down over each ramekin, then carefully invert them, letting the cake fall gracefully onto the plate. Gently lift the ramekin. Finish by dusting generously with powdered sugar and garnishing with fresh mint leaves for an elegant touch, then serve immediately to enjoy the incredible gooey goodness!
Chef’s Secrets & Troubleshooting: Elevate Your Lava Cake Game
The Golden Rule: Never Overmix Your Batter
Overmixing develops gluten in the flour, which creates a tough and chewy texture, completely detracting from the desired delicate cake and molten center.
Always use a gentle folding technique until ingredients are just combined, ensuring the cake remains tender and airy around its gooey core.
Understanding the “Wobbly” Center: Don’t Overbake!
The gentle “wobble” in the center is the ultimate indicator of perfection. It means the interior is still liquid and will create that iconic molten flow.
Baking even a minute too long can set the entire cake, turning your lava cake into a simple chocolate cupcake with a firm center.
Ensuring a Clean Release: Buttering and Dusting Tips
Beyond buttering and flouring, consider chilling your prepared ramekins for 5-10 minutes before filling. This helps the coating adhere better and reduces sticking.
For an extra deep chocolate flavor and a seamless appearance, dust your buttered ramekins with cocoa powder instead of flour.
Solving Common Lava Cake Mishaps: Too Firm or Too Liquid?
If your lava cake is too firm, it’s a clear sign of overbaking. Reduce your bake time by 1-2 minutes in future attempts.
Conversely, if it’s too liquid and doesn’t hold its shape at all, it was undercooked. Add another minute to the baking time next time, still watching for that crucial wobble.
What if My Cakes Stick to the Ramekins?
Thorough greasing and dusting are paramount. Ensure you coat every crevice of the ramekin or muffin cup generously.
For added security, you can cut small circles of parchment paper to line the bottom of each ramekin before buttering and dusting, guaranteeing an effortless release.
Presentation & Pleasure: Serving Your Decadent Chocolate Lava Cakes
Classic Toppings & Garnish Ideas (Beyond Powdered Sugar)
While powdered sugar is traditional, elevate your Decadent Chocolate Lava Cakes with a variety of toppings.
More Sweet Treats to Explore
Since you’re enjoying these chocolate lava cakes, here are other delightful recipes that complement the occasion.
- For a breakfast or brunch variation on warm, sweet flavors, consider these cinnamon sugar waffles.
- If you’re in the mood for something savory with a touch of sweetness, these ham and cheddar biscuits offer a satisfying contrast.
- Fresh raspberries, strawberries, or sliced bananas add a vibrant freshness and a touch of tang.
- A dollop of freshly whipped cream or a scoop of premium vanilla bean ice cream provides a delightful creamy contrast.
- For an extra layer of gourmet flair, drizzle with a raspberry coulis or a simple caramel sauce.
Perfect Pairings: What to Serve Alongside
These rich molten chocolate desserts pair beautifully with a strong cup of coffee or a shot of espresso, cutting through the sweetness.
For a sophisticated touch, consider a sweet dessert wine like a Port or a Late Harvest Riesling. Even a simple, cold glass of milk can be a comforting accompaniment.
When to Serve: Occasions for Indulgence
Decadent Chocolate Lava Cakes are perfect for a romantic dinner for two, impressing guests at a dinner party, or as a show-stopping dessert for special celebrations.
They’re also ideal for those moments when you simply crave a luxurious, comforting treat after a long week.
Plan Ahead: Make-Ahead, Storage, and Reheating Tips
Prepping Batter in Advance
You can certainly prepare the raw batter up to 24 hours in advance. Simply cover the bowl tightly with plastic wrap and store it in the refrigerator.
When ready to bake, let the batter sit at room temperature for 15-20 minutes, then bake as directed, potentially adding a minute or two to the bake time if it’s still quite cold.
Storing Leftover Lava Cakes
Baked lava cakes can be stored, though they are best enjoyed fresh. Cover them loosely at room temperature for up to one day, or refrigerate in an airtight container for 2-3 days.
Be aware that the molten center may firm up slightly upon cooling, but it can be revived.
Reviving the Molten Magic: Reheating Guide
To restore that warm, gooey center, reheat individual cakes in the microwave for 15-30 seconds, depending on your microwave’s power.
Alternatively, place them on a baking sheet and warm in a preheated oven at 300°F (150°C) for 5-10 minutes, until just warm through but still molten inside.
Your Decadent Chocolate Lava Cakes Questions Answered
What is the best type of dark chocolate to use?
For the best flavor and melt, choose a high-quality dark chocolate baking bar or fèves with a cacao percentage between 60-75%.
Brands like Ghirardelli, Valrhona, or Callebaut are excellent choices. Avoid chocolate chips, as they often contain stabilizers that prevent them from melting as smoothly.
Can I use a muffin tin instead of ramekins?
Yes, a standard 12-cup muffin tin can be used as a substitute for ramekins. Ensure each muffin cup is thoroughly buttered and dusted, just like the ramekins.
Monitor baking time closely, as smaller muffin cups may bake a minute or two faster. Always look for that tell-tale wobbly center.
How do I know if my lava cake is undercooked?
An undercooked lava cake will feel entirely liquid and collapse when removed from the oven. The edges will not be set, and the whole cake will appear raw.
Remember, a slight wobble in the center is good; a completely liquid, unset cake indicates it needs more time.
Is it possible to make this recipe gluten-free?
Absolutely! This recipe can be made gluten-free with a simple substitution. Replace the all-purpose flour with an equal amount of a good quality 1:1 gluten-free baking flour blend.
Ensure your chosen blend contains xanthan gum for proper structure and texture, and follow the baking instructions as written.
Ready to Create Your Own Molten Masterpiece?
Now armed with all the expert tips and a foolproof technique, you are ready to conquer the art of baking Decadent Chocolate Lava Cakes. Trust the process, embrace the “wobble test,” and prepare for an unforgettable dessert experience.
Dive into your kitchen, create this molten masterpiece, and delight in every ooey-gooey bite. Don’t forget to share your dazzling creations or any personal tips in the comments below!
Chocolate Lava Cakes
Course: DessertCuisine: AmericanDifficulty: easy4
servings15
minutes12
minutes450
kcal30
minutesCrack open a warm chocolate lava cake to reveal its rich, molten center. This recipe provides a simple trick to guarantee a perfectly gooey middle every time, making baking this decadent dessert effortless and delicious.
Ingredients
1/2 cup (1 stick) unsalted butter
4 ounces good quality dark chocolate, chopped
2 large eggs
2 large egg yolks
1/4 cup granulated sugar
1/4 cup all purpose flour
Pinch of salt
1 teaspoon vanilla extract
Powdered sugar, for dusting
Fresh mint leaves, for garnish
Directions
- Preheat your oven to 400 degrees Fahrenheit (200 degrees Celsius). Lightly butter four 4-ounce ramekins or a muffin tin. Dust them with a little flour or cocoa powder, tapping out any excess. This helps prevent sticking and ensures a clean release.
- In a heatproof bowl set over a saucepan of simmering water (or in a microwave safe bowl, microwaving in 30 second intervals), melt the butter and chopped dark chocolate together, stirring until smooth and fully combined. Remove from heat and let cool slightly for a few minutes.
- In a separate medium bowl, whisk together the whole eggs, egg yolks, granulated sugar, salt, and vanilla extract until light and frothy, about 1-2 minutes.
- Gently fold the melted chocolate mixture into the egg mixture until just combined. Do not overmix.
- Gradually fold in the flour until no streaks remain. The batter should be smooth but not overworked.
- Divide the batter evenly among the prepared ramekins or muffin cups.
- This is the secret for that perfect molten center: Bake for exactly 12-14 minutes. The edges should be set, but the center should still be noticeably wobbly when you gently shake the ramekin. This wobble is your guarantee of a perfectly gooey, molten core. Do not overbake.
- Carefully remove the ramekins from the oven. Let them cool for just 1-2 minutes.
- Place a plate upside down over each ramekin and carefully invert, letting the cake fall onto the plate. Carefully lift the ramekin.
- Dust generously with powdered sugar and garnish with fresh mint leaves before serving immediately. Enjoy that incredible gooey goodness!
Notes
- Bake for exactly 12-14 minutes; edges should be set, but center noticeably wobbly for a gooey, molten core. Do not overbake.