There’s nothing quite like the classic deviled egg. That creamy, tangy filling nestled inside a tender egg white is pure comfort food and a guaranteed crowd-pleaser at any gathering. But let’s be honest, making them can sometimes feel like a high-stakes game of chance, especially when it comes to peeling those hard-boiled eggs! The frustration of shells stubbornly clinging to the whites, tearing away half the beautiful egg in the process, is something many of us have experienced.
For years, I struggled with this exact problem whenever I wanted to whip up a batch of delicious deviled eggs. Ruined whites meant fewer perfect appetizers and a lot of wasted effort. But then, I discovered a simple, foolproof trick that changed everything. Now, I consistently achieve perfectly smooth, easy-to-peel hard-boiled eggs, ready to be transformed into something truly special. And today, we’re taking this beloved appetizer to the next level by adding succulent, perfectly cooked shrimp on top. These Deviled Eggs with Shrimp aren’t just food; they’re little bites of culinary happiness, perfect for parties, holidays, or just a luxurious snack.
For more ways to enjoy this familiar flavor, consider making a creamy deviled egg dip.
Why You’ll Love These Deviled Eggs with Shrimp
So, why add shrimp to an already amazing deviled egg? The addition of juicy, pan-seared shrimp elevates the classic appetizer from simple to stunning. It adds a touch of elegance and a burst of savory flavor that complements the creamy filling beautifully. It’s a sophisticated twist that feels fresh and exciting, making them stand out on any appetizer platter.
Beyond the incredible flavor combination, you’ll adore this recipe for several reasons:
- The Perfect Peel: Seriously, the egg peeling trick shared in this recipe is a game-changer. Say goodbye to frustrating, torn egg whites!
- Elevated Classic: It takes a familiar favorite and adds a delightful seafood element, making it feel gourmet without being complicated.
- Impressive Presentation: Topped with a plump shrimp, these deviled eggs look absolutely gorgeous and are sure to impress your guests.
- Customizable: The base deviled egg filling is versatile, allowing you to tweak the seasonings to your preference.
- Make Ahead Friendly: You can prepare components of this dish in advance, saving you time when it’s showtime.
Whether you’re hosting a holiday feast, planning a summer barbecue, or simply craving a special appetizer, these Deviled Eggs with Shrimp are guaranteed to be a hit. They offer that nostalgic comfort of a classic deviled egg with an exciting, flavorful twist that keeps everyone reaching for more.
Gathering Your Ingredients for Deviled Eggs with Shrimp
Creating these delightful bites starts with selecting the right ingredients. While the list is simple, focusing on quality will truly make your Deviled Eggs with Shrimp shine. We’re building a foundation of perfectly cooked eggs, a rich and tangy filling, and topping it all off with beautifully seasoned shrimp.
Here’s what you’ll need to bring this recipe to life, along with a few notes on selecting the best:
- Large Eggs: We need six large eggs. Believe it or not, the age of your eggs matters for peeling ease. Older eggs tend to peel much more easily than very fresh ones, though our ice bath trick helps significantly even with fresher eggs. Look for cartons that aren’t “just packed” if peeling is your main concern.
- Medium Shrimp: Twelve medium shrimp, peeled and deveined. Medium-sized shrimp are perfect here – large enough to make a statement on top of the egg but not so large that they overpower the bite. Make sure they are peeled and deveined; you can buy them this way for convenience.
- Mayonnaise: Two tablespoons of your favorite mayonnaise. This is the creamy base for our yolk filling. Use a good quality mayonnaise you enjoy the taste of, as it contributes significantly to the overall flavor and texture.
- Dijon Mustard: One teaspoon of Dijon mustard. Dijon adds that essential tangy, slightly spicy kick that cuts through the richness of the mayonnaise and egg yolk. It’s a classic deviled egg component for a reason.
- Sweet Relish (Optional): One teaspoon of sweet relish. The recipe notes this is optional based on visible texture, meaning if you prefer a super smooth filling, you might omit it. However, a little sweet relish adds a lovely touch of sweetness and acidity, plus tiny bits of texture that some people adore in their deviled eggs.
- Finely Chopped Chives: One tablespoon, plus extra for garnish. Chives provide a fresh, mild onion flavor and a beautiful pop of green color. Using fresh herbs makes a big difference!
- Salt and Black Pepper: To taste. You’ll use these for both the egg filling and seasoning the shrimp. Seasoning is key to bringing out all the flavors.
- Paprika or Other Red Seasoning: 1/4 teaspoon, plus extra for garnish. Paprika adds color and a subtle sweetness to the shrimp seasoning and is the traditional sprinkle on top of deviled eggs. Smoked paprika could offer a different depth of flavor if you prefer.
- Olive Oil: One tablespoon. Used for searing the shrimp, it helps them cook evenly and develop a nice exterior.
Having these ingredients prepped and ready makes the assembly process smooth and enjoyable. Now, let’s dive into how to put it all together, focusing on that essential step for flawlessly peeled eggs!
Crafting Your Deviled Eggs with Shrimp: Step-by-Step
Okay, let’s get cooking! This recipe involves two main parts: perfectly preparing the hard-boiled eggs (with that miracle peeling trick!) and then whipping up the filling and cooking the shrimp. Each step is straightforward, but paying attention to the details will ensure delicious results.
Start with the Eggs in Cold Water: Gently place your six large eggs in a single layer in a saucepan. Using cold water to start is important because it allows the eggs to heat up gradually with the water. This helps prevent the shells from cracking when they hit hot water and promotes more even cooking. Cover the eggs with cold water by about an inch. Make sure they are in a single layer so they cook uniformly.
Add a Pinch of Salt: Add about 1/2 teaspoon of salt to the water. Some cooks believe adding salt to the water can help if an egg cracks during boiling, potentially helping the white coagulate faster and preventing it from leaking out. While its effect on peeling is debated, the real magic comes next, but it’s an easy step to include.
Bring to a Rolling Boil: Place the saucepan over high heat and bring the water to a vigorous, rolling boil. You’ll see lots of large, active bubbles breaking the surface.
Rest and Cook Off-Heat: As soon as the water reaches a rolling boil, immediately remove the pan from the heat source. This is crucial! Covering the pan tightly traps the heat, allowing the eggs to cook gently through steaming and residual heat. Let the covered pan stand for exactly 10 to 12 minutes. Ten minutes will give you a slightly softer, creamier yolk center, while twelve minutes will result in a firmer, fully cooked yolk. Choose the timing based on your preferred yolk texture.
The Miracle Ice Bath: While your eggs are resting in the hot water, prepare a large bowl filled generously with ice water. As soon as the 10-12 minute rest time is up, use a slotted spoon to immediately transfer the cooked eggs from the hot water into the prepared ice bath. Do not skip this step! The rapid cooling in the ice bath is the key to easy peeling. This drastic temperature change causes the egg white to contract significantly, pulling away from the inner shell membrane. Let the eggs cool completely in the ice bath for at least 15 minutes. You can even leave them longer.
Peel with Ease and Prep the Halves: Once the eggs are thoroughly chilled, it’s time for the moment of truth – peeling! You can peel them under cool running water or back in the ice bath; either method helps wash away small shell fragments. The shells should now slip off beautifully, leaving you with smooth, intact egg whites. Cut each peeled egg carefully in half lengthwise using a sharp knife. Gently scoop the bright yellow yolks into a small mixing bowl. Arrange the empty, perfectly peeled egg white halves on your serving plate or a clean tray.
Make the Creamy Yolk Filling: Using a fork, mash the scooped yolks until they are finely crumbled. Don’t worry about getting them perfectly smooth just yet. To the mashed yolks, add the mayonnaise, Dijon mustard, and the chopped chives. If you’re using sweet relish, add that now too. Season generously with salt and black pepper to taste. Stir the mixture together thoroughly. Keep mixing until everything is well combined and the mixture is smooth and creamy with a consistent texture. Taste a tiny bit of the filling to check the seasoning – you might want a little more salt, pepper, or maybe even a tiny pinch of paprika here depending on your preference. Adjust as needed.
Fill the Egg Whites: Now for the fun part – filling! You can simply spoon the creamy yolk mixture evenly into the empty egg white halves. For a more polished look, you can use a piping bag fitted with a large star tip (or any tip you like) to pipe the filling into the cavities. Divide the filling evenly among the twelve egg white halves.
Prepare the Shrimp: Season your peeled and deveined shrimp lightly with salt, pepper, and the 1/4 teaspoon of paprika. Heat the olive oil in a small skillet over medium-high heat. Once the oil is shimmering, add the seasoned shrimp in a single layer. Cook them for just 2 to 3 minutes per side. Shrimp cook very quickly! They should turn pink and opaque all the way through. Be careful not to overcook them, or they can become rubbery.
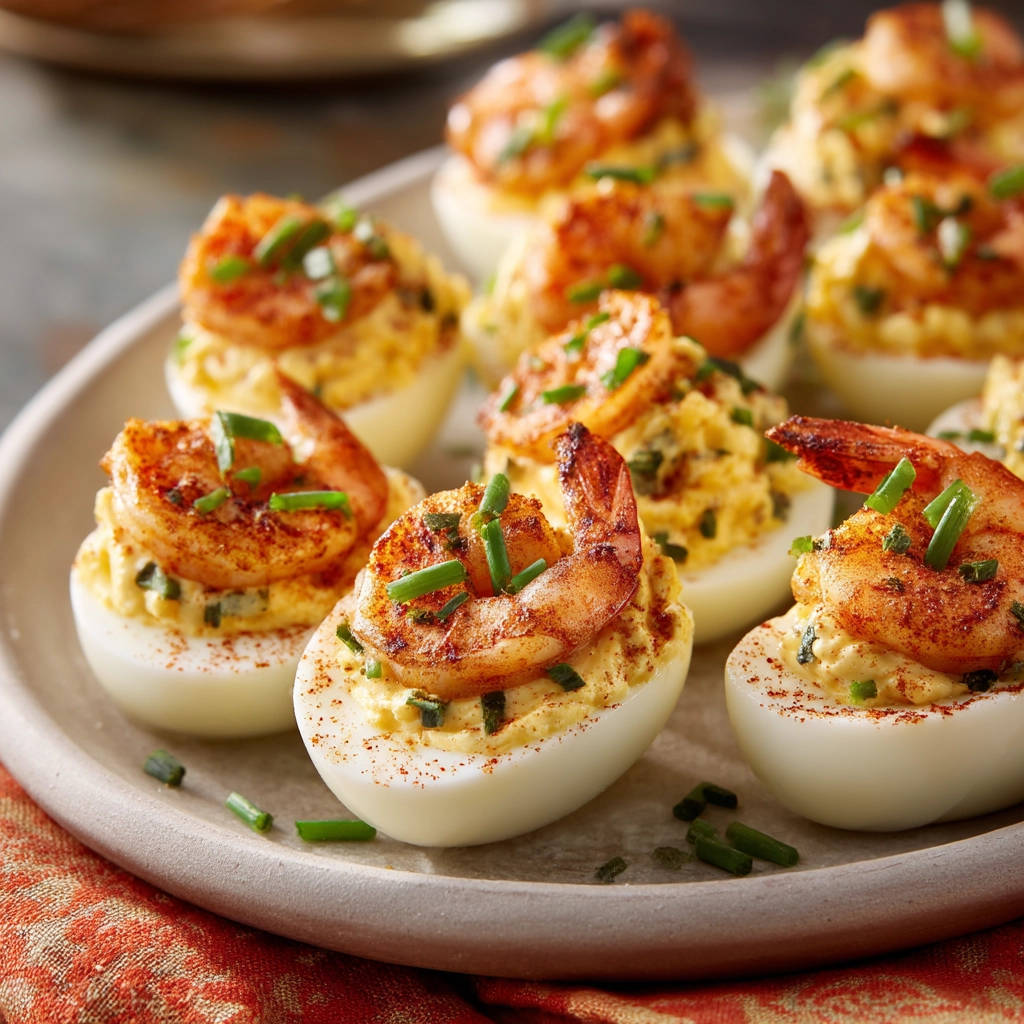
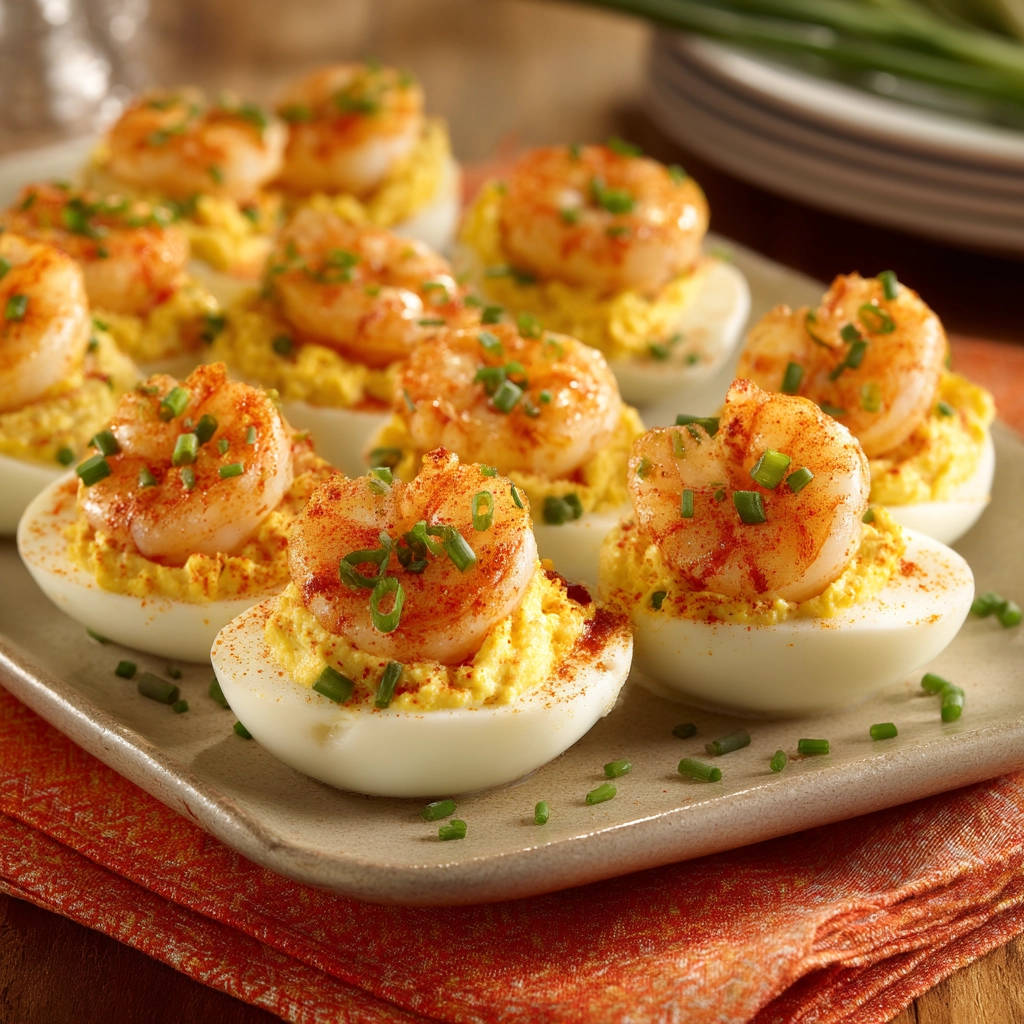
Assemble and Garnish: Place one perfectly cooked shrimp on top of the filling of each deviled egg half. This is what makes them extra special! For a final flourish, garnish the platter with a sprinkle of extra chopped chives over the top and a final dusting of paprika for color. Arrange them attractively on your serving dish.
Voila! You’ve successfully made stunning Deviled Eggs with Shrimp with minimal peeling fuss. These are ready to be admired and devoured!
Tips for Perfect Deviled Eggs with Shrimp Every Time
Mastering Deviled Eggs with Shrimp is all about understanding a few key principles and applying some simple techniques. Here are some pro tips to ensure your batch is absolutely perfect:
- Embrace the Ice Bath: I cannot stress this enough – the ice bath is your best friend for easy peeling. Don’t rush the cooling process. Ensure the eggs are completely cold before attempting to peel.
- Don’t Overcook the Eggs: The 10-12 minute rest period after boiling off-heat is ideal. Overcooking can lead to a grayish ring around the yolk (sulfur compounds reacting) and a tougher white texture. Stick to the timing based on your desired yolk firmness.
- Properly Cook the Shrimp: Shrimp cook rapidly. Keep a close eye on them and remove them from the heat as soon as they turn pink and opaque. Overcooked shrimp are tough and rubbery, which would detract from the delicate deviled egg.
- Taste and Adjust the Filling: Before filling the eggs, always taste your yolk mixture. Does it need a pinch more salt? A dash more pepper? A little more tang from the mustard? Adjust the seasonings until it tastes just right to you.
- Presentation Matters: While deliciousness is primary, deviled eggs are also about presentation. A piping bag makes them look professional, but even a spoon can create lovely mounds. A sprinkle of fresh herbs and paprika adds essential color and finish.
- Use Room Temperature Eggs (Optional, for Peeling): Some cooks find that starting with eggs that aren’t straight from the fridge can also slightly help with peeling, though the ice bath remains the most impactful step.
- Storage Savvy: If making ahead, store the egg white halves and the yolk filling separately. The filling can be kept in an airtight container or a piping bag (with the tip covered) in the refrigerator for up to 2 days. The egg whites can also be stored in an airtight container. Assemble just before serving for the freshest result, especially with the shrimp topping.
Following these simple tips will ensure your Deviled Eggs with Shrimp are not only beautiful but incredibly delicious, hitting all the right notes of creamy, tangy, and savory.
What to Serve With Deviled Eggs with Shrimp
These Deviled Eggs with Shrimp are fantastic on their own as a show-stopping appetizer, but they also pair wonderfully with other dishes, especially when putting together a spread for a party or a special occasion. Their richness and savory flavor make them versatile.
Consider serving them alongside other classic party favorites like crunchy vegetable sticks with Creamy Jalapeno Dip, or perhaps a refreshing Creamy Potato Salad for a light lunch or picnic setting. If you’re building a more substantial appetizer plate, crispy items like Crispy Jalapeno Poppers or savory pinwheels would create a nice contrast in textures and flavors. For a seafood-themed gathering, they would be a perfect complement to dishes like baked crab legs or shrimp skewers. Ultimately, anything fresh, crunchy, or slightly acidic helps balance the richness of the deviled eggs and shrimp.
Your Deviled Eggs with Shrimp Questions Answered (FAQ)
Got questions about making the best Deviled Eggs with Shrimp? Here are some common queries and helpful answers to ensure your success.
How long should I boil the eggs for perfect deviled eggs?
With our method, you don’t actually boil the eggs for the full time. You bring the water to a rolling boil, then immediately remove the pan from the heat, cover it tightly, and let the eggs stand in the hot water for 10-12 minutes. This gentle cooking method results in tender whites and creamy yolks, and is key to the process that leads to easy peeling when combined with the ice bath.
Why do my hard-boiled eggs still peel poorly sometimes?
The most common reason for poor peeling, even with good technique, is using very fresh eggs. Fresher eggs have a membrane that adheres more tightly to the white. Our ice bath trick significantly minimizes this issue by causing the white to contract, but if you consistently struggle, try using eggs that are at least a week or two old. They are still perfectly good to eat, but the pH changes slightly over time, making the membrane separation easier.
Can I use pre-cooked shrimp?
While you can use pre-cooked shrimp for convenience, I highly recommend cooking the shrimp fresh as directed in the recipe. Pan-searing fresh shrimp for a few minutes develops a much better flavor and texture compared to the rubbery texture pre-cooked shrimp can sometimes have, especially when reheated. It only takes a few minutes and makes a noticeable difference.
How far in advance can I make Deviled Eggs with Shrimp?
You can hard-boil and peel the eggs up to 2 days in advance. You can also make the yolk filling a day in advance and store it separately. Cook the shrimp no more than a few hours ahead of time (or just before serving) for the best texture. Assemble the deviled eggs just before serving to prevent the whites from drying out and to ensure the shrimp is at its best.
How do I get a smooth filling?
Ensure you mash the yolks very well before adding the other ingredients. Using room-temperature mayonnaise and mixing thoroughly until no lumps remain will help. If you prefer an extra-smooth filling, you can press the mashed yolks through a fine-mesh sieve before mixing with the other ingredients, though mashing well with a fork is usually sufficient for a creamy texture.
What’s the best way to store leftover Deviled Eggs with Shrimp?
Store leftover deviled eggs in an airtight container in the refrigerator. It’s best to consume them within 1-2 days for optimal freshness and safety, especially with the seafood topping. Note that the shrimp texture might change slightly upon refrigeration.
Can I make this recipe spicier?
Absolutely! To add heat, you could mix a pinch of cayenne pepper into the yolk filling, add a dash of hot sauce (like Sriracha or Tabasco) to the mix, or sprinkle a little smoked paprika or chili powder on top of the shrimp or filling for garnish. Adjust the amount to your desired spice level.
Enjoy Your Homemade Deviled Eggs with Shrimp!
There you have it – a truly elevated take on a classic appetizer, complete with the secret to perfectly peeled eggs! These Deviled Eggs with Shrimp are elegant, flavorful, and surprisingly simple to make, especially now that you know the peeling trick. They are perfect for holidays, parties, or anytime you want to add a little touch of something special to your table.
Give this recipe a try and prepare to be amazed by how easy and satisfying it is to get those smooth, beautiful egg whites every time. Your guests will be impressed, and you’ll wonder why you ever struggled with peeling before!
Did you try this recipe? How did your eggs peel? Let me know in the comments below! And don’t forget to share this recipe with anyone you know who struggles with sticky eggshells!
Deviled Eggs
Course: appetizers-snacksCuisine: AmericanDifficulty: easy4
servings15
minutes10
minutes240
kcal25
MinutesMake the best Deviled Eggs with Shrimp! Learn the simple trick for perfectly peeled eggs and get tips for this crowd-pleasing appetizer.
Ingredients
6 large eggs
12 medium shrimp, peeled and deveined
2 tablespoons mayonnaise
1 teaspoon Dijon mustard
1 teaspoon sweet relish (optional, based on visible texture)
1 tablespoon finely chopped chives, plus extra for garnish
Salt and black pepper to taste
1/4 teaspoon paprika or other red seasoning, plus extra for garnish
1 tablespoon olive oil
Directions
- Carefully place eggs in a single layer in a saucepan. Cover with cold water by about an inch.
- Add 1/2 teaspoon salt to the water. This can sometimes help with peeling, but the cooling step is key.
- Bring the water to a rolling boil over high heat.
- As soon as the water boils, immediately remove the pan from the heat, cover it tightly, and let it stand for exactly 10-12 minutes (10 for slightly softer yolks, 12 for firmer).
- This is the trick to perfect peeling: While the eggs are resting, prepare a large bowl of ice water. Immediately transfer the cooked eggs from the hot water to the ice bath using a slotted spoon. Let them cool completely in the ice bath for at least 15 minutes. This rapid cooling causes the egg white to contract, separating it from the shell membrane, which makes peeling dramatically easier.
- Once completely cool, peel the eggs under cool running water or back in the ice bath; the shells should slip off easily. Cut the peeled eggs in half lengthwise. Gently scoop the yolks into a small bowl. Place the egg white halves on a serving plate.
- Mash the yolks with a fork until crumbly. Add the mayonnaise, Dijon mustard, relish (if using), chopped chives, salt, and pepper to the mashed yolks. Stir until the mixture is smooth and creamy. Taste and adjust seasoning as needed.
- Spoon or pipe the yolk mixture evenly into the egg white halves.
- Season the shrimp with salt, pepper, and paprika. Heat olive oil in a small skillet over medium-high heat. Add the shrimp and cook for 2-3 minutes per side, until pink and cooked through.
- Place one cooked shrimp on top of each filled deviled egg. Garnish with extra chopped chives and a sprinkle of paprika.
Notes
- For easier peeling, ensure your eggs are not super fresh; slightly older eggs tend to peel more readily. Don’t skip the ice bath – the rapid temperature change is crucial for those shells to slip right off.