We’ve all faced the frustration of dry, uninspiring shredded chicken. It’s a common kitchen challenge, but I’ve discovered the secret to achieving perfectly moist and incredibly flavorful Easy Salsa Shredded Chicken every single time.
This method ensures the chicken stays tender, soaking up all that amazing salsa goodness. It’s a game-changer for delicious, hassle-free meals, offering both simplicity and impressive results.
Why This Easy Salsa Shredded Chicken Will Be Your New Go-To
The “Never Dry” Secret: Perfectly Moist Every Time
The magic lies in a gentle, low-and-slow simmering process. This method ensures the chicken cooks through without ever drying out, guaranteeing tender, succulent results.
For a different take on seasoned chicken, try blackened chicken street tacos next.
A crucial final step of reabsorbing the flavorful sauce further locks in moisture. This truly sets it apart, making dry chicken a distant memory.
Minimal Effort, Maximum Flavor Impact
You only need four simple ingredients to create a dish bursting with deep, rich flavors. The salsa does most of the heavy lifting, infusing the chicken with complex notes.
This recipe proves that incredible taste doesn’t require an extensive ingredient list or complicated techniques.

A Versatile Hero for Any Meal
Once prepared, this flavorful chicken becomes an incredibly adaptable ingredient. It’s perfect for transforming into various dishes throughout the week.
From quick weeknight dinners to impressive weekend spreads, its versatility makes meal planning a breeze.
Your Weeknight Meal Game-Changer
Designed for busy lives, this recipe streamlines dinner preparation. Its straightforward steps mean less time in the kitchen and more time enjoying delicious food.
It’s the ideal solution for when you crave a homemade meal without the fuss, simplifying your weeknights effortlessly.
Just Four Ingredients? Unlocking Flavor with Simple Staples
Boneless, Skinless Chicken Breasts: The Protein Powerhouse
Boneless, skinless chicken breasts are ideal for this recipe due to their lean profile and ability to cook quickly. Choose plump breasts that appear firm and pink for the best quality.
Ensure they are fresh and free from any blemishes or strong odors, as quality chicken is key to a superior finished dish.
The Star: Your Favorite Salsa
Salsa acts as both the cooking liquid and the primary flavor base for this dish. Its acidity and spice tenderize the chicken while imparting incredible depth.
Selecting your salsa is where you truly customize the dish: opt for mild for a family-friendly meal, medium for a gentle kick, or spicy for a bolder flavor. Consider chunky salsas for added texture or smoother ones for a more uniform sauce.
Seasoning Essentials: Salt and Black Pepper
These fundamental seasonings are crucial for enhancing the chicken’s natural taste. Salt draws out moisture and allows flavors to penetrate deeper into the meat.
Freshly ground black pepper adds a subtle warmth and aroma, complementing the brightness of the salsa. Don’t underestimate their power to elevate the overall profile.
The Optional Splash: Water or Broth
A small splash of water ensures the chicken remains adequately submerged, promoting even cooking. This prevents any exposed chicken from drying out during simmering.
For an added layer of flavor, consider using low-sodium chicken broth instead of water. This subtle substitution can impart extra richness to the sauce.
Essential Tools for Effortless Salsa Shredded Chicken
The Heart of the Cook: A Heavy-Bottomed Pot or Dutch Oven
A heavy-bottomed pot or Dutch oven is indispensable for this recipe. Its substantial construction ensures even heat distribution, preventing hot spots and scorching.
This even heating is critical for maintaining the gentle simmer needed to perfectly tenderize the chicken without overcooking or drying it out.
The Shredding Duo: Two Forks
Once cooked, the chicken will be so tender it practically shreds itself. Two sturdy forks are all you need for this simple and effective method.
This tool choice makes quick work of transforming the whole chicken breasts into beautifully shredded pieces, ready to absorb more sauce.
Basic Kitchen Aids: Measuring and Seasoning
You’ll need measuring spoons for accurate seasoning of the chicken. A reliable cutting board provides a clean surface for seasoning and later shredding.
These fundamental tools ensure precision and hygiene throughout the cooking process, contributing to a smooth and successful preparation.
Your Path to Perfectly Moist Easy Salsa Shredded Chicken: A Detailed Guide
- Prepare and Season Your Chicken:
Gently pat the chicken breasts dry with paper towels. This crucial step helps the seasoning adhere better and prevents excess moisture from diluting the salsa flavor.
Evenly season both sides of the chicken breasts with 1/2 teaspoon of salt and 1/4 teaspoon of black pepper, ensuring complete coverage for balanced flavor.
- Set Up for Simmering:
Carefully place the seasoned chicken breasts in a single layer at the bottom of your large, heavy-bottomed pot or Dutch oven. Avoid overcrowding the pot to ensure even cooking.
- The Flavor Bath: Salsa Submersion:
Pour your chosen salsa directly over the chicken, making sure the chicken is mostly submerged in the liquid. The salsa provides both moisture and the core flavor.
If the chicken isn’t quite covered, add a small splash of water or low-sodium chicken broth until it is just submerged. This ensures every part of the chicken cooks evenly and absorbs flavor.
- The Secret Simmer: Low and Slow Cooking:
Bring the liquid to a gentle simmer over medium heat. Look for small, lazy bubbles forming around the edges, indicating the liquid is just at a cooking temperature, not boiling vigorously.
Once simmering, immediately reduce the heat to low, cover the pot tightly with a lid, and let it cook undisturbed for 20 to 25 minutes. This slow cooking is vital for tenderizing.
Crucial Tip: Maintaining a gentle simmer is key. A hard, rolling boil will shock and toughen the chicken, negating all efforts to achieve a perfectly moist texture. Monitor closely and adjust heat if necessary.
- Checking for Perfect Tenderness:
After the initial cooking time, carefully remove the lid and check the chicken for tenderness. It should be incredibly soft and easily pulled apart with two forks when gently prodded.
If the chicken offers any resistance, indicating it’s not quite ready, simply replace the lid and continue to simmer, covered, for another 5-10 minutes. Then, recheck until perfectly tender.
- The Shredding Stage:
Using tongs, carefully remove the cooked chicken breasts from the pot and transfer them to a clean cutting board or a shallow bowl. Leave the flavorful salsa liquid in the pot.
Using two forks, one to hold the chicken steady and the other to pull, shred the chicken into your desired size and consistency. You can opt for fine, delicate strands or chunkier, more substantial pieces.
- Reuniting Chicken with Salsa: The Juiciness Trick:
Return all the shredded chicken directly to the pot, where the simmering salsa sauce awaits.
Stir everything together thoroughly, ensuring every single piece of chicken is completely coated in the rich, flavorful sauce. This step is absolutely critical for reabsorbing moisture and maximizing flavor, ensuring the shredded chicken stays juicy.
- Final Flavor Infusion & Serve:
Allow the chicken to simmer in the sauce for an additional 5 minutes, uncovered. This final simmer allows the flavors to meld deeply and the chicken to fully absorb the sauce’s richness, intensifying the taste.
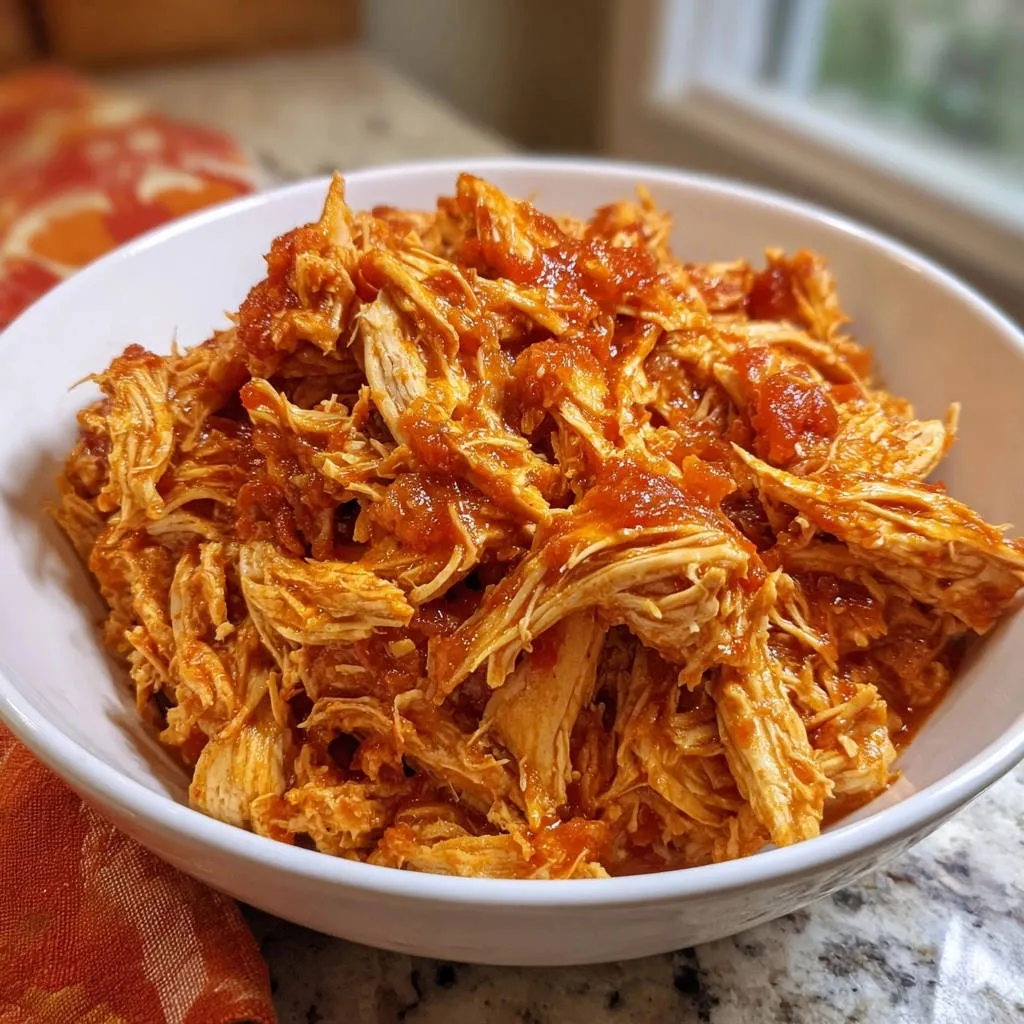
Serve your perfectly moist and flavorful Easy Salsa Shredded Chicken warm, ready to be incorporated into your favorite dishes!
Chef’s Secrets: Elevate Your Easy Salsa Shredded Chicken to Culinary Heights
Choosing Your Salsa: A Flavor Foundation: The specific salsa you select profoundly impacts the final taste profile of your moist shredded chicken. Experiment with specialty varieties like fire-roasted for smoky depth, mango salsa for a touch of sweetness, or a habanero salsa for serious heat. Remember that a very watery salsa might require slightly less added water, and a chunky one will contribute excellent texture.
Don’t Rush the Simmer: Patience is truly key when aiming for succulent, tender chicken. The “low and slow” method isn’t just a suggestion; it’s a non-negotiable step that ensures the chicken fibers relax and tenderize without ever seizing up or drying out. A consistent, gentle simmer is far superior to a vigorous, rolling boil for this recipe.
The Power of Reabsorption: Don’t Skip Step 7: Returning the shredded chicken to the simmering sauce is more than just a mixing step; it’s a critical technique for juiciness. This allows the chicken to actively soak up lost moisture and infuse every strand with intense flavor, preventing any post-shredding dryness. This makes all the difference in achieving truly moist shredded chicken.
Beyond Chicken Breasts: Thighs for Extra Flavor: While breasts are excellent, consider using boneless, skinless chicken thighs for an even richer, more forgiving result. Thigh meat is naturally juicier and less prone to drying out, offering a slightly deeper flavor. Adjust cooking time slightly if using larger or thicker thigh pieces, typically an extra 5-10 minutes.
Spice it Up! Customizing Heat: If your chosen salsa isn’t delivering enough heat, it’s easy to customize. At the beginning of the simmer, add a pinch of cayenne pepper, a few dashes of your favorite hot sauce, or a finely minced jalapeño (with seeds removed for controlled heat). For a deeper, smoky heat, a pinch of chipotle powder works wonders.
Transforming Your Table: Creative Serving Ideas for Easy Salsa Shredded Chicken
Classic Tacos & Burritos: The Ultimate Comfort Food
Pile your Easy Salsa Shredded Chicken into warm tortillas for instant tacos or burritos. Top with fresh avocado slices, crumbled cotija cheese, crisp shredded lettuce, and a dollop of sour cream or Greek yogurt.
For an even crispier bite, try rolling your tortillas tight for crispy chicken taquitos.
Add a squeeze of lime juice for brightness, enhancing the vibrant flavors of the chicken and making for a truly satisfying meal.
Hearty Bowls & Salads: Fresh and Flavorful
Create nourishing rice or quinoa bowls by layering the shredded chicken over your grain of choice, alongside black beans, corn, and chopped bell peppers. Drizzle with a cilantro-lime dressing.
What to Serve Alongside
To complement your easy shredded chicken, consider these dishes that bring their own exciting elements.
- For a vibrant and satisfying meal, try these Loaded Beef Nachos, which offer a delightful crunch to contrast the tender chicken.
- Add a touch of sweet heat with this Hot Honey Jalapeño Cornbread, its spicy-sweet notes pairing well with savory chicken.
Alternatively, use it as a robust, protein-packed topping for a vibrant salad. Combine with mixed greens, cherry tomatoes, cucumber, and a light vinaigrette for a refreshing and hearty lunch.
Quick Weeknight Dinners: Beyond the Obvious
Beyond the classics, this versatile chicken shines in many other applications. Use it as a savory filling for cheesy quesadillas or as the star in homemade enchiladas.
It also makes an excellent sandwich or slider filling, especially when paired with a zesty slaw. Don’t forget it can be tossed with pasta for a unique weeknight twist.
Plan Ahead: Storing and Reheating Your Delicious Salsa Shredded Chicken
Refrigeration Best Practices
Once cooled to room temperature, transfer your Easy Salsa Shredded Chicken, along with its sauce, into an airtight container. This keeps it fresh and prevents odor transfer.
Properly stored, it will maintain its quality and flavor in the refrigerator for up to 3-4 days, making it perfect for meal prepping.
Freezing for Future Feasts
For longer storage, freeze the cooked chicken in an airtight, freezer-safe container or heavy-duty freezer bag. Label with the date to keep track.
It can be safely frozen for up to 2-3 months without significant loss of quality. Thaw overnight in the refrigerator before reheating.
Reheating for Optimal Texture
To reheat, transfer the chicken and sauce to a saucepan and warm gently over low heat on the stovetop, adding a splash of water or broth if it seems dry. Stir occasionally until heated through.
Alternatively, microwave in a covered, microwave-safe dish, stirring every minute until warm. Be careful not to overheat, which can dry out the chicken.
Troubleshooting Your Easy Salsa Shredded Chicken: Solutions for Success
Problem: My Chicken is Dry or Tough
This usually indicates the chicken was cooked at too high a heat or for too long, causing the fibers to seize up. The low and slow simmering method is crucial for tenderness.
Ensure you maintain a very gentle simmer throughout the cooking process. Also, never skip the reabsorption step (Step 7), as it helps the shredded chicken regain moisture.
Problem: The Salsa Sauce is Too Thin or Watery
If your sauce is thinner than desired, it might be due to a watery salsa or added liquid. To thicken, simply remove the shredded chicken and simmer the sauce uncovered for a few extra minutes to reduce it.
For a quicker fix, mix a teaspoon of cornstarch with an equal amount of cold water to form a slurry, then stir it into the simmering sauce and cook for 1-2 minutes until thickened.
Problem: Chicken Isn’t Shredding Easily
If your chicken offers resistance when you try to shred it, it simply needs more cooking time. Toughness at this stage signals it hasn’t fully tenderized.
Return the chicken to the pot with the salsa, cover, and continue to simmer gently for an additional 5-15 minutes. Check again for tenderness; it should practically fall apart.
Your Top Questions Answered About Easy Salsa Shredded Chicken
Can I use frozen chicken breasts directly?
While technically possible, it’s highly recommended to thaw chicken breasts completely before cooking. This ensures even cooking and prevents the chicken from becoming rubbery or dry in spots.
If using frozen chicken, add an extra 10-15 minutes to the initial simmer time, ensuring it reaches the correct internal temperature and tenderness.
How can I make this recipe spicier?
To intensify the heat, choose a “hot” or “extra hot” salsa. You can also add finely minced fresh jalapeños or serrano peppers (with seeds for maximum heat) to the pot at the beginning.
A pinch of cayenne pepper, a dash of your favorite hot sauce, or even some chipotle powder can be stirred in during the final simmering stages for an extra kick.
Is this recipe gluten-free or dairy-free?
Yes, this Easy Salsa Shredded Chicken recipe is naturally gluten-free and dairy-free, assuming you use a standard salsa that doesn’t contain hidden additives. Always check your salsa label for specific ingredients.
It’s an excellent choice for those with dietary restrictions, offering a flavorful and compliant meal option without extra modifications.
What’s the best type of salsa to use for this recipe?
The “best” salsa is ultimately a matter of personal preference, as it largely dictates the final flavor profile. Consider roasted tomato salsas for a deeper, smoky taste, or fresh pico de gallo for a vibrant, herbaceous note.
Ensure the salsa isn’t overly watery, which might dilute the flavors, and check for any unwanted added sugars or preservatives that could alter the dish’s integrity.
Can I make this in a slow cooker or instant pot?
Absolutely! This recipe adapts beautifully to both slow cooker and Instant Pot methods. For a slow cooker, combine ingredients and cook on low for 4-6 hours or high for 2-3 hours until tender.
For an Instant Pot, combine ingredients and cook on high pressure for 10-12 minutes, followed by a natural pressure release for 5-10 minutes. Shred and return to the sauce as instructed.
The Final Bite: Your Easy Salsa Shredded Chicken Journey Begins Now!
You now possess the blueprint for creating truly exceptional Easy Salsa Shredded Chicken. It’s a recipe that promises perfectly moist, intensely flavorful results with minimal effort, making it the ultimate versatile hero for any meal.
Say goodbye to dry chicken and hello to tender, savory perfection. I encourage you to try this recipe, experiment with your favorite salsas, and share your delicious creations!
This flavorful chicken is more than just a meal; it’s a confident step towards simpler, more delicious cooking. Enjoy every bite!
Shredded Chicken
Course: Main CourseCuisine: MexicanDifficulty: easy4
servings10
minutes30
minutes240
kcal40
minutesCraving tender, juicy shredded chicken that’s packed with flavor? This game-changing recipe guarantees perfectly moist results every time, thanks to a simple, low-and-slow cooking method with your favorite salsa. Say goodbye to dry, uninspiring chicken!
Ingredients
2 pounds boneless, skinless chicken breasts
2 cups your favorite salsa
1/2 teaspoon salt
1/4 teaspoon black pepper
Directions
- Season the chicken breasts evenly with salt and black pepper on both sides.
- Place the seasoned chicken breasts in a large pot or Dutch oven.
- Pour the salsa over the chicken, making sure the chicken is mostly submerged. Add a splash of water if needed to just cover the chicken, though the salsa usually provides enough liquid.
- Bring the liquid to a gentle simmer over medium heat. Once simmering, reduce the heat to low, cover the pot, and let it cook for 20 to 25 minutes. The key here is to maintain a gentle simmer, never a rolling boil, which can toughen the chicken. This low and slow cooking process ensures the chicken cooks through without drying out.
- After 20 to 25 minutes, check the chicken for tenderness. It should be very tender and easily shredded with two forks. If it’s not quite ready, continue to simmer for another 5 to 10 minutes, checking again.
- Carefully remove the cooked chicken breasts from the pot and place them on a clean cutting board or in a shallow bowl. Using two forks, shred the chicken into desired pieces.
- Return all the shredded chicken to the pot with the simmering salsa. Stir well to thoroughly coat the chicken in the sauce, allowing it to reabsorb all the flavorful moisture. This step is crucial for ensuring every strand of chicken stays juicy and packed with flavor.
- Let the chicken simmer in the sauce for another 5 minutes, uncovered, to allow the flavors to meld and the chicken to fully absorb the salsa. Serve warm in tacos, burritos, over rice, or on a salad.
Notes
- Serve warm in tacos, burritos, over rice, or on a salad for a versatile meal.