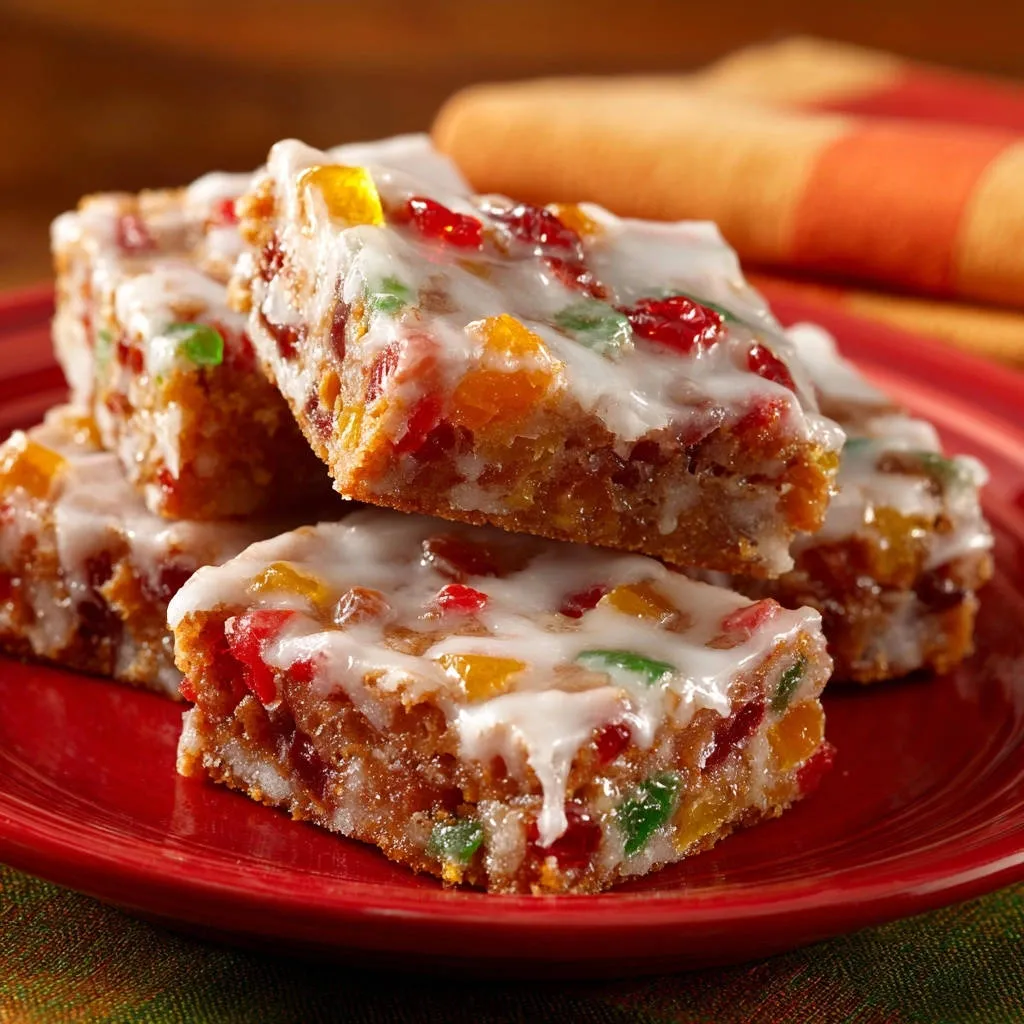
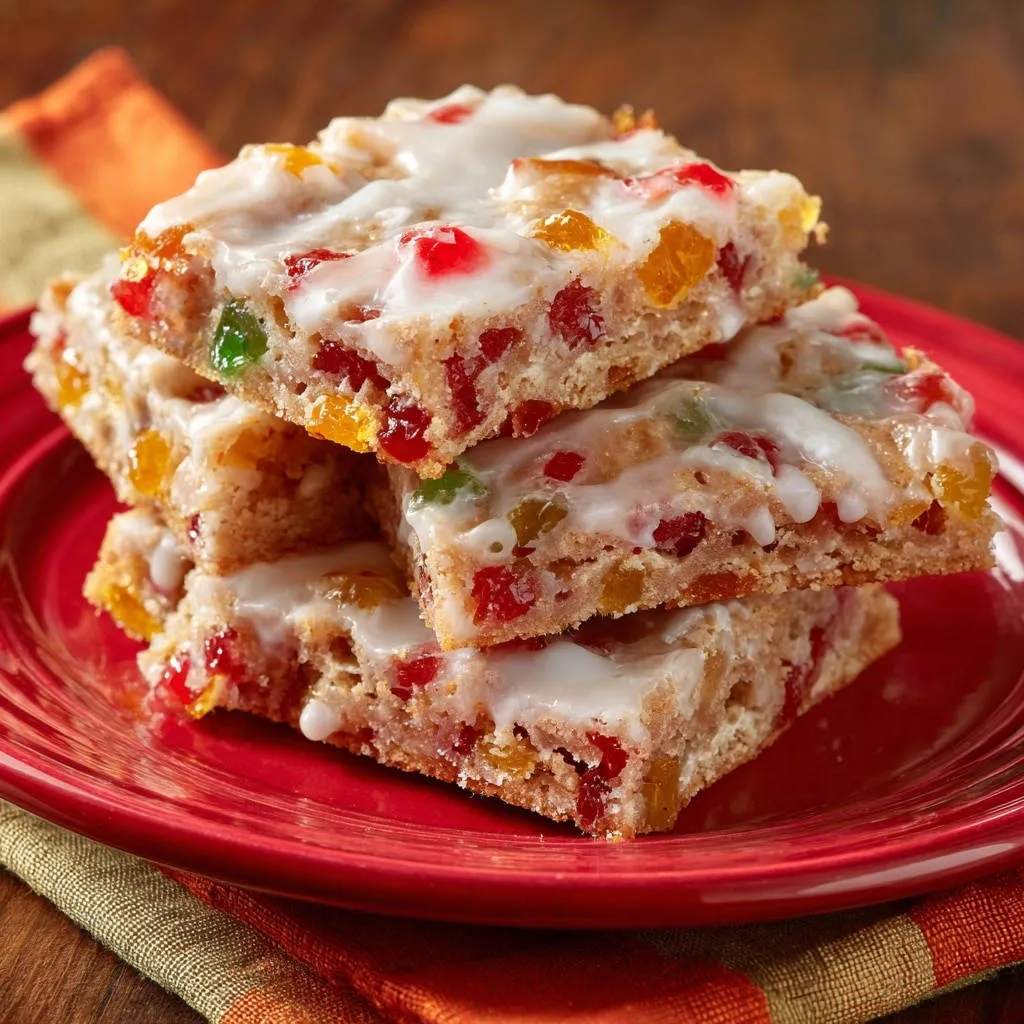
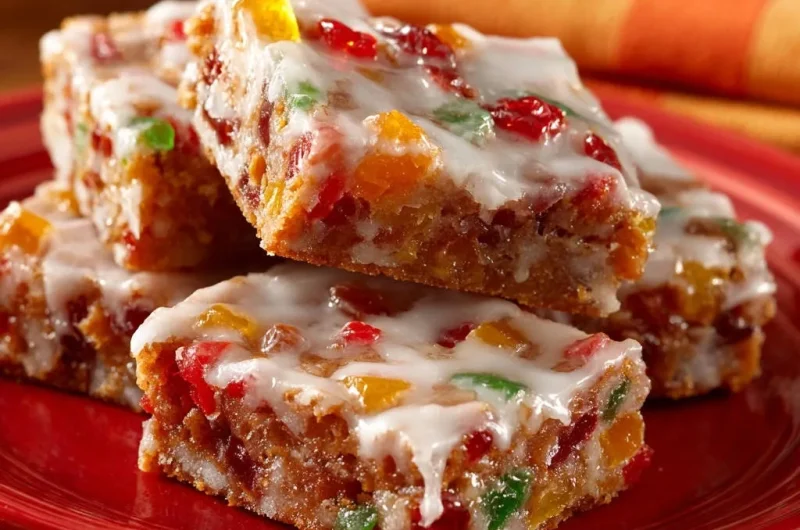
There’s nothing quite as disappointing as biting into a festive treat, only to find it dry and crumbly. I’ve been there, perfecting my technique over countless batches, and I’m thrilled to share the secret to creating truly exceptional Festive Candied Fruit Bars that are unbelievably moist, tender, and delightfully chewy. This recipe transforms humble ingredients into a holiday showstopper, guaranteed to have everyone asking for your secret.
Say Goodbye to Dry: The Secret to Our Irresistibly Moist & Chewy Fruit Bars
Our unique approach to these sweet treats guarantees a delightful experience unlike any other. We focus on key techniques that ensure maximum moisture and incredible flavor, making these bars a standout in any holiday spread.
A Texture That Truly Delights Every Bite
Prepare for a texture revelation: these chewy fruit bars boast a melt-in-your-mouth tenderness with just the right amount of chewiness. Gone are the days of dry, crumbly fruit bars; our method ensures a consistently moist and satisfying bite every time.
This perfect balance is achieved through careful ingredient ratios and precise baking times, making these Festive Candied Fruit Bars a true texture masterpiece.
Effortless Holiday Baking for Busy Schedules
Holiday baking should be joyous, not stressful. This recipe for homemade fruit bars is designed for simplicity, allowing you to whip up a beautiful and delicious treat without spending hours in the kitchen.
With straightforward steps and common ingredients, you can confidently create these sweet glazed bars, leaving you more time to enjoy the festivities.
Versatile Festive Flavors for Any Occasion
The beauty of these Festive Candied Fruit Bars lies in their classic yet customizable flavor profile. The vibrant medley of candied fruit offers a burst of sweet, tangy notes that perfectly capture the spirit of the holidays.
While the traditional mix is wonderful, you have the flexibility to tailor the fruit blend to your personal preference, ensuring a unique and delicious treat every time.
The Heart of the Holidays: Essential Ingredients for Your Festive Candied Fruit Bars
Quality ingredients are the foundation of any outstanding recipe. Here, we delve into why each component is vital for creating perfectly moist fruit bars with incredible flavor and texture.
Pantry Staples for the Perfect Foundation
These core ingredients work in harmony to provide structure and lift to your candied fruit treats.
All-Purpose Flour: Provides the essential structure for the bars, giving them shape and substance.
Baking Powder: Our leavening agent, ensuring a tender, slightly airy crumb rather than a dense, heavy texture.
Salt: A crucial flavor enhancer, balancing the sweetness and bringing out the nuanced notes of the candied fruit.
The Moisture-Adding Duo: Butter & Sugars
This combination is the secret to the bars’ signature moistness and delightful chew.
Unsalted Butter, Softened: Contributes richness and tenderness. Softened butter creams beautifully with sugar, incorporating air for a lighter texture.
Granulated Sugar: Provides sweetness and helps create a crisp exterior while keeping the interior tender.
For a perfect crust, check out this method for glazed cherry pie bars.
Packed Light Brown Sugar: Adds depth of flavor, a hint of caramel, and crucially, additional moisture due to its molasses content, contributing to that irresistible chewiness.
Binding & Flavor: Egg & Vanilla Extract
These ingredients play vital roles in the overall composition and taste of your Festive Candied Fruit Bars.
Large Egg: Acts as an emulsifier, binding the ingredients together and adding structure, richness, and moisture to the batter.
Vanilla Extract: Enhances all the other flavors, providing a warm, aromatic backdrop that complements the candied fruit beautifully.
Stars of the Show: Mixed Candied Fruit
The colorful and flavorful heart of these holiday treats.
Mixed Candied Fruit (Cherries, Pineapple, Citrus Peel): These vibrant jewels provide bursts of intense, sweet-tart flavor and a wonderfully chewy texture throughout the bars.
For a bright, tangy dessert experience similar to this, explore our recipe for creamy lemon crumble bars.
They are integral to the festive aesthetic and unique taste of Festive Candied Fruit Bars.
The Finishing Touch: Glaze Perfection
A simple yet elegant topping that adds visual appeal and an extra layer of sweetness.
Powdered Sugar: The base of our smooth, pourable glaze, providing a delicate sweetness and a beautiful opaque finish.
Milk or Water: Used to achieve the perfect consistency for the glaze, allowing it to coat the bars smoothly without being too thick or too thin.
Your Baking Toolkit: Essential Equipment for Seamless Preparation
Having the right tools at hand ensures a smooth and enjoyable baking process, making it easy to create these delightful Festive Candied Fruit Bars.
Must-Have Mixing & Baking Gear
Mixing Bowls (Medium and Large): Essential for separating dry and wet ingredients and for combining the batter efficiently.
Whisk: Used for thoroughly combining dry ingredients, ensuring even distribution of leavening and seasoning.
Electric Mixer: Ideal for creaming butter and sugars, as well as incorporating the egg, to achieve a light and fluffy batter texture.
8×8 Inch Baking Pan: The perfect size for achieving thick, substantial bars. Lining it with parchment paper is highly recommended for easy removal.
Cooling & Glazing Essentials
Wire Rack: Crucial for allowing the Festive Candied Fruit Bars to cool evenly and completely, preventing sogginess and preparing them for a flawless glaze.
Small Bowl: Perfect for whisking together the glaze ingredients, allowing for easy control over consistency.
Crafting Culinary Joy: Step-by-Step to Festive Candied Fruit Bars Perfection
- Prepare Your Pan & Oven:
Preheat your oven to 350°F (175°C).
Prepare an 8×8 inch baking pan by greasing and flouring it, or lining with parchment paper, leaving an overhang on the sides for easy lifting.
- Whisk Dry Ingredients:
In a medium bowl, thoroughly whisk together the all-purpose flour, baking powder, and salt.
This ensures leavening agents and seasoning are evenly distributed, contributing to a consistent rise and flavor in your Festive Candied Fruit Bars.
- Cream Butter & Sugars:
In a large bowl, using an electric mixer, cream together the softened unsalted butter, granulated sugar, and packed light brown sugar until the mixture is light and fluffy.
Achieving this light and fluffy consistency incorporates air, which is fundamental for the bars’ tender and chewy crumb.
- Incorporate Wet Ingredients:
Beat in the large egg and vanilla extract until they are fully combined and the mixture appears smooth.
This step effectively emulsifies and binds the wet ingredients, preparing the mixture for the dry components.
- Combine Dry & Wet:
Gradually add the whisked dry ingredients to the wet mixture, mixing on low speed until just combined.
CRITICAL: Do not overmix the batter. Overmixing can develop gluten, resulting in tough, dense bars instead of the desired moist and chewy texture.
- Fold in Candied Fruit:
Gently fold in the 1 1/2 cups of mixed candied fruit until it is evenly distributed throughout the batter.
Ensure the fruit doesn’t clump together, allowing for festive flavor in every square of your Festive Candied Fruit Bars.
- Spread into Pan:
Evenly spread the prepared batter into your greased and floured (or parchment-lined) 8×8 inch baking pan.
- Bake to Perfection (The Golden Rule for Moist Bars!):
Bake for 25 to 30 minutes in the preheated oven.
IMPORTANT: Do NOT overbake! The Festive Candied Fruit Bars are done when the edges are lightly golden, and a toothpick inserted into the center comes out with moist crumbs attached – not completely clean.
This slight crumb indicates perfect moisture retention, ensuring your bars are tender and chewy, never dry or crumbly.
- Cool Completely:
Let the baked bars cool completely in the pan on a wire rack.
Attempting to glaze warm bars will result in a messy, melted glaze that won’t set properly, rather than a smooth, elegant finish.
- Prepare the Glaze:
While the bars cool, prepare the simple glaze. In a small bowl, whisk together the powdered sugar and 2 tablespoons of milk or water until it’s smooth and pourable.
Adjust consistency by adding more liquid a teaspoon at a time if a thinner glaze is desired, or a tiny bit more powdered sugar if it’s too thin.
- Glaze & Set:
Once the bars are completely cool, pour the prepared glaze evenly over the top, allowing it to gently drip down the sides for a beautiful, rustic touch.
Allow the glaze to set for at least 30 minutes before cutting the Festive Candied Fruit Bars into neat squares.
Chef’s Secrets: Elevate Your Festive Candied Fruit Bars Game
The “No Overmixing” Mantra is Key: Remember that overmixing develops gluten, which leads to a tough, less tender texture. Always mix only until ingredients are just combined for that signature moist and chewy bite.
Mastering the Golden Rule of Baking: Don’t Overbake! This is the single most crucial tip for achieving perfectly moist Festive Candied Fruit Bars. Rely on the “moist crumb” toothpick test and pull them from the oven even if they seem slightly underdone; they will continue to set as they cool.
Prepping Your Candied Fruit for Success: If your candied fruit appears a bit dry or you’re worried about it sinking, you can briefly toss it with a tablespoon of flour before folding it into the batter. This helps it suspend evenly.
Customizing Your Festive Fruit Blend: Feel free to experiment with your favorite combination of candied cherries, pineapple, citrus peel, or even introduce dried cranberries, apricots, or golden raisins for a unique flavor profile.
Achieving the Perfect Glaze Consistency: For a thicker, more opaque glaze, use slightly less liquid. For a thinner, more translucent drizzle, add a tiny bit more milk or water. Always add liquid slowly to avoid a watery glaze.
Easy Cutting for Clean Squares: Once the glaze is fully set, use a sharp, non-serrated knife. For extra clean and professional-looking cuts, wipe the blade clean with a damp cloth between each slice.
Solving Common Baking Woes: Festive Candied Fruit Bars Troubleshooting
Why are My Fruit Bars Dry and Crumbly?
This issue is almost always a result of overbaking. Ensure you adhere to the “moist crumbs attached” toothpick test, pulling your bars from the oven even if they seem slightly underdone in the center. They will continue to set as they cool.
My Bars are Too Dense or Tough. What Went Wrong?
A dense or tough texture is typically caused by overmixing the batter. Too much mixing develops gluten, leading to a less tender, more bread-like consistency. Mix only until the dry ingredients are just incorporated.
Why is My Glaze Runny or Uneven?
A runny glaze indicates that too much liquid was added to the powdered sugar; add a bit more powdered sugar a teaspoon at a time to thicken it. Uneven glaze usually occurs if the bars weren’t completely cool, causing the warm surface to melt and absorb the glaze.
The Candied Fruit Sinks to the Bottom. How Can I Prevent This?
To prevent fruit from sinking, lightly toss your candied fruit with a tablespoon of flour before folding it into the batter. This light coating helps the fruit suspend more evenly in the batter during baking, ensuring distribution in your Festive Candied Fruit Bars.
Serving & Storage: Enjoying Your Festive Candied Fruit Bars to the Fullest
Perfect Presentation: Serving Suggestions
These Festive Candied Fruit Bars are delightful on their own, but they can also be elevated with a light dusting of extra powdered sugar or served alongside a scoop of vanilla bean ice cream for a truly decadent dessert experience.
What else to try
When you’ve finished your Festive Candied Fruit Bars, consider these other sweet breakfast ideas.
- For a different start to your day, try making Fluffy Diner-Style Pancakes, known for their airy texture.
- If you’re after another light and fluffy morning treat, the Fluffy Golden Pancakes offer a delightful alternative.
Arrange them artfully on a festive platter for holiday gatherings, or package them beautifully as charming homemade edible gifts for friends and family.
Keeping Them Fresh: Storage Tips
Store your Festive Candied Fruit Bars in an airtight container at room temperature for up to 3-4 days to maintain their exquisite moisture and chewiness. Layer with parchment paper if stacking to prevent sticking.
For longer preservation, these bars can be frozen for up to 2 months. Wrap individual bars tightly in plastic wrap, then place them in a freezer-safe bag or container for optimal freshness.
Make-Ahead Magic: Prepare for the Holidays
These bars are an excellent make-ahead treat, perfect for busy holiday seasons! You can bake the bars a day or two in advance and glaze them just before serving, or even bake and freeze them unglazed, adding the fresh glaze on the day you plan to enjoy them.
Your Festive Candied Fruit Bars Questions, Answered!
Can I use dried fruit instead of candied fruit in this recipe?
Yes, you can substitute dried fruit, but we recommend rehydrating it first for a moister bar. Soak the dried fruit in warm water or juice for 15-20 minutes, then thoroughly drain and pat it dry before folding it into the batter to prevent it from becoming too tough during baking.
Can I make these Festive Candied Fruit Bars gluten-free?
Absolutely! You can successfully substitute the all-purpose flour with a 1:1 gluten-free baking blend that contains xanthan gum. Ensure the blend is specifically formulated for baking for the best textural results.
How do I know if my butter is “softened” correctly?
Softened butter should be pliable enough to easily indent with your finger, but it should not be melted or greasy. It should still hold its shape. Butter that is too warm will not cream properly with the sugars, which can negatively impact the final texture of your bars.
What if I don’t have an 8×8 inch baking pan?
You can use a 9×9 inch pan, but be aware that your Festive Candied Fruit Bars will be slightly thinner and may bake a few minutes faster. Adjust your baking time accordingly and continue to rely on the moist crumb toothpick test. A small loaf pan could also work for thicker bars, but the baking time would need more significant adjustment.
Ready to Impress? Share Your Festive Candied Fruit Bars Masterpiece!
With this foolproof recipe and expert tips, you are now perfectly equipped to bake the most irresistibly moist and chewy Festive Candied Fruit Bars. Say goodbye to dry, crumbly disappointments and hello to a holiday treat that is guaranteed to earn you rave reviews and constant requests for the recipe!
We encourage you to share your delicious creations with friends and family, spreading festive cheer one delightful bite at a time. Don’t forget to leave a comment below with your own baking successes, creative twists, or any questions you might have!
Candied Fruit Bars
Course: DessertCuisine: AmericanDifficulty: medium4
16 bars20
minutes30
minutes350
kcal120
minutesThere’s nothing worse than biting into a beautiful fruit bar only to find it dry and crumbly. This recipe delivers a delicious, chewy texture that will have everyone asking for your secret to perfectly moist and tender bars every time!
Ingredients
1 cup all purpose flour
1/2 teaspoon baking powder
1/4 teaspoon salt
1/2 cup unsalted butter, softened
1/2 cup granulated sugar
1/4 cup packed light brown sugar
1 large egg
1 teaspoon vanilla extract
1 1/2 cups mixed candied fruit (cherries, pineapple, citrus peel)
For the Glaze:
1 cup powdered sugar
2 tablespoons milk or water
Directions
- Preheat your oven to 350 degrees Fahrenheit (175 degrees Celsius). Grease and flour an 8×8 inch baking pan, or line with parchment paper leaving an overhang on the sides.
- In a medium bowl, whisk together the flour, baking powder, and salt.
- In a large bowl, cream together the softened butter, granulated sugar, and brown sugar until light and fluffy.
- Beat in the egg and vanilla extract until well combined.
- Gradually add the dry ingredients to the wet ingredients, mixing on low speed until just combined. Be careful not to overmix the batter.
- Fold in the mixed candied fruit until evenly distributed throughout the batter.
- Spread the batter evenly into the prepared baking pan.
- Bake for 25 to 30 minutes. Here is the secret to perfectly moist bars: Do not overbake! The bars are done when the edges are lightly golden and a toothpick inserted into the center comes out with moist crumbs attached, not completely clean. This slight crumb signals the perfect moist texture without being raw.
- Let the bars cool completely in the pan on a wire rack before glazing.
- While the bars cool, prepare the glaze: In a small bowl, whisk together the powdered sugar and milk or water until smooth and pourable. Add more liquid a teaspoon at a time if needed to reach desired consistency.
- Once the bars are cool, pour the glaze evenly over the top, letting it drip down the sides. Allow the glaze to set before cutting the bars into squares.
Notes
- The secret to perfectly moist bars: Do not overbake! Bars are done when edges are lightly golden and a toothpick inserted into the center comes out with moist crumbs attached, not completely clean. This slight crumb signals perfect moist texture.