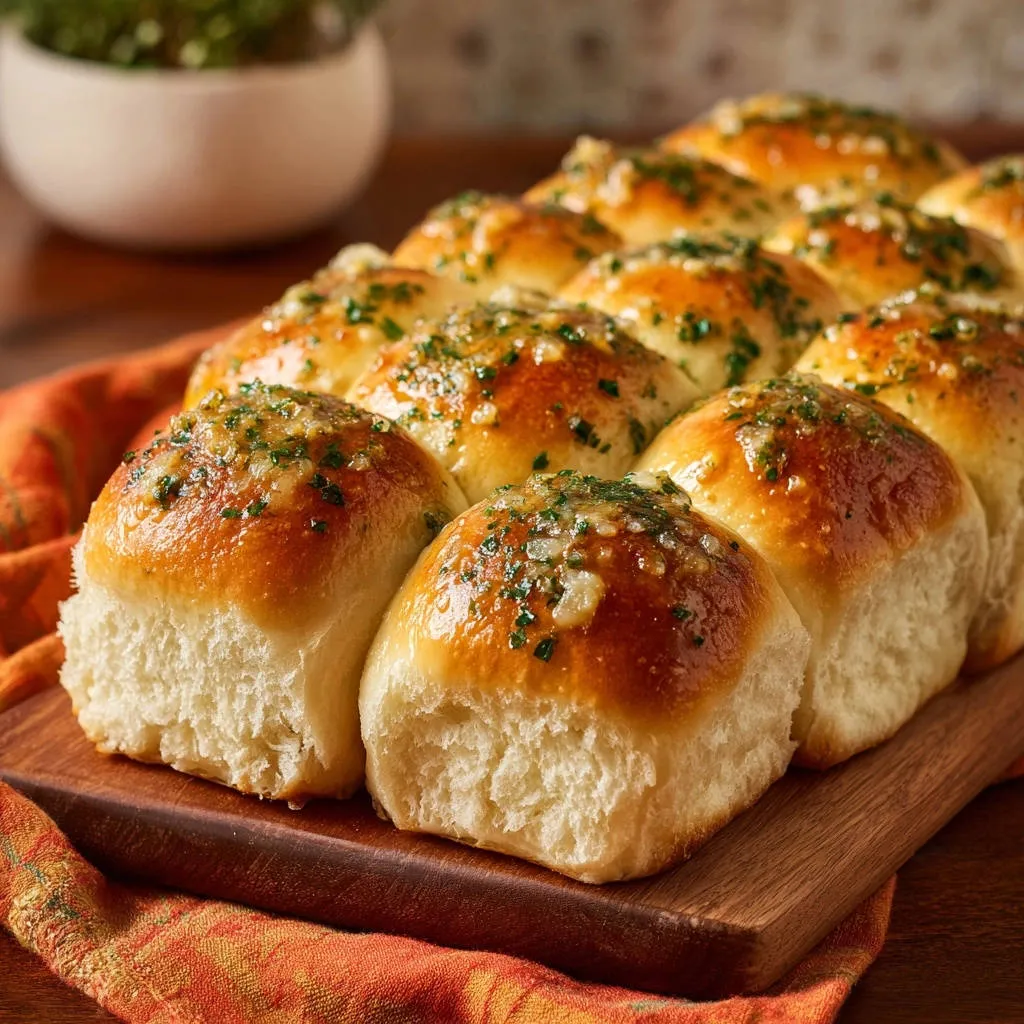
For years, I found myself frustrated by dinner rolls that promised fluffiness but delivered dense, heavy results. That familiar disappointment after all the effort truly tested my patience. Today, I’m thrilled to share my perfected method for the most exquisite Fluffy Garlic Herb Dinner Rolls, a recipe that guarantees a consistently light, airy texture every single time.
These rolls are the culmination of countless tests, leading to a simple yet game-changing approach that banishes dense bread forever. Prepare to elevate your meals with these incredibly tender, aromatic rolls that truly melt in your mouth.
The Secret to Undeniably Fluffy Garlic Herb Rolls
Ditching Dense Disappointments for Good
The promise of a warm, fresh dinner roll often falls flat when it lacks that irresistible airy quality. Our recipe directly addresses this common problem, ensuring your rolls are never disappointingly heavy. We focus on techniques that promote maximum air incorporation and a delicate crumb structure.
Why This Recipe Stands Apart: Our “Game-Changing” Approach
This recipe’s success hinges on two critical phases: precise kneading and a crucial second rise. Proper kneading develops the gluten just enough to create an elastic, pliable dough that traps air beautifully. The often-overlooked second proofing then allows those air pockets to expand further, leading to an incredibly light finish.
Round Out Your Meal
These fluffy garlic herb dinner rolls pair well with hearty main courses. Consider these for your next meal.
- For a complete dinner, serve the rolls alongside pan-seared herb chicken with creamy mash and glazed carrots.
- To start your meal, a warm bowl of creamy roasted tomato soup complements the rolls nicely.
The Allure of Homemade: Comfort and Flavor Combined
There’s an undeniable magic in homemade bread, and these rolls are no exception. The aroma of fresh yeast, warm dough, and eventually, fragrant garlic and herbs filling your kitchen is pure comfort. Serving these from-scratch rolls, still warm from the oven, truly elevates any meal into a special occasion.
For an equally satisfying crust, check out this method for crispy garlic bread.
Gathering Your Essentials: The Building Blocks of Perfect Rolls
Selecting quality ingredients is the first step towards achieving that sought-after fluffy texture and rich flavor.
Flour Power: Choosing the Right Base
All-purpose flour provides the ideal protein content for developing gluten, which is essential for structure. While not strictly necessary, sifting your flour can help incorporate air and prevent lumps, leading to an even smoother dough.
Yeast Activation: The Key to a Lively Rise
Active dry yeast is the living leavening agent responsible for the rolls’ airy texture. Ensuring your yeast is active by allowing it to foam confirms it’s ready to work its magic, giving your dough the lift it needs.
Dairy & Fat: For Richness and Tenderness
Warm milk activates the yeast and contributes to the dough’s softness and subtle sweetness. Unsalted butter adds essential richness and tenderness, preventing the rolls from drying out and ensuring a melt-in-your-mouth experience.
Aromatic Infusion: Fresh Garlic and Herbs
Fresh minced garlic and chopped parsley are the heart of the “garlic herb” flavor. Using fresh ingredients for the finishing butter guarantees a vibrant, pungent aroma and taste that perfectly complements the warm rolls.
Your Kitchen Arsenal: Tools for Effortless Roll Making
Before you begin, gather these essential tools to ensure a smooth and enjoyable baking process:
Large Mixing Bowls: You’ll need at least two – one for initial mixing and another for the first proofing of your dough.
Measuring Cups and Spoons: Accurate measurements are crucial for successful baking.
Whisk or Fork: For gently combining dry and wet ingredients.
Rubber Spatula or Wooden Spoon: Ideal for mixing and scraping down the sides of the bowl.
9×13 Inch Baking Pan: The perfect size to allow your Fluffy Garlic Herb Dinner Rolls to nestle together as they bake.
Plastic Wrap or Clean Kitchen Towel: Essential for covering the dough during its rising periods to prevent drying out.
Small Saucepan: For melting butter and infusing it with garlic and herbs.
Pastry Brush: For generously coating your warm rolls with the aromatic garlic herb butter.
Step-by-Step Mastery: Crafting Your Fluffy Garlic Herb Dinner Rolls
Phase 1: Activating the Yeast & Mixing the Wet Ingredients
In a large bowl, gently combine the warm milk, yeast, and one tablespoon of sugar. Stir briefly to dissolve. Allow this mixture to rest for 5-10 minutes until it becomes foamy. This crucial step confirms your yeast is active and alive, ready to provide that perfect lift for your Fluffy Garlic Herb Dinner Rolls.
Once foamy, add the remaining tablespoon of sugar, salt, three tablespoons of cooled melted butter, and the lightly beaten egg to the yeast mixture. Mix thoroughly until all ingredients are well combined, creating a homogeneous liquid base.
Phase 2: Developing the Dough (The Kneading Advantage)
Gradually incorporate the all-purpose flour, about a cup at a time, mixing until a shaggy dough forms. Turn the dough out onto a lightly floured surface. Now, the magic happens: knead the dough for 8-10 minutes. This process is vital for developing gluten, which gives the rolls their incredible structure and chew.
The dough should transform, becoming smooth, elastic, and spring back slowly when gently poked. It should still feel slightly tacky to the touch; avoid adding too much extra flour during kneading, as this is a common culprit for dense rolls.
Phase 3: The Crucial First Rise (Proofing for Perfection)
Lightly grease a clean bowl with a touch of oil. Transfer the kneaded dough to the bowl, turning it once to coat all sides. Cover the bowl tightly with plastic wrap or a clean kitchen towel. Place it in a warm, draft-free spot.
Let the dough rise for 1 to 1.5 hours, or until it has visibly doubled in size. A slightly warmed oven (turned off) or a sunny window works wonders for optimal proofing, creating the perfect environment for your yeast to thrive.
Phase 4: Shaping Your Rolls & The Indispensable Second Rise
Gently punch down the risen dough to release the accumulated air. Turn it out onto a lightly floured surface and divide it into 12-16 equal pieces, depending on your desired roll size. Shape each piece into a smooth, uniform ball, tucking the edges underneath to create tension on the top.
Arrange the shaped dough balls in your greased 9×13 inch baking pan, leaving a small space between each to allow for expansion. Cover the pan again and let the rolls rise for a second time in a warm spot for another 30-45 minutes. This second rise is truly indispensable for achieving an incredibly light and airy interior.
To check if they’re properly proofed, gently press a finger into a roll; if the indentation slowly springs back, they are ready. If it springs back too quickly, they need more time. If it stays indented, they are over-proofed and should be baked immediately to avoid deflation.
Phase 5: Baking to Golden Perfection & The Garlic-Herb Finish
While the rolls are on their second rise, preheat your oven to 375°F (190°C). Bake the rolls for 18-22 minutes, or until they achieve a beautiful golden-brown color on top and are cooked through.
While the rolls bake, melt the remaining 1/4 cup of butter in a small saucepan over low heat. Add the minced garlic and cook for 1-2 minutes until fragrant, being careful not to brown it. Stir in the chopped fresh parsley.
As soon as the Fluffy Garlic Herb Dinner Rolls emerge from the oven, generously brush the warm garlic herb butter over their tops. Serve them warm and savor every soft, flavorful bite!
Chef’s Secrets: Elevate Your Rolls to New Heights
The “Don’t Overmix” Golden Rule
Once you add the flour, mix just until a shaggy dough forms, then turn it out for kneading. Overmixing before kneading, or over-kneading, can activate too much gluten too quickly, leading to tough, dense rolls rather than light ones.
Mastering the Dough: The Tacky Test
The ideal dough consistency after kneading is smooth and elastic but still slightly tacky to the touch. This means it might stick a little to your fingers but will pull away cleanly. If it’s too sticky, add a tiny bit more flour; if it’s too dry, it won’t be fluffy.
Optimizing Your Proofing Environment
Yeast loves warmth and hates drafts. Besides a turned-off, slightly warm oven, you can create a warm spot by placing the covered bowl near a sunny window, or in a microwave with a cup of hot water (not heated, just a warm, steamy environment).
Achieving the Perfect Golden Crust
For an even golden-brown crust, ensure your oven is fully preheated before baking. If your oven has hot spots, rotate the pan halfway through baking. You can also brush the rolls with a light egg wash (egg yolk + a splash of water) before the second rise for an extra golden sheen.
Beyond the Recipe: Customizing Your Herb Infusion
While parsley is classic, feel free to experiment with other fresh herbs. A mix of finely chopped chives, rosemary, or thyme can add delightful complexity to your garlic herb butter. Always use fresh herbs for the best aroma and flavor.
Common Challenges, Simple Solutions: Troubleshooting Your Rolls
Why Are My Rolls Dense/Heavy?
This is often due to over-flouring during kneading or an insufficient rise. Ensure you’re not adding too much extra flour, and always confirm your dough has doubled in size during both proofing stages.
Under-kneading can also contribute to density, as gluten hasn’t been properly developed to create that airy structure. Aim for a full 8-10 minutes of kneading for optimal results.
My Dough Isn’t Rising! What Went Wrong?
The most common culprit is inactive or dead yeast, often from being too old or exposed to too hot/cold water initially. Always check your yeast’s expiration date and ensure your milk is between 105-115°F.
A cold environment or a drafty spot can also severely inhibit yeast activity. Make sure your proofing spot is consistently warm and calm.
Rolls Are Dry/Crumbly
Dryness typically points to overbaking or too much flour in the dough. Baking rolls for too long at a high temperature can strip them of moisture. Always bake until just golden brown.
Excess flour makes the dough stiff and dry, preventing it from hydrating properly. Stick to the recommended flour amount and adjust only slightly if absolutely necessary based on dough feel.
Uneven Browning Issues
Uneven browning can be caused by hot spots in your oven or inconsistent pan placement. Try rotating your baking pan halfway through the baking time to ensure all rolls brown evenly.
Using a lighter colored baking pan can also help prevent overly dark bottoms compared to dark pans, which absorb more heat.
Creative Twists: Elevating Your Garlic Herb Rolls Experience
Cheesy Garlic Herb Delight
For an extra layer of savory goodness, fold 1/2 cup of shredded Parmesan or sharp cheddar cheese into the dough during the last minute of kneading. You can also sprinkle cheese on top of the rolls during the last 5 minutes of baking for a beautiful melted crust, similar to the delightful texture of cheesy garlic bombs.
Spicy Kick: Adding Chili Flakes
If you enjoy a bit of heat, add a pinch or two of red pepper flakes to your garlic herb butter when cooking the minced garlic. This subtle warmth beautifully complements the savory flavors without overpowering them.
Herb Garden Variety: Exploring Other Greens
Don’t limit yourself to parsley! Fresh chives, finely chopped rosemary, or a blend of your favorite soft herbs like dill and thyme can completely transform the flavor profile of your rolls. Experiment to find your perfect combination.
Whole Wheat Wonder: A Healthier Touch
For a slightly healthier, nuttier flavor, you can substitute up to 1 cup of the all-purpose flour with whole wheat flour. You might need to add an extra tablespoon or two of milk, as whole wheat flour absorbs more liquid. Expect a slightly denser texture, but still delicious.
Enjoying, Storing, and Planning Ahead for Your Rolls
Serving Suggestions: Perfect Pairings
These Fluffy Garlic Herb Dinner Rolls are incredibly versatile. They are the ideal accompaniment to hearty main dishes like a comforting pot roast, a rich beef stew, or a creamy pasta. They also shine alongside simple salads, a warm bowl of soup, or as part of a festive holiday meal.
For a similarly satisfying option, consider these cheddar biscuits with flaky layers.
They are equally delightful simply dipped in olive oil or enjoyed on their own as a savory snack.
Storage Solutions: Keeping Them Fresh
To keep your baked Fluffy Garlic Herb Dinner Rolls fresh, store them in an airtight container at room temperature for up to 2-3 days. For longer storage, refrigerate them for up to a week. Gently rewarm in the oven or microwave before serving for the best texture.
Make-Ahead Magic: Prep for Future Feasts
You can prepare the dough through the first rise, then punch it down, shape it, and place it in the baking pan. Cover tightly and refrigerate overnight (up to 18 hours). Take them out an hour before baking to come to room temperature and complete the second rise.
Baked rolls can also be frozen for up to 3 months. Cool completely, then wrap tightly in foil and place in a freezer-safe bag. Thaw at room temperature and warm in a 300°F oven until heated through.
Your Fluffy Garlic Herb Dinner Rolls Questions Answered
Can I make these rolls without a stand mixer?
Absolutely! You can knead the dough by hand. It will require a bit more effort and possibly 2-3 extra minutes of kneading time to achieve the same smooth, elastic consistency. Enjoy the meditative process!
Can I use dried herbs instead of fresh?
Yes, you can use dried herbs, but the flavor will be less vibrant. Use one-third the amount of dried herbs compared to fresh (e.g., 1 teaspoon dried parsley for 1 tablespoon fresh). Add them directly to the melted butter with the garlic.
How do I know if my yeast is active?
After combining warm milk, yeast, and a tablespoon of sugar, the mixture should become foamy and bubbly within 5-10 minutes. If it doesn’t foam, your yeast is likely inactive, and you’ll need to start again with fresh yeast.
Can I freeze the dough or baked rolls?
Yes, both can be frozen. For unbaked dough, shape the rolls, arrange in the pan, then freeze until solid. Transfer to a freezer bag. When ready to bake, place frozen rolls back in the pan, thaw overnight in the fridge, then proof at room temperature and bake. Baked rolls can be frozen as described in the storage section.
Is there a gluten-free option for this recipe?
While you can attempt this recipe with a gluten-free all-purpose flour blend (one specifically designed for yeast baking), the texture will differ. Gluten-free flours often result in a denser, less elastic dough and may require more liquid. Results can vary widely depending on the brand of flour blend used.
Ready to Bake? Your Fluffy Garlic Herb Dinner Rolls Await!
With these expert tips and a meticulously detailed guide, you’re now equipped to bake the most incredible Fluffy Garlic Herb Dinner Rolls. Say goodbye to dense disappointments and hello to perfectly airy, aromatic bread that will impress everyone at your table.
I encourage you to try this recipe and experience the joy of truly superior homemade rolls. Don’t forget to share your baking successes and any delightful twists you discover in the comments below!
Dinner Rolls
Course: BreadCuisine: AmericanDifficulty: medium4
12-16 rolls45
minutes20
minutes320
kcal65
minutesThere’s nothing quite like a warm dinner roll, but a dense, heavy one can be such a disappointment. For years, I struggled to get that light, airy texture I craved, until I landed on a simple but game-changing method. Now, these garlic herb rolls turn out perfectly soft and fluffy every single time.
Ingredients
1 cup warm milk (about 105-115°F)
2 1/4 teaspoons active dry yeast (one standard packet)
2 tablespoons granulated sugar, divided
1 teaspoon salt
3 tablespoons unsalted butter, melted and cooled, plus 1/4 cup for topping
1 large egg, lightly beaten
3 1/2 cups all-purpose flour, plus more for dusting
3-4 cloves garlic, minced
2 tablespoons fresh parsley, chopped
Directions
- In a large bowl, combine the warm milk, yeast, and 1 tablespoon of sugar. Stir gently and let it sit for 5-10 minutes until foamy. This confirms your yeast is active and ready to make fluffy dough.
- Add the remaining 1 tablespoon of sugar, salt, 3 tablespoons of melted butter, and the beaten egg to the yeast mixture. Mix well.
- Gradually add the flour, about a cup at a time, mixing until a shaggy dough forms. Turn the dough out onto a lightly floured surface.
- Knead the dough for 8-10 minutes. The key to fluffiness is proper kneading; the dough should become smooth, elastic, and spring back when gently poked, but still remain slightly tacky to the touch. Avoid adding too much extra flour, as this can make the rolls dense.
- Lightly grease a clean bowl with a little oil. Place the dough in the bowl, turning once to coat. Cover the bowl with plastic wrap or a clean kitchen towel and place it in a warm, draft-free spot. Let the dough rise for 1 to 1.5 hours, or until it has doubled in size. A good spot is a slightly warmed oven (turned off) or near a sunny window.
- Gently punch down the risen dough to release the air. Turn it out onto a lightly floured surface and divide it into 12-16 equal pieces. Shape each piece into a smooth ball.
- Arrange the dough balls in a greased 9×13 inch baking pan, leaving a little space between each.
- Cover the pan again and let the rolls rise for a second time in a warm spot for another 30-45 minutes, or until they look puffy and almost doubled in size again. This second rise is crucial for an incredibly light texture. To check if they’re properly proofed, gently press a finger into a roll; if the indentation slowly springs back, they are ready. If it springs back too quickly, they need more time. If it stays indented, they are over-proofed.
- While the rolls are on their second rise, preheat your oven to 375°F (190°C).
- Bake the rolls for 18-22 minutes, or until they are golden brown on top.
- While the rolls are baking, melt the remaining 1/4 cup of butter in a small saucepan. Add the minced garlic and cook over low heat for 1-2 minutes until fragrant. Stir in the chopped fresh parsley.
- As soon as the rolls come out of the oven, brush the warm garlic herb butter generously over the tops. Serve warm and enjoy your perfectly fluffy dinner rolls!
Notes
- Ensure your milk is the right temperature for the yeast to activate properly; too hot and it will kill it, too cool and it won’t bloom. Don’t be afraid to add a little extra flour if your dough feels too sticky during kneading, but add it gradually to avoid making the rolls tough.