There’s nothing more disappointing than anticipating a perfectly crispy chicken cutlet, only to bite into a piece that has lost its crunch. I’ve perfected a technique to guarantee truly
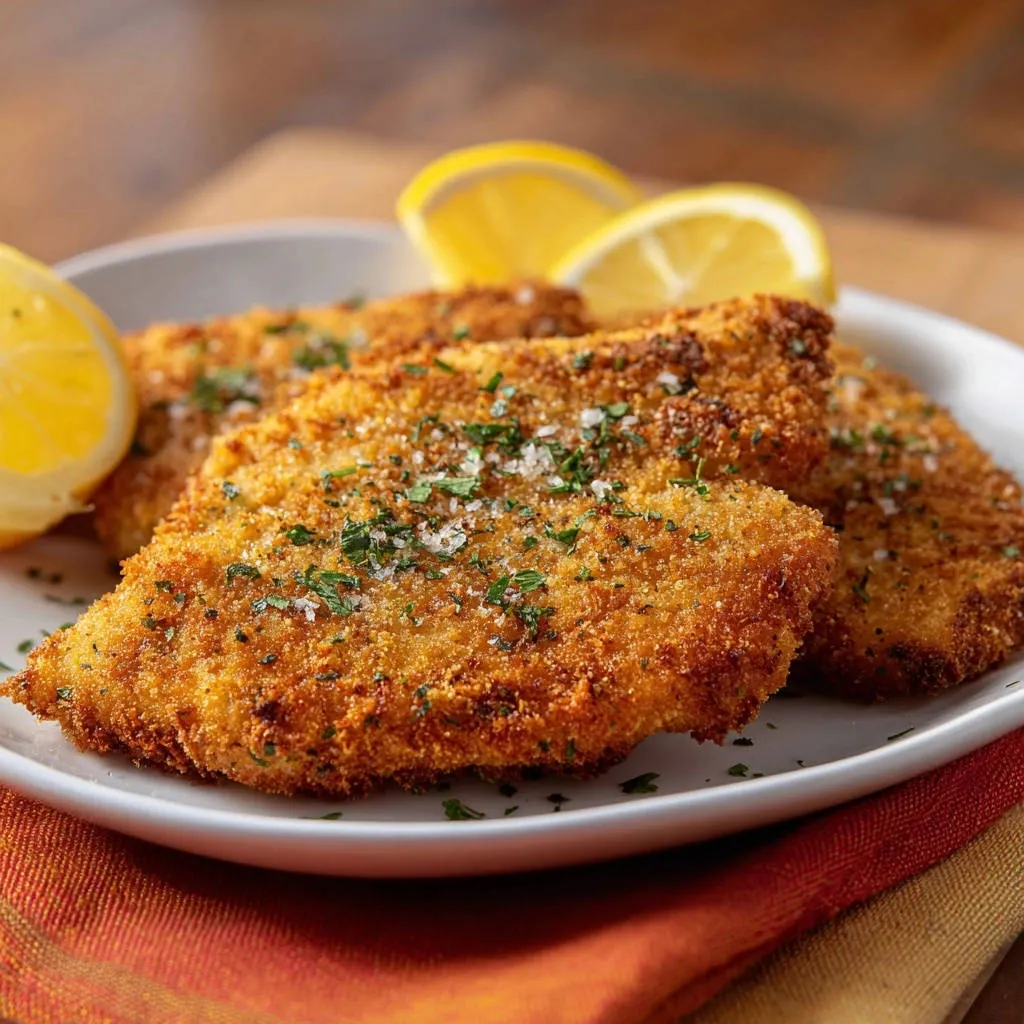
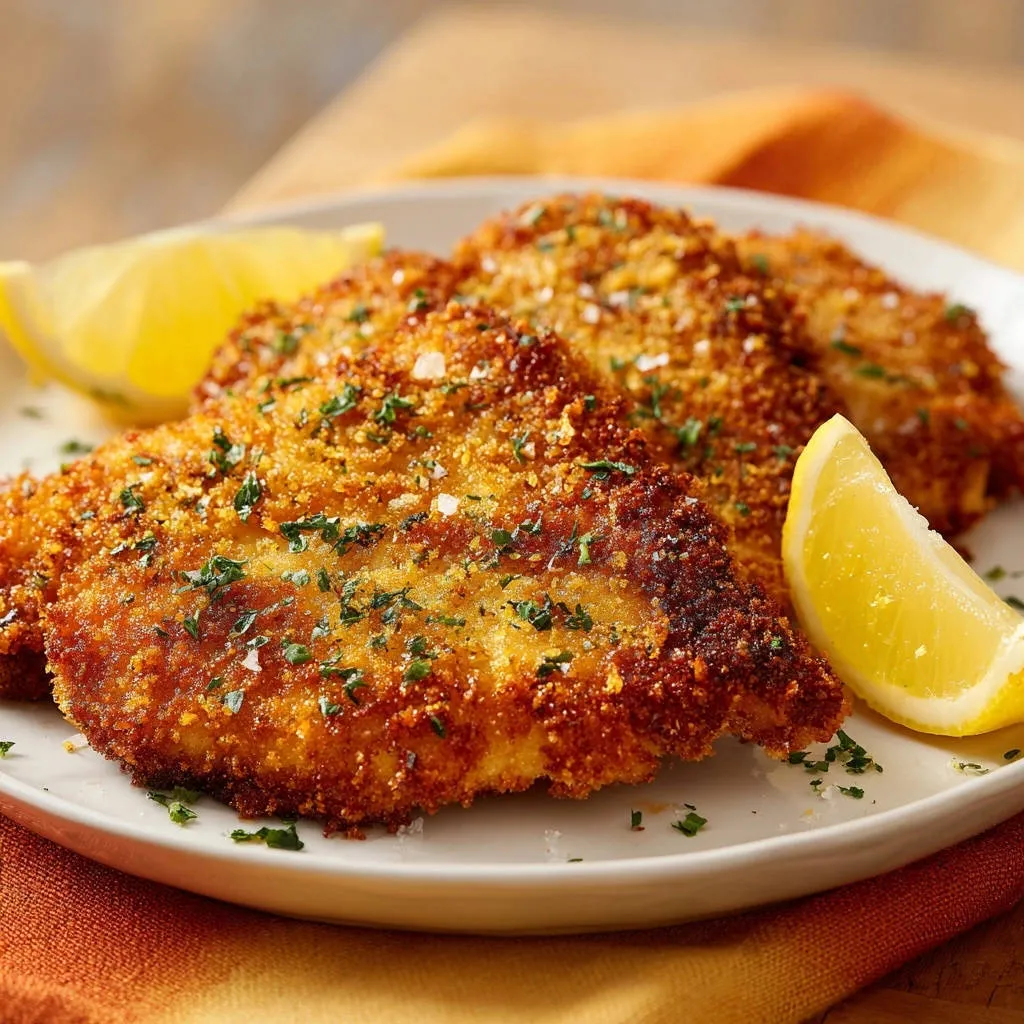
Golden Crispy Chicken Cutlets
every single time, solving the common dilemma of soggy breading. This recipe isn’t just about frying chicken; it’s about mastering a simple, yet game-changing, secret for unparalleled crispness and flavor that will become a cherished family favorite.Why This Golden Crispy Chicken Cutlets Recipe Will Be Your New Go-To
The Ultimate Crunch, Every Single Time
This recipe directly addresses the most common frustration: soggy cutlets. Our “no-soggy secret” ensures an exceptional, shatteringly crisp exterior with every bite.
For an even more satisfying crunch, explore honey fried chicken and waffles that boast a shatterproof crust.
You’ll achieve an unparalleled crunch that lasts, making these Golden Crispy Chicken Cutlets a true standout.
For an even more durable crisp, explore making crispy panko chicken cutlets using this same base.
Effortless Elegance for Weeknights & Beyond
Despite their gourmet appearance and incredible flavor, these cutlets are surprisingly simple to prepare. They’re perfect for a quick, satisfying family dinner.
Additionally, their elegant presentation makes them suitable for impressing guests on more special occasions.
More Than Just a Meal: A Family Favorite
The universal appeal of perfectly cooked chicken, coupled with its irresistible crispiness, makes this dish a guaranteed crowd-pleaser. Even the pickiest eaters will ask for seconds.
Complementary Recipes
After enjoying your golden crispy chicken cutlets, explore these other chicken dishes.
- For a fresh and creamy salad, consider the creamy green bean and egg salad, featuring similar textures.
- If you enjoyed the chicken, you might also like the creamy zesty chicken and corn salad for another chicken option.
These Golden Crispy Chicken Cutlets will quickly earn a permanent spot in your weekly meal rotation.
Gather Your Arsenal: Ingredients for Perfectly Golden Crispy Chicken Cutlets
The Chicken: Choosing Your Canvas
Boneless, skinless chicken breasts are the ideal choice for this recipe. Their mild flavor allows the seasoned breading to truly shine.
Pounding them to an even thickness is crucial for consistent cooking, preventing some parts from drying out while others remain undercooked.
The Breading Trinity: Flour, Egg, and Panko Magic
All-Purpose Flour: This provides the essential dry base for the egg wash to adhere. It helps create a cohesive surface for the subsequent breading layers.
Egg Wash (with milk/water): The whisked eggs act as the critical binder, creating a sticky bridge between the flour and the breadcrumbs. A splash of milk or water slightly thins the wash for better coverage.
Panko Breadcrumbs: Panko is paramount for achieving that signature, airy crispness. Unlike regular breadcrumbs, panko’s flaky texture fries up incredibly light and crunchy, ensuring your Golden Crispy Chicken Cutlets live up to their name. Pressing them firmly maximizes adhesion and coating thickness.
Flavor Boosters: A Symphony of Spices
A simple blend of salt, black pepper, garlic powder, and onion powder is divided between the flour and panko. This ensures every layer of your crispy chicken cutlet is bursting with savory flavor.
These seasonings create a well-rounded taste profile that complements the chicken without overpowering it.
Essential for Frying: The Right Oil
A neutral, high smoke point oil like vegetable, canola, or grapeseed oil is best for frying. It allows the natural flavors of the chicken and breading to dominate.
Maintaining the correct oil temperature is crucial; too cool, and your cutlets will be greasy; too hot, and they’ll burn before cooking through.
Finishing Touches: Garnish and Zest
Freshly chopped parsley adds a pop of color and a touch of herbaceous freshness. Lemon wedges offer a bright, acidic counterpoint that cuts through the richness of the fried chicken.
A sprinkle of flaky sea salt at the end provides a final textural flourish and enhances all the flavors.
Essential Tools for Your Golden Crispy Chicken Cutlets Adventure
Meat Mallet or Heavy Pan: Used for pounding chicken breasts to an even, thin thickness.
Three Shallow Dishes: Essential for setting up an efficient breading station with flour, egg wash, and panko.
Large, Heavy-Bottomed Skillet: Provides consistent heat distribution for even frying and perfect browning.
Wire Rack & Baking Sheet: Crucial for resting breaded chicken (our “no-soggy secret”) and draining fried cutlets, promoting air circulation.
Instant-Read Thermometer (Optional but Recommended): For precise control over oil temperature and ensuring chicken is cooked to 165°F (74°C).
Tongs: Allows for safe and easy handling of hot chicken during frying and draining.
Your Step-by-Step Guide to Golden Crispy Chicken Cutlets Perfection
Prep Like a Pro: Chicken Pounding & Breading Station Setup
Pound the Chicken Evenly: Start by placing each boneless, skinless chicken breast between two sheets of plastic wrap. Using a meat mallet or the bottom of a heavy pan, pound the chicken until it’s about 1/2 inch thick and uniform. This vital step ensures your chicken cooks evenly and quickly.
Assemble Your Breading Station: Prepare three shallow dishes. In the first, whisk together the all-purpose flour with 1/2 tsp salt, 1/4 tsp pepper, 1/2 tsp garlic powder, and 1/4 tsp onion powder. In the second dish, whisk the eggs with 1/4 cup milk or water until smooth. For the third dish, combine the panko breadcrumbs with the remaining 1/2 tsp salt, 1/4 tsp pepper, 1/2 tsp garlic powder, and 1/4 tsp onion powder.
The Non-Soggy Secret: Expert Breading and Resting
Crucial: Pat Chicken Dry: Before breading, pat each chicken cutlet very dry with paper towels. This is a critical step; any residual moisture is the enemy of crispiness and prevents the breading from adhering properly.
Flour, Egg, Then Firmly Press Panko: First, dredge a dry cutlet in the seasoned flour, shaking off any excess. Next, dip it into the egg wash, allowing extra liquid to drip away. Finally, transfer it to the seasoned panko breadcrumbs. Press the breadcrumbs firmly onto both sides of the chicken; the more you press, the better they’ll adhere and the crispier your Golden Crispy Chicken Cutlets will be.
The Mandatory Rest: A Game-Changer: Place your fully breaded cutlets on a wire rack set over a baking sheet. Crucially, let them rest in the refrigerator for at least 15-20 minutes. This resting period allows the breading to hydrate and bind firmly to the chicken, preventing it from falling off and ensuring an incredibly crispy, non-soggy crust when fried. Do not skip this step!
Frying to Golden Perfection
Heat Oil to the Optimal Temperature: Pour about 2 cups of vegetable oil into a large, heavy-bottomed skillet until it’s about 1 inch deep. Heat the oil over medium-high heat until it reaches 350°F (175°C). If you don’t have a thermometer, drop a tiny pinch of panko breadcrumb into the oil; it should sizzle immediately and vigorously without burning too quickly.
Fry in Batches, Golden Brown and Cooked Through: Carefully place 1-2 breaded cutlets into the hot oil, ensuring you don’t overcrowd the pan. Overcrowding lowers the oil temperature, leading to greasy, less crispy results. Cook each side for 3-5 minutes, or until deep golden brown and the internal temperature of the chicken reaches 165°F (74°C). Adjust the heat as needed to maintain a consistent, steady sizzle.
Drain, Garnish, and Serve Immediately
Drain Excess Oil: Once cooked, remove the Golden Crispy Chicken Cutlets from the pan and immediately place them on a clean wire rack set over paper towels. This crucial step allows excess oil to drain away and prevents steam from accumulating underneath, which would quickly lead to sogginess. Do not stack them.
The Finishing Flourish: Parsley, Sea Salt, and Lemon: Garnish your perfectly fried cutlets with a generous sprinkle of fresh chopped parsley and flaky sea salt (if using). Serve them hot, accompanied by bright, refreshing lemon wedges. The lemon zest adds a wonderful finish.
Chef’s Secrets: Elevate Your Golden Crispy Chicken Cutlets Game
Don’t Skip the Pound! Achieving an even 1/2-inch thickness is absolutely critical. This ensures every part of the chicken cooks at the same rate, preventing both dry edges and undercooked centers.
The Power of Patting Dry: Moisture on the chicken’s surface is the ultimate enemy of a truly crispy crust. Take the extra minute to pat your cutlets thoroughly dry with paper towels; this ensures the breading adheres perfectly and fries to a beautiful crunch.
Press, Don’t Just Dredge (Panko): When applying the panko, don’t just lightly dust the chicken. Firmly press the breadcrumbs into both sides of the cutlet. This creates a denser, more robust coating that adheres better and results in a thicker, more satisfying crunch.
Embrace the Chill: Why Resting Matters So Much: The 15-20 minute refrigeration step is where the magic happens for truly
Golden Crispy Chicken Cutlets
. During this time, the moisture from the chicken and egg wash is absorbed by the breadcrumbs, allowing them to bind tightly and “set.” This prevents the breading from falling off during frying and ensures an unbeatable, non-soggy crispness.Temperature Control is Key: Invest in an instant-read thermometer for your oil. Maintaining the ideal temperature of 350°F (175°C) is crucial. Oil that’s too cool results in greasy, soggy cutlets, while oil that’s too hot will burn the breading before the chicken cooks through.
The Wire Rack After Frying: Never place freshly fried cutlets directly onto paper towels for draining. The steam trapped underneath will quickly turn your crispy crust soggy. Draining on a wire rack allows air to circulate around the entire cutlet, ensuring it stays perfectly crisp.
Troubleshooting Common Golden Crispy Chicken Cutlets Conundrums
Why are my cutlets soggy?
Sogginess is often caused by excess moisture on the chicken, skipping the critical resting step, or overcrowding the pan. Ensure you pat the chicken very dry, always rest the breaded cutlets in the fridge, and fry in small batches to maintain oil temperature. Drain them on a wire rack, not directly on paper towels.
My breading fell off! What went wrong?
Breading detachment usually stems from insufficient patting dry, not pressing the panko firmly enough, or neglecting the refrigeration rest. Make sure the chicken is bone-dry, apply generous pressure when coating with panko, and allow ample resting time for the breading to set.
The chicken is cooked, but the breading is burnt.
This indicates your oil temperature was too high. The breading cooked too quickly before the chicken could finish. Use a thermometer to monitor oil temperature and adjust your stove’s heat as needed. Cook in smaller batches to prevent temperature fluctuations.
My cutlets are dry inside.
Dry chicken is typically a sign of overcooking or uneven pounding. Ensure all chicken cutlets are pounded to an even 1/2-inch thickness. Use an instant-read thermometer to remove the chicken from the oil as soon as it reaches 165°F (74°C) internal temperature.
Beyond the Plate: Serving Suggestions for Your Golden Crispy Chicken Cutlets
Classic Pairings
Creamy Mashed Potatoes: The smooth, rich texture of mashed potatoes offers a comforting contrast to the crispy chicken.
Crisp Green Salad: A simple, vibrant green salad dressed with a light vinaigrette provides freshness and cuts through the richness of the fried cutlets.
Fresh & Vibrant Sides
Lemon Herb Roasted Asparagus: The bright, earthy flavors of roasted asparagus, enhanced with lemon and herbs, make for an elegant spring accompaniment.
Light Coleslaw: A tangy, crunchy coleslaw offers a refreshing textural and flavor contrast that perfectly balances these Golden Crispy Chicken Cutlets.
Sauces & Dips to Elevate
Homemade Marinara: A classic Italian-inspired pairing, offering a sweet and savory tomato complement.
Aioli or Garlic Mayonnaise: A rich, creamy, and intensely flavorful dip that pairs beautifully with the crispy exterior.
Honey Mustard: A sweet and tangy condiment that is always a hit, especially popular for a family-friendly meal.
Make-Ahead, Storage, and Reheating Tips for Golden Crispy Chicken Cutlets
Can I Prepare Them Ahead?
Yes, you can bread the chicken cutlets up to 24 hours in advance. After breading, place them on a wire rack set over a baking sheet, cover loosely with plastic wrap, and store them in the refrigerator. This also serves as the essential resting step.
Storing Leftovers
Allow any leftover cooked cutlets to cool completely, then store them in an airtight container in the refrigerator for 3-4 days. Proper storage helps maintain their quality and flavor.
Best Way to Reheat for Maximum Crispness
To restore the irresistible crispiness of your
Golden Crispy Chicken Cutlets
, avoid the microwave. Reheat them in a preheated oven at 375°F (190°C) for 10-15 minutes, or in an air fryer at 350°F (175°C) for 5-8 minutes, until heated through and crisp.Your Top Golden Crispy Chicken Cutlets Questions Answered
What kind of chicken works best for cutlets?
Boneless, skinless chicken breasts are absolutely ideal for cutlets. They can be easily pounded thin to ensure quick, consistent cooking and a tender result that perfectly complements the crispy breading.
Can I use different breadcrumbs than panko?
While panko is highly recommended for its superior, airy crispiness, you can use regular breadcrumbs if preferred. However, be aware that the final texture may be less light and crunchy than with panko.
Is there a gluten-free option for Golden Crispy Chicken Cutlets?
Absolutely! To make this recipe gluten-free, simply substitute all-purpose flour with your favorite gluten-free all-purpose flour blend. Replace regular panko with gluten-free panko breadcrumbs. The method remains the same, ensuring a delicious and celiac-friendly crunch.
How do I know when the oil is hot enough without a thermometer?
To test the oil temperature without a thermometer, carefully drop a tiny pinch of breadcrumb into the hot oil. It should immediately sizzle vigorously. If it browns too quickly, the oil is too hot; if it barely bubbles, it’s not hot enough and needs more time to heat.
Can I bake these Golden Crispy Chicken Cutlets instead of frying?
Yes, you can bake these cutlets for a lighter option. Preheat your oven to 400°F (200°C), lightly spray the breaded cutlets with cooking oil, and bake for 20-25 minutes, flipping halfway, until golden brown and cooked through. While still flavorful, the crispness will be somewhat different from traditional pan-frying.
Ready to Impress? Share Your Golden Crispy Chicken Cutlets Masterpiece!
Now that you’re armed with the secrets to perfect
Golden Crispy Chicken Cutlets
, it’s your turn to create this incredible dish. There’s no need to dread soggy results ever again. Try this recipe, share your impressive creations with friends and family, and don’t forget to tell us how much you loved that satisfying crunch!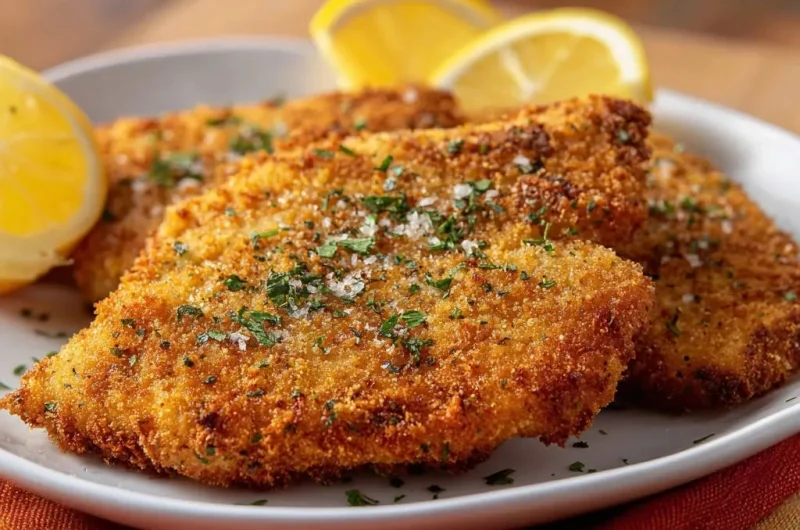
Chicken Cutlets
Course: Main CourseCuisine: AmericanDifficulty: easy4
servings40
minutes20
minutes750
kcal60
minutesUnlock the secret to perfectly Golden Crispy Chicken Cutlets that never go soggy. This recipe emphasizes a crucial resting step to ensure a super crispy crust, resulting in tender, flavorful chicken every time. Ideal for a delicious and satisfying main course.
Ingredients
4 boneless, skinless chicken breasts (about 1.5 lbs total)
1 cup all purpose flour
2 large eggs
1/4 cup milk or water
2 cups panko breadcrumbs (or regular breadcrumbs)
1 teaspoon salt
1/2 teaspoon black pepper
1 teaspoon garlic powder
1/2 teaspoon onion powder
2 cups vegetable oil (or other neutral oil) for frying
Fresh parsley, chopped, for garnish
Lemon wedges, for serving
Flaky sea salt, for garnish (optional)
Directions
- Prepare the Chicken: Place each chicken breast between two sheets of plastic wrap. Using a meat mallet or the bottom of a heavy pan, pound the chicken until it is about 1/2 inch thick and even. This ensures even cooking.
- Set Up Breading Station: Get three shallow dishes ready. In the first dish, combine flour, 1/2 teaspoon salt, 1/4 teaspoon pepper, 1/2 teaspoon garlic powder, and 1/4 teaspoon onion powder. In the second dish, whisk the eggs with milk or water until well combined. In the third dish, add the panko breadcrumbs along with the remaining 1/2 teaspoon salt, 1/4 teaspoon pepper, 1/2 teaspoon garlic powder, and 1/4 teaspoon onion powder.
- Bread the Chicken (The Non-Soggy Secret!):
- Pat each chicken cutlet very dry with paper towels. This is crucial for crispiness and adhesion.
- First, dredge a cutlet in the seasoned flour, shaking off any excess. Make sure it’s fully coated.
- Next, dip the floured cutlet into the egg mixture, allowing excess to drip off.
- Finally, transfer to the seasoned breadcrumbs. Press the breadcrumbs firmly onto both sides of the chicken, ensuring a thick, even coating. The more you press, the better they adhere and crisp.
- Place the breaded cutlets on a wire rack set over a baking sheet and let them rest for at least 15-20 minutes in the refrigerator. This critical resting step allows the breading to hydrate and adhere to the chicken, preventing sogginess and ensuring a super crispy crust when fried.
- Fry to Golden Perfection: Heat the vegetable oil in a large, heavy-bottomed skillet over medium high heat until it reaches about 350°F (175°C). If you don’t have a thermometer, a pinch of breadcrumb should sizzle immediately when dropped in.
- Carefully place 1-2 breaded cutlets in the hot oil, ensuring not to overcrowd the pan. Cook for 3-5 minutes per side, or until deep golden brown and cooked through (internal temperature reaches 165°F / 74°C). Adjust heat as needed to maintain a steady sizzle without burning.
- Drain and Serve: Remove cooked cutlets from the pan and place them on a clean wire rack set over paper towels to drain excess oil. This helps maintain crispiness.
- Garnish with fresh chopped parsley and a sprinkle of flaky sea salt. Serve immediately with lemon wedges for a bright finish.
Notes
- The key to crispiness is patting the chicken dry and the resting step after breading, allowing the coating to adhere properly.