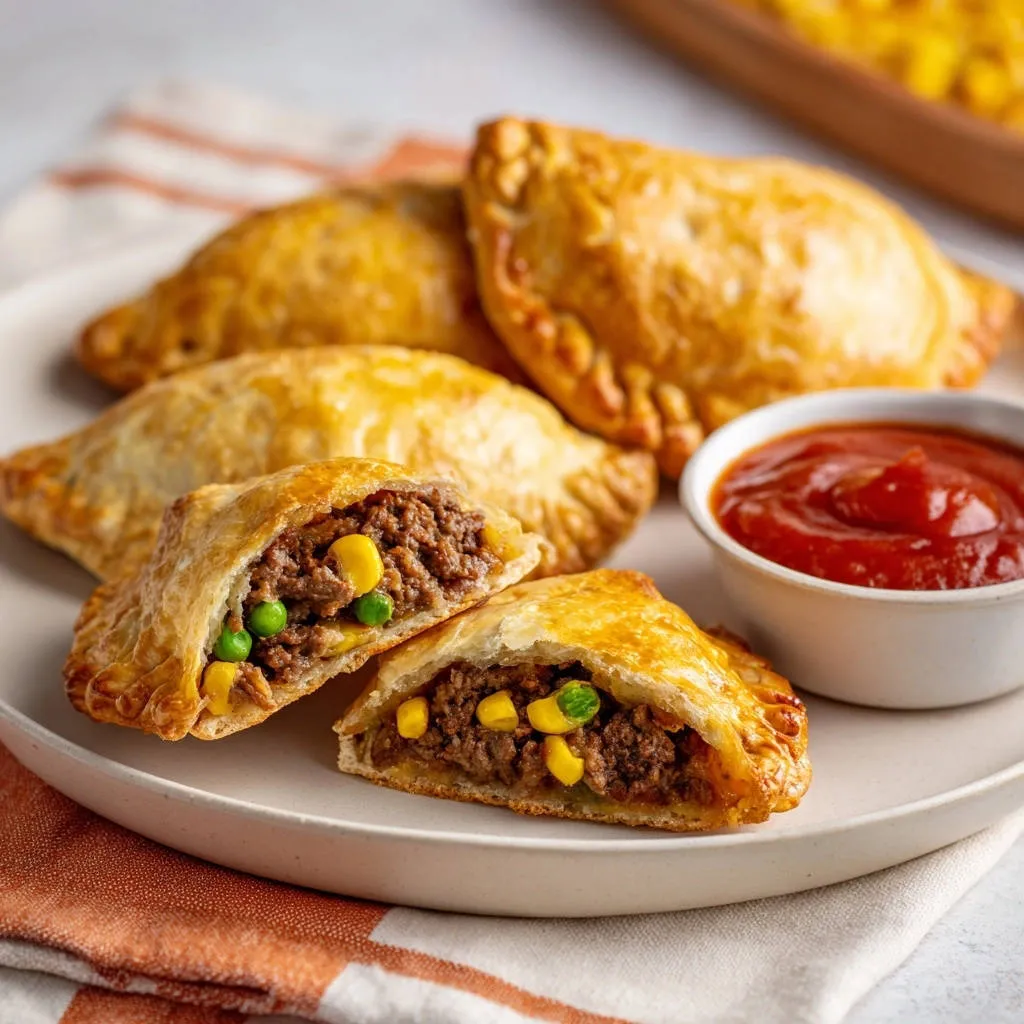
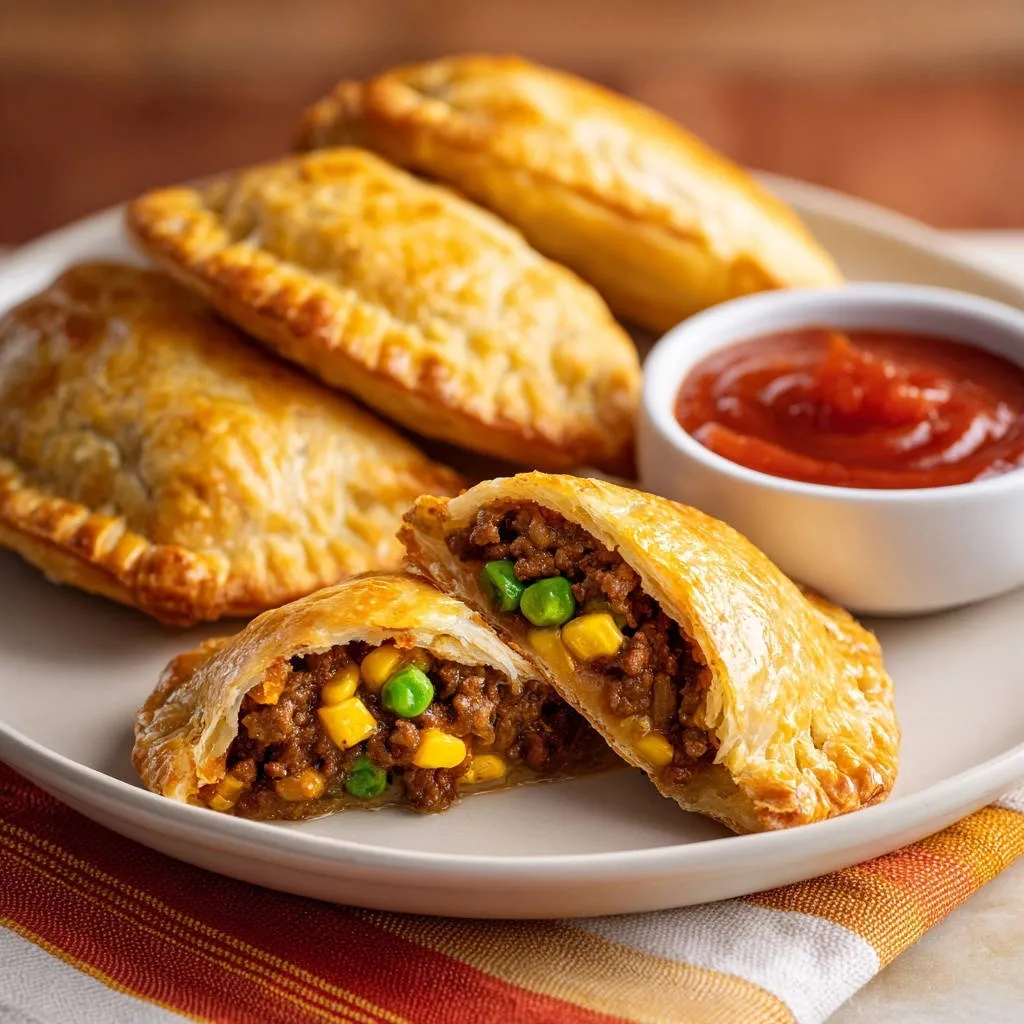
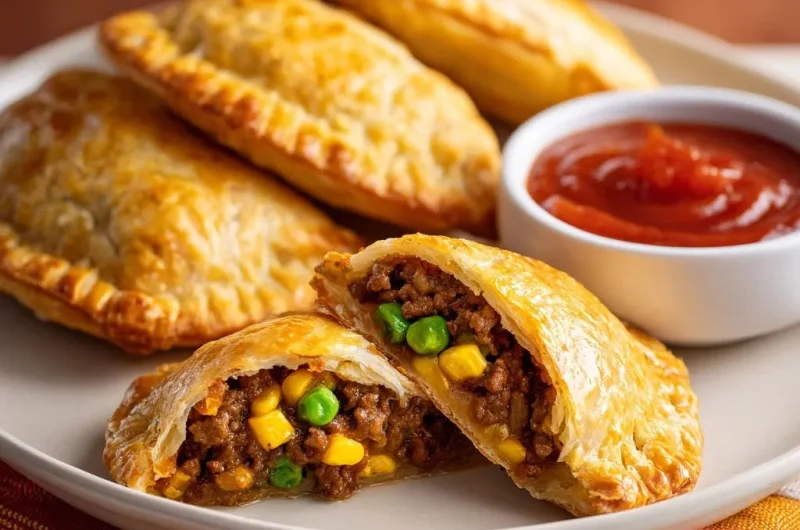
For years, my dream of perfect, crispy hand pies was ruined by soggy bottoms and leaky seams. Mastering the technique for these Golden Empanadas with Beef and Corn finally solved that frustration.
To prevent that from happening again, learn how to achieve a golden beef phyllo pie.
This recipe focuses entirely on moisture control-both in the filling and the dough-guaranteeing a flaky, golden bite every single time, making it the only empanada recipe you’ll ever need.
Beyond the Basic Filling: Why This Golden Empanada Recipe Never Leaks
This recipe transforms the classic savory treat by incorporating specific, technical steps designed to counteract the common structural failures that plague amateur bakers.
The Anti-Soggy Bottom Guarantee
The secret to eliminating soggy bottoms is a rapid pre-bake chill. Placing the assembled empanadas in the freezer for 10 minutes sets the fat in the pastry dough structure.
This ensures that when the empanadas hit the high heat of the oven, the crust instantly begins crisping up before any moisture has a chance to soak in from the filling.
Mastering Moisture Control in Savory Fillings
Filling leakage is almost always caused by excess internal liquid that turns to steam and builds pressure during baking.
We counteract this instability with a crucial two-part approach: first, we aggressively drain all fat and liquid from the cooked beef, and second, we use tomato puree and heat reduction to create a thick, stable, and bound filling consistency.
The Building Blocks of Flavor: Essential Ingredients for Golden Empanadas
Choosing the Best Empanada Dough Discs
Look for high-quality, pre-made dough discs designed specifically for baking rather than frying; they are generally thinner and puff better in the oven.
While refrigerated discs are often easier to separate and work with immediately, properly thawed frozen discs can offer slightly better flakiness due to their higher fat content.
The Heart of the Filling: Ground Beef and Binder Agents
Using lean ground beef (85/15 or 90/10) minimizes the amount of residual fat you must drain, simplifying the critical moisture control step significantly.
The small amount of thick tomato puree acts as a crucial binder. It prevents the finely cooked beef and vegetables from crumbling apart and ensures the filling remains cohesive inside the pastry.
Spice Profile: Balancing Chili Powder and Cumin
The signature flavor foundation relies on the warmth of chili powder and the earthiness of cumin, providing that classic, comforting savory profile.
Always toast the dry spices with the cooked aromatics for one minute before adding any liquid; this process blooms the spices, maximizing their aromatic depth and intensity.
Getting Started: Essential Prep Work and Kitchen Tools
Success starts before the oven door opens. Having the right equipment and understanding the physics of heat and moisture will guarantee beautiful results.
Must-Have Equipment for Empanada Assembly
While this recipe is straightforward, specific tools simplify the assembly process and guarantee structural success:
- Heavy-Bottomed Skillet: Essential for even browning and preventing spice burn during the flavor bloom phase.
- Parchment Paper: Ensures the empanadas do not stick to the baking sheet, especially crucial immediately after the chilling step.
- Pastry Brush: Necessary for applying the egg wash evenly, achieving that signature deep golden color and high shine.
- Fork or Repulgue Tool: Required for creating a tight, decorative, and leak-proof crimped edge.
The Absolute Importance of Cooling the Filling Completely
This step is non-negotiable for success. If the filling is even slightly warm when sealed inside the dough, the latent heat creates steam within the pastry shell.
That pressure buildup leads directly to bursting seams, leakage, and ultimately, a disappointing pastry texture. Chill the filling for a minimum of 30 minutes in the refrigerator.
Golden Empanadas with Beef and Corn Perfection: A Step-by-Step Guide
Phase 1: Creating the Deeply Flavored Filling
- Prepare and Drain the Beef:
Heat the oil in a large skillet over medium-high heat. Add the ground beef and cook, breaking it up with a spoon until fully browned. Immediately remove the beef and drain off every drop of accumulated fat and liquid; this is vital moisture control.
- Build the Flavor Base:
Return the drained beef to the pan and reduce the heat to medium. Add the diced onion and cook until softened, about five minutes. Stir in the minced garlic, chili powder, cumin, salt, and pepper, cooking only for 60 seconds until the spices are deeply fragrant.
- Bind and Reduce:
Stir in the thick tomato puree. Cook this mixture for two to three minutes until the sauce reduces down and clings thickly to the meat. This reduction step stabilizes the filling structure, ensuring it is thick enough not to flow during baking.
- Cool Completely:
Stir in the frozen peas and corn, cooking just until heated through, about one minute. Immediately transfer the entire mixture to a shallow dish and cool it completely, ideally in the refrigerator for 30 minutes, before assembly.
Phase 2: Sealing, Crimping, and Achieving the Golden Finish
- Assemble the Empanadas:
Preheat the oven to 400°F (200°C) and line a baking sheet with parchment paper. Lay out the thawed empanada discs. Place exactly two generous tablespoons of the cooled filling slightly off-center on each disc.
- Seal and Crimp Securely:
Brush the entire edge of the pastry with the egg wash. Fold the dough over and press the edges firmly to seal the half-moon shape, ensuring the edges are clean of filling residue.
Use a fork or the repulgue technique to create a tight, uniform crimp, pressing firmly enough to merge the dough layers completely without tearing the pastry.
- The 10-Minute Freeze Technique:
This crucial step ensures the perfect crust. Place the entire baking sheet of assembled empanadas into the freezer for exactly 10 minutes. This quick chill locks in the structural integrity of the dough.
- Bake to Golden Perfection:
Remove from the freezer. Brush the tops liberally with the remaining egg wash for maximum shine. Bake for 18 to 22 minutes, or until they achieve a deep, signature golden brown and are fully puffed.
Chef’s Secrets: Two Critical Steps for Flawless, Leak-Proof Empanadas
These two techniques separate a good empanada from a spectacular, structurally perfect one. They are the core of the recipe’s reliability.
For perfectly sealed pastries, explore tips for achieving those flaky beef empanadas.
Technique 1: Why Thorough Draining and Reduction Prevent Gummy Crusts
The cooking process releases significant moisture and fat from the ground beef. If this isn’t fully removed, it inevitably seeps into the bottom crust during baking, creating a dreaded soft or gummy texture.
Reducing the tomato puree creates a high-viscosity binder. This dense filling is incapable of releasing free liquid, keeping the contents contained and the surrounding pastry dry and flaky.
Technique 2: The 10-Minute Freezer Chill and Structural Integrity
This technique relies on setting the internal structure of the pastry dough before it encounters heat. The quick freeze solidifies the butter or fat content inside the dough.
When the chilled dough enters the hot oven, the fat creates an immediate thermal shock, preventing the dough from spreading outward and guaranteeing a tall, crisp, flaky foundation for your Golden Empanadas with Beef and Corn.
Flavor Customization and Presentation: Tips for Serving and Variation
Creative Dipping Sauces Beyond Ketchup
While the beef and corn filling is robust, a bright dipping sauce offers a necessary counterpoint to the rich savory flavors:
Complementary Sides for Your Empanadas
To round out your meal with these golden empanadas, consider these warming soup recipes.
- For a light yet satisfying starter, try this Vibrant Green Soup, which offers a fresh counterpoint to the rich filling.
- If you prefer something more substantial, this Hearty Vegetable Soup is packed with wholesome ingredients and makes for a comforting addition.
- Cilantro-Lime Crema: Sour cream or Mexican crema mixed with fresh lime juice, zest, cilantro, and a pinch of salt.
- Classic Chimichurri: A traditional Argentine sauce featuring parsley, oregano, garlic, red wine vinegar, and plenty of olive oil.
- Tangy Chipotle Aioli: Mayonnaise blended with chipotle peppers in adobo for smoky heat and creamy texture.
Meat and Vegetable Swap Ideas for Customization
The filling base is highly adaptable once you adhere to the draining and reduction principles.
Substitute the ground beef with ground turkey, shredded dark meat chicken, or use seasoned brown lentils and mushrooms for a hearty vegetarian option.
Swap out the peas and corn for finely diced roasted sweet potato, sautéed red bell peppers, or black beans for a textural contrast.
Make-Ahead and Freezing Instructions (Unbaked vs. Baked)
Empanadas freeze best when unbaked. Assemble them completely, flash freeze them solid on the baking sheet (skipping the egg wash), and then transfer them to a heavy-duty freezer bag.
When ready to bake, apply the egg wash and bake straight from frozen, adding about 5-8 minutes to the total bake time. Baked empanadas can also be frozen, but the crust texture degrades slightly upon reheating.
Why Did My Empanadas Leak? Troubleshooting Common Issues
The Filling Was Too Wet or Bursted
The root cause is almost always excessive moisture. Ensure you drained the meat thoroughly, removing all residual fat, and confirm that the tomato puree was properly reduced until it coated the beef like a thick paste.
Crucially, verify the filling was truly chilled. Warm filling creates steam, which is the primary cause of bursting seams in the oven.
The Edges Won’t Stay Sealed
Check that the dough edges are completely clean before sealing; any fat, flour, or filling residue on the rim will prevent the egg wash from acting as effective glue.
Press the initial seal firmly, then use the fork crimp or the stronger repulgue technique to securely weld the two layers of dough together, ensuring there are no weak points.
The Bottom is Still Soft After Baking
This structural failure is solved by ensuring two non-negotiable steps are followed: adherence to the 10-minute freezer chill, which ensures the dough sets quickly upon entering the oven.
Secondly, verify your oven temperature using an external thermometer; a true 400°F (200°C) is essential for rapid crust formation and crisping the bottom layer.
Quick Answers: Your Top Golden Empanada FAQs
Can I fry these Golden Empanadas instead of baking them?
While these discs and filling are optimized for baking, they can be fried. If you choose to fry, use a dough disc specifically labeled for frying for the best texture and shape retention.
Fry them in 350°F (175°C) oil until deeply golden brown, turning halfway through, about 3 to 4 minutes total.
What is the repulgue technique for sealing?
The repulgue is the traditional Latin American method of sealing the empanada by folding the edge of the dough back onto itself repeatedly, creating a thick, decorative, rope-like border.
It provides a robust, tight, and professional-looking seal that offers maximum protection against leakage.
How long do leftover baked empanadas last in the refrigerator?
Properly stored baked empanadas will last safely for 3 to 4 days in an airtight container in the refrigerator.
For best results and to restore the crispy crust, always reheat them in a toaster oven or air fryer for 5-8 minutes rather than using a microwave.
Ready to Impress? Share Your Golden Empanada Masterpiece!
These Golden Empanadas with Beef and Corn are more than just a snack-they are a testament to perfect technique. Once you implement the twin secrets of thorough draining and the crucial 10-minute freezer chill, you will achieve flawless results every single time.
Go ahead and create your next batch of crispy, flavorful savory hand pies. I can’t wait to hear how beautifully golden and leak-proof they turn out!
Empanadas
Course: Main CourseCuisine: InternationalDifficulty: easy10
Empanadas20
minutes20
minutes240
kcal60
minutesStop worrying about soggy bottoms! This recipe teaches the critical steps—draining the filling and a quick freezer chill—to guarantee a leak-proof, golden crust every time. These savory hand pies are packed with seasoned ground beef, corn, and peas.
Ingredients
1 tablespoon neutral cooking oil
1 pound lean ground beef
1 medium yellow onion, finely diced
2 cloves garlic, minced
1 tablespoon chili powder
1 teaspoon cumin
1 teaspoon salt
1/2 teaspoon black pepper
1/4 cup tomato puree (or thick tomato sauce)
1/2 cup frozen peas
1/2 cup frozen corn
1 package (10 count) refrigerated or frozen empanada discs (thawed)
1 large egg, whisked with 1 tablespoon water (for egg wash)
For Serving: Ketchup or dipping sauce of choice
Directions
- Prepare the Filling: Heat the oil in a large skillet over medium-high heat. Add the ground beef and cook, breaking it up with a spoon, until fully browned.
- Drain Thoroughly (The Moisture Control Step): This is essential. Once the beef is fully cooked, immediately drain off all accumulated grease and liquid. Return the beef to the skillet.
- Build the Flavor Base: Reduce the heat to medium. Add the diced onion to the beef mixture and cook until softened, about 5 minutes. Stir in the minced garlic, chili powder, cumin, salt, and pepper, cooking for 1 minute until fragrant.
- Finish the Filling: Stir in the tomato puree. Cook for 2 to 3 minutes until the sauce reduces and coats the meat mixture thickly. This step is critical to ensure the filling is bound and not watery. Stir in the frozen peas and corn, cooking just until heated through, about 1 minute. Remove the mixture from the heat and allow it to cool completely (at least 30 minutes in the refrigerator). Hot filling causes steam and bursts.
- Assemble the Empanadas: Preheat the oven to 400 degrees F. Line a baking sheet with parchment paper. Lay out the empanada discs. Place 2 generous tablespoons of the cooled filling slightly off-center on each disc.
- Seal and Crimp: Brush the edges of the pastry with the egg wash. Fold the dough over the filling to create a half-moon shape. Press the edges firmly to seal. Use a fork or the classic repulgue technique (twisting the edge) to securely crimp the dough and ensure a tight, leak-proof seal.
- Lock in the Structure (The Anti-Soggy Bottom Technique): Once assembled, place the entire baking sheet of empanadas into the freezer for 10 minutes. This quick chill sets the dough structure and ensures the bottom crust immediately starts baking crisp before the filling releases any moisture.
- Bake: Remove from the freezer. Brush the tops of the empanadas liberally with the remaining egg wash for that signature golden shine. Bake for 18 to 22 minutes, or until deeply golden brown and puffed. Serve warm with dipping sauce.
Notes
- The key to a non-soggy crust is thoroughly draining the cooked beef filling and freezing the assembled empanadas for 10 minutes immediately before baking.