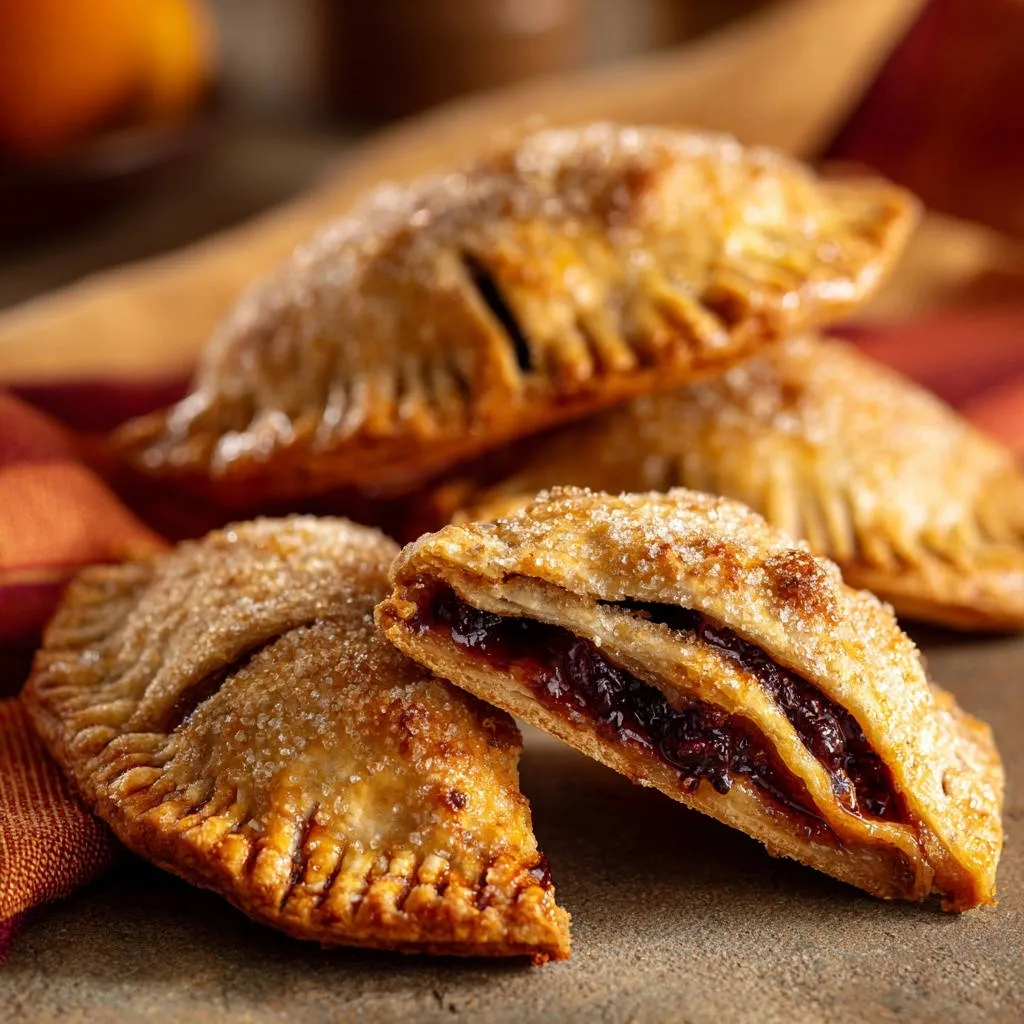
Oh, hand pies! I used to dread opening the oven or seeing them fry, only to find sticky fruit filling everywhere. But I finally cracked the code on how to get these Golden Fruit Hand Pies perfectly sealed and golden every single time, with absolutely no messy leaks.
This recipe transforms a common baking challenge into a foolproof success, delivering individual pockets of pure, crispy-fried bliss that everyone will adore.
Crack the Code: Why Our Golden Fruit Hand Pies Won’t Leak!
The frustration of a leaky hand pie is all too real, but it’s a problem this recipe masterfully solves. We focus on critical sealing techniques that ensure your delicious fruit filling stays exactly where it belongs: inside the pie.
Success starts with ample border space around the filling, followed by a robust egg wash application. The secret lies in a firm, confident fork crimp that truly locks the edges together, creating a formidable barrier against leaks.
Additionally, strategic venting prevents steam buildup, stopping your Golden Fruit Hand Pies from bursting and losing their precious contents. You’ll achieve crispy, intact pastries every time.
The Flavor Foundation: Simple Ingredients for Golden Fruit Hand Pies
Crafting these delightful hand pies relies on a handful of accessible, quality ingredients. Each component plays a vital role in achieving that perfect taste and texture.

Dough Delights: Choosing Your Crust
We begin with two sheets of refrigerated pie crust dough, the ultimate convenience for busy bakers. These provide a consistently flaky and tender base without the fuss of homemade pastry.
While refrigerated dough simplifies the process, a well-chilled homemade pie crust can also be used if you prefer to make your own from scratch. The key is a sturdy, cold dough.
Sweet Centers: Picking Your Fruit Filling
One cup of berry or cherry fruit filling, such as jam or preserves, forms the luscious heart of our hand pies. Opt for a thick, good-quality preserve to ensure the filling holds its shape and doesn’t become overly runny during cooking.
The vibrant flavors of berries or cherries are classic, but you can explore other thick fruit fillings like apple butter or peach preserves. Ensure the consistency isn’t too liquid to prevent leaks and achieve the perfect sweet berry hand pies.
For another bright, citrusy treat, explore this perfect lemon meringue pie recipe.
The Binding Agent: Egg Wash Essentials
A single large egg whisked with a tablespoon of water creates our essential egg wash. This mixture acts as a powerful adhesive, sealing the pie edges securely and contributing to the beautiful golden-brown exterior when fried.
Finishing Touches: Sugar and Oil
Granulated sugar, both a quarter cup for potential mixing into certain fillings (if needed) and extra for sprinkling, adds a final layer of sweetness and sparkle. The extra sugar adheres to the warm, fried surface, providing an irresistible crunchy coating.
Vegetable oil, heated to the correct temperature, is crucial for frying. Using about two inches ensures the pies are submerged enough to cook evenly and achieve that desirable crisp texture.
Essential Gear for Hand Pie Success
Having the right tools on hand makes the hand pie-making process smooth and enjoyable.
Round Cookie Cutter or Bowl Rim: Essential for uniform pie shapes, ensuring consistent cooking and presentation.
Small Bowl & Whisk: For efficiently preparing your egg wash, ensuring it’s well combined and ready to use.
Fork: Crucial for effectively crimping the edges, creating a strong, leak-proof seal, and for venting the pies.
Deep Skillet or Pot: A must-have for safe and even frying, providing sufficient depth for the oil.
Tongs: For safely handling hand pies in hot oil, allowing you to flip them and remove them with precision.
Wire Rack & Baking Sheet: Indispensable for draining excess oil after frying, preventing sogginess and promoting crispiness.
Baking Brilliance: Your Step-by-Step Golden Hand Pie Journey
Follow these detailed steps to create your own perfect Golden Fruit Hand Pies, guaranteeing a leak-proof and deliciously golden result every time.
Prepping Your Pie Crust Rounds
Unroll the refrigerated pie crust sheets carefully on a lightly floured surface. Using a 4-inch round cookie cutter or a bowl rim, cut out 4 to 6 circles from each sheet, maximizing your yield of perfectly shaped pastry.
The Critical Fill: Avoiding Overstuffing
Spoon 1 to 2 tablespoons of your chosen fruit filling onto one half of each dough circle. It’s crucial to leave a generous 1/2-inch clear border around the entire edge, as this space is paramount for preventing leaks.
Resist the temptation to overfill, even if it’s tempting, as this is a primary cause of messy ruptures during frying.
Whip Up the Egg Wash Binder
In a small bowl, whisk together the large egg with 1 tablespoon of water until the mixture is well combined and uniform. This creates the ‘glue’ that will secure your hand pies, ensuring a tight seal and contributing to their beautiful golden finish.
Sealing the Deal: Fold and Brush
Lightly brush the empty half of the dough circles (the side without filling) with the prepared egg wash. This moistens the dough, making it adhesive.
Carefully fold the empty, brushed half of the dough over the filling, creating a perfect half-moon shape that encases the sweet fruit center.
Locking in Flavor: The Fork Crimp
Gently press the edges of the folded dough together with your fingers to initially seal them. Then, using the tines of a fork, firmly crimp all along the curved edge.
Press down well to ensure a strong, locked-in seal that will confidently hold the filling inside during the frying process.
Ventilation for Perfection: Steam Escapes
With a small knife or the tines of a fork, make 2 to 3 small slits on top of each hand pie. These vents are vital; they allow steam to escape during cooking, preventing the pies from bursting and maintaining their integrity.
Heating the Oil for Frying
Pour about 2 inches of vegetable oil into a deep skillet or pot. Heat the oil over medium heat until it reaches 350°F (175°C). Use a kitchen thermometer to ensure accuracy for optimal frying temperature.
Frying to Golden Perfection
Carefully place 2 to 3 hand pies into the hot oil at a time, being mindful not to overcrowd the pan, which can drop the oil temperature and lead to soggy results. Fry for 3 to 5 minutes per side, or until they are deeply golden brown and cooked through.
Use tongs to gently flip them halfway through the cooking process for uniform color and crispness.
Drain, Sugar, and Shine
Once beautifully golden, remove the hand pies from the oil and immediately transfer them to a wire rack set over a baking sheet. This allows any excess oil to drain away, ensuring a crisp exterior.
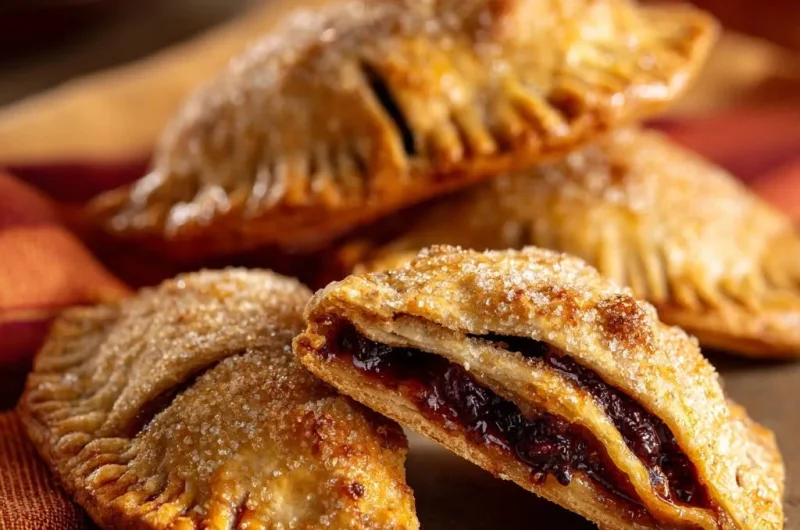
While the pies are still warm, generously sprinkle them with extra granulated sugar for an irresistible sparkle and a delightful, sweet finish.
Cool and Serve
Allow the Golden Fruit Hand Pies to cool slightly on the wire rack before serving. The fruit filling inside will be extremely hot immediately after frying, so patience is key for enjoying them safely and preventing burns.
Beyond the Recipe: Expert Tips for Flawless Hand Pies
Elevate your hand pie game with these insider tips, ensuring every batch is a triumph of flavor and texture.
Don’t Rush the Chill: If your dough feels too warm or sticky after cutting, place the cut circles in the fridge for 10-15 minutes before filling. Chilled dough is significantly easier to handle and much less prone to tearing or becoming gummy.
Customize Your Filling: While berry or cherry is classic, feel free to experiment with finely diced apple pie filling, peach preserves, or even a savory potato and cheese blend for a unique twist. Just ensure any filling isn’t too watery, as excess moisture can lead to leaks.
For a bright, sweet contrast to fruit, consider a classic lemon meringue pie.
The Flour Trick: Lightly flour your work surface and cookie cutter to prevent sticking, which helps maintain the dough’s shape. Too much flour, however, can dry out the dough, so use it sparingly and dust off any excess before sealing.
Test Your Oil Temperature: If you don’t have a thermometer, drop a tiny piece of dough into the oil. It should sizzle immediately and rise to the surface within a few seconds if the temperature is correct. If it browns too quickly, the oil is too hot; if it just sits there, it’s too cool.
Batch Fry for Best Results: Avoid overcrowding the pot. Frying in small batches maintains optimal oil temperature, ensuring even cooking and beautiful browning for each hand pie. Overcrowding drops the temperature, leading to greasy, pale pastries.
Common Hand Pie Hurdles (and How to Clear Them)
Even with a great recipe, common issues can arise. Here’s how to troubleshoot your way to perfect Golden Fruit Hand Pies.
My Hand Pies Are Leaking in the Oil!
This common issue is often due to overfilling or an insufficient seal. Ensure you leave that critical 1/2-inch border around the edges and press very firmly with a fork multiple times along the crimped edge. Also, double-check that your egg wash completely covers the entire sealing area before folding.
The Dough Is Soggy or Not Crispy Enough.
Sogginess can occur if the oil isn’t hot enough, causing the pies to absorb too much oil instead of frying quickly. Ensure your oil reaches the recommended 350°F (175°C) before frying. Additionally, overcrowding the pan will drop the oil temperature significantly, so always fry in small batches.
My Hand Pies Are Unevenly Browned.
Uneven browning often happens if the oil temperature fluctuates or if the pies aren’t flipped consistently during cooking. Maintain a consistent medium heat throughout the frying process and use tongs to carefully turn each pie midway through frying for uniform golden color on both sides.
Serving Suggestions & Smart Storage
These Golden Fruit Hand Pies are versatile treats, perfect for any occasion.
What to Try Next
Round out your meal with these sweet and savory ideas.
- For a delightful start to the day that complements the fruit in your hand pies, consider making ricotta stuffed brioche French toast using the double-crust method.
- If you’re enjoying the fried aspect of the hand pies, you’ll appreciate the crispiness of these golden crispy hash brown waffles.
Perfect Pairings for Your Golden Fruit Hand Pies
Serve these warm as a delightful dessert, a hearty breakfast treat, or an afternoon snack. They pair wonderfully with a scoop of vanilla bean ice cream, a dollop of fresh whipped cream, or simply a dusting of powdered sugar for an elegant touch.
Storing Your Delicious Hand Pies
Once completely cooled, store your Golden Fruit Hand Pies in an airtight container at room temperature for up to 2-3 days to maintain freshness. For longer storage, refrigerate for up to 5 days, or freeze for up to 1 month.
To reheat, place them in a toaster oven or conventional oven at 300°F (150°C) for a few minutes until warmed through and crisp, restoring their fresh-fried texture.
Your Golden Fruit Hand Pies Questions Answered
Can I bake these hand pies instead of frying?
Yes, you can! To bake, preheat your oven to 400°F (200°C). Brush the pies generously with egg wash, sprinkle with sugar, and bake for 15-20 minutes, or until beautifully golden brown. They won’t have the exact crisp fried texture, but will still be a delicious, flaky pastry.
What other fruit fillings can I use?
Almost any thick jam, preserve, or fruit butter works well for these hand pies. Consider delightful options like apple butter, peach preserves, blueberry jam, or even a spiced pumpkin filling for a seasonal twist. Just ensure the filling is not too runny, as excess moisture can compromise the seal and lead to leaks.
Can I make the dough from scratch?
Absolutely! If you prefer a homemade touch, use your favorite flaky pie crust recipe for these hand pies. Just ensure it’s well-chilled and sturdy enough to handle the filling and frying process. Refrigerated dough is simply a time-saving convenience, but a quality homemade crust, much like one for a classic apple pie, will yield excellent results.
Time to Indulge: Share Your Golden Creations!
There you have it – the definitive guide to creating irresistibly crispy, perfectly sealed, and utterly delicious Golden Fruit Hand Pies. No more leaked fillings or soggy bottoms; just pure, golden indulgence that will bring smiles to every face.
We encourage you to try this recipe, savor every bite, and share your delightful creations with friends and family. Don’t forget to tag us on social media with your masterpieces!
Fruit Hand Pies
Course: PastryCuisine: AmericanDifficulty: easy8
to 12 hand pies25
minutes30
minutes240
kcal55
minutesEnjoy perfectly sealed and golden Golden Fruit Hand Pies, free from messy leaks. This recipe reveals the secrets to a flaky crust and delicious fruit filling, bringing back happy memories. Fry them to a crisp, golden perfection and sprinkle with sugar for an irresistible finish.
Ingredients
2 sheets refrigerated pie crust dough
1 cup berry or cherry fruit filling (like jam or preserves)
1 large egg
1 tablespoon water
1/4 cup granulated sugar, plus extra for sprinkling
Vegetable oil, for frying
Directions
- Prepare the crust: Unroll the refrigerated pie crust dough sheets. Using a 4-inch round cookie cutter or a bowl rim, cut out circles from the dough. You should get about 4 to 6 circles from each sheet.
- Fill the pies carefully: Spoon about 1 to 2 tablespoons of your fruit filling onto one half of each dough circle, leaving a clear 1/2-inch border around the entire edge. This space is absolutely crucial to prevent leaks! Do not overfill, even if it’s tempting.
- Create the egg wash: In a small bowl, whisk the egg with the water until well combined. This is your binding agent.
- Seal the edges: Lightly brush the edges of the dough circles that do not have filling on them with the prepared egg wash. Fold the empty half of the dough over the filling to form a half-moon shape.
- Secure the seal: Gently press the edges together with your fingers to begin sealing. Then, use the tines of a fork to firmly crimp all along the curved edge. Press down well to create a strong, locked-in seal that truly holds the delicious filling inside.
- Vent the pies: Using a small knife or the tines of a fork, make 2 to 3 small slits on top of each hand pie. This allows steam to escape during cooking and helps prevent bursting.
- Fry the pies: Heat about 2 inches of vegetable oil in a deep skillet or pot over medium heat until it reaches 350°F (175°C). Carefully place 2 to 3 hand pies into the hot oil at a time, being careful not to overcrowd the pan.
- Cook until golden: Fry for 3 to 5 minutes per side, or until they are deeply golden brown and cooked through. Use tongs to carefully flip them halfway through the cooking process.
- Drain and sugar: Once golden, remove the hand pies from the oil and place them on a wire rack set over a baking sheet to drain any excess oil. While the pies are still warm, sprinkle them generously with extra granulated sugar for that irresistible finish.
- Serve: Let them cool slightly before serving. The filling will be very hot!
Notes
- The filling will be very hot! Let them cool slightly before serving.