Ever cut into a gorgeous, fruity dessert only to find that delicious bottom layer disappointingly soft and wet? It’s a common baking heartbreak, especially with juicy ingredients like pineapple.
That’s why I’m thrilled to share my perfected recipe for Golden Pineapple Cream Dream Bars, featuring game-changing secrets that ensure your base stays perfectly firm and delicious, no matter how lush the topping.
Say goodbye to soggy bottoms forever and get ready for pure, vibrant dessert bliss with these exquisite pineapple cream bars!
Say Goodbye to Soggy: Why These Golden Pineapple Cream Dream Bars Are Your New Favorite
This isn’t just another dessert recipe; it’s a meticulously crafted experience designed to solve common baking frustrations while delivering extraordinary flavor. My Golden Pineapple Cream Dream Bars stand apart, promising perfect texture with every bite.
They are the answer to achieving a truly remarkable no-soggy dessert that impresses with both ease and elegance.
The Genius of the Baked Crust Foundation
The secret to our impeccably firm crust lies in its initial bake. By pre-baking the yellow cake mix base, we create a barrier that actively prevents any moisture from the creamy or fruity layers from seeping in.
This vital step ensures a consistently sturdy and deliciously crisp foundation, eliminating the dreaded soggy bottom that often plagues fruit-topped bar recipes.
Unveiling the Cornstarch Secret for Juicy Pineapple
Beyond the crust, our second innovation is the strategic use of cornstarch within the pineapple topping itself. Combined with meticulous draining, this simple ingredient is a game-changer.
It acts as a natural thickener, absorbing any residual pineapple moisture during baking, guaranteeing a perfectly set, vibrant, and never-watery tropical treat.
A Symphony of Sweet and Tangy Flavors
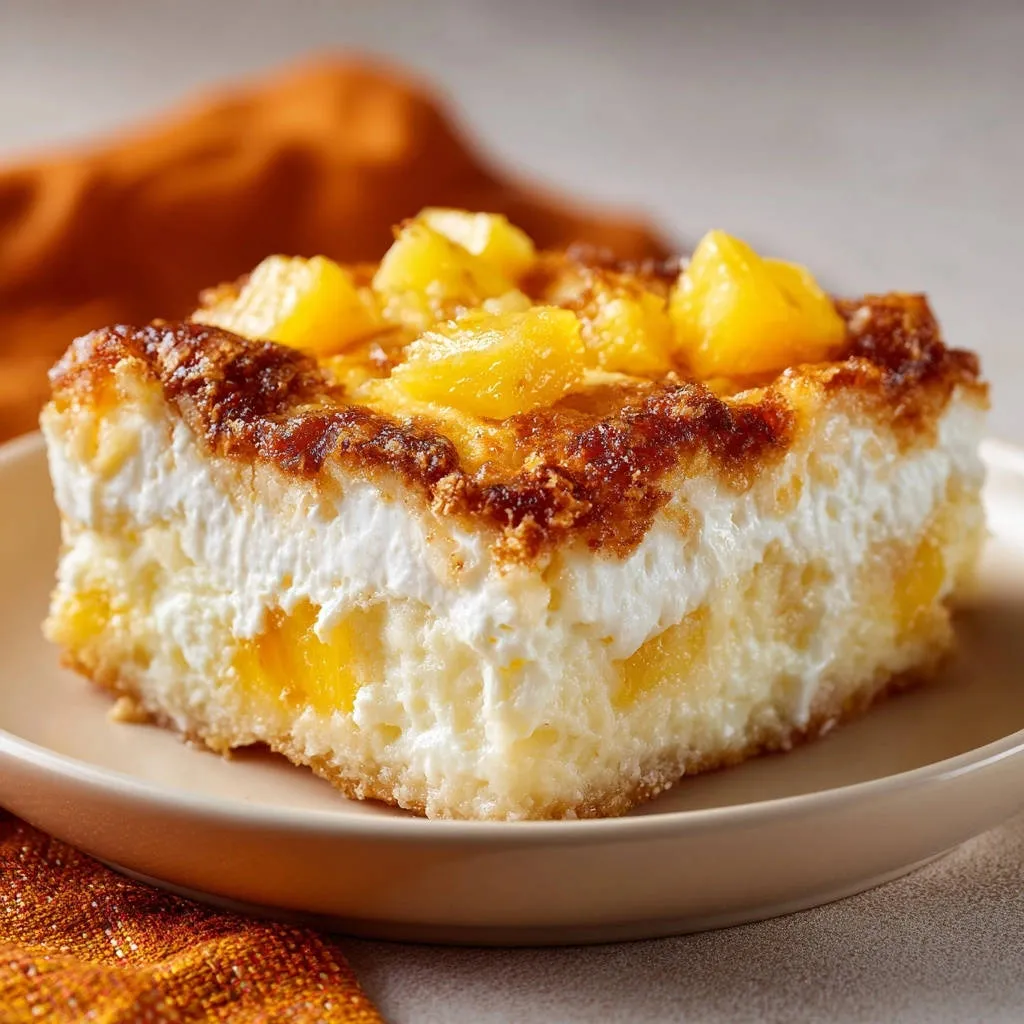
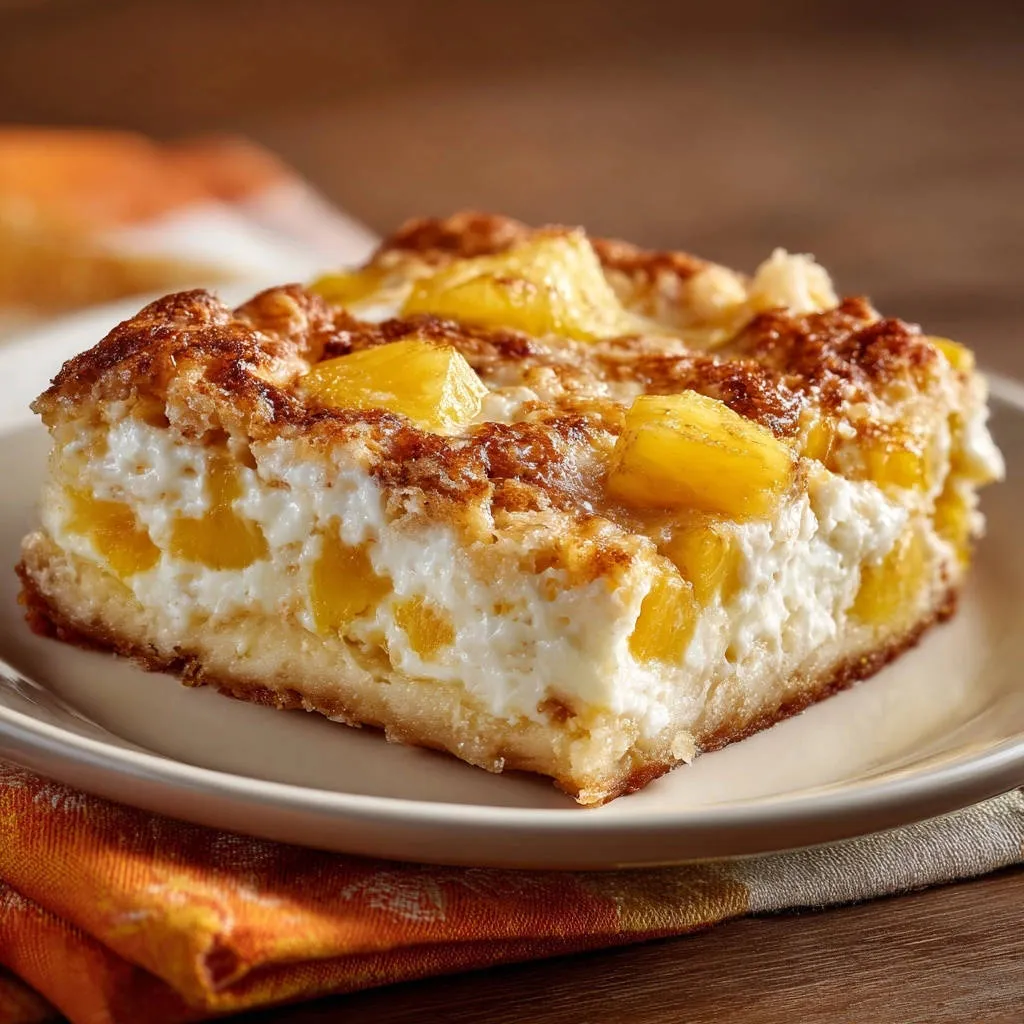
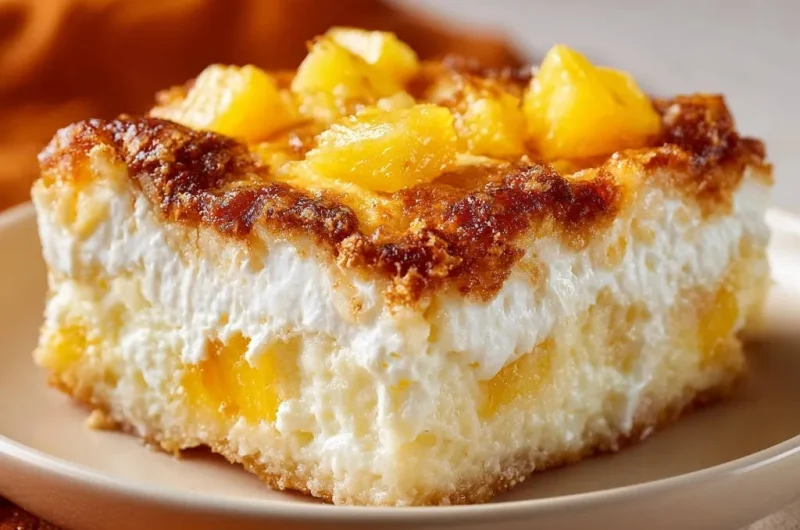
These Golden Pineapple Cream Dream Bars offer an exquisite balance of tastes and textures. The sweet, buttery crust provides a delightful counterpoint to the tangy, caramelized pineapple topping.
For more no-bake tropical bar ideas, check out these tropical no-bake pineapple bars.
Nestled in between is a rich, airy cream cheese layer, creating a harmonious blend that is both refreshing and indulgent.
Effortless Elegance: Why This Recipe is Perfect for Any Occasion
Despite their impressive appearance and complex flavor profile, these dream bars are surprisingly straightforward to prepare. They are ideal for busy hosts who want to serve something special without extensive effort.
From casual potlucks to elegant gatherings, these creamy pineapple delights are always a showstopper, making any occasion feel a little more festive.
Complementary Bites
To round out your dessert experience, consider these sweet treats.
- For a bright, fruity contrast alongside your pineapple bars, try these glazed raspberry sweet rolls, known for their satisfying texture.
- If you enjoy fruit-forward baked goods, you might also like these homemade apple cinnamon toaster strudels for a comforting bite.
Crafting Perfection: Essential Ingredients for Your Golden Pineapple Cream Dream Bars
Selecting the right ingredients, and understanding their role, is key to the success of these exceptional Golden Pineapple Cream Dream Bars. Here’s a detailed look at what you’ll need.
For a different kind of layered treat, try these caramel apple cheesecake bars.
The Foundation: What You Need for That Sturdy Cake Mix Crust
Yellow Cake Mix: This convenient base forms our sturdy, flavorful crust. A standard 15.25 oz box provides the perfect texture and a subtly sweet foundation. For dietary needs, consider a gluten-free yellow or vanilla cake mix.
Unsalted Butter (Melted): Butter binds the crust mixture together, adding essential richness and flavor. Using unsalted butter allows you to control the overall saltiness of your dessert.
Large Egg: The egg acts as an additional binder, helping to create a cohesive and tender crust. It contributes to the overall structure and bakes into a delightful, firm texture.
Pillowy Dream: Ingredients for the Cream Cheese Layer
Cream Cheese (Softened): The heart of the creamy layer. It is absolutely crucial that your cream cheese is genuinely softened to room temperature to ensure a smooth, lump-free filling.
Powdered Sugar: This fine sugar sweetens the cream cheese layer without adding graininess. It also helps to thicken the mixture, ensuring a silky, stable texture.
Whipped Topping (Thawed): Thawed whipped topping lightens the cream cheese layer, incorporating airiness and significant volume. Ensure it’s fully thawed but still cold for the best results.
The Star: Pineapple Topping Components & The Anti-Soggy Strategy
Pineapple Tidbits or Chunks (Very Well Drained): These are the star fruit of our dream bar recipe. Stressing the extreme importance of draining prevents a watery topping and keeps the crust pristine.
Granulated Sugar: This sugar enhances the pineapple’s natural sweetness and plays a role in achieving a beautiful, light caramelization during the final bake.
Cornstarch: This is our “soggy bottom solver.” Cornstarch works by absorbing excess moisture from the pineapple as it bakes, guaranteeing a perfectly set and stable topping.
Unsalted Butter (Melted): Drizzled over the pineapple, melted butter adds another layer of richness. It also helps the brown sugar topping to melt and caramelize beautifully.
Packed Brown Sugar: This ingredient is sprinkled on top to create a gorgeous, golden, caramelized crust during baking. It introduces a deep, molasses-rich flavor that complements the bright pineapple.
Your Kitchen Arsenal: Essential Tools for Golden Pineapple Cream Dream Bars Success
Having the right tools at hand will make preparing these Golden Pineapple Cream Dream Bars a seamless and enjoyable process.
Baking Pan & Prep Essentials
9×13 Inch Baking Pan: This is the standard size for this recipe, ensuring the correct layer thickness and baking consistency. If using a different size, be prepared to adjust baking times.
Parchment Paper: Crucial for easy lifting and impeccable cleanup. Line your pan with parchment, leaving an overhang on the sides, to effortlessly remove the bars once chilled.
Fine-Mesh Sieve: Absolutely indispensable for super-draining the pineapple. This tool allows you to press out as much liquid as possible, which is paramount for preventing a soggy outcome.
Mixing Bowls & Utensils
Various Mixing Bowls (Medium & Large): You’ll need at least three separate bowls for preparing the crust, cream cheese layer, and pineapple topping. This keeps your process organized and efficient.
Electric Mixer (Handheld or Stand): Essential for beating the cream cheese to a smooth, creamy consistency. It saves time and ensures a perfectly airy filling.
Spatulas & Whisks: Spatulas are perfect for scraping down bowls and gently folding in ingredients like whipped topping. A whisk is useful for combining dry ingredients or beating the egg into the crust mixture.
From Scratch to Slice: A Detailed Guide to Making Golden Pineapple Cream Dream Bars
Follow these steps carefully to create your perfect Golden Pineapple Cream Dream Bars, paying special attention to the details that prevent sogginess.
- Preparing Your Baking Canvas:
Preheat your oven to 350°F (175°C).
Lightly grease and flour a 9×13 inch baking pan, or for easiest removal, line it completely with parchment paper, allowing an overhang on the short sides.
- The Golden Crust: Baking a Firm Foundation:
In a medium bowl, combine the yellow cake mix, melted butter, and egg until a thick, crumbly dough forms, resembling wet sand.
Press this mixture evenly and firmly into the bottom of your prepared baking pan, ensuring it’s a uniform layer from edge to edge.
Bake for 15-18 minutes, or until the crust is lightly golden around the edges and set.
Remove from oven and let it cool completely on a wire rack – this crucial initial bake and cooling sets a firm foundation and is your first defense against a soggy bottom.
- Whipping Up the Velvety Cream Cheese Layer:
In a large bowl, beat the softened cream cheese with an electric mixer until it’s perfectly smooth and creamy, with no lumps remaining.
Gradually add the powdered sugar, continuing to beat until it’s well combined and the mixture becomes light and fluffy.
Gently fold in the thawed whipped topping until no streaks remain, taking care not to deflate the airiness you’ve created.
Spread this luscious cream cheese mixture evenly over the completely cooled crust, ensuring it reaches all edges.
- The Anti-Soggy Pineapple Topping: Crucial Prep!:
This is your “soggy bottom solver” step! First, ensure your pineapple tidbits or chunks are extremely well drained.
Press out as much liquid as possible using a fine-mesh sieve and the back of a spoon, or by pressing between several layers of paper towels – every drop counts for a no-soggy dessert!
In a separate bowl, toss the super-drained pineapple with granulated sugar and cornstarch until every piece is evenly coated.
The cornstarch will absorb any residual moisture during baking, safeguarding your crust from becoming wet and ensuring a perfectly set pineapple topping.
- Assembling the Dream Layers:
Carefully spread the prepared pineapple mixture evenly over the cream cheese layer, making sure it’s distributed from edge to edge of the pan.
Drizzle the remaining melted butter evenly over the pineapple layer.
Then, sprinkle evenly with the packed brown sugar, which will create a beautiful caramelized topping during the final bake.
- The Final Bake & Golden Caramelization:
Bake for an additional 25-30 minutes, or until the pineapple topping is visibly bubbly and the brown sugar has caramelized to a gorgeous golden-brown crust.
Keep a close eye on it during the last few minutes to prevent any over-browning of the edges.
- Patience is a Virtue: Cooling & Chilling for Perfection:
Remove the pan from the oven and let it cool completely on a wire rack at room temperature.
For the absolute best results and clean, neat slices, chill the Golden Pineapple Cream Dream Bars in the refrigerator for at least 2 hours (or preferably longer, even overnight) before serving.
This crucial chilling time allows all the layers to set perfectly, making for an easier, more enjoyable serving experience and maintaining their beautiful structure.
Unlock the Full Potential: Expert Tips for Your Golden Pineapple Cream Dream Bars
Elevate your baking and ensure every batch of Golden Pineapple Cream Dream Bars is absolutely perfect with these pro tips.
Draining Pineapple Like a Pro (Absolutely Critical!): Don’t just pour out the juice; press, press, press! Use a fine-mesh sieve and the back of a spoon, or even several layers of paper towels, to extract every possible drop of liquid. This is the secret to preventing a soggy topping and crust for these delightful pineapple squares.
Achieving the Perfect Cream Cheese Consistency: Ensure your cream cheese is genuinely softened at room temperature before beating. This prevents lumps and ensures a smooth, uniform texture when combined with powdered sugar and whipped topping. Cold cream cheese will inevitably result in a lumpy, uneven filling.
The Art of Cooling and Chilling for Clean Slices: Resist the urge to cut into warm bars! Complete cooling at room temperature, followed by a minimum of 2 hours of refrigeration (ideally longer), is essential. This allows the layers to fully set, resulting in clean, beautiful slices that hold their shape impeccably.
Personalizing Your Bars: Creative Variations: Feel free to experiment! Consider adding a sprinkle of toasted coconut to the topping for extra tropical flair, a touch of vanilla extract to the cream cheese layer for added depth, or even a different type of cake mix for the crust (e.g., butter pecan for an extra nutty flavor). Just ensure any additions don’t introduce excess moisture.
Don’t Overbake the Crust: When baking the initial crust, aim for lightly golden, not deeply browned. It will bake again with the topping, and you want it firm and set, but not dry or overly crispy, to provide a good, tender contrast to the creamy filling.
Common Conundrums Solved: Troubleshooting Your Golden Pineapple Cream Dream Bars
Even expert bakers encounter challenges. Here’s how to troubleshoot common issues with your Golden Pineapple Cream Dream Bars.
“Why is My Crust Still Soft or Crumbly After Chilling?”
Ensure the crust was baked for the full 15-18 minutes until lightly golden and allowed to cool completely before adding other layers. Inadequate baking or cooling can prevent it from setting properly and contribute to a soft foundation.
Also, double-check your butter-to-cake mix ratio; too little butter can result in a crumbly rather than cohesive crust.
“My Cream Cheese Layer Isn’t Smooth!”
The most common culprit is cold cream cheese. Always ensure it’s fully softened to room temperature before beating with an electric mixer. This allows it to whip up light and smooth.
If lumps persist, try scraping down the bowl and beating a little longer, or gently warm the bowl slightly (e.g., over a warm water bath) for a few seconds to aid softening, then beat again until perfectly smooth.
“The Pineapple Topping Looks Watery!”
This issue is almost always due to insufficient draining of the pineapple. Go back to the “Draining Pineapple Like a Pro” tip and be extremely thorough; every drop of liquid extracted prevents a watery topping.
The cornstarch helps significantly, but it can only do so much if there’s excessive liquid. Ensure you coated the pineapple evenly with cornstarch as well, as this ensures maximum moisture absorption.
“My Bars Are Hard to Slice Neatly!”
Lack of proper chilling is the main reason for messy slices. The layers need ample time in the refrigerator (at least 2 hours, ideally more) to firm up and meld together completely.
For the cleanest cuts, use a sharp, thin knife dipped in hot water and wiped clean between each slice. This creates a smoother cut through the chilled layers.
Enjoying and Preserving Your Golden Pineapple Cream Dream Bars
Maximize your enjoyment and ensure your delicious dream bars stay fresh with these expert tips.
Elegant Serving Suggestions
These Golden Pineapple Cream Dream Bars are delightful on their own, showcasing their vibrant layers beautifully. For an elegant touch, consider a light dusting of powdered sugar just before serving, or a fresh sprig of mint for a pop of color.
For an extra indulgent treat, serve them alongside a scoop of high-quality vanilla bean ice cream or a dollop of extra whipped cream.
Storing Your Delicious Leftovers
Store any leftover Golden Pineapple Cream Dream Bars in an airtight container in the refrigerator. Properly stored, they will maintain their freshness and delicious texture for up to 3-4 days.
Ensure they are well-covered to prevent them from drying out or absorbing any fridge odors, keeping them a delightful creamy pineapple dessert.
Can You Make Them Ahead?
Absolutely! These bars are an excellent make-ahead dessert, making them perfect for entertaining. You can prepare them a day or two in advance, which actually allows the flavors to meld even more beautifully and ensures they are perfectly chilled and set for serving.
Your Top Questions Answered: Golden Pineapple Cream Dream Bars FAQ
Here are answers to some of the most common questions about making and enjoying these spectacular Golden Pineapple Cream Dream Bars.
Can I use fresh pineapple instead of canned?
While canned pineapple is recommended for its consistent texture and ease of draining, you can use fresh pineapple. However, you’ll need to cook it down first to release excess moisture and concentrate its flavor, then cool and drain it extremely well, potentially even more so than canned, before proceeding with the cornstarch step. This extra prep is crucial.
Is there a substitute for whipped topping?
You can try using freshly whipped heavy cream, but be aware that it might not be as stable or hold its volume as long as store-bought whipped topping, especially over several days. If using fresh cream, ensure it’s whipped to stiff peaks and gently folded in, keeping the bars well chilled.
How long do these bars last in the refrigerator?
When stored properly in an airtight container, Golden Pineapple Cream Dream Bars will last for 3 to 4 days in the refrigerator. After this, the texture, particularly of the crust and cream cheese layer, may start to degrade slightly, though they might still be safe to eat.
Can I freeze Golden Pineapple Cream Dream Bars?
Yes, you can freeze these bars! Wrap individual slices or the entire pan (if tightly covered) tightly in plastic wrap, then an additional layer of aluminum foil. They can be frozen for up to 1-2 months. Thaw overnight in the refrigerator before serving. Note that the texture of the cream cheese layer might become slightly softer upon thawing.
What if I don’t have a 9×13 inch pan?
You can use an equivalent volume of baking dish, but cooking times may vary. For example, two 8×8 inch pans could work, but you’ll need to monitor for doneness more closely, especially for the crust and the final bake, as smaller/larger pans will have different heat distribution and evaporation rates.
Your Golden Pineapple Cream Dream Bars Await: Time to Indulge!
You now hold the secret to perfectly firm, gloriously golden, and utterly delicious Golden Pineapple Cream Dream Bars. No more soggy bottoms, just pure, unadulterated dessert joy!
This recipe transforms a common baking challenge into a triumph, ensuring every bite is as dreamy as the name suggests. We encourage you to embark on this delightful baking journey and experience the magic for yourself.
Once you’ve created your masterpiece, don’t forget to savor every moment and perhaps share your creations with loved ones!
Pineapple Cream Bars
Course: DessertCuisine: AmericanDifficulty: medium4
12-18 bars30
minutes45
minutes550
kcal75
minutesSay goodbye to soggy bottoms with these Golden Pineapple Cream Dream Bars! Featuring a firm cake mix crust, a creamy, fluffy cream cheese layer, and a vibrant pineapple topping engineered to stay perfectly delicious. This recipe includes a game-changing tip to ensure your bars are always firm and delightful.
Ingredients
For the Crust:
1 box yellow cake mix (15.25 oz)
1/2 cup (1 stick) unsalted butter, melted
1 large egg
For the Cream Cheese Layer:
1 (8 oz) package cream cheese, softened
1 cup powdered sugar
1 (8 oz) container whipped topping, thawed
For the Pineapple Topping:
1 (20 oz) can pineapple tidbits or chunks, very well drained
1/4 cup granulated sugar
1 tablespoon cornstarch
2 tablespoons unsalted butter, melted
1/4 cup packed brown sugar
Directions
- Preheat your oven to 350F (175C). Lightly grease and flour a 9×13 inch baking pan, or line with parchment paper leaving an overhang on the sides for easy lifting.
- For the Crust: In a medium bowl, combine the yellow cake mix, melted butter, and egg until a thick, crumbly dough forms. Press this mixture evenly into the bottom of the prepared baking pan. Bake for 15-18 minutes, or until lightly golden. Remove from oven and let cool completely on a wire rack. This initial bake sets a firm foundation for the bars.
- For the Cream Cheese Layer: In a large bowl, beat the softened cream cheese until smooth and creamy. Gradually add the powdered sugar, beating until well combined and fluffy. Gently fold in the thawed whipped topping until no streaks remain. Spread this mixture evenly over the cooled crust.
- For the Pineapple Topping (The Soggy Bottom Solver!): This is where we ensure no sogginess! First, make sure your pineapple tidbits or chunks are extremely well drained. Press out as much liquid as possible using a fine-mesh sieve or paper towels. In a separate bowl, toss the drained pineapple with granulated sugar and cornstarch until evenly coated. The cornstarch will absorb any residual moisture during baking, preventing it from seeping into the crust.
- Spread the pineapple mixture evenly over the cream cheese layer. Drizzle the melted butter over the pineapple, then sprinkle evenly with brown sugar.
- Bake for an additional 25-30 minutes, or until the pineapple topping is bubbly and the brown sugar has caramelized to a golden-brown crust.
- Remove from the oven and let cool completely on a wire rack. For best results and clean slicing, chill the bars in the refrigerator for at least 2 hours before serving. This allows all the layers to set perfectly.
Notes
- Ensure pineapple is extremely well drained to prevent soggy bottoms. Chill for best results and clean slicing.