There’s nothing quite as disappointing as a dry, lackluster pulled chicken sandwich. I’ve been there, and it’s a kitchen heartbreaker! But after countless trials, I’ve perfected a recipe for
Grilled Pulled Chicken Sandwiches so incredibly juicy and flavorful, you’ll wonder how you ever settled for less.
This isn’t just another sandwich; it’s a testament to the power of low-and-slow cooking, guaranteeing moist, tender chicken every single time.
If you enjoy tender, yogurt-marinated chicken, you’ll also love this chipotle chicken burrito bowl.
The Ultimate Grilled Pulled Chicken Sandwich Experience: What Makes It Special?
Forget everything you thought you knew about pulled chicken. This recipe for grilled pulled chicken sandwiches transforms a simple meal into an unforgettable culinary experience.
For more layered chicken goodness, check out the double decker chicken club.
It’s designed to deliver maximum flavor and an unbelievably tender texture that sets it apart from any other.
The Secret to Unbelievably Juicy Pulled Chicken (Never Dry!)
The core of this recipe’s success lies in its unique braising method: low and slow cooking in ample liquid. This gentle, extended simmer allows the chicken to fully absorb moisture and flavor.
The result is a truly “never dry” juicy pulled chicken that melts in your mouth with every bite.
Beyond Basic BBQ: Layers of Flavor and Freshness
We elevate the classic BBQ chicken sandwich with a thoughtful blend of aromatics and fresh toppings. Smoked paprika adds depth, while vibrant avocado, crisp lettuce, and tangy pickled cucumbers and jalapeños create a dynamic flavor profile.
These elements transform a simple sandwich into a sophisticated and satisfying meal.
Effortless Enjoyment: Quick Prep, Rewarding Results
Despite its luxurious outcome, this is a surprisingly simple recipe to execute. Most of the cooking time is hands-off, allowing the flavors to develop beautifully.
It’s a truly game-changing recipe that rewards minimal effort with maximum deliciousness, making it perfect for weeknights or weekend gatherings.
Essential Gear: Tools for Pulled Chicken Success
Having the right tools makes all the difference when crafting perfect Grilled Pulled Chicken Sandwiches.
Here’s what you’ll need to ensure a smooth cooking process and a delicious outcome.
Standard Kitchen Helpers
Large Pot or Dutch Oven: Essential for searing the chicken and simmering it low and slow.
Cutting Board: For preparing chicken and shredding it once cooked.
Measuring Cups & Spoons: To accurately measure ingredients for consistent results.
Two Forks: The perfect tool for easily shredding the fork-tender chicken.
The Grill Pan Advantage (or Panini Press)
A grill pan or panini press is ideal for toasting the bread, creating those appealing grill marks and a delightful crunch. This step is crucial for textural contrast and preventing sogginess.
If you don’t have one, a regular skillet or even a toaster will work to achieve a perfectly golden, firm bread base.
Gather Your Flavor Makers: Inside This Recipe’s Ingredient List
Every ingredient in this recipe for grilled pulled chicken sandwiches plays a vital role in achieving its signature flavor and texture.
Understanding their purpose will help you appreciate the magic of this dish even more.
The Foundation: Boneless, Skinless Chicken Thighs
Chicken thighs are chosen for their higher fat content, which inherently makes them more flavorful and resistant to drying out during long cooking times.
This ensures our juicy pulled chicken remains moist and tender, even after extended simmering.
Aromatic Base & Spice Boost: Onion, Garlic, and Smoked Paprika
Chopped onion and minced garlic create a deeply aromatic foundation, infusing the braising liquid with savory notes.
Smoked paprika adds a crucial layer of smoky flavor and a beautiful color, enhancing the BBQ profile without being overpowering.
Building the Braising Liquid: Chicken Broth and Your Favorite BBQ Sauce
Chicken broth provides the essential liquid for the low-and-slow braising, keeping the chicken incredibly moist and tender.
Your favorite BBQ sauce, divided for cooking and finishing, coats every strand of chicken with that familiar, tangy-sweet flavor, making it a true BBQ chicken sandwich.
Fresh Finishes & Topping Perfection: Bread, Produce, and Pickles
Whole wheat bread provides a sturdy, wholesome base that stands up well to grilling and hearty fillings.
Fresh lettuce, sliced tomatoes, and creamy avocado add essential freshness, texture, and a healthy balance to the rich chicken.
The pickled cucumber and jalapeño slices introduce a bright, acidic counterpoint, cutting through the richness and adding an irresistible tang and subtle heat.
From Pot to Plate: Your Step-by-Step Guide to Perfect Pulled Chicken Sandwiches
Seasoning & Searing: Building Foundational Flavor
Step 1: Prepare and Season Chicken. Pat the chicken thighs dry with paper towels to ensure a better sear. Season them generously with salt, pepper, and smoked paprika, ensuring even coverage for maximum flavor.
Step 2: Sear the Chicken. Heat 1 tablespoon of olive oil in a large pot or Dutch oven over medium-high heat. Sear the seasoned chicken thighs for 3-4 minutes per side until lightly browned. This crucial searing step develops a rich, complex flavor through the Maillard reaction, which is essential for our flavorful chicken dish.
Remove the chicken and set it aside once seared.
Sautéing Aromatics & Building the Braising Base
Step 3: Cook Aromatics. Add the chopped onion to the same pot, utilizing the residual chicken drippings for extra flavor. Cook the onion until it softens, about 3-4 minutes, then stir in the minced garlic. Continue cooking for another minute until the garlic becomes fragrant. This step builds a savory aromatic foundation for the sauce.
The Low-and-Slow Simmer: Unlocking Tenderness and Moisture
Step 4: Begin the Simmer. Return the seared chicken thighs to the pot. Pour in the chicken broth and 3/4 cup of your favorite BBQ sauce. Bring the mixture to a gentle simmer, ensuring the chicken is mostly submerged in the flavorful liquid.
Step 5: Low and Slow Cooking. Reduce the heat to low, cover the pot tightly, and let it simmer for 1.5 to 2 hours. The chicken is ready when it is absolutely fork-tender chicken and easily shreds with minimal effort. This extended, gentle cooking process is the absolute secret to achieving incredibly juicy and tender pulled chicken that will never disappoint.
Shredding & Sauce Integration: Coating Every Bite
Step 6: Shred the Chicken. Carefully remove the cooked chicken from the pot and place it on a cutting board. Using two forks, shred the chicken into bite-sized pieces. It should fall apart effortlessly due to the low-and-slow cooking.
Step 7: Finish with Sauce. Return the shredded chicken to the pot with the remaining cooking liquid and sauce. Stir in the remaining 1/4 cup of BBQ sauce until all the chicken is thoroughly coated and heated through. This ensures every piece of homemade pulled chicken is bursting with flavor.
Grilling the Bread: The Perfect Crunch
Step 8: Grill the Bread. Lightly brush your bread slices with a touch of olive oil if you desire a richer crust. Grill them on a panini press or grill pan until they achieve a golden-brown color with distinct grill marks. This crucial step provides a delightful textural contrast to the soft pulled chicken, preventing a soggy sandwich.
Assembling Your Masterpiece: Layers of Deliciousness
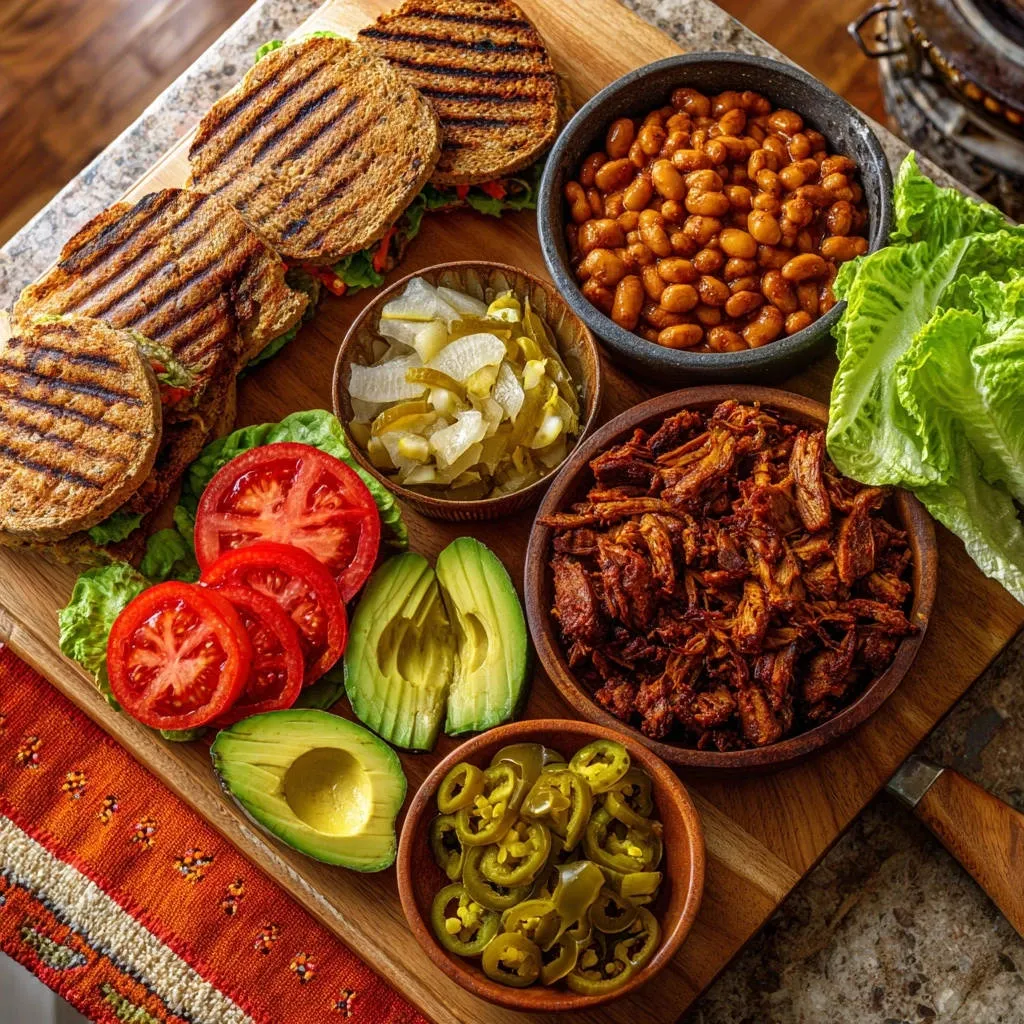
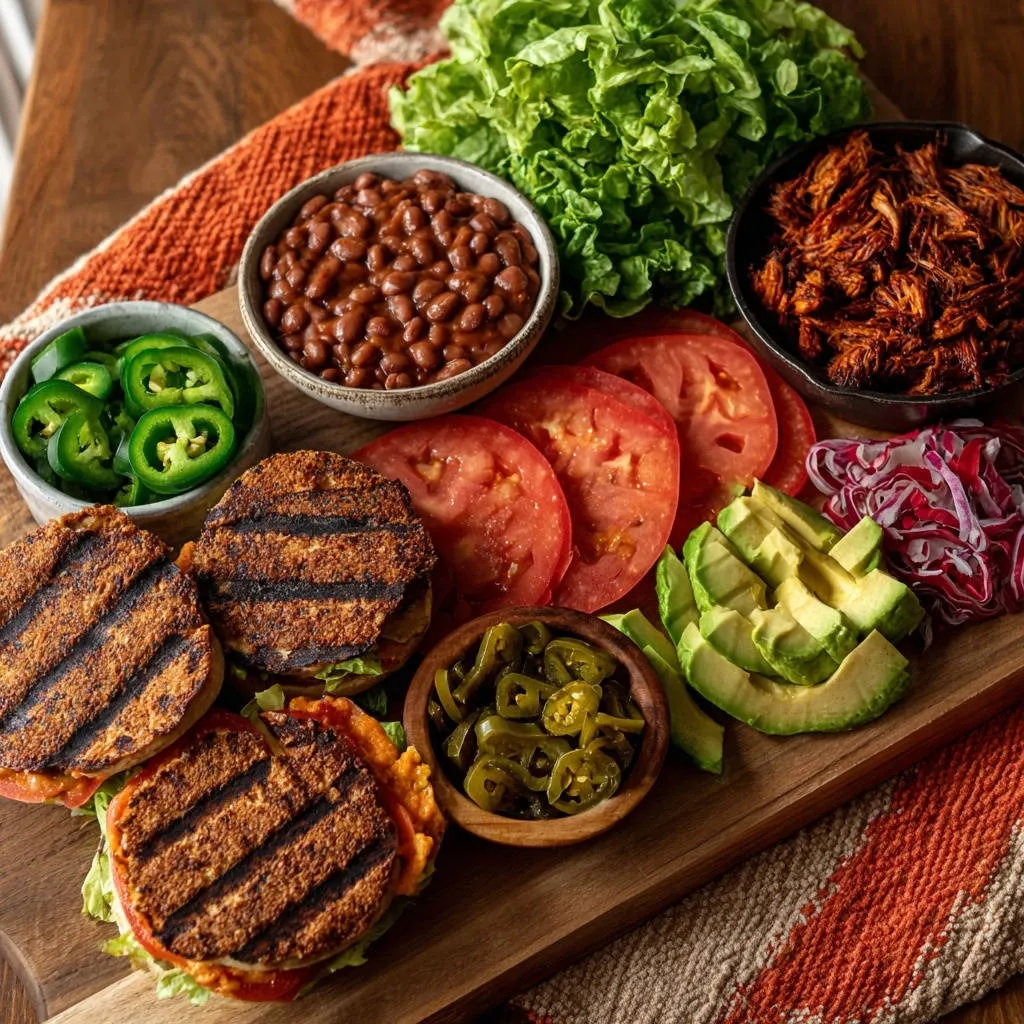
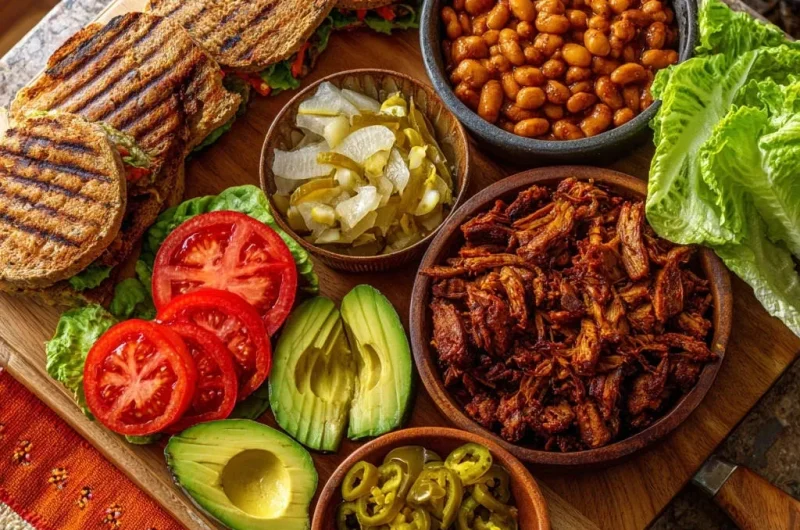
Step 9: Assemble Your Sandwiches. On each grilled bread slice, layer fresh lettuce, sliced tomatoes, creamy avocado, and a generous helping of the juicy pulled chicken. Top with pickled cucumber slices and pickled jalapeños, if using, for that essential tangy kick. Serve your magnificent Grilled Pulled Chicken Sandwiches immediately with a side of baked beans.
Unlock Pro Secrets: Elevate Your Pulled Chicken Sandwich Game
Don’t Rush the Simmer
The extended simmering time isn’t just for tenderness; it allows the chicken to fully absorb the flavors of the broth and BBQ sauce. Patience here truly pays off for a “never dry” result.
Embrace the Sear
While often skipped in slow-cooker recipes, searing the chicken thighs first creates a rich, complex foundational flavor that permeates the entire dish. Don’t skip this crucial step!
Customize Your Sauce for Signature Flavor
Don’t be afraid to experiment with your favorite BBQ sauce. Add a splash of apple cider vinegar for tang, a dash of hot sauce for heat, or a spoonful of brown sugar for sweetness to tailor it to your palate. This elevates your BBQ chicken sandwich to new heights.
Choosing the Right Bread
While whole wheat bread is suggested, consider brioche for a richer sandwich, or a crusty sourdough for more texture. Grilling or toasting the bread is non-negotiable for preventing sogginess and adding a satisfying crunch.
The Magic of Pickled Toppings
The pickled cucumber and jalapeño slices provide a bright, acidic contrast that cuts through the richness of the BBQ chicken. This elevates the sandwich and makes each bite exciting, distinguishing your Grilled Pulled Chicken Sandwiches.
Common Challenges Solved: Ensuring Your Pulled Chicken Sandwiches Are Perfect
Why is my chicken dry?
If your chicken is dry, it’s likely it didn’t simmer long enough, or the heat was too high, causing the liquid to evaporate too quickly. Ensure a gentle simmer and the pot is properly covered for the full duration. This guarantees truly juicy pulled chicken.
My sauce isn’t thick enough.
If the sauce seems too thin after shredding, remove the chicken, increase the heat, and reduce the sauce slightly before returning the chicken. You can also whisk in a cornstarch slurry (1 tsp cornstarch mixed with 1 tsp cold water) and simmer for a minute to thicken.
How to prevent soggy bread?
The key is grilling or toasting your bread until golden and firm. Assemble your sandwiches just before serving to minimize the time the bread sits with the moist pulled chicken and toppings, ensuring a perfect homemade pulled chicken experience.
Your Questions Answered: FAQ About Grilled Pulled Chicken Sandwiches
Can I use chicken breast instead of thighs?
While chicken thighs are recommended for their inherent moisture and richer flavor, you can use boneless, skinless chicken breasts. Be aware they may cook a bit faster and have a slightly drier texture, so monitor cooking time carefully to still achieve fork-tender chicken.
How can I adjust the spice level?
To increase heat, add a pinch of cayenne pepper with the smoked paprika, or stir in a few dashes of your favorite hot sauce with the BBQ sauce. For less heat, simply omit the pickled jalapeños entirely.
Can this recipe be prepared in advance?
Absolutely! The pulled chicken can be made 1-2 days ahead of time. Store it in an airtight container in the refrigerator with a little extra sauce to keep it moist. This makes preparing your Grilled Pulled Chicken Sandwiches a breeze.
What are the best ways to store leftovers?
Store any leftover pulled chicken in an airtight container in the refrigerator for up to 3-4 days. You can also freeze it for up to 3 months. Thaw in the refrigerator overnight before reheating.
What to Have With Your Sandwiches
Complete your meal with these complementary recipes that go well with pulled chicken.
- For a comforting addition, try this creamy shredded chicken tomato soup, a rich and smooth pairing.
- Add a bit of crunch with these crispy garlic parsley bread bites, perfect for soaking up any extra sauce.
Beyond the Bun: Serving Suggestions and Smart Storage
Perfect Pairing: Sides for Your Sandwich
While baked beans are a classic, consider serving your Grilled Pulled Chicken Sandwiches with a fresh coleslaw, potato salad, corn on the cob, or a simple green salad for a complete meal. Each option complements the rich flavors beautifully.
Creative Adaptations: New Ways to Enjoy Pulled Chicken
This versatile pulled chicken isn’t just for sandwiches! Use it in tacos, on top of nachos, as a pizza topping, or mixed into a hearty salad. It’s also fantastic in a cheesy quesadilla or as a protein boost for baked potatoes, offering endless possibilities for this flavorful chicken dish.
Make-Ahead & Reheating Best Practices
To maximize convenience, prepare the pulled chicken ahead of time. When reheating, always add a splash of chicken broth or extra BBQ sauce to prevent it from drying out, warming gently over low heat until heated through. This ensures your juicy pulled chicken remains perfect.
Your Culinary Triumph Awaits: Share Your Grilled Pulled Chicken Sandwiches!
You’ve now mastered the art of truly succulent Grilled Pulled Chicken Sandwiches – a dish that promises to banish dry, disappointing results forever. This recipe isn’t just about food; it’s about bringing joy and flavor to your table with every bite.
So go ahead, fire up the grill, gather your ingredients, and prepare to impress. Don’t forget to share your delicious creations and tag us with your culinary triumphs!
Grilled Pulled Chicken
Course: Main CourseCuisine: AmericanDifficulty: medium4
servings15
minutes2
hours650
kcal120
minutesSay goodbye to dry pulled chicken! This game-changing recipe guarantees incredibly moist and flavorful pulled chicken, slow-simmered to juicy perfection. Layered on grilled bread with fresh toppings, it’s a sandwich experience you won’t forget.
Ingredients
2 lbs boneless, skinless chicken thighs
1 tablespoon olive oil
1 small onion, chopped
2 cloves garlic, minced
1 teaspoon smoked paprika
1/2 teaspoon salt
1/4 teaspoon black pepper
1 cup chicken broth
1 cup your favorite BBQ sauce, divided
8 slices whole wheat bread
Lettuce leaves
2 tomatoes, sliced
1 avocado, sliced
1/2 cup pickled cucumber slices
1/4 cup pickled jalapeño slices (optional)
Baked beans, for serving
Directions
- Pat the chicken thighs dry with paper towels and season them generously with salt, pepper, and smoked paprika.
- Heat 1 tablespoon of olive oil in a large pot or Dutch oven over medium high heat. Sear the chicken thighs for 3-4 minutes per side until lightly browned. This step helps build a foundational flavor. Remove chicken and set aside.
- Add the chopped onion to the pot and cook until softened, about 3-4 minutes. Stir in the minced garlic and cook for another minute until fragrant.
- Return the seared chicken thighs to the pot. Pour in the chicken broth and 3/4 cup of the BBQ sauce. Bring the mixture to a gentle simmer. This low and slow cooking in ample liquid is the absolute secret to incredibly juicy pulled chicken that will never disappoint.
- Reduce the heat to low, cover the pot, and let it simmer for 1.5 to 2 hours, or until the chicken is fork tender and easily shreds. Resist the urge to rush this step; the extended simmering time ensures maximum moisture and flavor absorption.
- Remove the chicken from the pot and place it on a cutting board. Using two forks, shred the chicken into bite sized pieces.
- Return the shredded chicken to the pot with the remaining liquid and sauce. Stir in the remaining 1/4 cup of BBQ sauce until all the chicken is well coated and heated through.
- Lightly brush your bread slices with a touch of olive oil if desired, then grill them on a panini press or grill pan until golden brown with distinct grill marks.
- Assemble your sandwiches: layer grilled bread, lettuce, sliced tomatoes, avocado, a generous helping of the juicy pulled chicken, pickled cucumber slices, and pickled jalapeños if using. Serve immediately with a side of baked beans.
Notes
- The key to incredibly juicy pulled chicken is low and slow simmering for maximum moisture and flavor absorption. Don’t rush this step!