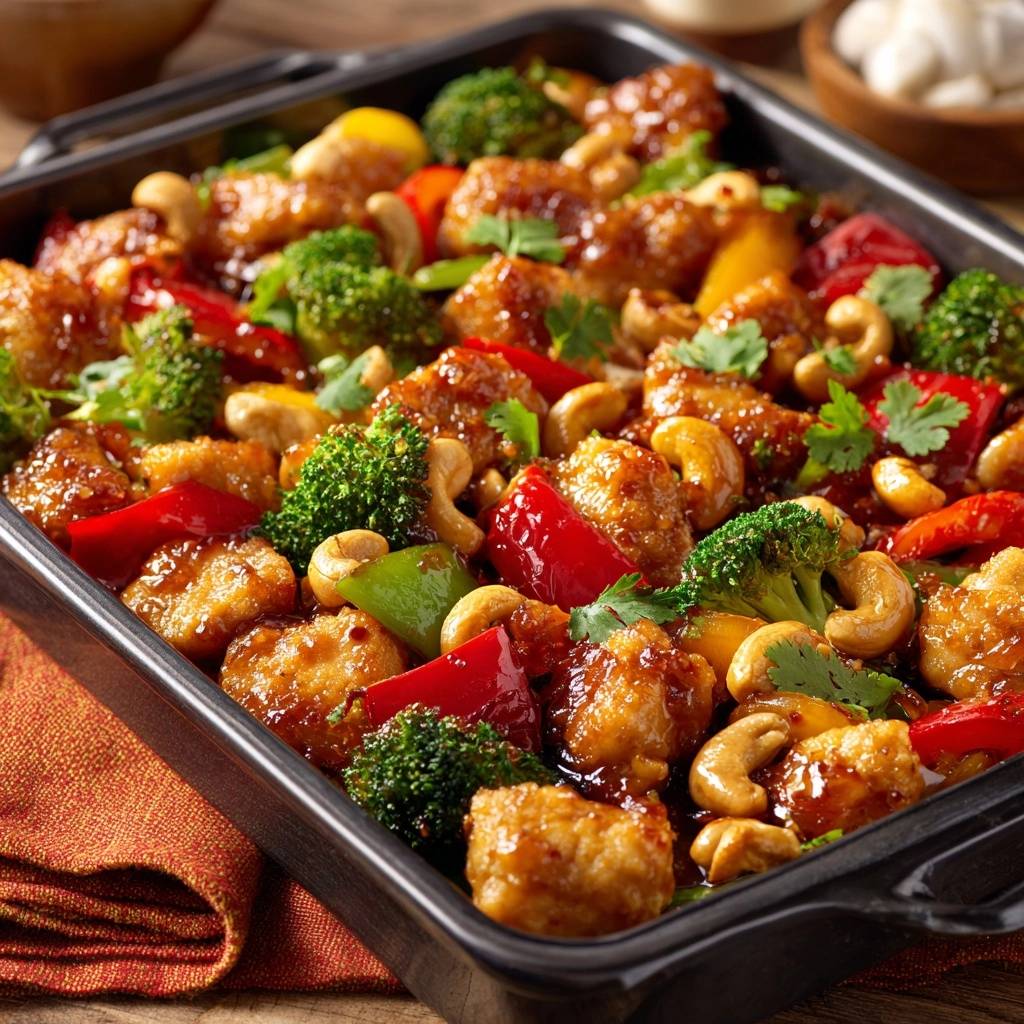
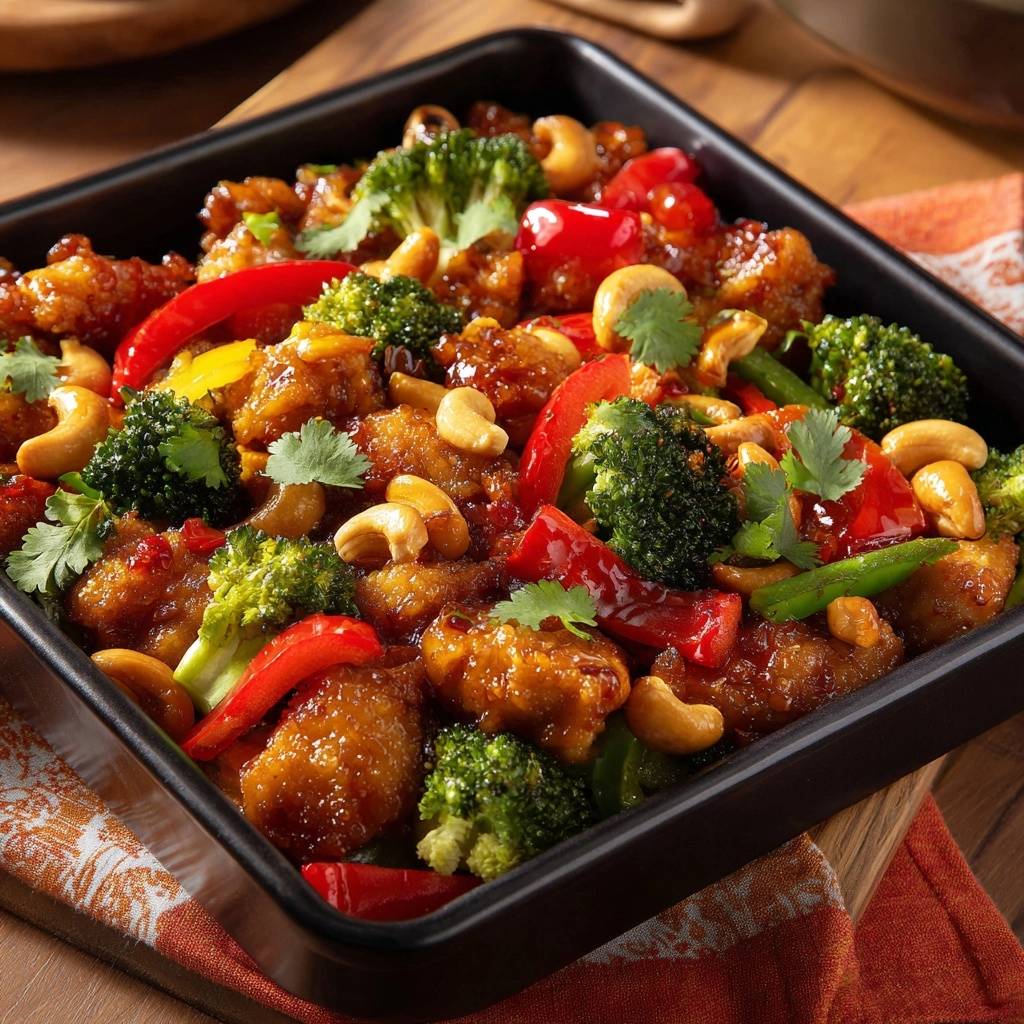
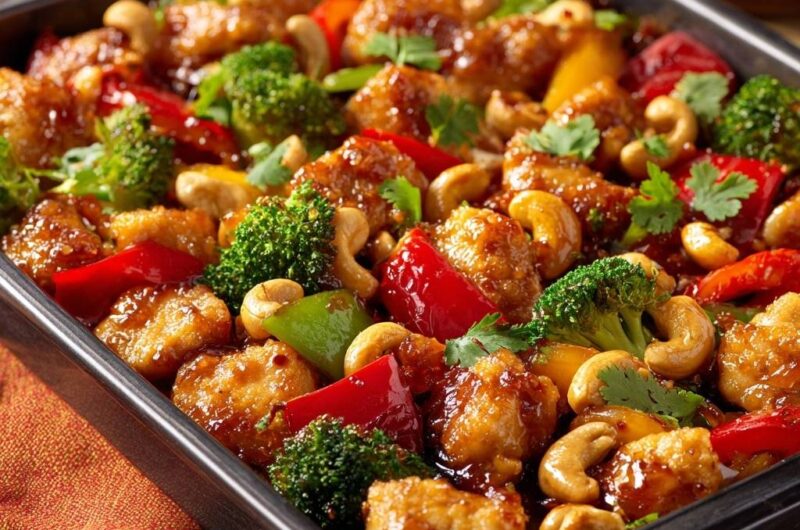
We’ve all been there. You crave that perfect bite of Crispy Cashew Chicken and Broccoli, but the homemade version usually ends up as a pile of soggy, rubbery meat swimming in a thin soup. It’s frustrating when the breading slides right off the chicken the moment it touches the sauce. You want that shatteringly crisp exterior that holds its own against a thick, savory glaze.
For an even fresher take on crispy chicken, explore this crispy Asian chicken salad.
The secret to beating takeout at its own game lies in my “Anti-Soggy Coating Secret.” By using a specific double-dredge method, we create a structural barrier that stays crunchy even after a toss in the wok. You get that incredible sensory contrast between the golden, craggy crust and the juicy, tender chicken inside. Plus, the buttery crunch of whole cashews adds a rich fat profile that balances the vibrant snap of fresh broccoli.
The real trick to success is ensuring your chicken is bone-dry before you start the dredging process. If there’s moisture on the surface of the meat, the cornstarch will turn into a paste rather than a crisp shell. Pat that chicken down with paper towels until it’s completely dry, and you’ll see the coating stick like a dream. Let’s get into the science of why this works so well.
For that same lasting crunch, consider this crispy sesame chicken.
The Science of the Double-Dredge Technique
Most people fail because they use a single layer of flour, which quickly absorbs moisture and turns into mush. However, this recipe utilizes a three-step “dry-wet-dry” system. The initial dusting of plain cornstarch acts as a primer, absorbing any deep-seated moisture and giving the egg something to grip onto.
The beaten egg serves as a protein-rich glue, while the final mixture of cornstarch, flour, and baking powder creates the “craggy barrier.” Cornstarch provides that signature Asian-style crispness, while the all-purpose flour adds the structural integrity needed to withstand the sauce. Therefore, the coating becomes a hardened shell that protects the meat from overcooking while resisting the liquid glaze.
This layered approach ensures that the sauce clings to the nooks and crannies of the crust rather than penetrating it. In addition, the flour provides enough body to the breading so it doesn’t shatter into dust when you bite down. It’s the ultimate defense against the dreaded “soggy stir-fry” syndrome.
Why Baking Powder Changes the Texture
You might be surprised to see baking powder in a stir-fry recipe, but it’s a total game-changer for texture. When the baking powder hits the hot oil, it reacts by releasing tiny CO2 bubbles within the coating. This chemical reaction aerates the breading, creating a lighter, more delicate crunch.
Without it, the cornstarch and flour can sometimes create a hard, dense shell that feels like a workout for your jaw. Instead, the baking powder ensures the crust is full of microscopic air pockets. This increases the surface area, allowing the glaze to coat more of the chicken while maintaining a “shatter” effect that feels professional.
Essential Components for Crispy Cashew Chicken
Quality ingredients are the backbone of this dish, starting with the protein. While many prefer thighs for their fat content, chicken breast is actually the superior choice for this specific frying method. The lean meat provides a firm base that allows the crispy coating to stand out without feeling overly greasy.
Furthermore, the cashews you choose will dictate the final flavor profile. Always opt for whole roasted cashews rather than raw pieces or halves. Roasted cashews have already developed their deep, nutty oils, which release into the pan during the final toss. This adds a layer of richness that raw nuts simply can’t provide.
In addition to the nuts, make sure your ginger and garlic are fresh. Pre-minced jars often have an acidic, metallic aftertaste that can ruin a delicate glaze. Grating fresh ginger directly into the bowl ensures those bright, spicy aromatics are at their peak when they hit the heat.
Selecting and Prepping Fresh Vegetables
The broccoli and bell peppers aren’t just there for color; they provide the essential textural contrast to the fried chicken. When prepping, aim for uniform 1-inch pieces so everything cooks at the same rate. If your broccoli florets are too large, they’ll stay raw while your peppers turn to mush.
The goal is “tender-crisp” vegetables that still have a vibrant, saturated color. You want them to have a distinct snap when you bite into them. This freshness cuts through the richness of the fried coating and the sweetness of the honey-based glaze, keeping the dish balanced and light.
The Savory Glaze: Balancing Five Flavors
A great stir-fry sauce must hit every part of the palate. We use soy sauce for that deep umami base and honey for a natural sweetness that also provides viscosity. The rice vinegar adds the necessary acid to brighten the heavy flavors, while the chili flakes provide a gentle, lingering heat.
Round Out Your Meal
To complement your crispy cashew chicken and broccoli, consider these dishes that bring similar textures or satisfying flavors.
- For a satisfying starch, try these Sesame Glazed Baby Potatoes, which share a delightful sticky glaze.
- For a fresh start, explore Glazed Beef Fresh Spring Rolls for a delightful contrast in textures.
The honey is particularly important because it helps the sauce reduce into a thick, syrupy glaze. As the water evaporates in the hot pan, the sugars in the honey begin to caramelize slightly. This creates a sauce that “clings” to the chicken and vegetables rather than pooling at the bottom of the plate.
Finally, the sesame oil is added for its toasted aroma. Because sesame oil has a low smoke point, we whisk it into the sauce rather than using it for frying. This preserves its delicate flavor, ensuring the finished dish smells as good as it tastes.
Step-by-Step: Achieving the Perfect Shallow Fry
Setting up your dredging station is the first step toward success. Keep one hand for “dry” ingredients and the other for “wet” to avoid your fingers becoming breaded themselves. Toss the chicken in the cornstarch, dip it in the egg, and then press it firmly into the final flour mixture.
You want to see a rough, uneven surface on the chicken before it hits the oil. Those little ridges and bumps are what will become the extra-crispy bits later. If the coating looks too smooth, give it another firm press into the flour mixture to create more texture.
Managing Oil Temperature and Batch Cooking
Temperature control is everything when shallow frying. You want the oil at a steady 350°F; if it’s too cold, the chicken will soak up the oil and become greasy. If it’s too hot, the outside will burn before the inside is cooked through. Use a thermometer if you have one, or look for the oil to shimmer and dance.
Never crowd the pan! Adding too much meat at once causes the oil temperature to plummet. This leads to “boiled” meat rather than fried meat, which ruins the crust. Fry in two or three batches, allowing the oil to come back up to temperature for a minute between each round.
As the chicken fries, look for a deep golden-brown color. It should take about 3 to 4 minutes per side. Use tongs to flip the pieces gently so you don’t knock off that precious crust you worked so hard to build.
The Wire Rack Cooling Method
This is a non-negotiable rule: do not drain your fried chicken on paper towels. While it seems logical to soak up the oil, paper towels trap steam underneath the meat. That steam immediately softens the bottom of the crust, turning your crispy masterpiece into a soggy disappointment.
Instead, place the fried chicken on a wire cooling rack set over a baking sheet. This allows for 360-degree airflow, letting the steam escape from all sides. This “sets” the coating and ensures the chicken stays shatteringly crisp while you finish the rest of the meal.
Executing the High-Heat Vegetable Stir-Fry
Once the chicken is resting, carefully pour out the excess oil, leaving just about a tablespoon in the pan. You want the pan to remain very hot for the vegetables. Toss in the broccoli and peppers and keep them moving constantly to prevent scorching.
This “flash-sear” method locks in the vibrant green and red colors of the vegetables. You only need about three minutes here. The vegetables should be slightly charred on the edges but still firm in the center. This high-heat approach ensures they don’t release too much water, which would thin out your sauce.
The Flash-Coat: Timing the Final Toss
This is the most critical phase of the entire recipe. Once your sauce has bubbled and reduced into a thick syrup, it’s time for the “Flash-Coat.” You only have a 20 to 30-second window to get this right. If the chicken sits in the sauce too long, the crust will eventually soften.
Add the crispy chicken and the cashews back into the pan. Use a folding motion to quickly coat every piece in the glaze. You aren’t “cooking” the chicken anymore; you are simply dressing it. As soon as everything is glistening, pull the pan off the heat immediately.
The goal is to have the chicken coated but not submerged. By moving quickly, you preserve that “shatter” effect of the crust while ensuring every bite is packed with the savory, sweet flavors of the glaze. Serve it the second it hits the plate!
Troubleshooting Common Stir-Fry Issues
If your coating falls off, it’s usually because the chicken was too wet or the oil wasn’t hot enough. Ensure you’re pressing the flour mixture firmly into the meat to create a solid bond. If the sauce is too thin, let it bubble for another minute before adding the chicken; it needs to look like warm maple syrup.
Mushy broccoli is another common pitfall. This usually happens if you add the sauce too early or cook the vegetables on low heat. Keep the flame high and the movements fast. If you follow these cues, you’ll avoid the most common mistakes and end up with a restaurant-quality meal.
Optimal Pairings for Crispy Cashew Chicken and Broccoli
To make the most of that delicious glaze, serve this over a bed of long-grain jasmine rice. The floral aroma of the rice complements the ginger and garlic perfectly. If you want a nuttier profile, brown rice is a fantastic hearty alternative that stands up well to the bold sauce.
For a lighter option, try serving the chicken over chilled rice noodles or even in large lettuce cups. A simple side of smashed cucumber salad with a splash of rice vinegar can also provide a cooling, refreshing break from the savory heat of the main dish.
Storage and Reheating for Maximum Crunch
Fried foods are always best eaten immediately, but you can definitely save leftovers. Store them in an airtight container in the fridge for up to three days. However, whatever you do, stay away from the microwave! The microwave will turn the coating into a rubbery mess.
To rescue the crunch the next day, use an air fryer or a standard oven. Heat it to 400°F and bake the chicken for about 5 to 7 minutes. This high, dry heat will re-crisp the coating and melt the glaze back into a delicious syrup, making it almost as good as the first day.
Expert Tips for Customizing Heat and Flavor
If you’re a fan of serious heat, try adding a teaspoon of crushed Szechuan peppercorns to the sauce. This adds a numbing, citrusy spice that is classic in many regional stir-fries. Alternatively, you can add fresh orange zest to the glaze for a bright, citrus-forward profile that pairs beautifully with the cashews.
Don’t be afraid to swap the nuts, either. While cashews are traditional, toasted almonds or even macadamias offer different fat profiles and textures. Just make sure whatever nut you use is roasted beforehand to ensure the best possible flavor and crunch in every single bite.
How do I keep the chicken from getting soggy?
The key is the double-dredge technique and the wire rack. By using cornstarch and baking powder, you create a moisture-resistant shell. Cooling the chicken on a wire rack instead of paper towels prevents steam from softening the crust. Finally, only toss the chicken in the sauce for 20 seconds right before serving to ensure it stays crispy.
Can I use a different vegetable instead of broccoli?
Absolutely! Snap peas, bok choy, or sliced carrots work beautifully in this recipe. Just remember to cut them into uniform sizes so they cook at the same rate as the bell peppers. The goal is always to maintain that “tender-crisp” texture, so adjust your stir-fry time based on the density of the vegetable you choose.
What is the best way to reheat leftovers?
Avoid the microwave at all costs, as it will make the breading rubbery. The best method is using an air fryer at 400°F for about 5 minutes. If you don’t have an air fryer, a conventional oven at 400°F on a baking sheet will also work. This dry heat helps re-crisp the coating and brings the sauce back to life.
Why did my sauce not thicken properly?
The sauce thickens through reduction, meaning the water needs to evaporate so the honey and soy sauce can become syrupy. If your sauce is too thin, let it bubble on medium-high heat for an extra minute or two before adding the chicken back in. It should be thick enough to coat the back of a spoon easily.
Can I make this gluten-free?
Yes, you can easily adapt this recipe. Replace the all-purpose flour with a gluten-free 1-to-1 baking flour and ensure your soy sauce is replaced with tamari. Since cornstarch is naturally gluten-free, the core of the crispy coating remains the same. The texture will still be incredibly crunchy and delicious.
Is it okay to use chicken thighs instead of breasts?
You can use boneless, skinless chicken thighs if you prefer darker meat. Thighs are more forgiving and stay juicier, but they may take an extra minute or two to cook through during the shallow fry. Make sure to trim any excess fat so the coating can adhere properly to the meat surface.
Crispy Cashew Chicken
Course: Main CourseCuisine: Asian FusionDifficulty: medium4
servings15
minutes15
minutes480
kcal30
MinutesA high-heat stir-fry featuring a double-dredge technique to ensure chicken stays crispy. Combined with fresh broccoli, bell peppers, and roasted cashews in a thick ginger and garlic sauce.
Ingredients
1.5 lbs chicken breast, cut into 1-inch chunks
2 cups broccoli florets
1 red bell pepper, chopped
1 yellow bell pepper, chopped
1 cup whole roasted cashews
1/2 cup cornstarch
1/4 cup all-purpose flour
1 teaspoon baking powder (for extra aeration/crunch)
2 large eggs, beaten
1/2 cup vegetable oil (for shallow frying)
1/2 cup soy sauce
2 tablespoons honey
1 tablespoon rice vinegar
1 tablespoon ginger, minced
3 cloves garlic, minced
1 teaspoon chili flakes
1 teaspoon sesame oil
Fresh cilantro for garnish
Directions
- The Double-Dredge: In one bowl, place 1/4 cup cornstarch. In a second bowl, beat the eggs. In a third bowl, whisk together the remaining 1/4 cup cornstarch, flour, and baking powder. Toss chicken in the plain cornstarch, dip into the egg, then press firmly into the flour/cornstarch mixture. This creates a structural, craggy barrier that prevents sogginess.
- The Shallow Fry: Heat 1/2 cup oil in a large skillet or wok over medium-high heat until shimmering (350°F). Add the chicken in batches to avoid crowding. Fry for 3-4 minutes per side until deep golden brown and very crisp. Remove chicken and set aside on a wire rack to maintain airflow; do not use paper towels as the steam will soften the crust.
- The Vegetables: Carefully pour out all but 1 tablespoon of the hot oil. Add the broccoli and peppers to the pan. Stir-fry for 3 minutes until tender-crisp and vibrant.
- The Glaze: In a small bowl, whisk soy sauce, honey, rice vinegar, ginger, garlic, chili flakes, and sesame oil. Pour the sauce into the pan with the vegetables. Let it bubble and reduce for 1-2 minutes until it becomes a thick, syrupy glaze.
- The Flash-Coat: Add the crispy chicken and cashews back into the pan. Toss quickly for only 20-30 seconds. This ensures the chicken is glazed but the crust does not have time to absorb moisture and soften.
- Finish: Garnish with fresh cilantro and serve immediately.
Notes
- Use a wire rack instead of paper towels to drain the chicken to prevent steam from softening the crust. The baking powder in the dredge is essential for extra aeration and crunch.