Listen to that sound. It is a sharp, high-shatter snap that echoes when you bite into a perfectly fried kettle chip. Most people struggle with homemade sweet potato chips because they end up with something leathery, chewy, or—even worse—burnt on the edges and raw in the middle.
You’ve likely tried the oven method and felt the disappointment of a soggy center. This recipe abandons the “healthy bake” for a traditional kettle-fry technique that delivers a vibrant orange hue and a bubbled, brittle texture. We are chasing that specific crunch that only comes from controlled frying and a few professional secrets.
The real secret to the “Anti-Soggy” promise isn’t just the oil temperature; it’s the cornstarch dust. By applying a microscopic layer of starch to the sliced tubers, we create a barrier that repels moisture and invites the oil to create tiny, crispy micro-bubbles on the surface. This is how you get that professional, store-bought texture in your own kitchen.
For another crispy treat, check out how to achieve crispy fried onion strings using a similar coating method.
The Science of the Kettle-Style Crunch
Sweet potatoes are fundamentally different from the Russets used for standard potato chips. They contain significantly more natural sugar, which means they want to caramelize and burn long before the water inside has evaporated. If you fry them like a regular potato, you’ll get a bitter, dark brown mess.
Kettle-style frying involves a specific temperature curve. By starting at a slightly lower temperature than French fries, we allow the moisture to escape the cellular structure of the sweet potato. This dehydration happens before the sugars reach their burning point, resulting in a chip that is crisp all the way through.
The cornstarch plays a vital role in this chemical transformation. As the chip hits the oil, the starch instantly dehydrates and hardens, forming a rigid lattice. This lattice supports the thin slice of potato, preventing it from collapsing into a limp, oily rag and instead creating that signature “shatter” when you take a bite.
Essential Components for Kettle-Style Sweet Potato Chips
Quality starts with the tuber itself. I recommend looking for Jewel or Garnet sweet potatoes. These varieties have a deep orange flesh and a consistent moisture content that reacts predictably to the hot oil. Avoid the lighter-skinned “Jersey” types for this specific recipe, as they can be too starchy and dry.
Beyond the potato, the salt choice is paramount. Fine sea salt is the gold standard here because the tiny grains have more surface area to grip the nooks and crannies of the curled chip. Standard table salt is often too heavy and simply slides off to the bottom of the bowl.
Smoked paprika and garlic powder provide the necessary savory counterpoint to the potato’s natural sugars. The paprika adds an earthy depth that mimics the flavor of a wood-fired snack, while the garlic powder provides a punchy finish that keeps you reaching back into the bowl for more.
Selecting the Right Frying Medium
You need an oil that can stand the heat without breaking down or imparting a heavy flavor. Grapeseed oil is a fantastic choice for its clean finish, but Peanut oil is the traditional favorite for kettle chips because of its high smoke point and excellent heat stability.
Avoid unrefined oils like extra virgin olive oil or unrefined coconut oil. These have low smoke points and will smoke and develop “off” flavors at the temperatures required for frying. You want a neutral oil that lets the flavor of the sweet potato and the spices shine through clearly.
The Mandoline: Precision Slicing for Uniformity
If you try to slice these with a chef’s knife, you are setting yourself up for failure. Even the best knife skills can’t produce the 1/16th-inch consistency required for a perfect batch. A mandoline slicer is your best friend here, ensuring every single chip is the exact same thickness.
Uniformity is the key to a successful fry. If one chip is twice as thick as the one next to it, the thin one will burn while the thick one stays gummy. Always use the safety guard on your mandoline; sweet potatoes are dense and can be slippery, so protect your fingers at all costs.
The Cold Water Soak: Removing Surface Starch
Once you have your beautiful, thin rounds, they need a bath. Placing the slices in ice-cold water for 30 minutes is a non-negotiable step. If you skip this, the surface starch will act like glue in the fryer, causing your chips to clump together into a giant, oily mass.
As the potatoes soak, you’ll notice the water becoming cloudy. That cloudiness is the excess starch leaving the potato. By removing this layer, you ensure that the chips stay individual and develop a clean, crisp exterior rather than a sticky, gummy one.
Eliminating Moisture Before the Fry
Moisture is the absolute enemy of a crispy chip. If you drop a damp potato slice into hot oil, the water has to turn into steam before the frying can even begin. This steam softens the potato and prevents it from ever reaching that brittle state we want.
After draining the slices, lay them out in a single layer between two clean, lint-free kitchen towels. Press down firmly to wick away every drop of water. The slices should feel “bone-dry” to the touch and slightly tacky before you move on to the dusting phase.
The Cornstarch Dusting Technique
Now comes the “Anti-Soggy” secret. Toss your dry slices in a large bowl with a tablespoon of cornstarch. You aren’t looking for a thick breading; you want a very thin, almost invisible film that coats each piece. I like to use my hands to gently separate any slices that are sticking together.
This cornstarch layer acts as a secondary moisture barrier. It also creates a micro-textured surface that the oil can “grip,” leading to those beautiful little bubbles and ridges you see on high-end kettle chips. It is the difference between a flat, boring chip and a professional-grade snack.
Step-by-Step: Frying for Maximum Crispness
Heat your oil in a heavy-bottomed pot to 325°F. A Dutch oven is perfect for this because the thick cast iron holds heat exceptionally well, preventing the temperature from plummeting when you add the cold potatoes. Use a digital thermometer to stay precise.
Gently drop the slices into the oil one by one. You’ll see an immediate rush of bubbles—this is the remaining moisture escaping. Use a spider strainer to gently move the chips around during the first minute. This agitation helps them curl and prevents them from nesting together.
Managing Batch Sizes and Oil Recovery
Do not get impatient and overcrowd the pot. If you add too many chips at once, the oil temperature will drop too low, and the chips will absorb oil rather than frying in it. This results in a greasy, heavy chip that won’t crisp up as it cools.
Watch the bubbles. As the chips get closer to being done, the vigorous bubbling will slow down significantly. This is your signal that the moisture is almost gone. Once the edges are just starting to turn a deeper golden brown, it’s time to pull them out.
The Spider Strainer and Initial Drainage
A spider strainer is superior to a slotted spoon because it allows the oil to drain away instantly without trapping it against the chip. Transfer the hot chips to a wire rack set over a paper towel. This is a crucial detail that many home cooks miss.
If you drain chips directly onto a flat paper towel, the bottom of the chip will “sweat” as it cools, trapped against the oil-soaked paper. A wire rack allows air to circulate around the entire chip, ensuring it stays crisp on both sides as the internal structure sets.
The Seasoning Window: Timing and Adhesion
You have a “Golden Window” of about 30 seconds after the chips leave the oil. While they are still glistening with a tiny bit of residual heat and oil, toss them into a large bowl and sprinkle your spice mix over them. The oil acts as a natural adhesive for the salt and paprika.
If you wait until the chips are cool to season them, the spices will simply fall to the bottom of the bowl. Give the bowl a few gentle tosses to ensure every chip gets a light dusting of flavor. Be gentle here; the chips are fragile and can break easily if handled roughly.
Troubleshooting Common Sweet Potato Chip Failures
If your chips are turning dark brown or black very quickly, your oil is likely too hot. Sweet potatoes have high sugar content, and those sugars will burn at 350°F or higher. Keep your oil strictly around 325°F to allow for a slower, more even fry.
If the centers of your chips are still soft or chewy after they have cooled, they weren’t in the oil long enough or they were sliced too thick. Next time, try a slightly longer fry time at a marginally lower temperature, or check your mandoline setting to ensure you are hitting that 1/16th-inch mark.
Optimal Storage to Maintain Texture
Never, ever bag your chips while they are still warm. Even a tiny amount of residual heat will create condensation inside the container, which will turn your crispy masterpieces into a soggy mess within minutes. Let them sit on the wire rack for at least 10 to 15 minutes.
Once they are completely at room temperature, store them in an airtight glass jar or a high-quality zip-top bag. Sweet potato chips are more sensitive to humidity than white potato chips because of their sugar content, so keep them in a cool, dry pantry for the best results.
Flavor Variations Beyond Smoked Paprika
Once you master the base technique, you can get creative with the flavors. A “Hot Honey” dust made from honey powder and cayenne is incredible. Alternatively, try a “Rosemary and Sea Salt” version by tossing finely minced fresh rosemary into the oil for the last 30 seconds of frying.
What to Try Next
If you’re in the mood for more sweet potato goodness, consider these recipes.
- For another way to enjoy sweet potatoes with herbs, try these rosemary sea salt sweet potato fries, which bring a similar savory note.
- If you like your sweet potatoes with a bit more spice, these Mexican loaded sweet potatoes offer a flavorful contrast.
For a dessert-style snack, skip the garlic and paprika and toss the hot chips in a mixture of cinnamon and superfine sugar. Just remember to keep your seasonings dry. Adding wet sauces or glazes after frying will immediately destroy the crunch you worked so hard to achieve.
If you’re enjoying this way of frying, you might also like to try gooey pizza egg rolls.
Expert Tips for Professional Results
If you want to go the extra mile, try the “double-fry” method. Fry the chips at 300°F for two minutes, remove them, let them cool, and then flash-fry them at 350°F for 30 seconds. This creates an even more intense, bubbly crunch, though it requires more attention to prevent burning.
Don’t throw away the leftover oil! After it cools, strain it through a coffee filter to remove any stray bits of potato or starch. This oil now has a subtle, sweet aroma and can be used for roasting vegetables or even making a savory vinaigrette for a fall salad.
Troubleshooting Oil Temperature Fluctuations
When you add a batch of potatoes, the oil temperature will naturally dip. Don’t immediately crank the heat to high. Instead, proactively increase the flame slightly just before you add the potatoes, then dial it back once the oil stabilizes. This prevents the “yo-yo” effect of overheating and underheating.
A heavy Dutch oven is your best insurance policy against these fluctuations. The thermal mass of the heavy metal acts as a buffer, making the frying process much more forgiving than it would be in a thin stainless steel pot.
Achieving the Perfect Curled Edge
The “kettle” look is defined by chips that are folded, curled, and twisted. To achieve this, don’t just let the chips sit in the oil. Use your spider strainer to gently push them down and swirl them around during the first minute of frying. This movement encourages the edges to warp and fold as the moisture leaves the cells.
Frequently Asked Questions
Can I bake these instead of frying?
You can bake them, but the texture will be fundamentally different. Baking relies on dry air to remove moisture, which often results in a leathery or “chewy-crisp” texture rather than the brittle, high-shatter snap of a fried kettle chip. If you must bake, use a very low temperature (250°F) for a long time, but it won’t truly replicate this specific recipe.
Why are my chips turning dark brown so quickly?
This is almost always due to the natural sugars in the sweet potato caramelizing too fast. This happens if your oil is too hot (above 330°F) or if you are using a variety of sweet potato with an exceptionally high sugar content. Stick to the 325°F target and watch the chips closely; they can go from perfect to burnt in about 15 seconds.
Can I use yams instead of sweet potatoes?
In the US, what are labeled as “yams” are usually just soft-variety sweet potatoes (like Garnets), which work perfectly. However, true botanical yams are much starchier and drier, similar to a yucca root. If you find actual African yams, they will be much crunchier but will lack the characteristic sweetness and orange color of this dish.
How do I keep the oil clean between batches?
Use a fine-mesh skimmer or your spider strainer to remove any small bits of potato or clumps of cornstarch that break off during the fry. If these bits stay in the oil, they will burn and impart a bitter, scorched flavor to your subsequent batches of chips.
Is the cornstarch absolutely necessary?
While you can fry sweet potatoes without it, the cornstarch is the “secret sauce” for that specific kettle-style texture. It creates a microscopic physical barrier that helps the chip stay rigid and develop those tiny surface bubbles. Without it, the chips are more likely to be flat and may lose their crispness faster once stored.
Sweet Potato Chips
Course: SnackCuisine: AmericanDifficulty: medium4
servings20
minutes15
minutes185
kcal35
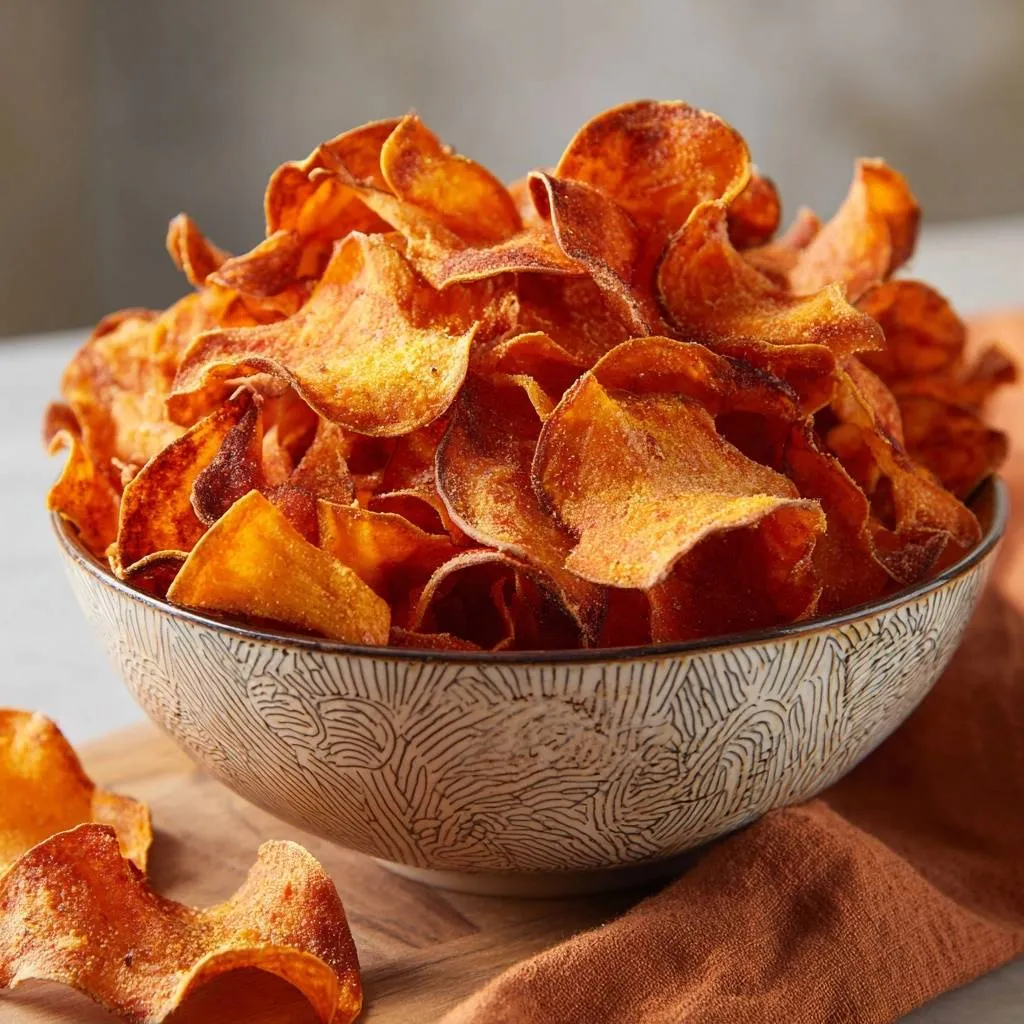
MinutesThese kettle-style sweet potato chips achieve a deep golden, bubbled texture and curled edges through a specific soaking and cornstarch-coating method. Unlike leathery baked versions, these are fried to create a brittle, vibrant orange snack with a smoky garlic seasoning.
Ingredients
2 large sweet potatoes, scrubbed (peeling optional)
1 tablespoon cornstarch
1 teaspoon fine sea salt
1/2 teaspoon smoked paprika
1/2 teaspoon garlic powder
Neutral oil for frying (Grapeseed, Peanut, or Canola)
Directions
- Use a mandoline slicer to cut the sweet potatoes into very thin, uniform rounds (about 1/16th inch).
- Place the slices in a large bowl of ice-cold water for 30 minutes. This is the critical step to remove excess surface starch, which prevents the chips from sticking together and ensures they don’t turn gummy.
- Drain the slices and pat them extremely dry between two clean kitchen towels. Moisture is the enemy of the “Anti-Soggy” promise; any water left will cause the oil to splatter and the chips to steam.
- In a large dry bowl, toss the dried slices with the cornstarch until a very thin, almost invisible film covers each slice. This creates the micro-textured “bubbles” seen in the image.
- Fill a heavy-bottomed pot or Dutch oven with 2 inches of oil. Heat to 325°F (165°C).
- Fry the slices in small batches to avoid crowding. Stir gently with a slotted spoon to ensure they curl and don’t stick. Fry for 3-5 minutes until the bubbling slows down and the edges are slightly browned.
- Remove with a spider strainer and drain on a wire rack set over a paper towel.
- While hot, immediately toss the chips in a bowl with the salt, smoked paprika, and garlic powder.
- Allow the chips to cool completely for 10 minutes. They will transition from slightly flexible to perfectly brittle and crisp as they reach room temperature. Store in an airtight container.
Notes
- The 30-minute ice water soak is critical to remove surface starch. Ensure slices are extremely dry before frying to prevent steaming and oil splattering. Chips will continue to crisp up as they cool for 10 minutes.