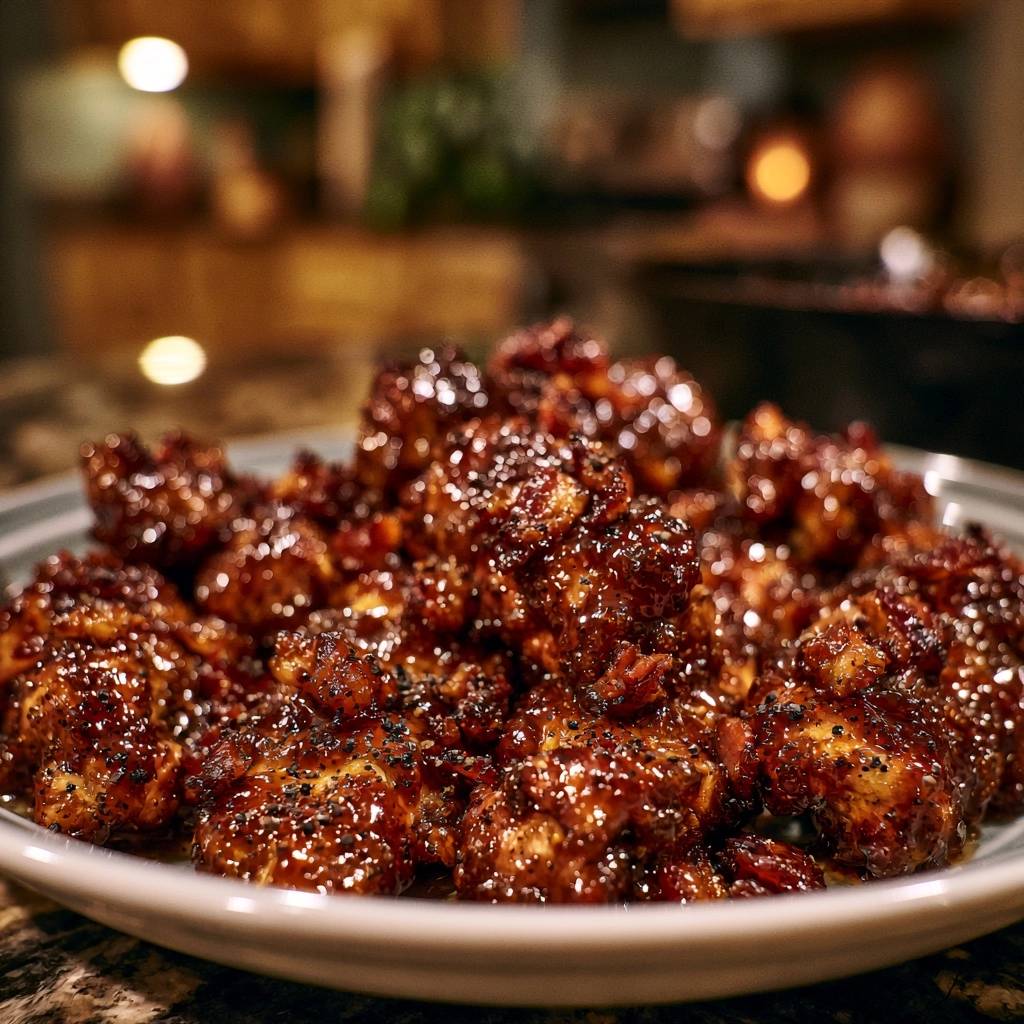
We’ve all experienced the heartbreak of ordering “crispy” takeout only to have it arrive as a soggy, lukewarm mess. You bite into a piece of chicken expecting a satisfying crunch, but instead, you get a sponge-like texture that’s soaked up every drop of sauce. It’s frustrating because that contrast between a shattering crust and a sticky glaze is exactly what makes this dish a classic.
The secret to avoiding this culinary tragedy lies in my “Anti-Soggy Coating Secret.” By rethinking how we dredge and fry, we can create a structural barrier that stands up to even the thickest sauces. You’re going to love the way the pungent, floral heat of the black pepper cuts through the sweet, tacky glaze while the chicken stays incredibly loud-crunchy underneath.
To pull this off like a pro, you need to understand that moisture is the enemy of the crunch. The real trick is using a specific ratio of starches and a leavening agent to create tiny air pockets in the crust. These pockets act as a buffer, ensuring your Sticky Black Pepper Glazed Chicken Bites stay crispy from the first bite to the very last.
The Science of Lasting Crunch
Most home cooks reach for a bag of all-purpose flour and call it a day, but that’s why their chicken turns soft so quickly. Flour contains gluten, which can become tough and bread-like when it meets moisture. By mixing cornstarch with flour, we dilute those proteins. The cornstarch provides a crisp, glass-like finish that doesn’t soften as easily when the sauce hits it.
However, the real MVP here is the baking powder. When the chicken hits the hot oil, the baking powder reacts and releases carbon dioxide. This creates millions of microscopic bubbles throughout the coating. Instead of a dense, solid shell that traps steam, you get a light, aerated crust that stays rigid and airy.
Think of it as building a honeycomb structure around the meat. This airy texture provides more surface area for the glaze to cling to without allowing the liquid to penetrate the core. It’s the difference between a heavy, doughy coating and a professional-grade fry that shatters when you bite down.
Why Chicken Thighs Outperform Breasts
While you might be tempted to use chicken breasts, I strongly urge you to stick with boneless, skinless thighs. Frying requires high heat to achieve that golden-brown exterior. Chicken breasts are lean and dry out almost instantly once they pass the 165°F mark, leaving you with “woody” or stringy meat inside your crispy shell.
Thighs have a higher fat content and more connective tissue, which means they stay succulent and juicy even under intense heat. This fat acts as an internal basting liquid. As the exterior crisps up, the interior stays tender, providing a beautiful contrast in every single bite.
Essential Components for the Black Pepper Glaze
A great glaze is all about balance, and it starts with your soy sauce choice. Always use low-sodium soy sauce for this recipe. As the sauce simmers and reduces, the salt concentrates. If you start with full-sodium soy, the final result will be aggressively salty and nearly inedible once it thickens into a syrup.
To get that iconic “tacky” texture that coats the chicken like a second skin, we use a combination of honey and brown sugar. Honey provides a smooth, viscous body and a floral sweetness, while the molasses in the brown sugar adds a deep, caramelized complexity. Together, they create a glaze that is thick enough to hang onto the chicken without soaking into the crust.
Selecting and Cracking the Peppercorns
Please put away the pre-ground table pepper for this one. That fine dust provides a one-dimensional, bitter heat that will overwhelm the dish. For this recipe, we want “cracked” peppercorns. These larger fragments provide little bursts of spicy, citrusy heat that pop in your mouth rather than a uniform burn.
You can achieve this easily by placing whole peppercorns in a plastic bag and smashing them with the bottom of a heavy cast-iron skillet. Alternatively, use a mortar and pestle for a few seconds. You’re looking for a coarse texture where you can still see the white centers of the peppercorns. This adds a visual element and a sophisticated flavor profile that pre-ground pepper simply can’t match.
The Double-Dredge Technique Explained
The double-dredge is the most important technical step in this entire process. First, you’ll toss your chicken cubes in a beaten egg. This acts as the “glue.” Then, you move them into the starch and flour mixture, pressing firmly to make sure every nook and cranny is covered. But don’t head to the stove just yet.
You must let the coated chicken sit for about 5 minutes. This is called the “hydration rest.” During this time, the dry starches absorb the moisture from the egg and the chicken’s surface. This creates a paste-like bond that prevents the coating from sloughing off in the oil. If you fry immediately, the coating often separates from the meat, leaving you with “bald” spots.
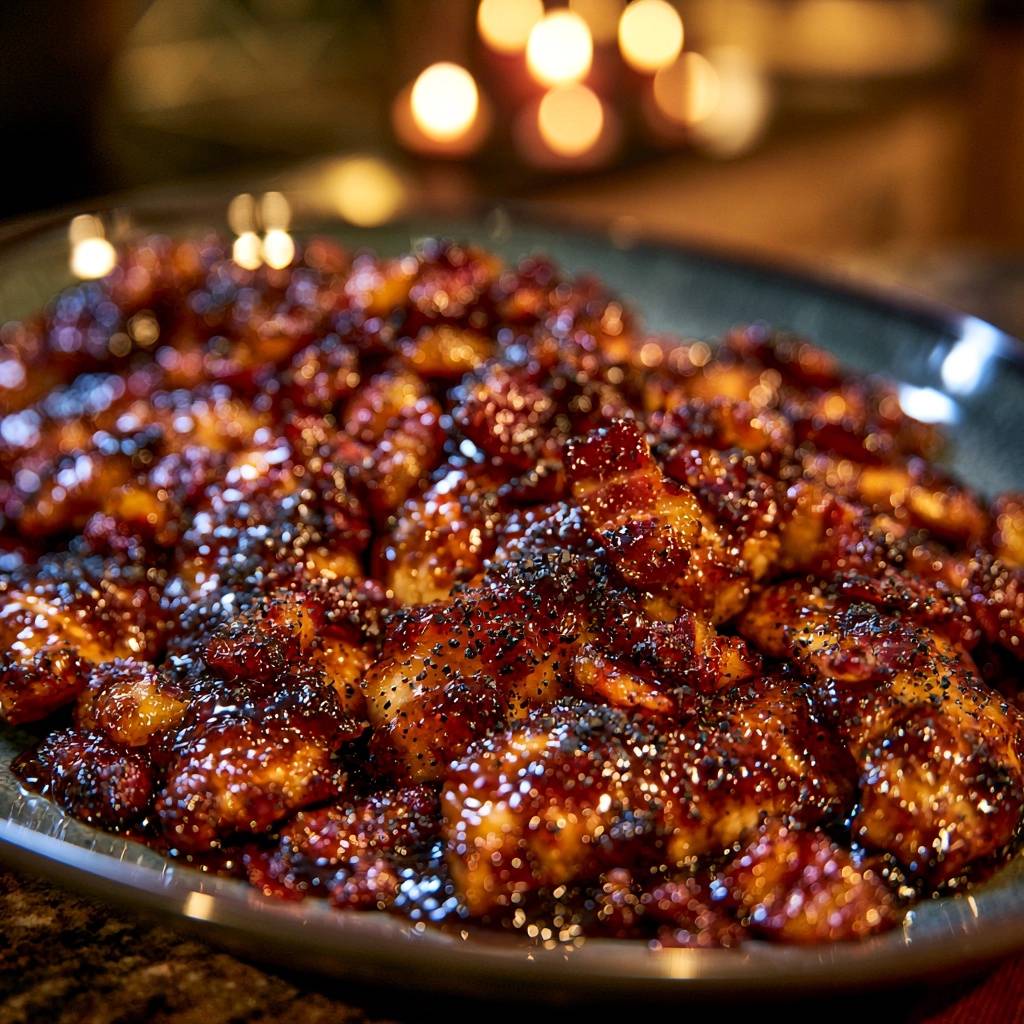
After the rest, give the chicken one final toss in the leftover flour mix. This second coating sticks to the hydrated first layer, creating those craggy, irregular bits that turn into extra-crunchy “nuggets” of flavor. It’s these jagged edges that catch the glaze and provide the ultimate texture.
Frying for Maximum Texture Retention
Temperature control is the difference between greasy chicken and crispy chicken. You want your oil at a steady 350°F. If the oil is too cold, the chicken will soak it up like a sponge. If it’s too hot, the outside will burn before the inside is safe to eat. Use a clip-on thermometer to stay precise.
Never overcrowd the pan. When you add cold meat to hot oil, the temperature drops instantly. If you put too much in at once, the oil won’t recover fast enough, and the chicken will end up steaming in its own juices rather than frying. Work in batches to keep that oil bubbling vigorously around every piece.
Once the chicken is deep golden brown, move it to a wire cooling rack set over a baking sheet. Never drain fried chicken on paper towels! Paper towels trap steam underneath the meat, which quickly turns your hard-earned crust into a soggy mess. A wire rack allows air to circulate 360 degrees around the chicken, keeping it dry and crisp.
Reducing the Glaze to a Syrupy Consistency
The glaze needs to be reduced in a separate saucepan while you fry. You’re looking for the “nappe” stage. This is a fancy French term that just means the sauce is thick enough to coat the back of a spoon. If you run your finger through the sauce on the spoon, the line should stay clean and not fill back in.
By simmering the soy sauce, vinegar, and sugars, you are evaporating the water. This is your final insurance policy. A watery sauce will immediately penetrate the chicken’s crust and make it soft. A reduced, syrupy glaze sits on top of the crust, keeping the interior dry while providing maximum flavor impact.
Assembling the Sticky Black Pepper Glazed Chicken Bites
Timing is everything during assembly. Do not toss the chicken in the saucepan where you reduced the glaze. Instead, place the hot, crispy chicken into a large, room-temperature stainless steel bowl. Pour the thickened glaze over the top and add your second tablespoon of cracked pepper.
Use a large spoon or a quick flick of the wrist to toss the chicken until every piece is glistening. This “Flash Toss” method ensures even coverage without exposing the chicken to the direct heat of the pan for too long. Serve it immediately. The glaze should be tacky and warm, and the chicken should still have a loud, audible crunch when you bite into it.
Troubleshooting Common Texture Issues
If you find your coating is falling off in the oil, you likely skipped the hydration rest. That 5-minute wait is non-negotiable for bonding the starch to the protein. Also, make sure your chicken pieces are patted dry with paper towels before you start the egg wash process.
If the chicken looks dark on the outside but is still pink inside, your oil is too hot. Turn the heat down and let the oil temperature stabilize before the next batch. Conversely, if the chicken feels heavy and greasy, your oil was too cold. Wait for it to return to 350°F between batches.
Is your sauce too thin? Just keep simmering. The sugar content will eventually reach a point where it bubbles thickly and turns into a syrup. If it’s too thick and looks like hard candy, whisk in a teaspoon of water or rice vinegar to loosen it back up over low heat.
Optimal Pairings for Bold Pepper Flavors
This dish is a flavor powerhouse, so you want sides that offer a place for your palate to rest. A simple bowl of steamed jasmine rice is the perfect partner. The neutral, fragrant rice soaks up any extra black pepper glaze and balances the intensity of the spice.
For a fresh contrast, try a cold cucumber salad dressed with a little rice vinegar and a pinch of sugar. The cooling effect of the cucumber and the sharp acidity of the vinegar cut right through the richness of the fried chicken and the sweetness of the honey. It cleanses your palate so every bite of chicken tastes as bold as the first.
Flavor Variations and Ingredient Swaps
You can easily tweak this recipe based on what’s in your pantry. If you don’t have honey, maple syrup works beautifully and adds a slight woody note that pairs well with black pepper. For a nuttier aroma, whisk a teaspoon of toasted sesame oil into the glaze right before tossing.
If you need a gluten-free version, simply swap the all-purpose flour for more cornstarch or a gluten-free flour blend. Use tamari instead of soy sauce. Because cornstarch is the primary driver of the crunch anyway, the texture remains remarkably similar to the original version.
Preparation and Storage Logistics
While this dish is undeniably best the moment it’s made, you can handle leftovers if you’re smart about it. Store any extra chicken in an airtight container in the fridge for up to two days. However, be prepared for the glaze to soften the crust slightly over time.
To bring back the life in your leftovers, avoid the microwave at all costs. The microwave will turn the chicken into rubber. Instead, use an air fryer or oven at 400°F for about 4-5 minutes. This high, dry heat will re-caramelize the sugars in the glaze and crisp up the coating without overcooking the meat.
Expert Tips for Professional Results
For the ultimate “shattering” crunch, you can try the double-fry method. Fry the chicken once at 325°F for 3 minutes, let it rest, then fry it again at 375°F for 1 minute right before glazing. This second flash-fry drives out any remaining moisture in the crust.
Always use fresh ginger and garlic. The jars of pre-minced paste have a metallic aftertaste that becomes very obvious when the sauce is reduced. Grating a fresh knob of ginger directly into the pan provides a bright, zingy heat that complements the black pepper perfectly.
If you have a wok, use it! The wide flared sides of a wok allow moisture to escape more quickly than a high-sided pot, which helps maintain oil temperature and prevents the chicken from “steaming” while it fries. It also makes tossing the chicken in the glaze much easier.
How do I store leftovers?
Store leftovers in an airtight container in the refrigerator for up to 3 days. For the best results, do not freeze this dish. The moisture in the sauce and the chicken will cause the breading to become mushy and separate upon thawing, ruining the texture entirely.
Why is my chicken coating falling off?
This usually happens for two reasons: the chicken was too wet before dredging, or you didn’t let the coating rest. Ensure you pat the chicken dry with paper towels before the egg wash. Most importantly, let the coated chicken sit for 5 minutes before frying so the starches can hydrate and “glue” themselves to the meat.
Can I use a different sweetener?
Yes, you can substitute the honey with maple syrup or agave nectar. If you want to use only brown sugar, increase the amount to 1/3 cup and add a tablespoon of water to help it dissolve into a syrup. Avoid using granulated white sugar alone, as it lacks the viscosity needed for a tacky glaze.
What if I don’t have rice vinegar?
Apple cider vinegar is the best substitute as it has a similar mild acidity and slight sweetness. White wine vinegar also works well. Avoid using plain distilled white vinegar if possible, as the flavor is quite harsh and can overpower the delicate balance of the glaze.
How do I make it extra spicy?
While the black pepper provides a significant kick, you can add a teaspoon of red pepper flakes or a squeeze of sriracha to the glaze while it’s reducing. This adds a “front-of-tongue” heat that complements the “back-of-throat” heat provided by the cracked peppercorns.
Why is my sauce not thickening?
The sauce needs to reach a vigorous simmer to evaporate the water content. If it’s still thin after 8 minutes, increase the heat slightly. The sugars must concentrate to create that syrupy texture. If you’re in a rush, you can whisk in a small cornstarch slurry (1 tsp cornstarch mixed with 1 tsp cold water), but a natural reduction provides a better flavor.
Sticky Black Pepper Glazed Chicken Bites
Course: Main CourseCuisine: Asian FusionDifficulty: easy4
servings15
minutes20
minutes35
Minutes410
kcalAsian Fusion
Ingredients
1.5 lbs chicken thighs, cut into 1-inch cubes (thighs stay juicier during the high-heat fry)
1 large egg, beaten
1/2 cup cornstarch
1/4 cup all-purpose flour
1 teaspoon baking powder
2 tablespoons coarsely cracked black pepper (divided)
1/2 cup low-sodium soy sauce
1/4 cup honey
2 tablespoons brown sugar
1 tablespoon rice vinegar
1 tablespoon minced garlic
1 teaspoon grated ginger
Neutral oil for frying (canola or vegetable)
Directions
- Prepare the coating: In a large bowl, whisk together the cornstarch, flour, baking powder, and 1 tablespoon of the cracked black pepper. The baking powder creates tiny air bubbles that prevent the crust from becoming a solid, soggy sheet.
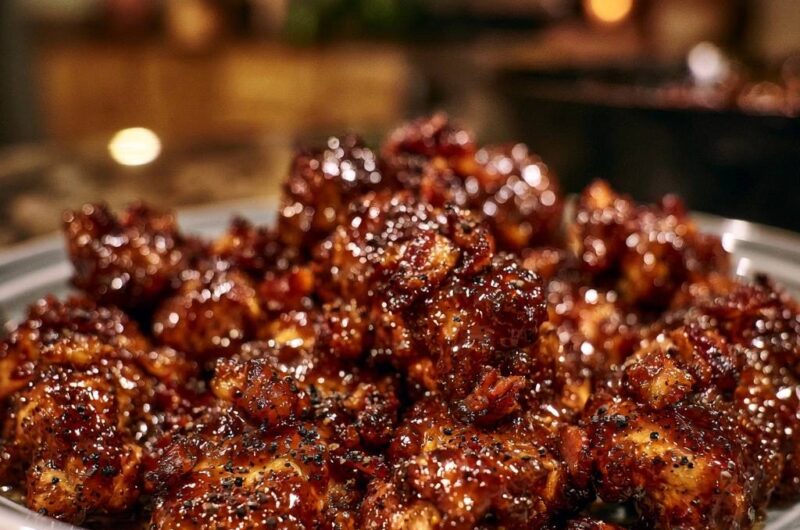
- The double-dredge: Toss the chicken cubes in the beaten egg until fully coated. Transfer the chicken to the dry mix, pressing firmly so the coating adheres. Let the chicken sit for 5 minutes to hydrate the starch, then toss it one more time in the leftover flour mix. This creates the craggy, textured surface seen in the image.
- Fry for maximum crunch: Heat 1 inch of oil in a heavy skillet or wok to 350°F. Fry the chicken in batches to avoid crowding, which drops oil temperature. Fry until deep golden brown and extremely crispy, about 5 to 6 minutes. Drain on a wire rack, not paper towels, to keep air circulating so they do not steam themselves soft. The chicken is done when it reaches 165°F (74°C) in the thickest part.
- Reduce the glaze: In a separate small saucepan, combine soy sauce, honey, brown sugar, rice vinegar, garlic, and ginger. Simmer over medium-high heat for 6 to 8 minutes until it reduces into a thick, syrupy glaze that coats the back of a spoon. Reducing the water content is the final step to preventing sogginess.
- The finish: Place the crispy chicken in a large bowl. Pour the thickened glaze over it and add the remaining 1 tablespoon of cracked black pepper. Toss quickly to coat and serve immediately while the glaze is tacky and the chicken is still shattering-crisp.
Notes
- Drain the chicken on a wire rack instead of paper towels to prevent steaming and maintain crunch. Reducing the glaze is essential to keep the coating from becoming soggy.