Nothing ruins a movie night faster than a handful of chewy, stale popcorn treats. You know the ones—they look beautiful in the bowl, but the moment you take a bite, the popcorn has the texture of packing peanuts. It’s a common heartbreak for home cooks because most coatings actually draw moisture into the kernel, destroying that satisfying crunch within minutes.
The secret to a professional-grade snack lies in the science of the moisture barrier. Instead of just tossing popcorn in melted sugar, we’re going to use a specific fat-to-sugar ratio that shrink-wraps every single kernel. This creates a waterproof seal that keeps the air out and the “snap” in, even hours after you’ve finished the batch.
I’ve found that the real trick is adding a touch of refined coconut oil to high-quality white chocolate. This doesn’t just make the chocolate smoother; it lowers the viscosity so the coating flows into every nook and cranny of the popcorn. You get a thin, shatter-crisp shell rather than a thick, clumpy mess that weighs the kernels down.
The Physics of Crunch: Why Popcorn Clusters Fail
Popcorn is essentially a delicate foam of starch and air. Because it’s so porous, it acts like a sponge for any moisture in its environment. When you coat it in traditional caramel or cheap chocolate, the water content in those toppings migrates directly into the kernel. This is why your clusters might feel “tough” or “rubbery” shortly after they cool.
To fix this, we have to engineer a moisture seal. By using a fat-heavy coating like white chocolate mixed with coconut oil, we create a hydrophobic layer. This layer prevents humidity from reaching the starch. Therefore, the popcorn stays as crisp as the moment it popped. It’s all about controlling the “water activity” of your ingredients to ensure the crunch lasts for days rather than minutes.
Essential Components for White Chocolate Chip Popcorn Clusters
Quality is everything when you only have a handful of ingredients. Firstly, start with plain, unbuttered popcorn. Those microwave bags with “movie theater butter” are coated in oils that will prevent your chocolate from sticking. In addition, the artificial flavorings can clash with the delicate sweetness of the white chocolate.
Secondly, choose your chocolate wisely. There is a massive difference between “white chocolate chips” and “white melting wafers.” Wafers are designed to melt smoothly and set firmly because they contain a higher ratio of vegetable fats or cocoa butter. If you use standard baking chips, they often contain stabilizers that make them resist melting, which leads to a thick, gloppy coating that’s hard to work with.
Selecting the Right Popcorn Base
Air-popped popcorn is the gold standard here because it’s bone-dry. However, if you prefer the stovetop method, just ensure you use a minimal amount of oil. Before you even think about melting your chocolate, do the “shake test.” Place your popped corn in a large bowl and shake it gently; the unpopped “old maids” will sink to the bottom. Discard them now so nobody chips a tooth on a hidden kernel later!
The Role of Refined Coconut Oil
Make sure you grab “refined” coconut oil rather than “virgin” or “unrefined” oil. Refined oil has a neutral scent and flavor, so your clusters won’t taste like a tropical vacation. The oil serves a dual purpose: it thins the chocolate for a more even coat and ensures the clusters have a pleasant “melt-in-your-mouth” feel rather than being waxy or hard.
Step-by-Step: Engineering the Perfect Moisture Barrier
Melting white chocolate is a delicate process because it has a lower burning point than dark chocolate. Use a microwave-safe glass bowl and heat in 30-second bursts. After each interval, give it a vigorous stir. Even if it looks like the wafers haven’t moved, the residual heat is doing the work. If you overheat it, the milk solids will clump and “seize,” turning your smooth sauce into a gritty paste.
Once the chocolate and coconut oil are completely fluid, you’re ready to coat. You want the mixture to be warm but not boiling. If it’s too hot, it can actually steam the popcorn from the outside in, which defeats the purpose of our moisture barrier. A steady, warm stream is exactly what you’re looking for.
Achieving the Waterproof Coating
Pour the chocolate over your popcorn and use a large rubber spatula to fold the mixture. Avoid using a metal spoon, as the thin edges can crush the delicate kernels. Think of this like folding egg whites into a cake batter. You want to be gentle but thorough. Every single white surface of the popcorn should be glistening with chocolate to ensure that “waterproof” seal is complete.
The 60-Second Cooling Window
Timing is the difference between a messy streak and a perfect cluster. After coating, let the popcorn sit in the bowl for about 60 seconds. You want the chocolate to become “tacky.” If you add your dark chocolate chunks too early, the heat will melt them, turning your beautiful white clusters a muddy grey. If you wait too long, the salt and chunks won’t stick at all. Look for that sweet spot where the chocolate is still sticky but no longer runny.
Forming and Snap-Setting the Clusters
Now it’s time to move fast. Use a greased cookie scoop or two large spoons to drop mounds onto a parchment-lined sheet. Don’t just pile them up; give them a little squeeze with your spoons to ensure the kernels are locked together. This creates a tight structure that won’t fall apart when you pick it up.
The “Snap-Set” is the final crucial step. Slide the tray into the refrigerator for 15 to 20 minutes. This rapid temperature drop forces the fats in the chocolate and coconut oil to solidify instantly. This “locks” the popcorn in its crisp state before it has any chance to absorb ambient moisture from the kitchen air.
Troubleshooting Common Texture Issues
If your chocolate turns grainy while melting, a tiny drop of water or steam likely got into the bowl. You can often save it by whisking in a teaspoon of neutral oil very quickly. However, prevention is better; always ensure your bowls and spatulas are bone-dry. If your clusters are falling apart, you might have used too much popcorn for the amount of chocolate. Next time, slightly increase the chocolate or reduce the corn to ensure there’s enough “glue” to hold the structure.
Flavor Profiles and Creative Swaps
Once you master the base, you can get creative. For a sophisticated twist, try dusting the wet clusters with freeze-dried raspberry powder. The tartness cuts through the rich white chocolate beautifully. Alternatively, a pinch of espresso powder mixed into the melted chocolate adds a wonderful depth. Just remember to avoid “wet” additions like honey or fresh fruit, as these introduce moisture that will compromise the crunch of the popcorn.
For a similarly smooth finish, see how these white chocolate candy clusters achieve that no-seize secret.
Storage Strategy: Maintaining the Shatter-Crisp Texture
While we used the fridge to “snap-set” the clusters, don’t store them there long-term. Refrigerators are surprisingly humid environments. Once the clusters are firm, move them to an airtight glass jar or a high-quality plastic container. Store the container in a cool, dark pantry. If you live in a very humid climate, you can even toss a food-safe desiccant packet into the jar to keep things extra dry.
Expert Tips for Professional Results
To get that perfect salt distribution, use fine sea salt and sprinkle it from high above the bowl. This prevents “salt pockets” and ensures every bite has that addictive sweet-and-salty balance. Another pro tip: if you’re making these for a party, scale the recipe in batches rather than doubling it in one giant bowl. It’s much easier to get an even coating on 8 cups of popcorn than 16.
Finally, always do a final visual check before the chocolate sets. If you see any “naked” popcorn kernels, give the bowl one last fold. That exposed starch is the weak point where staleness starts. A fully coated kernel is a crunchy kernel!
Can I use milk chocolate instead of white?
You certainly can, but keep in mind that milk chocolate has a different fat structure. It generally flows more easily than white chocolate, so you might want to reduce the coconut oil by half a teaspoon. The moisture-barrier principle remains the same, but the flavor profile will be much richer and less “creamy” than the white chocolate version.
How long do these clusters stay fresh?
If you followed the “Snap-Set” method and stored them in a truly airtight container, these clusters will stay shatteringly crisp for 5 to 7 days. You’ll know the barrier is breaking down if the popcorn starts to feel “bendy” or chewy rather than snapping when you bite into it. In addition, the chocolate may start to look dull if exposed to too much temperature fluctuation.
Why did my white chocolate turn grainy?
White chocolate is notorious for “seizing.” This usually happens because of overheating or a single drop of water entering the bowl. White chocolate doesn’t actually contain cocoa solids—only cocoa butter, milk, and sugar—making it very sensitive to heat. If it seizes, try whisking in a teaspoon of refined coconut oil or vegetable oil to smooth it back out, though it may never be quite as fluid as a fresh batch.
Is there a substitute for coconut oil?
If you don’t have coconut oil, cocoa butter is the absolute best professional substitute. It provides the same thinning effect and a wonderful “snap.” Avoid using liquid vegetable oils like canola if possible; while they thin the chocolate, they don’t solidify as firmly at room temperature, which can result in a cluster that feels slightly greasy or soft to the touch.

Popcorn Clusters
Course: SnackCuisine: AmericanDifficulty: easy12
clusters10
minutes5
minutes185
kcal15
MinutesA delicious and crunchy snack featuring popcorn coated in a thin layer of white chocolate and coconut oil, mixed with dark chocolate chunks and sea salt. This recipe uses a specific technique to prevent the popcorn from becoming soggy.
Ingredients
8 cups plain popped popcorn (kernels removed)
1.5 cups high-quality white chocolate melting wafers
1 cup dark chocolate chunks or chips
1/2 teaspoon sea salt
1 tablespoon coconut oil (refined)
Directions
- Line a large baking sheet with parchment paper. Place your popped popcorn in a very large mixing bowl, ensuring you have discarded any unpopped kernels.
- The secret to preventing sogginess is the fat-to-sugar ratio. Melt the white chocolate wafers with the coconut oil in a microwave-safe bowl in 30-second intervals, stirring vigorously between each until smooth. The coconut oil lowers the viscosity of the chocolate, allowing for a thinner, waterproof coating that seals the popcorn without weighing it down.
- Pour the melted white chocolate over the popcorn. Use a rubber spatula to fold gently until every kernel is thoroughly and evenly coated.
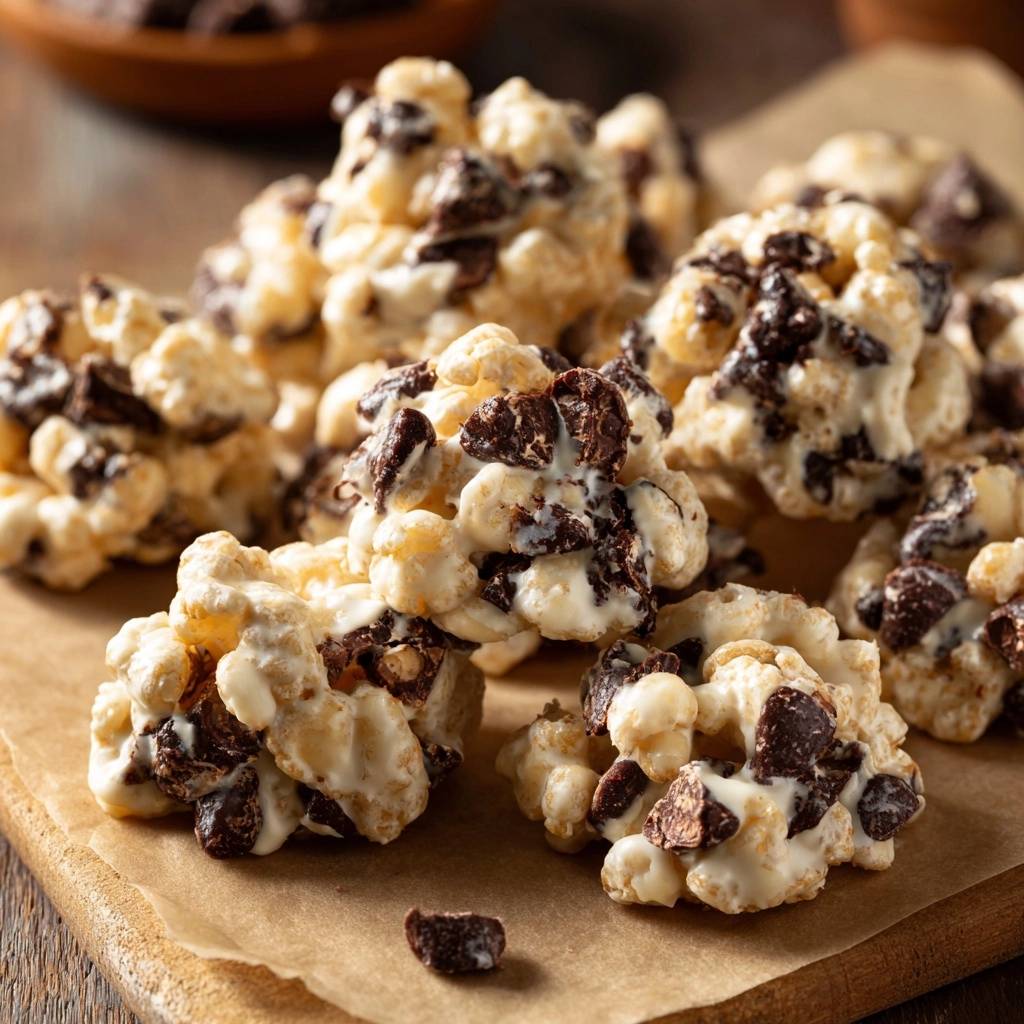
- Allow the white chocolate to cool for about 60 seconds in the bowl (it should still be tacky but not hot). Immediately sprinkle in the dark chocolate chunks and sea salt. This ensures the dark chocolate adheres to the clusters as shown in the image without melting into streaks.
- Working quickly before the coating sets, use two spoons or a greased cookie scoop to drop tight, rounded mounds of the mixture onto the parchment paper.
- To lock in the crunch, place the tray in the refrigerator for at least 15 minutes. This rapid cooling “snap-sets” the chocolate, preventing the popcorn from absorbing any ambient moisture. Store in an airtight container in a cool, dry place.
Notes
- The secret to preventing sogginess is the fat-to-sugar ratio provided by the coconut oil, which creates a waterproof seal around the popcorn kernels.