If you have ever been frustrated by soggy, rubbery wings that lose their texture the moment you apply sauce, you are not alone-I spent years perfecting this recipe. These Oven-Baked Buffalo Chicken Wings are different, using a simple, secret pantry ingredient that guarantees a snap every single time, giving you genuine restaurant-quality crispness right at home.
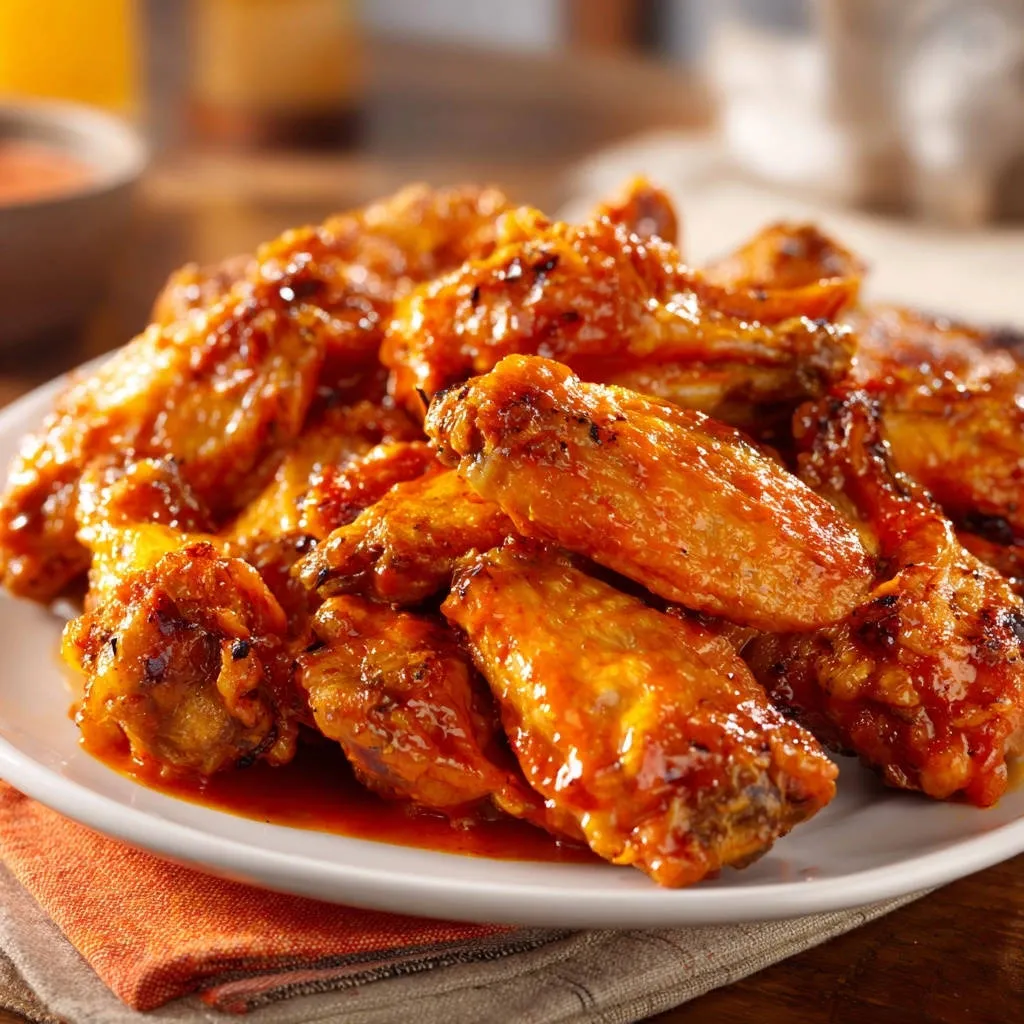
Trust this method to deliver wings that are succulent inside and beautifully golden outside, holding up perfectly under a rich, glossy buffalo glaze. This is the last buffalo wing recipe you will ever need.
The Crispy Revolution: Why This Recipe Ends Soggy Wings Forever
The quest for truly crispy wings without deep-frying is notoriously difficult because chicken skin is naturally rich in moisture and fat.
Traditional baking methods often steam the wings instead of crisping them, but by tackling both surface moisture and internal fat rendering with precise steps, we achieve flawless texture consistency.
The Baking Powder pH Trick: Science Meets Snack Food
The magic ingredient is aluminum-free baking powder, which acts as a powerful drying and alkalizing agent. When applied to the raw chicken skin, it raises the skin’s pH level.
This elevated pH allows the proteins in the skin to break down more efficiently during baking, resulting in accelerated browning and profound crispness at lower temperatures.
Essentially, the baking powder helps the skin mimic the texture achieved through high-heat frying, but safely in your oven.
The Power of Patience: Why Air Drying and Chilling Are Non-Negotiable
Moisture is the single greatest enemy of crispy chicken skin. Before seasoning, the wings must be patted absolutely dry with paper towels.
The subsequent chilling period, performed on an elevated rack, allows the circulating air to further dehydrate the skin’s surface. This creates an optimal environment for the baking powder to work and ensures the skin sets hard during cooking.
Optimal Temperature Control: The Two-Stage Baking Method
We use two distinct temperatures to maximize results. Starting at 400°F allows the chicken’s internal fat to slowly render out and ensures the meat cooks through evenly.
The final boost to 425°F is the high-heat blast required to fully dehydrate the surface, activate the baking powder coating, and achieve that deep golden-brown color and definitive crunch.
The Flavor Foundation: Ingredients Breakdown for Ultimate Results
Choosing the Wings: Flats vs. Drumettes and Prep
Use whole wings, cut into flats (wingettes) and drumettes; they cook more evenly and are easier to eat than full wings.
Remember that the absolute first step is patting them dry-any residual moisture will prevent the baking powder from adhering and working effectively.
The Buffalo Glaze Essentials: Butter, Hot Sauce, and Optional Shine
A true buffalo sauce requires equal parts melted butter and a quality cayenne pepper-based hot sauce, such as Frank’s Red Hot.
The butter mellows the heat and creates the rich, classic mouthfeel, while a teaspoon of honey or brown sugar adds essential gloss and balances the vinegar’s tang.
Don’t Skip the Aluminum-Free Baking Powder!
The type of baking powder is crucial for flavor: standard baking powder contains aluminum salts that can leave a distinctly metallic and bitter taste.
Always seek out aluminum-free varieties for savory baking applications to ensure a pure, clean finish on your crunchy wings.
Gear Up: Essential Tools for Perfect Oven-Baked Buffalo Chicken Wings
The Wire Rack and Baking Sheet Setup
The wire rack elevates the wings off the baking sheet, ensuring hot air circulates entirely around the chicken.
This critical 360-degree exposure prevents a soggy bottom and is indispensable for uniform crispness.
Tongs and Mixing Bowls
Use one large bowl exclusively for tossing the raw wings with the dry rub and a separate, clean bowl for saucing the cooked wings.
Keeping the coating and saucing stages separate ensures hygiene and helps the finished sauce adhere without interference from raw moisture.
Digital Meat Thermometer (The Safety Essential)
While visual cues usually suffice, the only way to guarantee safety and prevent dry chicken is by checking the internal temperature.
Chicken wings are safely done when the internal temperature reaches 165°F in the thickest part of the meat.
Flawless Technique: A Step-by-Step Guide to Oven-Baked Buffalo Chicken Wings
Prep and Pat: Removing All Surface Moisture
Place the cut wings on a clean kitchen towel or layer of paper towels and firmly press to remove every trace of surface moisture.
While this step may seem tedious, taking 5 minutes here is the foundation that secures the crispness of your final product.
Applying the Crucial Crispness Coating
In a large bowl, combine the dry wings with the kosher salt, black pepper, and the crucial aluminum-free baking powder.
Toss vigorously for about 1 minute until every wing piece is lightly and evenly coated-look for a subtle, white dusting, not clumps.
The Chill Period (The Secret to Dry Skin)
Arrange the coated wings on the wire rack and transfer them to the refrigerator for a minimum of 30 minutes, or up to 4 hours.
During this time, the skin dries out further and the baking powder begins its work; concurrently, preheat your oven to 400°F.
The First Bake: Rendering the Fat
Bake the wings at 400°F for 30 minutes; this lower heat allows the fat under the skin to melt and render out slowly.
When you pull them out, the skin should appear slightly shrunken and the wings should have released a noticeable amount of fat onto the pan below.
Boosting the Heat for the Final Snap
Increase the oven temperature to 425°F, then carefully flip every wing piece with tongs.
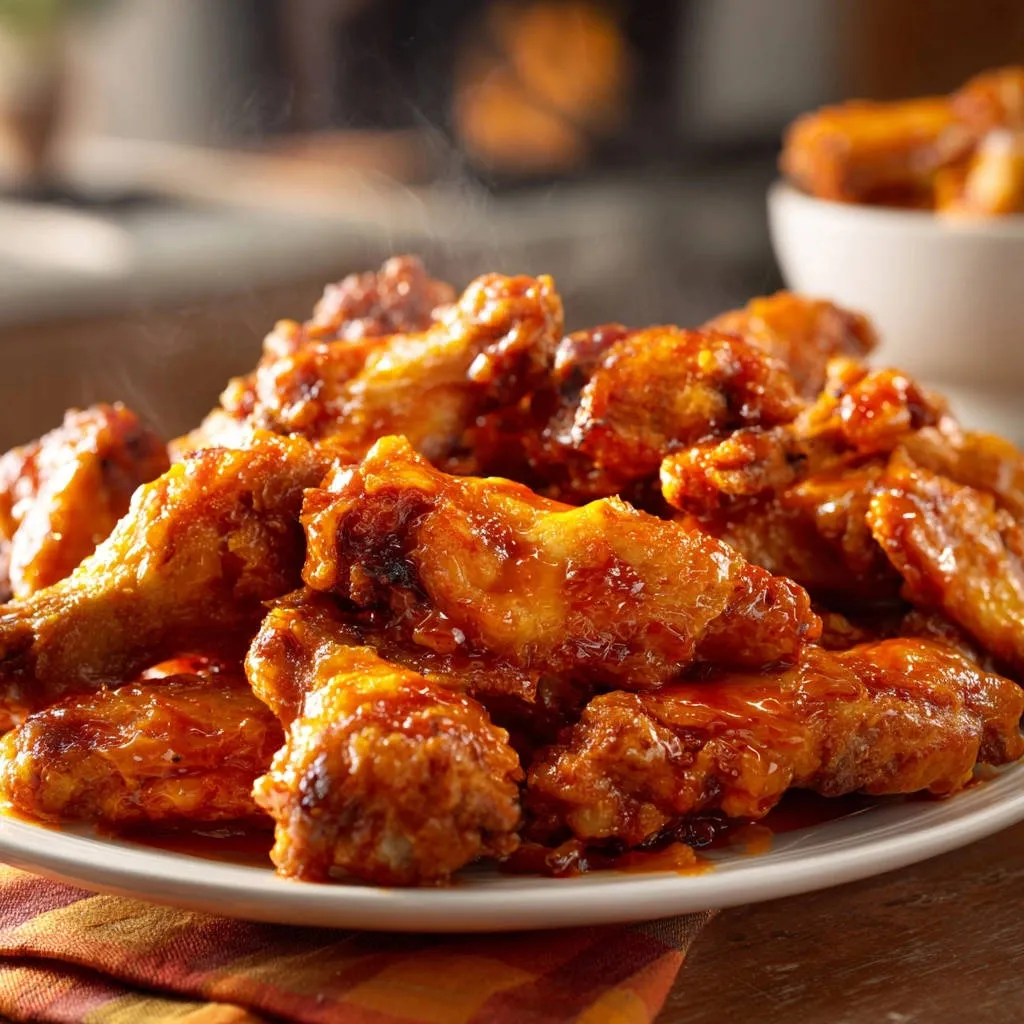
Return the wings to the oven for an additional 20 to 25 minutes, baking until they are deep golden-brown, truly crunchy, and shatteringly crispy.
Mastering the Glaze: Creating the Perfect Glossy Buffalo Sauce
Gentle Melting and Infusion
In a small saucepan over medium heat, gently melt the unsalted butter; avoid letting it brown or separate.
Once melted, stir in the cup of hot sauce and the tablespoon of white vinegar, ensuring they are fully emulsified.
The Glaze Simmer: Achieving Thickness and Shine
Bring the sauce mixture to a low simmer, maintaining a gentle bubble for approximately five minutes.
This slight reduction concentrates the flavors and is the perfect moment to stir in the honey or brown sugar, which ensures a deep, glossy shine on the finished sauce.
Tossing the Wings (Speed is Key)
As soon as the crispy wings come out of the 425°F oven, immediately transfer them to a clean, large bowl.
Pour the hot glaze over the wings and toss quickly and decisively; the residual heat helps the sauce adhere instantly while the hardened skin resists sogginess.
Expert Tips and Quick Adjustments for Your Next Batch
Flavor Boost: Adding Smoked Paprika to the Coating
For a subtle, woodsy depth that pairs beautifully with the heat of the buffalo sauce, add 1/2 teaspoon of smoked paprika to your dry baking powder rub.
The Oil Debate: Should I Use Oil on My Baked Wings?
Oil is typically unnecessary as chicken skin has ample natural fat to render, which is key to its own crisping.
If you prefer, a very light spray of high-heat cooking oil (like avocado oil) applied before the final 425°F boost can help ensure deep browning.
Batch Baking: How to Cook Large Quantities
Never overcrowd the baking sheet; wings must be in a single layer with space between each piece for maximum air circulation.
If cooking a double batch, use two separate sheet pans on different racks, swapping their positions halfway through the baking process to ensure even cooking.
Handling Spice: Adjusting the Heat Level
To reduce the heat of the buffalo sauce, increase the amount of unsalted butter to 3/4 cup while keeping the hot sauce at 1 cup.
To intensify the spice, whisk in a 1/2 teaspoon of cayenne pepper powder directly into the simmering glaze.
Troubleshooting & FAQs: Solving Common Oven-Baked Wing Challenges
My Wings Still Came Out Rubbery or Chewy. What Went Wrong?
The primary cause of rubbery wings is inadequate moisture removal before baking; ensure you pat them vigorously dry and perform the chilling step.
Alternatively, they may not have cooked long enough at the higher heat setting; the skin must be fully dehydrated and deeply colored to achieve the required crispness.
I Forgot to Buy Aluminum-Free Baking Powder, is the Regular Kind Safe?
While standard baking powder is safe to consume, using it on these Oven-Baked Buffalo Chicken Wings will likely ruin the flavor.
The aluminum salts in regular baking powder react under heat and create a pronounced, metallic bitterness; it is absolutely worth the effort to source the aluminum-free variety.
Can I Use the Air Fryer Instead of the Oven for This Recipe?
Yes, this baking powder method works perfectly in the air fryer, often reducing cooking time significantly.
Coat the wings as directed, arrange them in the air fryer basket without overlapping, and cook at 380°F for about 20-25 minutes, shaking the basket halfway, until beautifully golden and crisp.
How Can I Make These Wings Ahead of Time?
The best way to prepare ahead is to complete the coating and chilling steps up to four hours in advance; this allows the skin to dry perfectly before baking.
The wings should never be sauced until immediately before serving, as the moisture from the sauce will destroy the crisp texture over time.
Make-Ahead, Storage, and Best Dipping Sauce Pairings
Reheating Oven-Baked Buffalo Chicken Wings for Day Two
Never reheat leftover wings in the microwave, as this creates steam and turns the crispy skin rubbery almost instantly.
The best method is to reheat them in a 350°F oven or an air fryer for 8-10 minutes until they are sizzling hot and the crispness is restored.
The Ultimate Wing Board: Best Sides and Accompaniments
Cooling Crudités: Crisp celery sticks and carrot sticks are essential for textural contrast and neutralizing the heat.
Blue Cheese Dressing: The traditional accompaniment; the tanginess of the blue cheese cuts beautifully through the rich buffalo butter sauce.
Ranch Dip: A creamier, milder option that provides a cooling counterbalance for those who find blue cheese too intense.
Proper Storage: Keeping Leftovers Fresh and Safe
Store any leftover Oven-Baked Buffalo Chicken Wings in an airtight container in the refrigerator for up to three to four days.
If you have extra sauce, store it separately and drizzle it on immediately after reheating the wings to maintain maximum crispness.
Ready to Impress? Share Your Oven-Baked Buffalo Chicken Wings Masterpiece!
This baking powder technique eliminates the need for messy deep-frying while delivering the kind of satisfying snap that usually only comes from a restaurant kitchen.
Now that you hold the secret to genuinely crispy skin, you are ready to master truly exceptional game-day snacks or family favorites. Give this recipe for Oven-Baked Buffalo Chicken Wings a try, and prepare for rave reviews!
For a different kind of colorful creation, check out the secrets behind swirled rainbow sugar cookies.
I encourage you to share your results-send a picture of your perfectly glazed, golden-brown wings and tell me which dipping sauce you chose!

Buffalo Chicken Wings
Course: AppetizerCuisine: AmericanDifficulty: medium4
servings45
minutes55
minutes750
kcal60
minutesSay goodbye to soggy wings! This game-changing technique uses a simple pantry secret—baking powder—to guarantee crispy skin every time, even when drenched in a glossy, tangy buffalo glaze. Perfect for game day.
Ingredients
3 pounds Chicken Wings (cut into flats and drumettes)
1 tablespoon Baking Powder (aluminum-free, crucial for crispness)
1 teaspoon Kosher Salt
1/2 teaspoon Black Pepper
1/2 cup Unsalted Butter
1 cup Hot Sauce (like Frank’s Red Hot)
1 tablespoon White Vinegar
1 teaspoon Honey or Brown Sugar (optional, for glaze shine)
Directions
- Prepare the Wings for Maximum Crispness The absolute key to avoiding soggy wings starts here. Pat the chicken wings extremely dry using paper towels. Moisture is the enemy of crisp skin.
- Apply the Crispness Coating In a large mixing bowl, combine the dry wings with the kosher salt, black pepper, and the crucial ingredient: the baking powder. Toss thoroughly until the wings are fully and lightly coated. The baking powder raises the pH of the skin, allowing it to brown and crisp much faster in the oven.
- Chill and Preheat Place the coated wings on a wire rack set over a baking sheet (this allows air circulation, which helps dry the skin further). Let the wings rest in the refrigerator for at least 30 minutes, or up to 4 hours. Meanwhile, preheat your oven to 400 degrees F.
- The First Bake Transfer the baking sheet (with the rack) to the preheated 400 degree F oven. Bake the wings for 30 minutes.
- Boost the Heat and Crisp Increase the oven temperature to 425 degrees F. Flip the wings and bake for an additional 20 to 25 minutes, or until they are deeply golden brown and perfectly crispy. The total cooking time should be around 50 to 55 minutes.
- Make the Buffalo Glaze While the wings finish baking, make the sauce. In a small saucepan over medium heat, melt the unsalted butter. Once melted, stir in the hot sauce, white vinegar, and honey or brown sugar if using. Bring the mixture to a low simmer and stir until fully combined and slightly reduced (about 5 minutes). Remove from heat.
- Toss and Serve Once the wings are pulled from the oven, immediately transfer them to a clean, large bowl. Pour the sauce over the hot, crispy wings. Toss quickly but thoroughly to coat every piece. Serve immediately. Because of the special baking powder technique, the skin will retain its snap even under the wet sauce.
Notes
- Ensure you use aluminum-free baking powder for the best crisp results. Pat the wings extremely dry before coating.