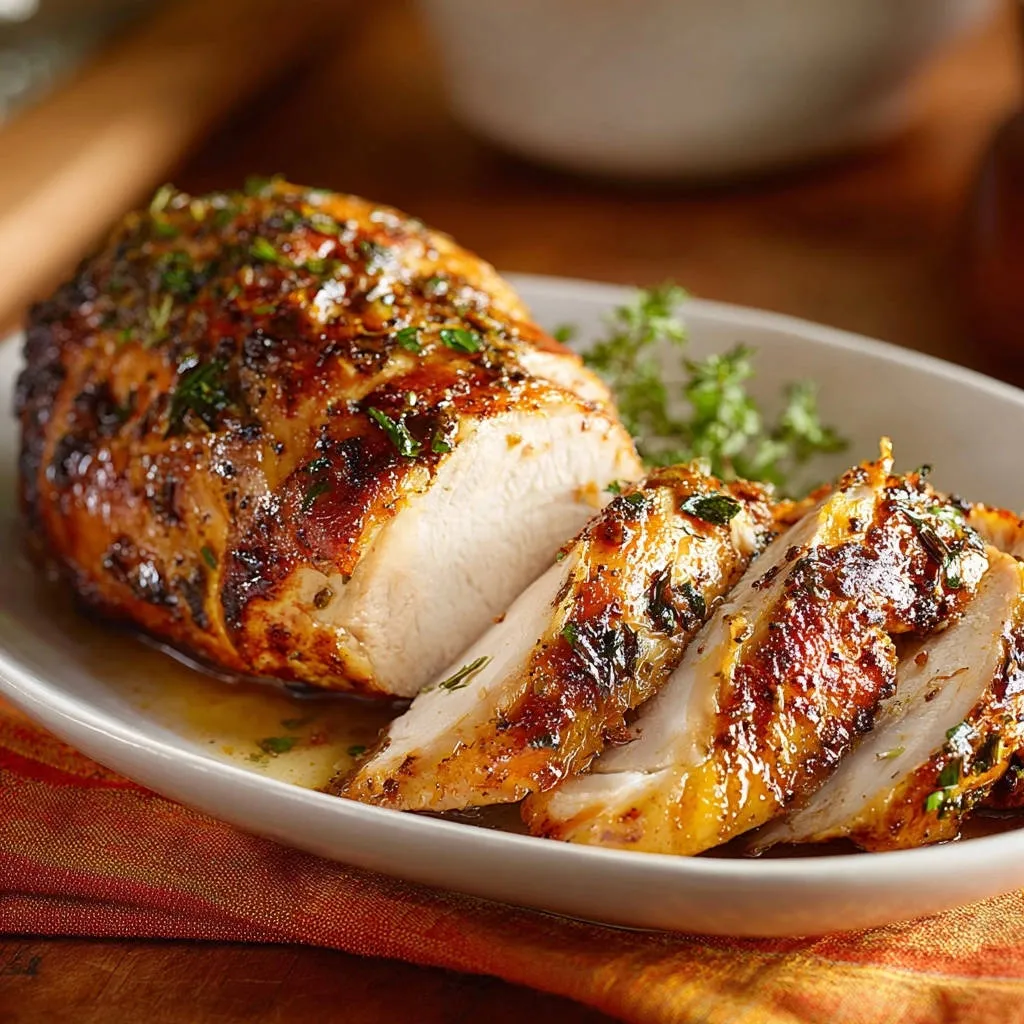
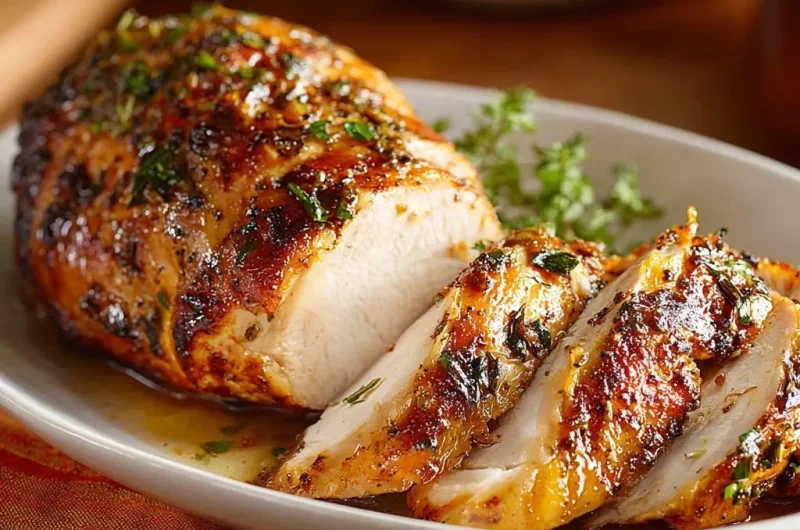
For years, crafting a truly succulent chicken breast felt like an elusive culinary quest, often ending in dry, disappointing results. I finally cracked the code to making a perfectly roasted chicken breast that is consistently moist, tender, and bursting with flavor every single time.
This recipe isn’t just about cooking chicken; it’s about mastering a simple technique that guarantees an incredibly juicy outcome. Prepare to transform your weeknight meals with the best roasted chicken you’ve ever made.
Tired of Dry Chicken? Discover Our Juicy Secret!
Why This Recipe Guarantees Success Every Time
Many recipes leave chicken bland and overcooked, but ours addresses these pain points directly.
We’ve fine-tuned the precise internal temperature and critical resting period to ensure consistent perfection.
The Simple Key to Unbeatable Tenderness
Achieving truly tender chicken breast is far simpler than you might imagine.
Our method focuses on precise temperature control and a non-negotiable resting phase, guaranteeing incredible juiciness.
Our Commitment to Flavor: Aromatic & Satisfying
Beyond texture, we prioritize a deeply satisfying flavor profile.
A thoughtfully balanced blend of aromatic herbs and spices penetrates the meat, delivering a delicious experience in every bite.
For even more aromatic depth, explore this herb-crusted roasted chicken breast.
The Essential Lineup for Perfectly Roasted Chicken Breast
The Star: Choosing Your Chicken Breast
Start with a large, boneless, skinless chicken breast, ideally around 1.5 pounds.
Look for plump, uniformly thick breasts without any discolored spots for the best results.
Building the Flavor Foundation: Our Simple Herb Blend
Olive Oil: Two tablespoons provide a luscious coating, helping to crisp the exterior and lock in moisture during roasting.
Garlic Powder: One teaspoon offers a mellow, foundational garlic flavor that enhances the overall savoriness without being overpowering.
Dried Parsley: One teaspoon adds a subtle herbaceous brightness and a pop of color to the seasoning mix.
Dried Thyme: Half a teaspoon contributes a warm, earthy note that beautifully complements chicken.
For an even more aromatic experience, explore herb-roasted chicken breast.
Salt & Black Pepper: A teaspoon of salt and half a teaspoon of black pepper are essential for seasoning the meat thoroughly and enhancing all other flavors.
Tools for Roasting Perfection
Must-Have Kitchen Essentials
A shallow baking dish or a sturdy baking sheet is essential for even heat distribution, ensuring your chicken roasts uniformly.
An instant-read thermometer is your most crucial tool for cooking chicken safely and preventing overcooking, guaranteeing a juicy chicken breast every time.
Handy Helpers for Optimal Results
Paper towels are indispensable for patting the chicken completely dry before seasoning, a small step that makes a big difference.
A small bowl allows you to thoroughly combine your seasoning blend, ensuring even distribution of flavors.
Your Step-by-Step Guide to Perfectly Roasted Chicken Breast
- Preheat Your Oven:
Set your oven to 400°F (200°C).
Achieving the correct oven temperature before adding the chicken is crucial for even cooking and a beautiful roast, jump-starting the searing process.
- Pat It Dry, Every Time:
Thoroughly pat the chicken breast dry with paper towels.
This simple, often-skipped step is vital for creating that desirable golden-brown crust and sealing in juices, leading to a truly juicy chicken breast.
- Mix the Aromatic Seasoning:
In a small bowl, combine olive oil, garlic powder, dried parsley, dried thyme, salt, and black pepper.
Mixing beforehand ensures a homogenous blend, leading to consistent flavor in every bite of your Perfectly Roasted Chicken Breast.
- Coat for Maximum Flavor:
Rub the seasoning mixture all over the chicken breast, ensuring every side is evenly coated.
Don’t be shy; a generous, even application is key for deep flavor penetration and a flavorful chicken breast.
- Prepare for Roasting:
Place the seasoned chicken breast in a shallow baking dish or directly on a baking sheet.
Ensure there’s enough space around the chicken for air circulation, which aids in even roasting and browning.
- Roast to Perfection:
Roast for 20-25 minutes, or until an instant-read thermometer inserted into the thickest part registers 160°F (71°C).
Monitor closely; the exact time may vary based on your oven and chicken thickness. This temperature is your internal target for a perfectly roasted chicken breast.
- The Crucial Resting Period:
Immediately remove the chicken from the oven once it reaches 160°F. Loosely tent the dish/sheet with aluminum foil and allow it to rest for at least 10-15 minutes before slicing.
This resting period is the absolute secret to incredibly tender and moist Perfectly Roasted Chicken Breast, allowing juices to redistribute instead of escaping when cut.
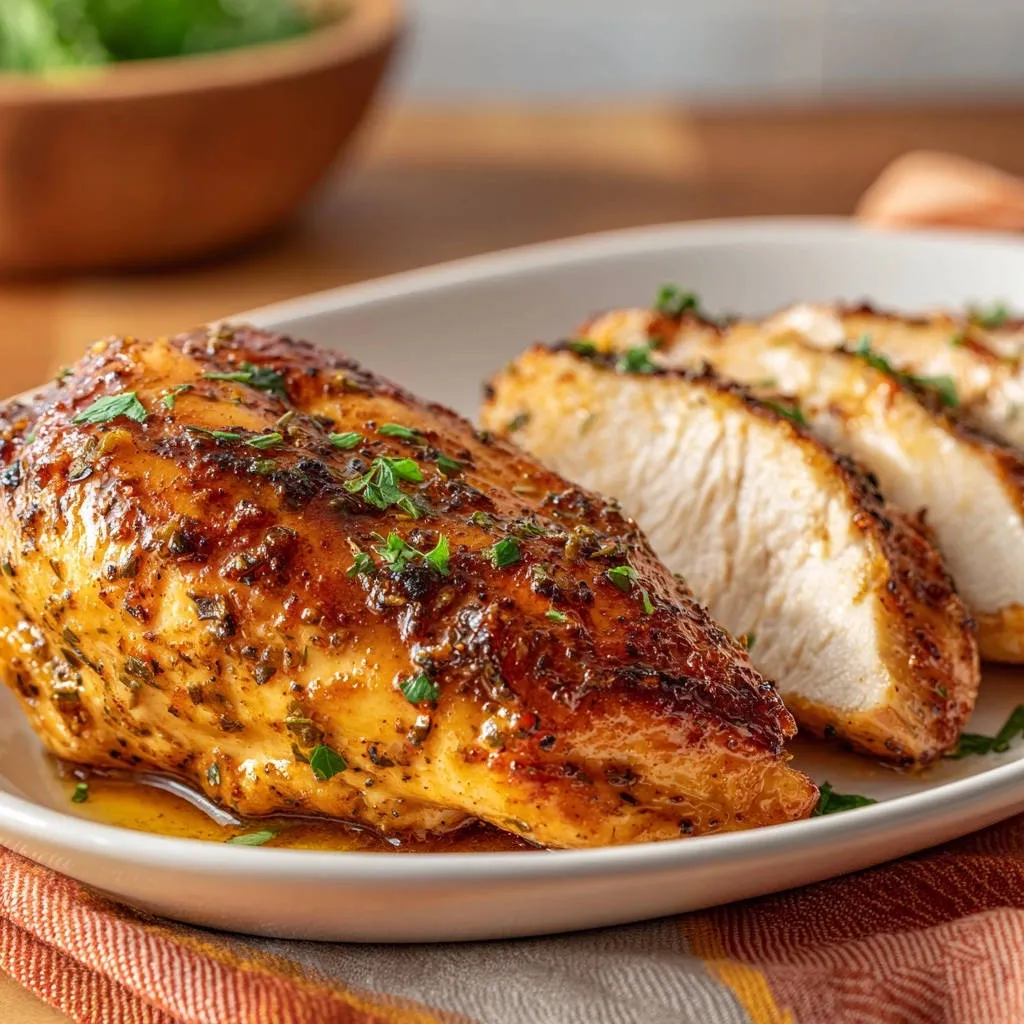
- Slice and Serve:
Slice the chicken breast against the grain and serve immediately.
Slicing against the grain shortens the muscle fibers, making each bite even more tender and enjoyable, a true tender chicken recipe secret.
Unlock Next-Level Flavor: Expert Tips for Your Roasted Chicken
The Power of Patting Dry: A Golden Crust Secret
Patting your chicken breast completely dry removes surface moisture, which is essential for developing a beautiful golden-brown crust.
This dryness allows the Maillard reaction to occur efficiently, creating complex, savory flavors and an appealing texture.
Why Resting is Non-Negotiable for Juiciness
Resting allows the muscle fibers, which contract during cooking, to relax.
This relaxation enables the reabsorption of juices throughout the meat, preventing them from escaping when you slice and ensuring every bite is moist.
Mastering Internal Temperature with Confidence
An instant-read thermometer is your best friend for food safety and preventing dry chicken.
Pulling the chicken at 160°F is strategic; it will continue to cook slightly, reaching the safe internal temperature of 165°F (74°C) as it rests (this is called carry-over cooking).
Against the Grain: Slicing for Ultimate Tenderness
Observe the parallel lines of muscle fibers on your chicken breast; this is the grain.
Slicing perpendicular to these lines shortens the fibers, making the chicken significantly more tender and easier to chew.
Perfect Pairings: What to Serve with Your Succulent Chicken Breast
Classic Sides for a Complete Meal
Complement your Perfectly Roasted Chicken Breast with simple, elegant sides.
Serving Suggestions
Round out your perfectly roasted chicken breast meal with these complementing dishes.
- For a sweet and savory addition to your perfectly roasted chicken breast, try these perfect caramelized onions.
- Pair your juicy chicken breast with a refreshing and vibrant zesty couscous veggie salad for a balanced meal.
Roasted asparagus, garlic mashed potatoes, or a fresh garden salad with a light vinaigrette all make excellent choices.
Creative Ideas & Variations
Don’t limit this tender chicken recipe to a single meal.
Use leftover roasted chicken in Caesar salads, hearty sandwiches, or stirred into a creamy pasta dish for an instant upgrade.
Prep Ahead & Keep it Fresh: Storage Tips
Storing Leftovers Safely
Allow any leftover Perfectly Roasted Chicken Breast to cool completely before storing.
Place it in an airtight container in the refrigerator for up to 3-4 days to maintain freshness and safety.
Reheating for Best Texture
To reheat without drying, warm the chicken gently in a preheated oven at 300°F (150°C) until just warm through.
Adding a splash of chicken broth to the dish or wrapping it in foil can help retain moisture during reheating.
Make-Ahead Meal Prep Ideas
Roast a batch of chicken breasts at the start of the week for effortless meal prep.
Shred it for tacos, dice it for protein bowls, or simply slice it for quick, healthy lunches.
Roasted Chicken Not Perfect? Common Issues & Quick Fixes
Problem: Dry Chicken
Solution: The most common cause is overcooking. Always use an instant-read thermometer and remove the chicken promptly at 160°F (71°C).
Ensure you allow the chicken to rest for the full 10-15 minutes; this is critical for a truly juicy chicken breast.
Problem: Lackluster Flavor
Solution: Check that your seasonings were evenly distributed and generously applied.
Ensure your dried herbs and spices are fresh, as older ones lose potency. For an extra boost, consider a quick brine before seasoning next time.
Problem: Rubber-like Texture
Solution: A rubbery texture is almost always a sign of severe overcooking, which toughens the protein fibers.
Strictly adhering to the internal temperature guidelines with a reliable thermometer and allowing proper rest will prevent this issue.
Your Perfectly Roasted Chicken Breast Questions Answered
Can I use bone-in chicken breast for this recipe?
Yes, but bone-in chicken breast will require a longer cooking time due to the bone.
Ensure it reaches an internal temperature of 165°F (74°C) in the thickest part for food safety, and consider keeping the skin on for added flavor and moisture.
How long does roasted chicken last in the fridge?
Cooked roasted chicken breast, stored properly in an airtight container, will last for 3 to 4 days in the refrigerator.
Can I use fresh herbs instead of dried?
Absolutely! If using fresh herbs like parsley and thyme, you’ll need a larger quantity.
A general rule of thumb is to use three times the amount of fresh herbs for every one part of dried herbs (e.g., 3 teaspoons fresh parsley for 1 teaspoon dried).
What if I don’t have an instant-read thermometer?
While an instant-read thermometer is highly recommended for accuracy, you can make a small cut into the thickest part of the chicken.
The juices should run clear, and the meat should be opaque white throughout, with no pink remaining. However, this method is less precise and risks losing juices.
Can I add vegetables to the baking dish?
Yes, you can certainly roast vegetables alongside your chicken, transforming it into a one-pan meal.
Cut heartier vegetables like potatoes, carrots, or broccoli into similar-sized pieces and add them to the dish about 10-15 minutes before the chicken, or ensure they are spaced to avoid steaming.
Ready to Master Perfectly Roasted Chicken Breast?
You now possess the secrets to achieving a truly exceptional Perfectly Roasted Chicken Breast, tender and flavorful every single time. This method removes the guesswork, promising moist, delicious results that will impress.
Don’t let the fear of dry chicken hold you back any longer. Grab your ingredients, follow these simple steps, and prepare to elevate your everyday cooking.
Try this recipe tonight and discover the joy of perfectly cooked chicken. We’d love to hear about your culinary triumph!
Chicken Breast
Course: Main CourseCuisine: AmericanDifficulty: easy2
servings10
minutes25
minutes450
kcal50
minutesStruggle no more with dry chicken! This foolproof recipe guarantees a succulent, flavorful, and perfectly moist chicken breast every time. Discover the secret to incredible juiciness with a simple, yet crucial, resting step.
Ingredients
1 large boneless, skinless chicken breast (about 1.5 pounds)
2 tablespoons olive oil
1 teaspoon garlic powder
1 teaspoon dried parsley
1/2 teaspoon dried thyme
1 teaspoon salt
1/2 teaspoon black pepper
Directions
- Preheat your oven to 400°F (200°C).
- Pat the chicken breast thoroughly dry with paper towels. This step helps create a nice crust during roasting.
- In a small bowl, combine the olive oil, garlic powder, dried parsley, dried thyme, salt, and black pepper. Mix well.
- Rub the seasoning mixture all over the chicken breast, ensuring it’s evenly coated on all sides.
- Place the seasoned chicken breast in a shallow baking dish or on a baking sheet.
- Roast for 20-25 minutes, or until an instant-read thermometer inserted into the thickest part of the chicken registers 160°F (71°C). The internal temperature will rise a bit more as it rests.
- This is the crucial step for juiciness: Once the chicken reaches 160°F, remove it from the oven immediately. Loosely tent the baking dish or sheet with aluminum foil and allow the chicken to rest for at least 10-15 minutes before slicing. This resting period is essential! It allows the juices to redistribute throughout the meat, resulting in incredibly tender and moist chicken instead of them running out when you cut it.
- Slice the chicken breast against the grain and serve immediately.
Notes
- Do not skip the resting period after cooking; it’s key for truly juicy chicken.