There’s nothing quite as disappointing as biting into a beautiful dessert bar only to find the caramel layer is either too runny and messy, or so hard it pulls out your fillings. I used to struggle with getting that ideal gooey, yet perfectly set, caramel for other caramel bars, but I’ve finally cracked the code for these extraordinary Salted Caramel Chocolate Bars. This recipe ensures a caramel that holds its shape beautifully, melts in your mouth, and allows for perfectly clean cuts every single time, making you a confident bar-baking expert.
The Secret to Irresistible Salted Caramel Chocolate Bars
This recipe isn’t just about combining ingredients; it’s about mastering techniques that elevate your baking. We focus on achieving distinct, delicious layers that work in harmony.
From the tender, buttery shortbread to the rich, perfectly set caramel and the smooth chocolate topping, every element is designed for success.
Get ready for homemade caramel treats that impress with both taste and presentation, solving common baking frustrations with clever, easy-to-follow steps.
Achieving That Perfect Gooey-Yet-Set Caramel Layer
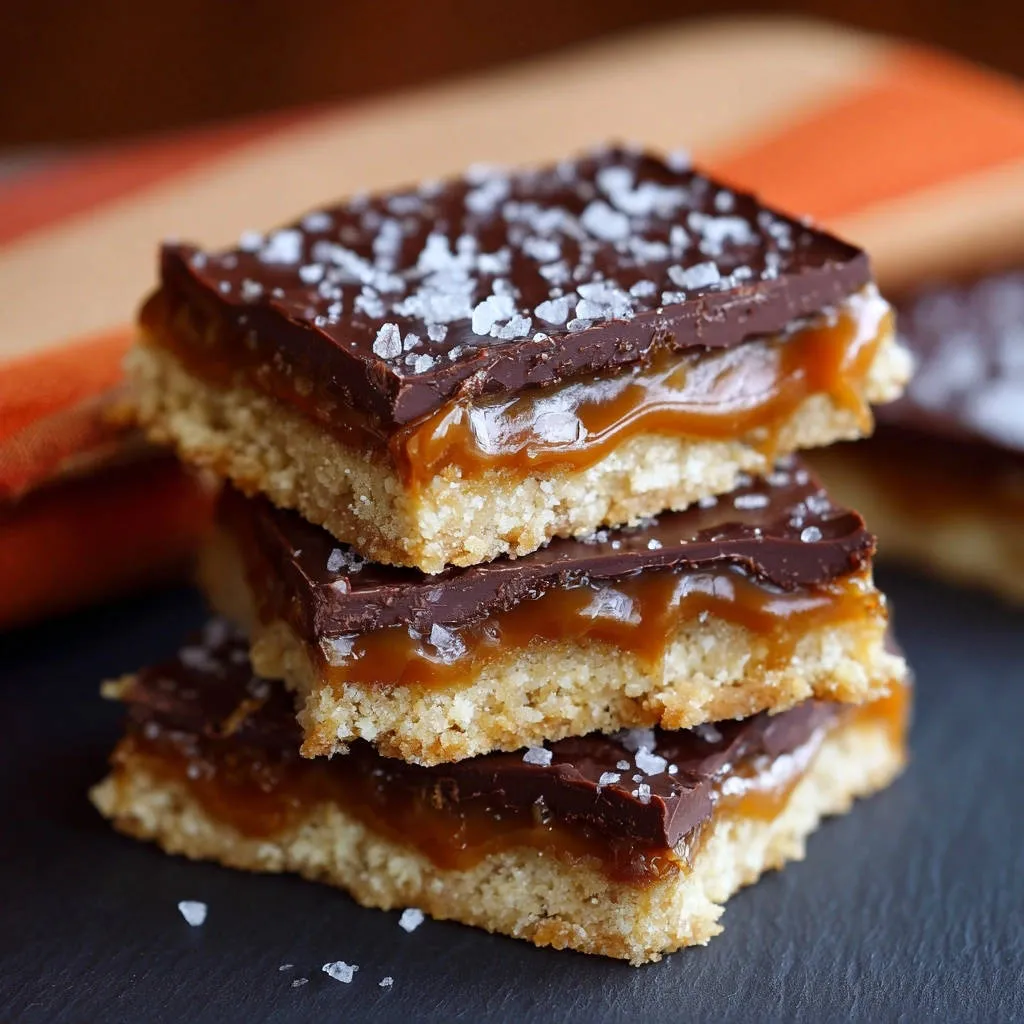
The true magic of these bars lies in their caramel layer: it’s perfectly gooey without being runny, yet firm enough to slice cleanly. The secret is a precise cooking method that develops deep flavor and the right consistency, followed by a crucial chilling step.
This ensures your caramel is always the star, never a messy afterthought. You’ll get that satisfying pull without any sticky mishaps.
The Magic of Clean Cuts and Beautiful Presentation
A beautiful bar should look as good as it tastes. This recipe incorporates specific tricks, like adding a touch of coconut oil to the chocolate, which helps it set with a clean snap and makes cutting effortless.
Combine this with the warm knife technique, and your Salted Caramel Chocolate Bars will emerge with crisp, defined layers, ready for any occasion.
Why This Recipe Solves Common Bar Baking Woes
Many recipes leave bakers frustrated with runny caramel or cracked chocolate. Our method directly addresses these issues, guiding you through each stage with confidence.
You’ll learn the ‘why’ behind each step, ensuring you understand the process and achieve consistent, professional-quality results every single time.
Gather Your Gourmet Ingredients: What You’ll Need
To create these delightful Salted Caramel Chocolate Bars, you’ll need high-quality ingredients for each distinct layer. Using fresh, good-quality components makes a noticeable difference in the final flavor and texture of your dessert.
For the Shortbread Crust:
- 1 1/2 cups all-purpose flour
- 1/2 cup granulated sugar
- 1/4 teaspoon salt
- 1 cup (2 sticks) unsalted butter, cold and cubed
For the Caramel Layer:
- 1 cup granulated sugar
- 1/4 cup water
- 1/2 cup (1 stick) unsalted butter, cubed
- 1/2 cup heavy cream
- 1 teaspoon vanilla extract
- 1/2 teaspoon salt
For the Chocolate Topping:
- 1 1/2 cups semi-sweet chocolate chips
- 1 tablespoon coconut oil
- 1/2 teaspoon flaky sea salt, for sprinkling
The Role of Cold Butter in Your Crumbly Shortbread Base
Using cold, cubed butter is absolutely essential for a tender, flaky shortbread crust. The cold butter creates steam as it melts during baking, forming pockets of air that result in a perfectly crumbly, not dense, texture.
It also prevents the butter from fully incorporating into the flour too early, which would lead to a tougher crust. This step is key for that delicate foundation.
Crafting the Signature Gooey Caramel: Key Components
The interaction of sugar and water forms the initial syrup, which then caramelizes to develop complex flavors. Adding butter and heavy cream stops the cooking process and creates a rich, creamy emulsion.
Vanilla extract and a touch of salt enhance the flavor profile, balancing the sweetness and adding depth to this classic homemade caramel.
The Decadent Chocolate Topping: Why Coconut Oil Matters
A small amount of coconut oil is the secret ingredient for a flawless chocolate topping. It helps the chocolate melt smoothly, creates a beautiful glossy finish, and, most importantly, makes the chocolate easier to cut without cracking or dragging.
This ensures your chocolate caramel squares have crisp, defined edges, enhancing their visual appeal significantly.
Essential Kitchen Tools for Bar Baking Success
Having the right tools on hand will make preparing these Salted Caramel Chocolate Bars a smooth and enjoyable process. Most are likely already in your kitchen!
- 8×8 inch baking pan:
This size is perfect for achieving thick, substantial bars with distinct layers.
- Parchment paper:
Crucial for lining the pan, allowing for easy, clean removal of the entire slab of bars.
- Medium bowl:
For mixing the shortbread crust ingredients effectively.
- Pastry blender or your fingertips:
To cut the cold butter into the flour mixture, creating the desired crumbly texture.
- Heavy-bottomed saucepan:
Essential for making caramel; its even heat distribution prevents scorching and ensures consistent cooking.
- Whisk:
For blending ingredients smoothly and incorporating the butter and cream into the caramel.
- Rubber spatula:
For spreading the chocolate topping evenly and scraping bowls clean.
- Microwave-safe bowl:
For melting chocolate chips conveniently and safely.
- Sharp, warm knife:
The ultimate tool for clean, precise cuts once the bars are chilled.
Your Step-by-Step Guide to Perfect Salted Caramel Chocolate Bars
Creating these incredible Salted Caramel Chocolate Bars is a rewarding process, and with these detailed steps, you’ll find it surprisingly straightforward. Each stage builds upon the last, ensuring a harmonious and delicious result.
- Prepare Your Pan and Preheat Oven:
Preheat your oven to 350°F (175°C). Line an 8×8 inch baking pan with parchment paper, leaving an overhang on the sides for easy removal. This overhang is your secret weapon for lifting the bars out cleanly without any sticking.
- Mix and Press the Crust:
In a medium bowl, whisk together the flour, granulated sugar, and salt. Add the cold, cubed butter and cut it into the dry ingredients using a pastry blender or your fingertips until the mixture resembles coarse crumbs. Press this mixture evenly and firmly into the bottom of the prepared pan. Even pressure ensures an even bake and a sturdy base for your gooey chocolate bars.
- Bake the Shortbread:
Bake the shortbread crust for 20-25 minutes, or until lightly golden brown around the edges. Remove from oven and let cool slightly while you prepare the caramel. A slightly cooled crust prevents the warm caramel from melting through and softening the base too much.
- Begin the Caramel Base:
In a heavy-bottomed saucepan over medium heat, combine the granulated sugar and water. Stir gently until the sugar dissolves. Stop stirring once it comes to a boil. Constant stirring at this stage can introduce air and encourage sugar crystallization, which we want to avoid for a smooth caramel.
- Achieve the Amber Hue:
Allow the mixture to boil without stirring until it turns a deep amber color, which typically takes about 8-12 minutes. Watch it carefully to prevent burning; a burnt caramel is irredeemable and will taste bitter. The deep amber color indicates peak flavor development for your homemade caramel treats.
- Incorporate Butter and Cream:
Remove the saucepan from the heat immediately. Carefully and slowly whisk in the cubed butter until melted and smooth. The mixture will bubble vigorously. Then, slowly pour in the heavy cream and whisk until fully incorporated. Take your time with these additions to prevent splattering and ensure a smooth, uniform emulsion, which is critical for that ideal gooey caramel texture.
- Finish and Chill the Caramel:
Return the saucepan to low heat and stir for 1-2 minutes until the caramel is smooth and slightly thickened. This gentle stirring ensures a consistent texture. Remove from heat and stir in the vanilla extract and salt. Pour the warm caramel evenly over the baked shortbread crust. Place the pan in the refrigerator for at least 1 hour, or until the caramel is completely set and firm to the touch. This crucial chilling step is the key to achieving that perfect set, preventing a runny middle and ensuring clean layers when cut.
- Melt the Chocolate Topping:
In a microwave-safe bowl, combine the semi-sweet chocolate chips and coconut oil. Microwave in 30-second intervals, stirring well after each, until the chocolate is completely melted and smooth. This small amount of coconut oil helps the chocolate melt smoothly and makes for easier, cleaner cutting once set, contributing to beautiful chocolate caramel squares.
- Apply Chocolate and Sea Salt:
Pour the melted chocolate over the chilled caramel layer, spreading it evenly. Immediately sprinkle with flaky sea salt. The salt adheres best to wet chocolate, providing that signature contrasting flavor and texture that makes these Salted Caramel Chocolate Bars so irresistible.
- Final Chill for Setting:
Return the pan to the refrigerator for another 30 minutes, or until the chocolate layer is fully set. Patience here ensures all layers are firm for cutting, preventing any smudging or cracking.
- Cut and Serve:
Once completely chilled and firm, use the parchment paper overhang to lift the entire slab out of the pan. Place on a cutting board and use a sharp, warm knife to cut into squares or bars. For the cleanest cuts, wipe the knife clean between each slice. This technique prevents dragging and keeps your bars looking professional and appealing.
Building the Golden Shortbread Crust
Mastering the Silky Salted Caramel
Finishing with a Flawless Chocolate Layer
The Grand Finale: Cutting and Serving
Chef’s Secrets: Elevate Your Salted Caramel Chocolate Bars Game
Beyond the steps, a few expert tips can make all the difference in achieving truly outstanding Salted Caramel Chocolate Bars. These are the nuances that set good baking apart from truly great baking.
Mastering Caramel Color: Don’t rush the caramel-making process. The color is your guide; aim for a deep amber, like an old penny, but pull it off the heat immediately when it reaches this stage to prevent bitterness. A good quality heavy-bottomed saucepan helps distribute heat evenly and prevents hot spots.
The Chilling Imperative: The chilling steps are non-negotiable for these bars. They are fundamental to achieving firm layers and clean cuts, ensuring your gooey chocolate bars hold their structure. Don’t be tempted to cut corners here; good things truly come to those who wait!
Perfecting Your Chocolate Finish: When melting chocolate, low and slow is key. Overheating chocolate can cause it to seize or become grainy, ruining the smooth texture. The coconut oil addition is vital for that smooth, snappable, yet easy-to-cut topping, a hallmark of perfect bar dessert.
The Warm Knife Trick: For truly pristine slices, warm your knife under hot water, wipe it dry, and then make your cut. Repeat for each slice. This simple trick melts through the chocolate cleanly without cracking it and helps you achieve those picture-perfect edges.
Troubleshooting Your Salted Caramel Chocolate Bars: Common Fixes
Even the most experienced bakers sometimes encounter a hiccup. Here are solutions to common issues you might face when making these delightful Salted Caramel Chocolate Bars, ensuring your success every time.
Why is My Caramel Too Runny?
If your caramel layer isn’t setting firm, it’s likely due to insufficient cooking. The sugar syrup didn’t reach a high enough temperature to form a stable bond. Ensure you cook it to the deep amber stage as specified, and don’t skimp on the crucial chilling time in the refrigerator. Patience is key for a perfectly set caramel.
My Caramel is Hard and Brittle!
A hard caramel indicates it was cooked too long or to too high a temperature. This can also happen if the sugar crystallizes. Next time, remove it from heat immediately once it reaches the target amber color, and ensure no sugar crystals are clinging to the sides of the pan during the initial boiling phase. For more on working with sugar, consider exploring foolproof honeycomb bites which also involve precise sugar cooking.
Chocolate Topping Cracked or Won’t Set
Cracking can occur if the chocolate is too thick or if the bars are cut before the chocolate is fully set. Ensure your chocolate layer is evenly spread and not excessively thick. If it won’t set, your refrigerator might not be cold enough, or the coconut oil ratio might be off if you deviated from the recipe. Trust the recipe’s measurements for the ideal consistency.
Crust Crumbles Too Much or is Too Hard
If your shortbread crust is overly crumbly, there might not have been enough butter or it wasn’t pressed firmly enough into the pan. If it’s too hard, it may have been overbaked, or too much flour was used. Always measure precisely and watch baking times carefully for a tender, yet firm, shortbread base.
Serving, Storing, and Enjoying Your Caramel Bars
Once you’ve mastered these impressive Salted Caramel Chocolate Bars, knowing how to best serve and store them ensures maximum enjoyment. They are a versatile treat perfect for many occasions.
Best Ways to Serve Your Bars
These Salted Caramel Chocolate Bars are best served at room temperature or slightly chilled, allowing the caramel to be perfectly gooey and the chocolate to soften just enough. They make an excellent dessert for parties, a delightful treat for lunchboxes, or a satisfying indulgence with your afternoon coffee or tea. Pair them with a scoop of vanilla ice cream for an extra decadent experience.
How to Store for Maximum Freshness
Store your finished Salted Caramel Chocolate Bars in an airtight container at room temperature for up to 3-4 days, or in the refrigerator for up to a week. If storing in the fridge, let them sit at room temperature for 15-20 minutes before serving for optimal texture and to ensure the caramel is soft and pliable.
Can I Make These Ahead of Time?
Absolutely! These bars are an excellent make-ahead dessert, perfect for planning. You can prepare them up to 2-3 days in advance and store them in the refrigerator, uncut, in the parchment-lined pan. Cut them just before serving for the freshest look and cleanest edges, making party prep a breeze.
Your Top Questions About Salted Caramel Chocolate Bars, Answered!
We’ve gathered some of the most common inquiries about making these delectable Salted Caramel Chocolate Bars to help ensure your baking success and provide extra confidence in the kitchen.
Can I use a different type of chocolate for the topping?
Yes, you can certainly experiment! While semi-sweet chocolate chips provide a classic balance, dark chocolate chips (60-70% cocoa) would offer a richer, less sweet topping, complementing the caramel beautifully. Milk chocolate would result in a sweeter, creamier top layer. Choose what best suits your preference for these chocolate caramel squares.
What if I don’t have coconut oil for the chocolate topping?
If you don’t have coconut oil, you can substitute it with a neutral-flavored oil like refined avocado oil or even a tiny pat of unsalted butter (about 1/2 tablespoon). The goal is to slightly thin the chocolate for easier spreading and cleaner cuts. Avoid oils with strong flavors that might interfere with the chocolate.
Can I make these Salted Caramel Chocolate Bars gluten-free?
To make these gluten-free, you can substitute the all-purpose flour in the shortbread crust with a 1:1 gluten-free baking flour blend that contains xanthan gum. Ensure the blend is suitable for baking for best results, as some blends can be drier than others. Always check package directions for optimal gluten-free baking.
Is light or dark corn syrup an option for the caramel?
While this recipe achieves perfect caramel without corn syrup, a tablespoon of light corn syrup can be added with the sugar and water to help prevent sugar crystallization, which is sometimes a concern for novice caramel makers. Dark corn syrup would significantly alter the flavor profile of your finished caramel.
How do I know when the caramel is the right color?
The ideal color for the caramel is a deep amber, similar to a copper penny or dark honey. It will smell toasty and rich, signaling the perfect balance of sweetness and depth. This typically happens between 320-330°F (160-165°C) if using a candy thermometer, but visual cues are often more reliable than exact temperature for this critical stage.
Ready to Impress? Share Your Salted Caramel Chocolate Bars Masterpiece!
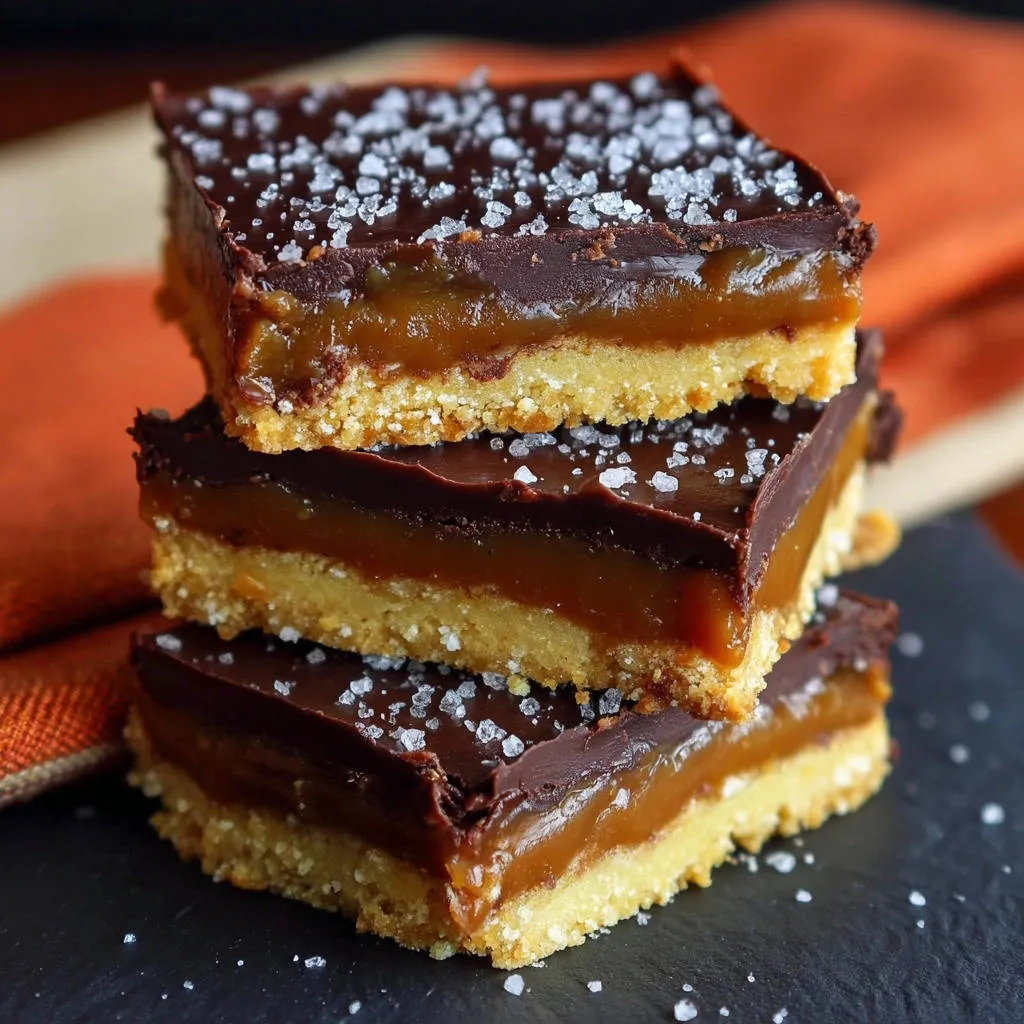
You’ve now mastered the art of creating truly exceptional Salted Caramel Chocolate Bars – a dessert that promises perfect texture, rich flavor, and a show-stopping appearance. From the crumbly shortbread to the gooey, perfectly set caramel and the decadent chocolate topping, every bite is a testament to your newfound baking prowess.
We encourage you to share your creations with friends, family, or even just indulge yourself! Don’t forget to snap a photo and share your experience with us. What will you bake next to satisfy your sweet tooth, perhaps some decadent chocolate brownies?

Salted Caramel Chocolate Bars
Course: DessertCuisine: AmericanDifficulty: medium4
16 bars30
minutes40
minutes450
kcal120
minutesMaster the perfect gooey, yet set, caramel for these irresistible Salted Caramel Chocolate Bars. Layered on a buttery shortbread crust and topped with smooth chocolate, they’re a delightful treat.
Ingredients
For the Shortbread Crust:
1 1/2 cups all-purpose flour
1/2 cup granulated sugar
1/4 teaspoon salt
1 cup (2 sticks) unsalted butter, cold and cubed
For the Caramel Layer:
1 cup granulated sugar
1/4 cup water
1/2 cup (1 stick) unsalted butter, cubed
1/2 cup heavy cream
1 teaspoon vanilla extract
1/2 teaspoon salt
For the Chocolate Topping:
1 1/2 cups semi-sweet chocolate chips
1 tablespoon coconut oil
1/2 teaspoon flaky sea salt, for sprinkling
Directions
- Preheat your oven to 350°F (175°C). Line an 8×8 inch baking pan with parchment paper, leaving an overhang on the sides for easy removal.
- For the Shortbread Crust: In a medium bowl, whisk together the flour, granulated sugar, and salt. Add the cold, cubed butter and cut it into the dry ingredients using a pastry blender or your fingertips until the mixture resembles coarse crumbs. Press the mixture evenly into the bottom of the prepared pan.
- Bake the shortbread crust for 20-25 minutes, or until lightly golden brown around the edges. Remove from oven and let cool slightly while you prepare the caramel.
- For the Caramel Layer: In a heavy-bottomed saucepan over medium heat, combine the granulated sugar and water. Stir gently until the sugar dissolves. Stop stirring once it comes to a boil. Allow the mixture to boil without stirring until it turns a deep amber color, which typically takes about 8-12 minutes. Watch it carefully to prevent burning.
- Remove the saucepan from the heat immediately. Carefully and slowly whisk in the cubed butter until melted and smooth. The mixture will bubble vigorously. Then, slowly pour in the heavy cream and whisk until fully incorporated.
- Return the saucepan to low heat and stir for 1-2 minutes until the caramel is smooth and slightly thickened. This gentle stirring ensures a consistent texture. Remove from heat and stir in the vanilla extract and salt.
- Pour the warm caramel evenly over the baked shortbread crust. Place the pan in the refrigerator for at least 1 hour, or until the caramel is completely set and firm to the touch. This crucial chilling step is the key to achieving that perfect set, preventing a runny middle and ensuring clean layers when cut.
- For the Chocolate Topping: In a microwave-safe bowl, combine the semi-sweet chocolate chips and coconut oil. Microwave in 30-second intervals, stirring well after each, until the chocolate is completely melted and smooth. This small amount of coconut oil helps the chocolate melt smoothly and makes for easier, cleaner cutting once set.
- Pour the melted chocolate over the chilled caramel layer, spreading it evenly. Immediately sprinkle with flaky sea salt.
- Return the pan to the refrigerator for another 30 minutes, or until the chocolate layer is fully set.
- Once completely chilled and firm, use the parchment paper overhang to lift the entire slab out of the pan. Place on a cutting board and use a sharp, warm knife to cut into squares or bars. For the cleanest cuts, wipe the knife clean between each slice.
Notes
- Crucial chilling ensures perfectly set caramel and clean cuts. Wipe knife clean between slices for best results.