There’s nothing quite like a warm, gooey cheese dip, but I’ve certainly had my share of disappointing, oily, or clumpy messes in the past. That’s why I perfected this Skillet Herb and Chili Melted Cheese Dip recipe, guaranteeing a gloriously smooth and irresistibly stretchy texture every single time, completely free from the usual frustrations.
It’s the ultimate crowd-pleaser, delivering that sought-after perfect cheese pull that will have everyone reaching for more, making it an essential addition to your appetizer repertoire.
Say Goodbye to Oily Clumps: The Magic of This Cheese Dip!
The Secret to Glorious, Guaranteed Stretch
This recipe directly tackles the common problem of separated, oily cheese. By carefully controlling the heat and adding just a touch of water, we create a stable emulsion that stays perfectly smooth and incredibly stretchy, never turning into a greasy puddle.
Effortless Elegance: Simple Steps, Stunning Results
Despite its luxurious appeal, this melted cheese appetizer is remarkably straightforward to prepare. Minimal ingredients and a few key techniques transform simple cheese into a gourmet experience, ideal for both casual and special occasions.
Why This Skillet Herb and Chili Melted Cheese Dip Will Become Your Go-To
From impromptu get-togethers to a cozy night in, this savory herb dip offers versatility and undeniable deliciousness. It’s easily customizable to your preferred spice level and pairs wonderfully with a variety of dippers, making it a guaranteed hit every time.
Gather Your Gooey Goodness: Ingredients for Your Dip
The Star of the Show: Choosing Your Cheese Wisely
Eight ounces of low-moisture mozzarella, or a blend of mozzarella and provolone, forms the foundation of this luscious dip. Low moisture content is crucial here; it prevents the cheese from releasing excess water and oil, ensuring that coveted smooth and stretchy texture.
While pre-shredded cheese works, freshly shredded melts more evenly as it lacks anti-caking agents that can sometimes interfere with a silky melt.
Aromatic Accents: Herbs and Chili for Flavor
A tablespoon each of dried parsley and dried oregano infuse a classic, earthy aroma, while a teaspoon of red pepper flakes adds a vibrant, subtle warmth. These herbs and chili flakes create a balanced flavor profile that beautifully complements the rich, melted cheese.
Feel free to adjust the red pepper flakes to your taste, making this chili cheese delight as mild or as fiery as you desire.
The Unsung Hero: Why a Splash of Water Matters
One tablespoon of water might seem insignificant, but it’s a game-changer. This small addition helps to create an emulsion, preventing the cheese proteins and fats from separating, which is the secret behind the dip’s consistently smooth, non-oily, and perfectly stretchy consistency.
Essentials: Olive Oil and a Pinch of Salt
Two tablespoons of good quality olive oil are divided: one for the herb infusion and a small amount for the initial sautéing if needed, though this recipe focuses on direct melting. A pinch of salt enhances all the flavors, bringing out the best in the cheese and herbs.
Your Kitchen Arsenal: Essential Tools for Skillet Herb and Chili Melted Cheese Dip
The Right Skillet Makes All the Difference
A small saucepan or an oven-safe skillet, like a cast iron pan, is ideal. These vessels offer excellent heat distribution, which is key for a controlled, even melt, and a cast iron skillet allows for beautiful serving directly from the heat source.
Stirring Success: The Humble Wooden Spoon
A wooden spoon is your best friend during the melting process. Its gentle nature prevents scratching your pan, and its sturdy design allows for constant, effective stirring, which is vital for achieving a smooth, lump-free dip.
Simple Prep: Grater & Small Bowl
If you opt for a block of cheese, a sturdy cheese grater is essential. A small bowl is perfect for mixing the olive oil with the dried herbs and chili flakes, ensuring an even distribution of flavor for your aromatic topping.
Crafting Perfection: Your Step-by-Step Guide to the Best Skillet Herb and Chili Melted Cheese Dip
- Prepare Your Cheese & Lay the Foundation:
Grate your low-moisture mozzarella or preferred cheese blend if it isn’t already shredded. This step ensures uniform pieces that will melt consistently and smoothly.
In your chosen small saucepan or oven-safe skillet, combine the shredded cheese with 1 tablespoon of water and just a tiny pinch of salt. Gently toss to mix everything together before applying heat.
- The Gentle Melt: Unlocking Unrivaled Stretchiness:
Place your saucepan or skillet over very low heat. This is the critical technique to bypass any oily, clumpy dip woes and to achieve that truly glorious, perfectly stretchy cheese.
Cook, stirring constantly and gently with your wooden spoon, allowing the cheese to gradually melt. Continue until it becomes a completely smooth, cohesive, and wonderfully stretchy consistency, which typically takes 5 to 7 minutes.
It’s crucial to resist the temptation to increase the heat, as high temperatures are the main reason cheese separates and becomes oily.
- Infusing Flavor: Crafting the Herb & Chili Oil:
While your cheese is gently melting, prepare the aromatic topping. In a separate small bowl, combine the remaining 1 tablespoon of olive oil, dried parsley, dried oregano, and the red pepper flakes.
Stir these ingredients thoroughly until the herbs and chili are well incorporated into the oil, creating a fragrant and visually appealing drizzle that will finish your dip.
- The Grand Finale: Drizzle & Serve!
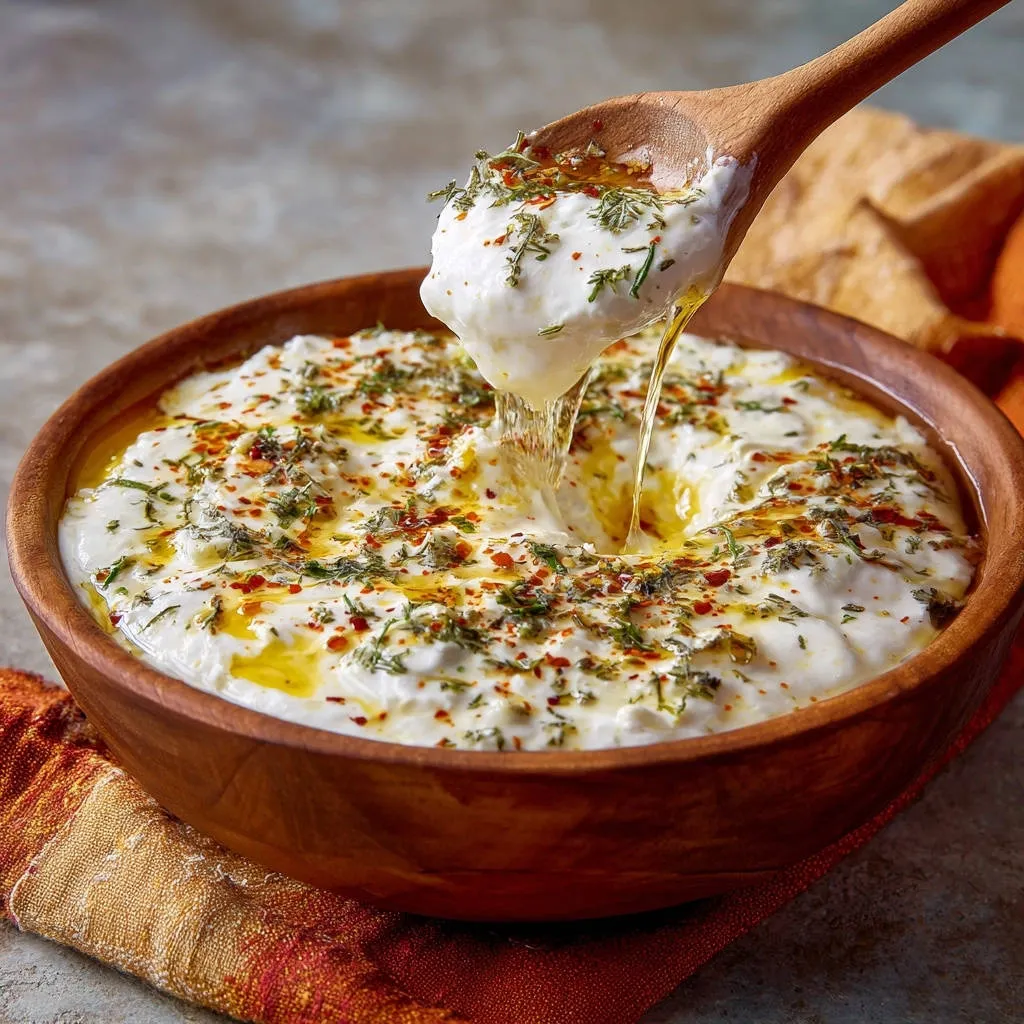
Once your cheese dip has reached that perfectly melted, incredibly stretchy stage, immediately transfer it to your chosen serving bowl if it’s not already in an attractive, oven-safe skillet.
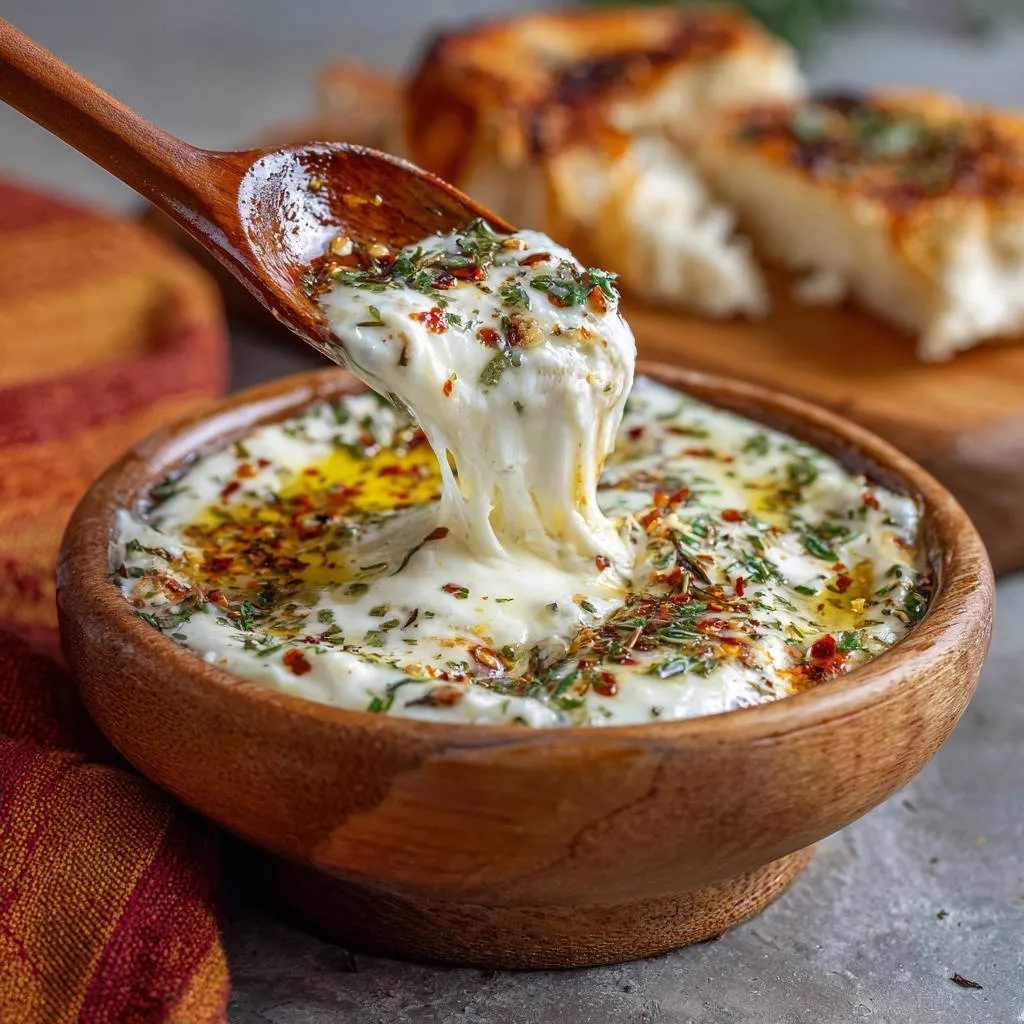
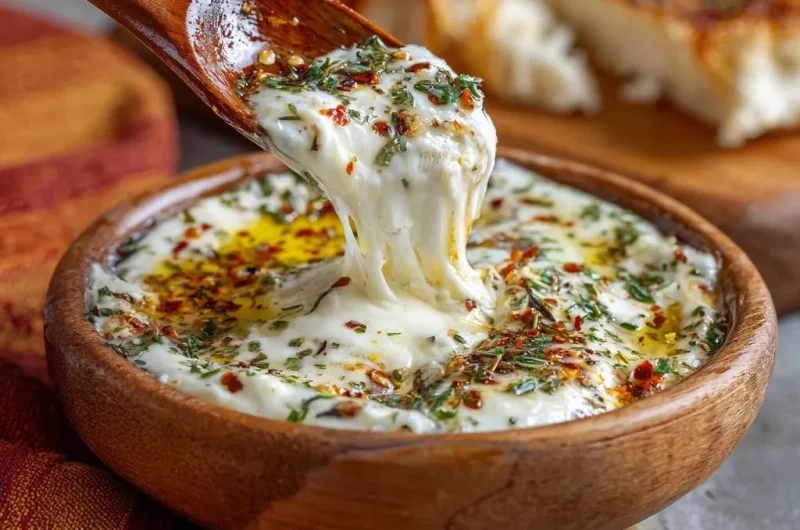
Generously drizzle the prepared herb and chili infused olive oil over the top of the hot, gooey cheese. This not only adds a burst of flavor but also a beautiful presentation.
Serve your Skillet Herb and Chili Melted Cheese Dip immediately with warm, crusty bread or pita. Enjoy that incredible, guaranteed stretch that makes this an unforgettable easy party dip!
Chef’s Secrets: Elevating Your Skillet Herb and Chili Melted Cheese Dip Experience
Mastering the Low Heat: Patience truly is a virtue here. Cooking cheese slowly and gently is the fundamental key to avoiding separation and achieving a velvety smooth texture. Never rush this step, as a few extra minutes make all the difference for this stretchy cheese recipe.
The Art of Gentle, Constant Stirring: Continuous, light stirring helps the cheese melt evenly and emulsify with the water. This prevents lumps from forming and actively promotes that desired glorious stretch.
Freshly Grated vs. Pre-Shredded Cheese: While the recipe allows for pre-shredded, freshly grated cheese often melts more smoothly because it lacks the anti-caking agents found in packaged varieties. For the absolute best results and melt, grate your own cheese!
Herb & Chili Oil: Infusion Tricks: For an even deeper flavor, let your herb and chili oil sit for 5-10 minutes before drizzling, allowing the flavors to meld beautifully. You can also gently warm the oil first (being careful not to fry the herbs) to release more aroma and ensure a potent infusion.
Timing is Everything: Serve Immediately: Cheese dips are always best enjoyed fresh off the heat when they are at their most gooey and stretchy. Ensure all your dippers are prepped and ready to go before the cheese is even fully melted!
Beyond Bread: Creative Ways to Enjoy Your Skillet Herb and Chili Melted Cheese Dip
Classic Pairings: Crusty Bread and Pita Perfection
Warm, crusty bread, like a sliced baguette or ciabatta, and soft pita are quintessential dippers. Their robust textures are perfect for scooping up generous amounts of the gooey, melted cheese appetizer.
For an extra treat, try serving alongside some spicy cheesy bread for a truly decadent pairing.
Veggie Dippers for a Lighter Touch
For a fresher, lighter approach, offer a colorful array of fresh vegetables. Crisp bell pepper strips, carrot sticks, cool cucumber slices, or blanched broccoli florets provide a delightful crunch and a healthy counterpoint to the rich dip.
Unexpected Twists: Elevating Your Appetizer Spread
Don’t limit yourself to traditional dippers! Sturdy crackers, tortilla chips, or even crisp apple slices can offer an exciting textural contrast. This versatile dip also makes an incredible topping for baked potatoes, chili, or even scrambled eggs.
Planning Ahead? Tips for Skillet Herb and Chili Melted Cheese Dip Prep & Storage
Can You Make it Ahead? (And Should You?)
Melted cheese dips are truly at their peak immediately after preparation, when they are at their ultimate stretchiness. Making it entirely ahead of time is challenging as the texture will firm up significantly upon cooling.
However, you can prep all your ingredients in advance – grate the cheese, mix the herb oil – and then perform the melting step just before serving for the best results. For another great make-ahead dip, consider our perfect creamy garlic dip.
Storing Leftovers: Reheating for Best Results
If you happen to have any leftovers of this delicious gooey cheese dip, store them in an airtight container in the refrigerator for up to 3 days. When reheating, the key is low and slow.
Gently rewarm the dip on the stovetop over very low heat, stirring constantly, and add a tiny splash of milk or water to help regain some of its original creamy, stretchy texture.
Uh Oh! Troubleshooting Common Skillet Herb and Chili Melted Cheese Dip Issues
My Dip is Oily/Clumpy, Not Stretchy!
This almost always means the heat was too high or the cheese was overcooked. The fats separated from the proteins. To attempt a rescue, remove from heat, stir in a tiny bit more water (1-2 teaspoons), and return to very low heat, stirring continuously and gently until it re-emulsifies. If it’s too far gone, unfortunately, it’s best to start fresh with a keen eye on the heat.
It’s Not Melting Evenly
Uneven melting is usually due to insufficient stirring or inconsistent heat distribution. Ensure you are stirring constantly and gently, scraping the bottom and sides of the pan to integrate all the cheese. If using a thinner pan, try moving it slightly on the burner to even out the heat.
The Herbs Aren’t Infusing Enough Flavor
For a more potent herb and chili oil, try letting it sit for at least 10 minutes before drizzling to allow the flavors to deepen. You could also gently warm the olive oil before adding the dried herbs and chili flakes; this helps release their aromatic compounds more effectively.
Your Top Questions About Skillet Herb and Chili Melted Cheese Dip, Answered!
Can I use a different type of cheese?
Absolutely! Provolone, white cheddar, or fontina are excellent choices that melt well and offer delicious flavor variations for your Skillet Herb and Chili Melted Cheese Dip. Avoid high-moisture cheeses (like fresh mozzarella) or very aged, crumbly varieties, as they won’t provide the same smooth, stretchy texture.
What if I don’t have a cast iron skillet?
No cast iron? No problem! Any small, heavy-bottomed saucepan will work perfectly. The key is consistent, low heat, which any good quality pan can provide. The serving presentation might differ, but the delicious taste will be the same!
Is this recipe spicy? Can I adjust the heat?
The specified amount of red pepper flakes provides a mild to moderate warmth. It’s incredibly easy to adjust; omit them entirely for no heat, reduce for just a hint, or double (or even triple!) them for a more fiery kick in your chili cheese delight.
Can I add other ingredients directly to the dip itself?
You certainly can, but with caution! For instance, finely minced garlic or shallots should be sautéed first until fragrant before adding the cheese. Finely chopped jalapeños (fresh or pickled) can be stirred in with the cheese for an extra layer of flavor and texture. Just remember, additional ingredients can slightly alter the melting dynamics, so keep the heat very low.
Ready to Impress? Share Your Skillet Herb and Chili Melted Cheese Dip Masterpiece!
We’re confident this Skillet Herb and Chili Melted Cheese Dip will be a star at your next gathering or a delightful treat for a cozy night in. Its guaranteed smooth, stretchy texture and vibrant herb-chili flavor are truly irresistible, making it a new favorite for every cheese lover.
We’d love to see your culinary creations! Share your experience and photos on social media, tagging us and using #SkilletCheeseDip. What’s your favorite dipper? Let us know in the comments below! For more delicious dipper ideas, you might also love our crispy garlic parmesan potato wedges.
Herb and Chili Melted Cheese Dip
Course: AppetizerCuisine: InternationalDifficulty: easy2
servings5
minutes7
minutes450
kcal12
minutesSay goodbye to clumpy, oily cheese dips! This recipe guarantees a smooth, gloriously stretchy cheese every time with a simple trick. Infused with herbs and a hint of chili, it’s the ultimate dipping experience.
Ingredients
8 ounces low moisture mozzarella cheese, shredded (or a blend of mozzarella and provolone)
2 tablespoons olive oil, divided
1 tablespoon dried parsley
1 tablespoon dried oregano
1 teaspoon red pepper flakes (or more, to taste)
1 tablespoon water
Pinch of salt
Crusty bread or pita, for serving
Directions
- Grate your cheese if not already shredded. In a small saucepan or an oven safe skillet (like cast iron), combine the shredded cheese with the water and a tiny pinch of salt.
- This is the secret for stretchiness! Place the saucepan over very low heat. Cook, stirring constantly and gently with a wooden spoon, until the cheese begins to melt and becomes smooth and completely stretchy. Do not rush this step or use high heat, as it can cause the cheese to become oily and separate. It might take 5 to 7 minutes for the cheese to fully melt into a cohesive, gooey consistency.
- While the cheese is melting, in a separate small bowl, combine 1 tablespoon of olive oil, dried parsley, dried oregano, and red pepper flakes. Mix well.
- Once the cheese is perfectly melted and stretchy, immediately transfer it to your serving bowl if not already in one. Drizzle the herb and chili infused olive oil generously over the top.
- Serve immediately with warm, crusty bread or pita for dipping. Enjoy that incredible, guaranteed stretch!
Notes
- For best results, cook cheese over very low heat; high heat can cause oiliness and separation.