We’ve all been there: biting into a seemingly perfect Spicy Fried Chicken Sandwich, only for that glorious crispiness to give way to a disappointing soggy mess. It’s a culinary heartbreak. But I’ve spent years perfecting the technique to ensure every bite delivers an unparalleled, lasting crunch, even with all the delicious fixings.
This recipe isn’t just another take on a classic; it’s a meticulously crafted guide to an exceptional sandwich that will stay crispy from the first bite to the last, proving that homemade truly can be better than anything you’ll find out there.
Why This Spicy Fried Chicken Sandwich Belongs in Your Recipe Box
The Double-Fry Difference: Unlocking Unrivaled Crispness
The secret weapon for our ultimate Spicy Fried Chicken Sandwich is the double-fry method. This two-stage process cooks the chicken thoroughly at a lower temperature, then blasts it at a higher heat to expel moisture, creating an intensely crisp crust that defies sogginess, even when coated in sauce.
A Symphony of Flavors: Fiery Glaze Meets Cooling Coleslaw
Experience a perfectly orchestrated flavor profile where the thrilling heat of a sticky, spicy glaze harmonizes with the refreshing tang and creaminess of our homemade coleslaw. This balance ensures each bite is exciting, vibrant, and utterly delicious.
Achieve That Perfect Bite, Every Single Time
From the succulent, buttermilk-marinated chicken to the ultra-crispy coating and the perfectly toasted brioche bun, this recipe guarantees a consistently satisfying experience. You’ll achieve that ideal combination of tender, juicy, crunchy, spicy, and tangy, making it the best Spicy Fried Chicken Sandwich you’ve ever had.
Gathering Your Arsenal: Essential Ingredients for the Ultimate Sandwich
For the Star: Tender Chicken Thighs & Buttermilk Magic
We opt for boneless, skinless chicken thighs over breasts for their inherent juiciness and rich flavor, which stands up beautifully to frying. Buttermilk is crucial; its mild acidity tenderizes the chicken, breaks down tough proteins, and helps the dredge adhere for an even, crispy coating.
The Crisping Foundation: Flour, Cornstarch & the Perfect Spice Blend
Our dredge goes beyond simple flour by incorporating cornstarch, a secret ingredient that ensures an extra-crisp, golden-brown crust that truly lasts. The blend of paprika, garlic powder, onion powder, and cayenne pepper infuses the chicken with aromatic depth and a customizable kick of heat, creating a foundational flavor for this spicy chicken recipe.
Crafting the Fiery-Sweet Glaze: Hot Sauce, Honey, Butter & Vinegar
This dynamic glaze combines the iconic heat of hot sauce (like Frank’s RedHot) with the sweetness of honey, the richness of butter, and the bright acidity of apple cider vinegar. This quartet creates a balanced, sticky sauce that coats every nook and cranny of the chicken, delivering bold flavor without compromising crunch.
The Refreshing Counterpoint: Creamy Cabbage & Carrot Coleslaw
Our quick coleslaw is more than just a topping; it’s an essential element. The crisp shredded cabbage and carrot, bound in a tangy mayonnaise-based dressing, provide a vital cooling and textural contrast, cutting through the richness and heat of the fried chicken.
The Essential Finish: Toasted Brioche & Zesty Dill Pickles
A high-quality brioche bun, lightly buttered and toasted, provides a soft yet sturdy foundation that won’t get soggy. Its slight sweetness complements the spicy chicken. Zesty dill pickle slices add a crucial bright, briny pop that cuts through the richness and heat, completing the classic Spicy Fried Chicken Sandwich experience.
Setting Up Your Kitchen: Tools for Frying Success
Heavy-Bottomed Pot or Dutch Oven: This essential piece of equipment distributes heat evenly and maintains consistent oil temperature, which is critical for successful deep frying and preventing temperature fluctuations.
Deep-Fry Thermometer: Absolutely crucial for achieving the perfect crispy texture. Accurate temperature control prevents your homemade fried chicken sandwich from becoming either greasy and limp or burnt on the outside and raw inside.
Wire Rack & Baking Sheet: After frying, chicken needs to drain on a wire rack set over a baking sheet. This allows air to circulate around all sides, preventing the bottom from steaming and ensuring a truly crisp exterior.
Tongs: Long-handled tongs are your best friend for safely maneuvering chicken in and out of hot oil, protecting your hands from splatters and burns.
Shallow Dishes: Using wide, shallow dishes for your buttermilk marinade and flour dredge simplifies the coating process, allowing for an even and thorough application that’s key to a great crust.
Your Journey to the Perfect Spicy Fried Chicken Sandwich: A Detailed Guide
- Prepare Your Chicken for Ultimate Tenderness:
Start by pounding your boneless, skinless chicken thighs to an even thickness, approximately ½-inch. This ensures uniform cooking. In a medium bowl, combine the pounded chicken with buttermilk, 1 teaspoon salt, and ½ teaspoon black pepper. Cover the bowl and refrigerate for at least 30 minutes, but ideally up to 4 hours. This buttermilk bath is a foundational step for tenderizing the chicken and infusing it with flavor, leading to a truly juicy buttermilk fried chicken.
- Crafting the Crispy Dredge:
In a shallow dish, whisk together 1 cup all-purpose flour, ¼ cup cornstarch, 1 teaspoon paprika, ½ teaspoon garlic powder, ½ teaspoon onion powder, and ¼ teaspoon cayenne pepper. The addition of cornstarch is a vital component here, acting as our secret weapon for achieving an exceptionally crispy, enduring crust on your Spicy Fried Chicken Sandwich.
For an even better crunch, check out this Nashville-inspired chicken sandwich.
- The Perfect Coating Technique:
Remove each chicken thigh from the buttermilk, allowing any significant excess liquid to drip off for a few seconds. Immediately dredge each piece thoroughly in the prepared flour mixture. Press firmly to ensure a thick, even coating all over the chicken, which is crucial for building that incredible texture.
Once coated, transfer the chicken to a clean wire rack while you prepare for frying. This brief rest allows the coating to moisten slightly and adhere better, reducing the chance of it flaking off in the hot oil.
- The Crucial First Fry: Building the Base Crisp (325°F/160°C):
Heat about 2-3 inches of vegetable oil in a heavy-bottomed pot or Dutch oven until your deep-fry thermometer registers a steady 325°F (160°C). Carefully lower the coated chicken pieces into the hot oil, taking care not to overcrowd the pot; fry in batches if necessary.
Fry for 6-8 minutes, flipping occasionally, until the chicken is golden brown and cooked through, reaching an internal temperature of 165°F (74°C). Remove the chicken to a clean wire rack set over a baking sheet to drain; this initial fry fully cooks the chicken and begins to develop its crust, preventing it from steaming.
- Whipping Up the Spicy Glaze and Toasting Buns:
While the chicken drains, in a small saucepan, combine ¼ cup hot sauce, 2 tablespoons honey, 1 tablespoon butter, and ½ tablespoon apple cider vinegar. Heat this mixture over medium-low heat, stirring constantly until the butter is completely melted and the glaze is smooth and warm. Keep the glaze warm while you prepare the other components.
Next, lightly butter the cut sides of your brioche buns and toast them face-down in a dry skillet over medium heat for 1-2 minutes, until they are beautifully golden brown. This toasting step creates a critical barrier, preventing the bun from becoming soggy from the saucy chicken and coleslaw, essential for a perfect Spicy Fried Chicken Sandwich.
- Assembling Your Refreshing Coleslaw:
In a medium bowl, combine 2 cups shredded green cabbage, ¼ cup shredded carrot, ¼ cup mayonnaise, 1 tablespoon apple cider vinegar, 1 teaspoon sugar, ¼ teaspoon salt, and a pinch of black pepper. Mix all of these ingredients thoroughly until well combined.
Finally, stir in 2 tablespoons of fresh chopped parsley. This bright, herbaceous addition provides a vibrant finish and an extra layer of freshness that balances the richness of the fried chicken.
- The “Crunch Lock-In”: The Second Fry (375°F/190°C):
Increase your frying oil temperature to 375°F (190°C). Once the oil is up to temperature, carefully return the pre-fried chicken pieces to the hot oil for an additional 1-2 minutes. This higher-temperature, quick second fry is the “crunch lock-in” step; it expels any lingering moisture, creating an incredibly crisp crust that will truly stand up to the glaze and toppings.
- Sauce, Stack, and Savor Your Masterpiece:
Immediately after the second fry, transfer the piping hot, double-fried chicken directly into the warm spicy glaze. Toss quickly to coat evenly, ensuring every part of the crispy chicken is generously covered in the delicious, sticky sauce.
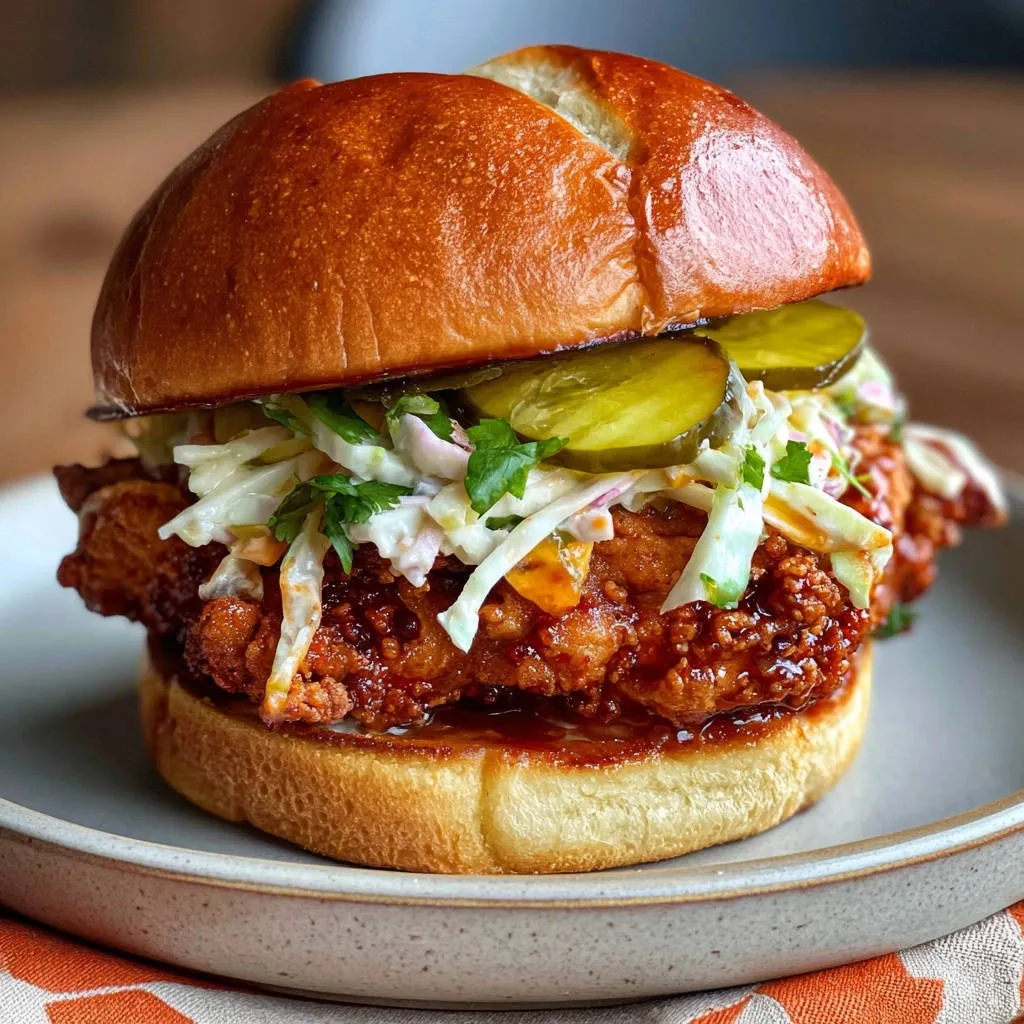
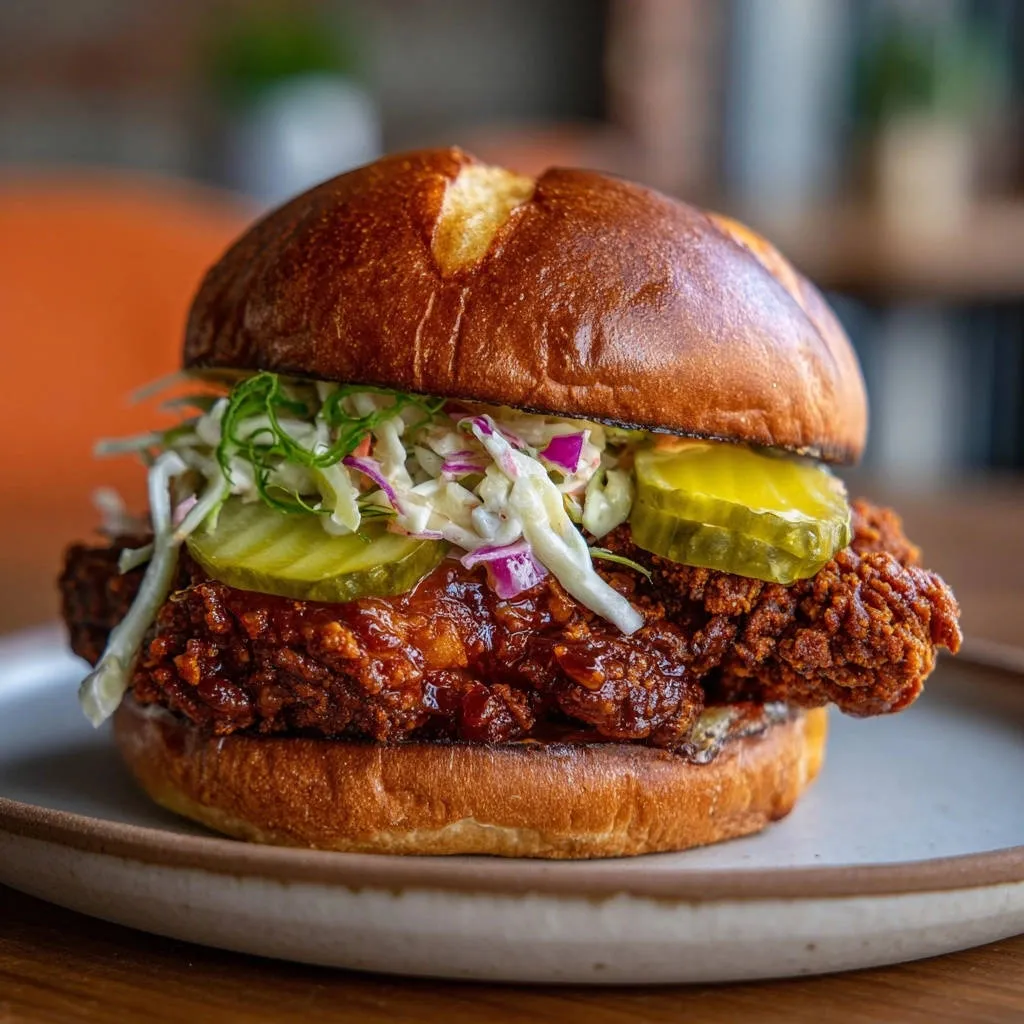
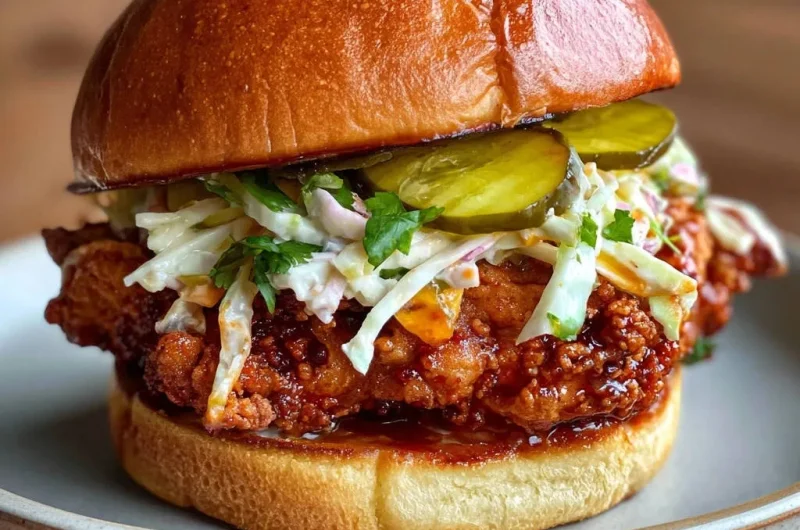
Place a sauced chicken thigh on the bottom half of each toasted brioche bun. Top generously with your freshly prepared coleslaw, then add 4-6 zesty dill pickle slices, and finally, cap it all off with the top bun. Serve your Spicy Fried Chicken Sandwich immediately to enjoy that maximum, lasting crunch and explosion of flavors!
Elevate Your Sandwich: Expert Tips for Frying and Flavor
Temperature Control is King: Always use a reliable deep-fry thermometer to monitor your oil. Oil that’s too cool results in greasy, limp chicken; too hot and it burns on the outside before cooking through, ruining your crispy fried chicken.
Don’t Overcrowd the Pot: Fry chicken in batches if necessary, typically one or two pieces at a time depending on your pot size. Overcrowding dramatically drops the oil temperature, leading to less crispy results and uneven cooking.
Rest and Drain Properly: After each fry, always drain fried chicken on a wire rack set over a baking sheet, not directly on paper towels. This allows air to circulate freely around all sides, preventing the bottom from becoming soggy and preserving the crunch.
Customize Your Heat: Adjust the amount of cayenne pepper in the dredge and the hot sauce in the glaze to match your preferred spice level for your spicy chicken recipe. For an even more intense kick, consider adding a tiny pinch of finely ground habanero powder.
Embrace Freshness: The quality of your fresh ingredients significantly impacts the final taste. Freshly chopped parsley in the coleslaw and high-quality brioche buns make a noticeable difference in the overall flavor and texture of your homemade Spicy Fried Chicken Sandwich.
Even Pounding for Even Cooking: Pounding chicken to an even thickness (around ½-inch) is crucial. It ensures that all parts cook uniformly and at the same rate, preventing dry spots or undercooked areas, leading to perfectly tender chicken every time.
Tackling Common Frying Woes: Troubleshooting Your Sandwich
“Why isn’t my chicken crispy, even after the double fry?”
The most common culprits are incorrect oil temperature or overcrowding. Ensure your oil temperature is accurate and consistent for both frying steps using a reliable thermometer. If the oil is too cool, the chicken absorbs too much oil and becomes greasy rather than developing a crisp crust. Overcrowding the pot instantly drops the oil temperature, making crispness impossible.
Also, double-check that you’ve included cornstarch in your dredge; it’s a non-negotiable ingredient for achieving that lasting crispness. Lastly, always drain your chicken on a wire rack after each fry to allow proper air circulation and prevent steaming, which can soften the crust.
“My chicken is tough or dry inside.”
This is typically a sign of overcooking. Always use a meat thermometer to ensure the internal temperature of the chicken reaches precisely 165°F (74°C) during the initial fry, and adhere strictly to the recommended 1-2 minutes for the second, high-temperature fry. Pounding the chicken to an even thickness before marinating also promotes uniform cooking, preventing thinner edges from drying out prematurely.
Additionally, a shorter marination time can contribute to dryness. Make sure you marinate the chicken in buttermilk for at least the minimum 30 minutes, or up to 4 hours, to allow the buttermilk to work its magic in tenderizing the meat and enhancing its moisture retention.
“The glaze is too thin or too thick.”
If your spicy chicken glaze turns out too thin and runny, gently reduce it over medium-low heat for a few minutes, stirring frequently, until it thickens to your desired consistency. Be patient, as it will thicken more as it cools slightly.
Conversely, if the glaze becomes too thick and gloopy, you can easily thin it out. Add a tiny splash of water, a bit more hot sauce, or a touch more apple cider vinegar, stirring until it reaches a smooth, pourable, and coatable consistency. Adjust gradually to avoid making it too thin.
Complementary Sides: What to Serve with Your Spicy Fried Chicken Sandwich
While this Spicy Fried Chicken Sandwich is robust enough to be a standalone meal, pairing it with thoughtfully chosen side dishes can elevate the entire experience. Classic crispy French fries or perfectly crispy garlic parmesan potato wedges make an obvious and satisfying choice, adding another layer of delightful crunch.
For a lighter, refreshing contrast, consider serving a simple green salad dressed with a bright vinaigrette; this helps to cut through the richness of the fried chicken. Other fantastic options include a batch of crispy baked onion rings for another deep-fried indulgence, or even a side of extra dill pickle spears or our homemade quick pickled jalapenos for an added tangy, spicy bite.
Your Top Questions Answered: Spicy Fried Chicken Sandwich FAQs
Can I use chicken breasts instead of thighs for this recipe?
Yes, you can absolutely substitute boneless, skinless chicken breasts for thighs in this fried chicken sandwich recipe. However, chicken thighs naturally retain more moisture and tend to stay more tender during the frying process. If using breasts, it’s particularly important to pound them to an even thickness to ensure uniform cooking and to avoid overcooking, which can easily lead to dryness.
How do I make this Spicy Fried Chicken Sandwich gluten-free?
To make this recipe gluten-free, the main modification is replacing the all-purpose flour in the dredge. Use a high-quality gluten-free all-purpose flour blend; ideally, one that contains xanthan gum, as this helps achieve a crispier and more cohesive coating. Additionally, always verify that all other ingredients, such as your chosen hot sauce and spices, are certified gluten-free to avoid any cross-contamination.
Can I bake or air fry the chicken for a healthier option?
While baking or air frying won’t perfectly replicate the deep-fried texture, you can adapt this crunchy chicken sandwich recipe. For air frying, preheat your air fryer to 375°F (190°C), spray the coated chicken generously with oil, and cook for 15-20 minutes, flipping halfway, until golden brown and cooked through. You might still benefit from a very short, higher-temperature “second fry” in the air fryer (e.g., 2-3 minutes at 400°F/200°C) for an extra crisp boost.
How long does the fried chicken last, and can I make it ahead?
For the absolute best crispness and flavor, this Spicy Fried Chicken Sandwich is truly best enjoyed immediately after assembly. However, the fried chicken pieces (before being tossed in the glaze) can be stored in an airtight container in the refrigerator for up to 2-3 days. To reheat, place them in an oven or air fryer until hot and re-crisped, then proceed with glazing and assembling your sandwich.
What’s the best hot sauce to use for the spicy glaze?
Frank’s RedHot is a classic and highly recommended choice for this glaze, offering a balanced heat and tangy flavor that perfectly complements the chicken. However, feel free to use your favorite cayenne-based hot sauce if you prefer a different profile. Experimenting with other hot sauces, such as a habanero-based one for more fruitiness or sriracha for a garlicky kick, can also yield exciting and delicious results, personalizing your spicy chicken recipe.
Ready to Impress? Share Your Spicy Fried Chicken Sandwich Masterpiece!
You’ve now unlocked the definitive secrets to crafting a truly unforgettable Spicy Fried Chicken Sandwich – one that promises an undeniable, delightful crunch with every single bite. This recipe isn’t just about cooking; it’s about mastering an experience, a moment of pure culinary joy that will undoubtedly leave everyone asking for your secret.
We encourage you to try this recipe, customize it to your taste, and then proudly share your delicious creations! Tag us on social media using #SpicyFriedChickenSandwich or leave a comment below with your feedback and any personal twists you added. Happy frying, and prepare for rave reviews!
Spicy Fried Chicken
Course: Main CourseCuisine: AmericanDifficulty: medium2
sandwiches30
minutes20
minutes950
kcal50
minutesTired of soggy fried chicken sandwiches? This recipe guarantees a truly crispy experience that stays crunchy with a double-fry technique. Topped with a spicy glaze and refreshing coleslaw, get ready for the perfect bite every time.
Ingredients
For the Chicken:
2 boneless skinless chicken thighs (or breasts), pounded to even thickness
1 cup buttermilk
1 teaspoon salt
1/2 teaspoon black pepper
1 cup all-purpose flour
1/4 cup cornstarch
1 teaspoon paprika
1/2 teaspoon garlic powder
1/2 teaspoon onion powder
1/4 teaspoon cayenne pepper (adjust to taste)
Vegetable oil, for frying
For the Spicy Glaze:
1/4 cup hot sauce (like Frank’s RedHot)
2 tablespoons honey
1 tablespoon butter
1/2 tablespoon apple cider vinegar
For the Coleslaw:
2 cups shredded green cabbage
1/4 cup shredded carrot
1/4 cup mayonnaise
1 tablespoon apple cider vinegar
1 teaspoon sugar
1/4 teaspoon salt
Pinch of black pepper
2 tablespoons fresh parsley, chopped, for garnish
For Assembly:
2 brioche buns, split
4-6 dill pickle slices
Directions
- Marinate the Chicken: In a bowl, combine chicken thighs with buttermilk, salt, and black pepper. Cover and refrigerate for at least 30 minutes, or up to 4 hours.
- Prepare the Dredge: In a shallow dish, whisk together flour, cornstarch, paprika, garlic powder, onion powder, and cayenne pepper.
- Coat the Chicken: Remove chicken from buttermilk, letting excess drip off. Dredge each piece thoroughly in the flour mixture, pressing firmly to ensure a thick, even coating. Place on a wire rack.
- First Fry: Heat about 2-3 inches of vegetable oil in a heavy-bottomed pot or Dutch oven to 325°F (160°C). Carefully lower chicken pieces into the hot oil, ensuring not to overcrowd the pot. Fry for 6-8 minutes, flipping occasionally, until golden brown and cooked through (internal temperature reaches 165°F / 74°C). Remove chicken to a clean wire rack set over a baking sheet to drain. This crucial step prevents the chicken from steaming and losing its initial crispness.
- Make the Glaze: While chicken drains, in a small saucepan, combine hot sauce, honey, butter, and apple cider vinegar. Heat over medium-low, stirring until butter is melted and mixture is smooth. Keep warm.
- Toast the Buns: Lightly butter the cut sides of the brioche buns and toast them face-down in a dry skillet over medium heat for 1-2 minutes until golden brown. This creates a barrier against moisture from the toppings.
- Prepare Coleslaw: In a medium bowl, combine shredded cabbage, carrot, mayonnaise, apple cider vinegar, sugar, salt, and pepper. Mix well. Stir in chopped parsley.
- The Crunch Lock-In (Second Fry): Increase oil temperature to 375°F (190°C). Carefully return the fried chicken pieces to the hot oil for an additional 1-2 minutes. This second fry at a higher temperature drives out any remaining moisture and creates an incredibly crisp crust that will stand up to the sauce and toppings.
- Sauce and Assemble: Immediately after the second fry, transfer the piping hot chicken directly into the warm spicy glaze. Toss quickly to coat evenly. Place a sauced chicken thigh on the bottom half of each toasted bun. Top generously with coleslaw, then dill pickle slices, and finally, the top bun. Serve immediately to enjoy that maximum, lasting crunch!
Notes
- The double-fry and toasted buns are key to maintaining an incredibly crisp texture against sauces and toppings.