If you’ve ever wrestled with homemade caramel that turned out rock-hard, gritty, or so stubbornly sticky it threatened your dental work, you know the frustration. I’ve been there countless times, but after much experimentation, I’ve finally perfected the technique for the most luscious, perfectly chewy caramel layer that absolutely shines in these Ultimate Salted Caramel Chocolate Bars.
This recipe ensures a stable, non-stick caramel that holds its shape beautifully, creating a truly unforgettable treat. Get ready to bake a bar that’s not just delicious, but also consistently perfect every single time.
Why These Ultimate Salted Caramel Chocolate Bars Will Be Your New Favorite
These bars aren’t just another dessert; they’re a masterclass in texture and flavor balance. Every component is designed to complement the next, creating a harmonious and utterly addictive experience.
Say Goodbye to Sticky, Hard Caramel!
My unique caramel method focuses on careful temperature control and consistent stirring to achieve a dream texture. It’s perfectly chewy, never pulls your fillings, and melts in your mouth without being runny.
This ensures the caramel layer is the star it’s meant to be, offering that delightful pull without any unpleasant stickiness or grittiness.
The Secret to Perfectly Balanced Layers
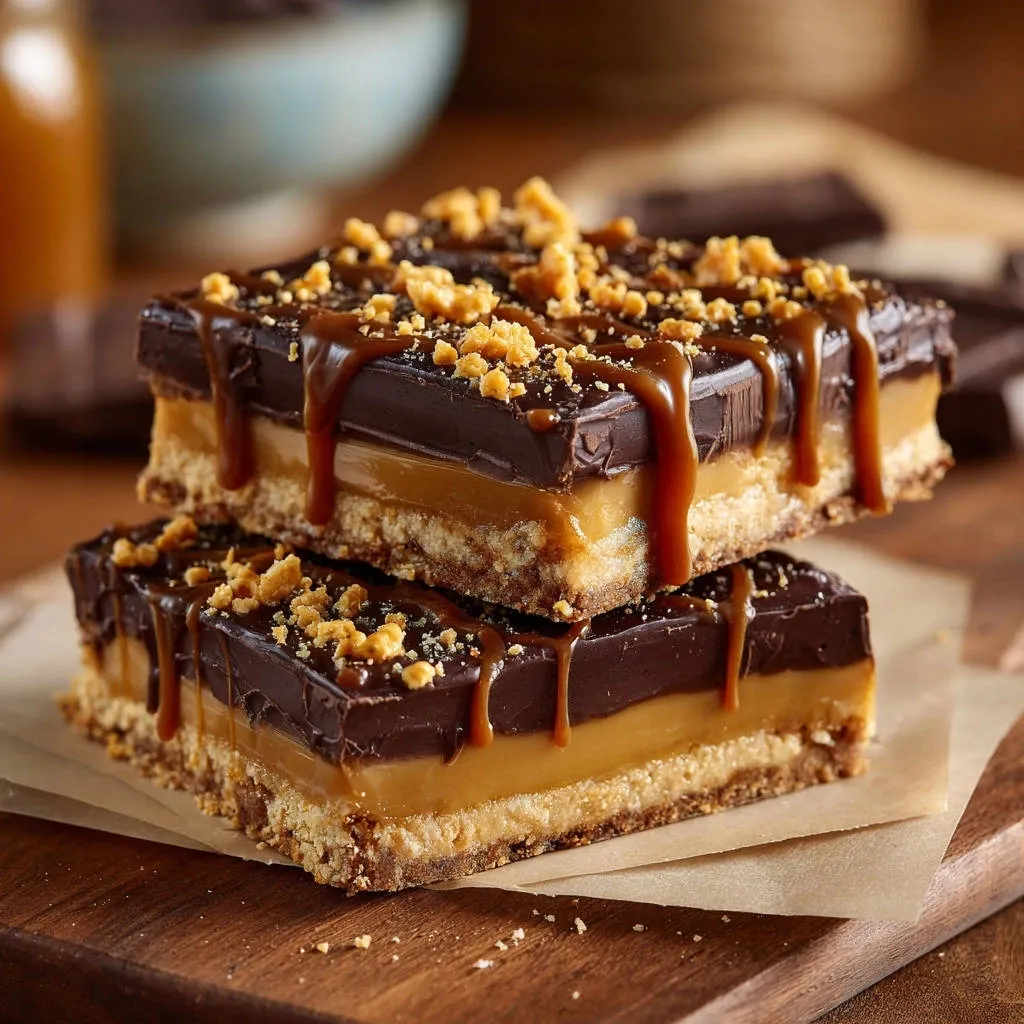
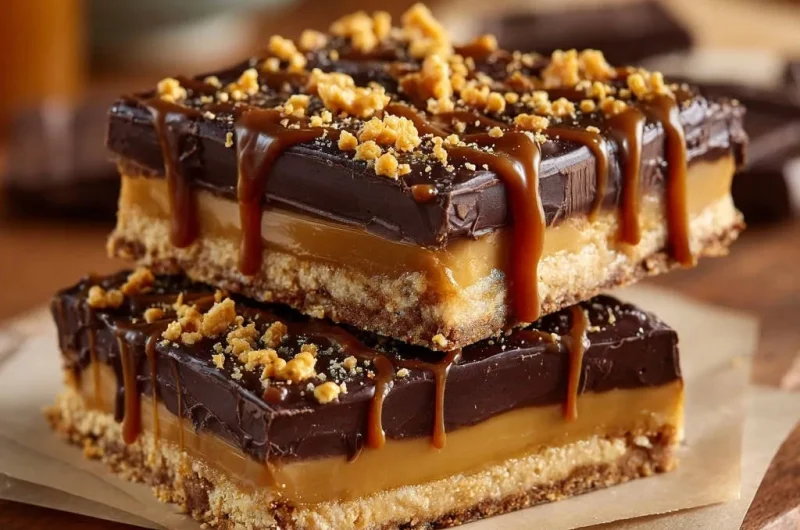
We start with a crisp, buttery graham cracker crust that provides a sturdy foundation. This is topped with our signature chewy salted caramel, creating a wonderful contrast.
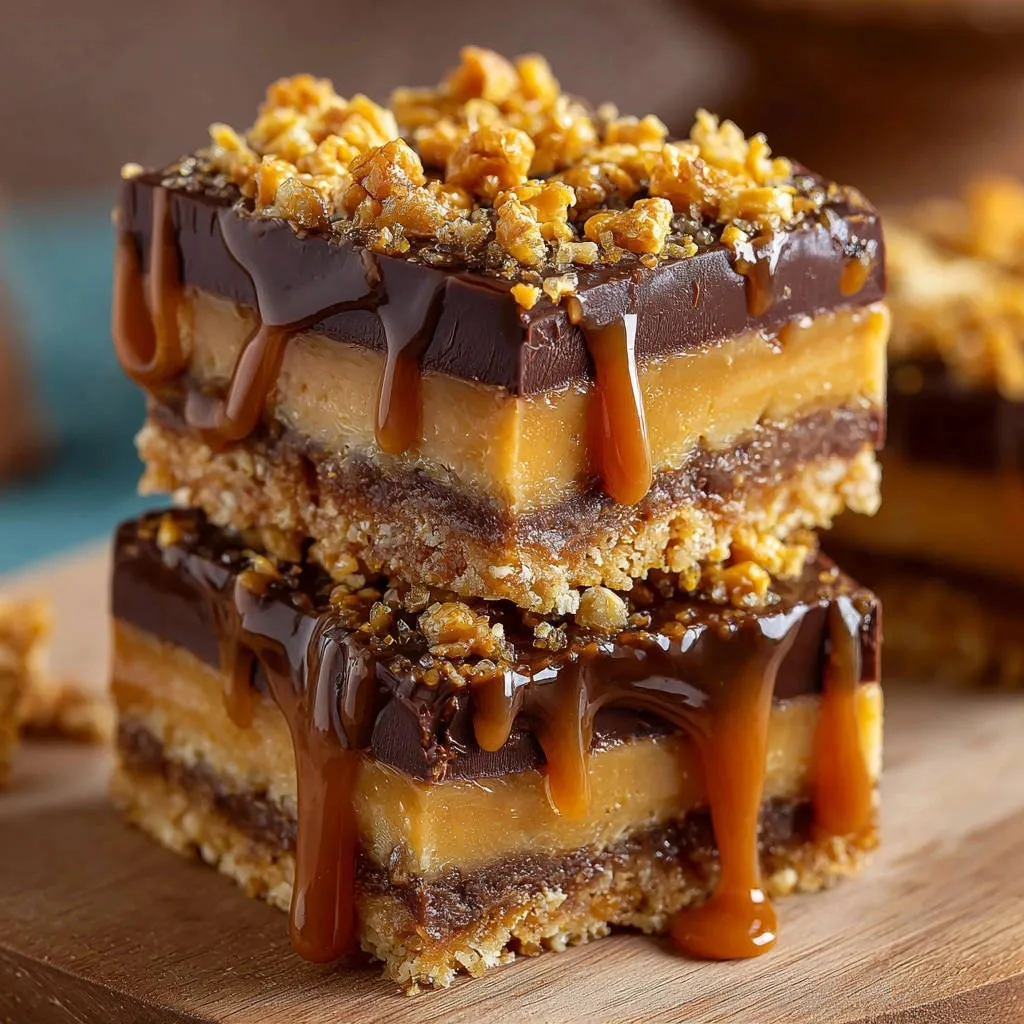
Finally, a rich, silky smooth chocolate ganache crowns the bar, balancing the sweetness and adding a decadent finish. Each layer contributes its best without overpowering the others.
Effortless Elegance for Any Occasion
Despite their gourmet appearance and incredible flavor, these Ultimate Salted Caramel Chocolate Bars are surprisingly approachable for any home baker. They look impressive on any dessert platter, making them ideal for parties, gifting, or a special treat.
The clear steps and helpful tips guarantee success, allowing you to confidently create a truly elegant dessert.
Essential Ingredients for Irresistible Bars
Quality ingredients are the foundation of any great dessert. Here’s a breakdown of what you’ll need and why each element is important.
The Crunchy Foundation: Graham Cracker Crust
Graham Cracker Crumbs: These provide the classic, slightly honeyed flavor and firm texture for our base. Ensure they are finely crushed for an even crust.
Granulated Sugar: A touch of sugar helps bind the crumbs and adds a hint of sweetness to the crust.
Unsalted Butter, Melted: Butter is crucial for binding the crumbs and creating a rich, sturdy crust. Using unsalted butter allows you to control the overall saltiness in the recipe.
Crafting the Signature Chewy Caramel
Unsalted Butter: The fat content contributes to the caramel’s richness and smooth texture. Again, unsalted for precise seasoning.
Packed Light Brown Sugar: This provides a deeper, more molasses-like flavor than white sugar, which is essential for a truly decadent caramel.
Sweetened Condensed Milk: The hero of our chewy caramel, it brings a creamy texture and sweetness that’s difficult to achieve otherwise. Do not use evaporated milk.
Salt: A critical ingredient for “salted caramel,” it beautifully balances the sweetness and enhances all the other flavors.
Vanilla Extract: Added off the heat, vanilla rounds out the caramel’s flavor profile, offering warmth and complexity.
Silky Smooth Chocolate Ganache
Semi-Sweet Chocolate Chips (or Chopped Chocolate): High-quality chocolate is key here for a glossy, rich ganache. Chips are convenient, but chopped bar chocolate often melts smoother.
Heavy Cream: This provides the lush, creamy base for the ganache, ensuring it sets with a beautiful shine and smooth texture. Don’t substitute with lighter creams.
Unsalted Butter: A small amount of butter adds extra richness and helps achieve that desirable glossy finish on your ganache.
Optional Garnishes for a Flawless Finish
Extra Caramel Sauce for Drizzling: If you have extra, a swirl of caramel on top adds an artistic and delicious touch.
Crushed Shortbread or Toffee Bits: These offer a delightful textural contrast and an extra layer of buttery flavor and crunch.
Tools of the Trade: Equipping Your Kitchen
Having the right tools makes all the difference in ensuring a smooth baking process and perfect results.
Baking Essentials
8×8 inch Baking Pan: This size is ideal for producing thick, substantial bars. A smaller pan would make them too tall, a larger one too thin.
Parchment Paper: Crucial for lining the pan, especially with an overhang. This makes lifting the chilled bars out incredibly easy, preventing sticking and breaking.
Mixing Bowls: You’ll need a couple of medium bowls for combining crust ingredients and preparing the ganache.
Spatulas: Both rubber and offset spatulas are handy for spreading the crust, caramel, and ganache evenly.
Caramel Making Aids
Heavy-Bottomed Saucepan: Essential for making caramel. Its thick base distributes heat evenly, significantly reducing the risk of burning and ensuring consistent cooking.
Whisk: A good whisk is indispensable for constant stirring, which is key to preventing crystal formation and achieving a smooth caramel.
Heat-Resistant Spatula: Great for scraping down the sides of the pan while making caramel and ensuring everything is thoroughly mixed.
Finishing Touches
Large, Sharp Knife: For clean, professional-looking slices, a sharp knife is non-negotiable. It cuts through all layers without tearing or smudging.
Cutting Board: Provides a stable surface for slicing your perfectly chilled bars.
Your Step-by-Step Guide to Ultimate Salted Caramel Chocolate Bars Perfection
Let’s walk through each stage of creating these incredible bars, ensuring you achieve flawless results.
- Building the Golden Crust
- Mastering the Chewy Caramel Layer
- The Crucial Chill: Setting the Caramel
- Whipped Up Ganache: Silky & Glossy
- The Grand Finale: Finishing & Final Chill
- Slicing Secrets for Picture-Perfect Bars
Begin by preheating your oven to 350°F (175°C) and lining an 8×8 inch baking pan with parchment paper, leaving generous overhangs on two sides. This overhang will be your best friend for effortless removal later.
In a medium bowl, thoroughly combine the graham cracker crumbs, granulated sugar, and melted unsalted butter. Press this mixture firmly and evenly into the bottom of your prepared pan, using the back of a spoon or your knuckles to create a compact, stable base.
Bake the crust for 8-10 minutes, just until it’s lightly golden and fragrant. Be careful not to overbake, as it will continue to firm up as it cools, providing the perfect crunchy foundation for your Ultimate Salted Caramel Chocolate Bars.
In a heavy-bottomed saucepan, melt 1/2 cup of unsalted butter over medium-low heat. Once melted, add the packed light brown sugar and the entire can of sweetened condensed milk, stirring well to combine.
Bring this mixture to a gentle boil, stirring constantly with a whisk or heat-resistant spatula. This constant stirring is absolutely crucial for preventing the caramel from burning on the bottom and ensuring a perfectly smooth, non-grainy texture, preventing those dreaded sugar crystals.
Continue to boil gently and stir for 5-7 minutes, or until the caramel thickens significantly and develops a rich golden-brown color. You’ll notice it clinging more to the spoon and feeling noticeably denser, but it should still be pourable; trust your instincts here – undercooking means runny caramel, while overcooking leads to hard, brittle caramel.
Remove the saucepan from the heat immediately, then stir in the 1/4 teaspoon of salt and the 1 teaspoon of vanilla extract. The vanilla extract provides a lovely aromatic depth to the rich caramel, truly embodying the essence of a gourmet treat.
Carefully pour the hot, luscious caramel evenly over your pre-baked graham cracker crust. Gently spread it with a spatula if necessary, ensuring a uniform layer from edge to edge.
Place the pan into the refrigerator for at least 30-45 minutes. This chilling step is absolutely essential for the caramel to set firmly and achieve its signature chewy, non-sticky texture. Rushing this will result in a messy, runny caramel layer when you go to add the ganache.
In a heatproof bowl, combine the 1.5 cups of semi-sweet chocolate chips and 1 tablespoon of unsalted butter. Set this aside.
In a small saucepan, heat 1/2 cup of heavy cream over medium heat until it just begins to simmer, showing small bubbles around the edges. Do not let it come to a rolling boil.
Pour the hot cream directly over the chocolate chips and butter in the bowl. Let this mixture sit undisturbed for 5 minutes; this allows the heat from the cream to gently melt the chocolate. After 5 minutes, whisk gently from the center outwards until the ganache is perfectly smooth, glossy, and uniform, without any lumps.
Pour the silky chocolate ganache evenly over the thoroughly chilled and set caramel layer. Carefully spread it with an offset spatula to create a beautiful, smooth top layer.
If you desire, sprinkle with crushed shortbread or toffee bits for extra crunch, and drizzle with additional caramel sauce for an elegant finish. This is also a perfect spot to add a sprinkle of flaky sea salt for an even more pronounced “salted caramel” experience.
Return the pan to the refrigerator for at least 2 hours, or ideally until the chocolate is completely firm and set. This final chill is crucial for allowing all layers to meld and solidify, ensuring your Ultimate Salted Caramel Chocolate Bars are easy to slice and hold their shape.
Once thoroughly chilled, use the parchment paper overhang to gently lift the entire slab of bars from the pan and transfer it to a clean cutting board.
For the cleanest, most professional-looking slices, employ the “hot knife” technique. Dip a large, sharp knife into very hot water, wipe it completely dry with a clean cloth, and then make a decisive cut straight through the bars. Repeat this process for each slice, re-heating and wiping the knife between cuts; this prevents the chocolate from cracking, the caramel from sticking, and ensures smooth, neat edges every single time.
Pro Tips & Baker’s Secrets for Flawless Bars
Elevate your baking with these expert insights to ensure your Ultimate Salted Caramel Chocolate Bars are nothing short of perfect.
Achieving the Perfect Caramel Consistency
The “gentle boil” and “stirring constantly” are your mantras for caramel. Look for visual cues: the caramel will transform from pale and thin to a rich, deep golden-brown, becoming significantly thicker and coating the back of your spoon. It should not be runny, but still pourable, moving like a slow, thick syrup.
A good test is to drop a tiny bit into a glass of cold water; it should form a soft, chewy ball, not dissolve or become rock hard. Trust your senses more than the clock, as stove temperatures vary.
Why Chilling is Non-Negotiable
The chilling steps are absolutely critical for structural integrity and optimal texture. For the caramel, chilling allows the sugar molecules to stabilize, preventing stickiness and achieving that signature chewy bite.
The final chill ensures the chocolate ganache sets firm and glossy, preventing cracks during slicing and allowing all the delicious layers to fuse together perfectly. Skipping this leads to a gooey, messy bar.
The Hot Knife Trick for Clean Slices
This technique is a game-changer for any layered dessert! The heat from the knife warms the chocolate just enough to slice cleanly without cracking or dragging the caramel.
Always ensure your knife is completely dry after heating to prevent water from marring the chocolate’s surface. For very precise cuts, use a ruler to mark your slices before cutting.
Flavor Boosts & Creative Variations
For an extra pop of flavor, sprinkle a generous pinch of flaky sea salt over the finished ganache before it sets. This truly enhances the “salted caramel” experience.
Feel free to experiment with the chocolate: dark chocolate for intensity, milk chocolate for a sweeter profile, or a mix. You could also try a different crust, perhaps an easy shortbread crust or even crushed pretzels for a salty twist.
Troubleshooting Your Salted Caramel Chocolate Bars
Even expert bakers encounter hiccups. Here’s how to tackle common issues with these irresistible bars.
Caramel Too Hard or Gritty?
If your caramel turned out rock-hard, it was likely overcooked; too much moisture evaporated, crystallizing the sugars. Gritty caramel often means it wasn’t stirred enough, allowing sugar crystals to form on the pan’s sides and incorporate.
The solution is precise timing and constant stirring. If it’s already hard, you can try reheating it gently with a tablespoon or two of cream to try and salvage it, but prevention is key.
Caramel Too Runny?
A runny caramel indicates undercooking; not enough moisture evaporated to reach the proper thickening point. It might have looked golden, but didn’t reach the correct consistency.
Unfortunately, once poured and cooled, it’s hard to fix. Next time, allow it to simmer for the full 5-7 minutes, paying attention to the visual and textural cues of thickening and rich color mentioned in the Pro Tips.
Chocolate Ganache Not Setting?
This usually happens if the cream wasn’t hot enough to properly melt the chocolate, or if the chocolate itself wasn’t high enough quality. Poor quality chocolate can also seize or not emulsify properly.
To remedy, gently reheat the ganache in a double boiler or microwave on low power, stirring constantly until smooth and fully melted, then chill longer. Ensure you’re using heavy cream, not half-and-half.
Bars Cracking When Sliced?
Cracking is almost always due to insufficient chilling or trying to slice with a cold knife. The chocolate ganache needs to be fully set but not rock-solid, and the caramel layer firm.
Ensure a full 2-hour chill (or longer) for the final set, and always use the hot knife technique detailed earlier. If the bars are too cold, let them sit at room temperature for 5-10 minutes before slicing to slightly soften the chocolate.
Serving, Storing, and Making Ahead
Here’s how to best enjoy and manage your delicious Ultimate Salted Caramel Chocolate Bars.
Ideal Serving Temperatures
While these bars are fantastic chilled, allowing them to come to room temperature for 15-20 minutes before serving often yields the best texture. The chocolate softens slightly, and the caramel becomes even chewier, enhancing the overall experience.
The flavors also tend to be more pronounced when not straight from the fridge.
Storing Your Delicious Creation
Store leftover bars in an airtight container in the refrigerator for up to 5-7 days. This preserves their freshness and keeps the caramel from getting too soft or sticky.
Ensure they are kept away from strong odors in the fridge, as the chocolate can absorb them.
Can You Make These Bars in Advance?
Absolutely! These Ultimate Salted Caramel Chocolate Bars are an excellent make-ahead dessert. You can prepare them entirely up to 2-3 days in advance and store them, unsliced, in the refrigerator.
Slice them just before serving for the freshest look. They also freeze beautifully; see the FAQ section for details.
Frequently Asked Questions About These Ultimate Salted Caramel Chocolate Bars
Here are answers to some common questions you might have about this recipe.
Can I use different types of chocolate for the ganache?
Yes, you can! Dark chocolate (60-70% cocoa) will give a more intense, less sweet flavor, while milk chocolate will result in a sweeter, milder ganache. White chocolate can also be used, but it’s much sweeter and may require slightly less cream to achieve the right consistency. Always use good quality chocolate for the best results.
Is there a substitute for sweetened condensed milk in the caramel?
Sweetened condensed milk is truly the backbone of this particular chewy caramel, providing its unique texture and richness. While you can make caramel from scratch with heavy cream and sugar, it’s a different technique and would result in a different consistency for these bars.
For a similar no-bake bar experience, you might enjoy our recipe for amazing no-bake peanut butter bars that never fall apart, which uses a different base.
How do I make these Ultimate Salted Caramel Chocolate Bars gluten-free?
Making these bars gluten-free is quite simple! Just swap out the regular graham cracker crumbs for a gluten-free version. Most major grocery stores carry gluten-free graham crackers that will work perfectly in this recipe without any other modifications needed.
How long do these bars last, and can I freeze them?
These bars will last for 5-7 days when stored in an airtight container in the refrigerator. Yes, you can absolutely freeze them! Wrap the entire slab (before slicing) tightly in plastic wrap, then again in aluminum foil, and freeze for up to 1-2 months. Thaw overnight in the refrigerator before slicing and serving. For other impressive frozen treats, consider our creamy caramel crumble cheesecake bars recipe!
Ready to Indulge? Your Ultimate Salted Caramel Chocolate Bars Await!
Now that you have all the insider tips, tricks, and expert guidance, there’s nothing stopping you from creating the most exceptional Ultimate Salted Caramel Chocolate Bars. Say goodbye to caramel frustrations and hello to perfectly chewy, rich, and utterly satisfying layers of flavor.
Gather your ingredients, trust the process, and prepare to impress everyone with these show-stopping bars. We’d love to see your creations and hear what you think – share your baking triumphs in the comments below!
Salted Caramel Chocolate Bars
Course: DessertCuisine: AmericanDifficulty: medium12
bars25
minutes15
minutes450
kcal180
minutesMaster the art of homemade caramel with this foolproof recipe for Ultimate Salted Caramel Chocolate Bars. Featuring a crisp graham cracker crust, a perfectly chewy, non-sticky caramel layer, and a rich chocolate ganache topping, these bars are a truly irresistible dessert that will impress everyone.
Ingredients
For the Crust:
1.5 cups graham cracker crumbs
1/4 cup granulated sugar
1/2 cup unsalted butter, melted
For the Caramel Layer:
1/2 cup unsalted butter
1/2 cup packed light brown sugar
1 (14 ounce) can sweetened condensed milk
1/4 teaspoon salt
1 teaspoon vanilla extract
For the Chocolate Ganache Topping:
1.5 cups semi-sweet chocolate chips (or chopped chocolate)
1/2 cup heavy cream
1 tablespoon unsalted butter
For Garnish:
Extra caramel sauce for drizzling
Crushed shortbread or toffee bits
Directions
- Prepare the Crust: Preheat oven to 350F (175C). Line an 8×8 inch baking pan with parchment paper, leaving an overhang on two sides for easy removal. In a medium bowl, combine graham cracker crumbs, granulated sugar, and melted butter. Press firmly and evenly into the bottom of the prepared pan. Bake for 8-10 minutes, until lightly golden. Remove from oven and set aside.
- Make the Chewy Caramel Layer: In a heavy-bottomed saucepan over medium-low heat, melt 1/2 cup unsalted butter. Add brown sugar and sweetened condensed milk. Bring the mixture to a gentle boil, stirring constantly. This constant stirring is key to preventing burning and ensuring a smooth, non-grainy texture. Continue to boil gently and stir for 5-7 minutes, or until the caramel thickens significantly and turns a rich golden-brown color. The caramel should cling to the spoon and feel noticeably thicker, but still pourable. Do not overcook, as this leads to hard caramel, and do not undercook, as this leads to runny caramel. Remove from heat and stir in the salt and vanilla extract.
- Assemble the Bars: Pour the hot caramel evenly over the baked crust. Gently spread with a spatula if needed. Place the pan in the refrigerator for at least 30-45 minutes to allow the caramel to set firmly. This chilling step is crucial for the caramel to achieve its perfect chewy texture and prevent it from being sticky or runny when you add the next layer.
- Prepare the Chocolate Ganache: In a heatproof bowl, combine chocolate chips and 1 tablespoon unsalted butter. In a small saucepan, heat heavy cream over medium heat until it just begins to simmer. Pour the hot cream over the chocolate chips and butter. Let sit for 5 minutes, then whisk gently until smooth and glossy.
- Finish and Chill: Pour the ganache over the chilled caramel layer and spread evenly. Sprinkle with crushed shortbread or toffee bits (if using) and drizzle with extra caramel sauce. Return the pan to the refrigerator for at least 2 hours, or until the chocolate is fully set.
- Slice and Serve: Once thoroughly chilled, use the parchment paper overhang to lift the entire bar slab from the pan. Place on a cutting board. For the cleanest slices, use a large, sharp knife. Dip the knife in hot water, wipe it dry, and make a decisive cut. Repeat for each slice, re-heating and wiping the knife between cuts. This helps ensure smooth, clean edges and prevents the chocolate from cracking or the layers from smudging.
Notes
- Ensure thorough chilling for best texture and easy slicing. Use a hot, clean knife for perfect cuts.